Repair
0
34 324
Share
The kitchen work area, as a rule, is decorated with a ceramic tile covering that has protective functions - protection from moisture, dirt, and grease. As an alternative, MDF kitchen aprons are gaining popularity. The material is resistant to aggressive conditions - temperature changes, humidity, durable - with proper care it will last longer than the life of the kitchen set. And, most importantly, it is cheap and can be processed by hand, and this is a serious savings item. Let's find out how to install an MDF apron in the kitchen.
Furniture with an apron is the ideal solution
- Disadvantages of MDF
- DIY MDF apron installation
- Preparatory work
- Fastener selection
- Installation of panels: using skirting boards and more
- For self-tapping screws
Disadvantages of MDF
Before you start purchasing and installing an MDF apron in the kitchen, you should consider its shortcomings.
Perhaps they will become an obstacle to purchase. So:
- Negligence in care will affect the MDF board. She will be led or bent. The same applies to high humidity - you cannot mount MDF panels directly near the sink - it is better to install tiles there. The stoves must be equipped with hoods to prevent drops of condensation from settling on the surface of the apron.
- Material is flammable. This is important if the owners are planning to completely cover the wall from the edge of the set to the edge. Mandatory external control is required if a heat supply source is mounted on the wall - a gas boiler, for example.
The disadvantages are serious and should not be neglected. If, nevertheless, there are no prerequisites for future damage, then it is worth trying to create something new in the interior.
Dark furniture with an original pattern on the apron looks beautiful
Varieties
The following materials are used in the manufacture of plastic aprons:
- PVC panels, the standard width of which is 25 cm and thickness - 0.8–1.2 cm. They are produced in lengths from 2.6 to 3 m. Their main feature is the presence of special locking fasteners on glossy or matte parts for seamless connections. Therefore, with proper installation, you can independently make a kitchen apron for the kitchen on the wall in the form of a monolithic surface from individual elements. The main thing is that there are no cracks, otherwise water and debris will get into them. PVC is used to make plain, thermo-film-coated or varnished aprons.
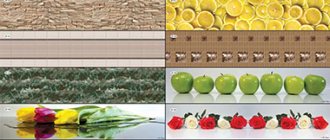
- ABS sheets are single-layer plastic materials decorated with photo printing or designs. A finished kitchen apron made of ABS plastic is usually produced in dimensions of 200 x 60 x 0.15 cm. Its main advantage is its high resistance to mechanical damage and the absence of deformation during bending. Aprons made of sheet plastic are produced in a wide variety of designs, since high-quality images are applied to the surface of the product. In addition, you can order an apron with an original design.
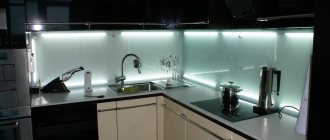
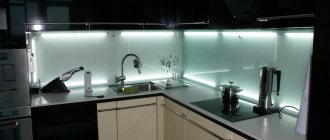
- Cast polycarbonate is a refractory plastic material that looks like ordinary glass. The surface can be glossy or matte. Kitchen aprons made from this material are sold ready-made. Images imitating tiles, decorative stone, brick and other materials are applied to the inner polycarbonate coating. In addition, such an apron can be equipped with lighting elements (for example, LEDs) that will highlight the product.
Taking into account the size of the kitchen wall that needs to be tiled, you need to calculate and select the appropriate model.
DIY MDF apron installation
In order to attach MDF panels to the wall, calculations are first made. They are important for safe further operation both for the apron itself and adjacent surfaces. What are they:
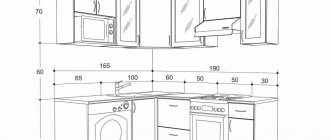
- Height measurement from floor to MDF panel. This is important, since sockets for household appliances are almost always located below, and the stove should in no way interfere with safe access.
- Apron height. As in the case of ceramics, the edges of the panels or slabs extend beyond the lower and upper set of fittings by 3–5 cm. The size of the hood is also taken into account - according to GOST, its height is at least 75 cm and the panels should be fixed taking into account this feature.
- The number of sockets coming out through the apron. You should pre-drill holes for them in the slabs.
When all the required dimensions have been transferred to the drawing (it makes sense to compile one), they begin preparing the wall and cutting out the slabs.
Preparing the kitchen wall for installation
Considering the large size of MDF boards, as well as their density, it is not worthwhile to align the walls particularly precisely, even if they are fastened with adhesive. The surface must be cleaned of the previous finish and treated with a liquid primer.
Might be interesting! Follow the link for step-by-step instructions for attaching wall panels
One of the options for installing an apron
Preparatory work
The wall is being dismantled. They operate with a hammer drill, spatulas, nail pullers - depending on the interfering elements. It is important to leave it absolutely clean, otherwise you will not be able to attach the wall panel for the kitchen. After dismantling, the wall is washed and impregnated with a primer for future plaster. If the surface requires significant repairs - a large number of chips, whole pieces falling off, then sealing alone will not do - you will have to completely level the walls, that is, do the entire cycle of plastering work, including laying reinforcing mesh and placing beacons.
A beautiful apron made of flowers looks fabulous with light furniture
When the wall is ready - dry, soaked in antiseptic - a starting profile is attached to it. This is an ordinary wooden lath or aluminum profile for drywall. The guide is placed according to the level, otherwise the entire apron will become skewed. Subsequently, if it interferes with the tight connection of the headset to the wall, it is removed. Further:
Fastener selection
The following types are used for work: liquid nails for plastic, wood or self-tapping screws. Advantages of the first option:
- Ease of operation. Even a child can use a liquid nail gun.
- Speed. There is no need to drill holes for self-tapping screws or maintain the required level - after fixing, it is possible to immediately level the slab with the liquid composition. Liquid nails dry from 20 to 40 minutes, the total setting time is 24 hours.
- Ease of use. A liquid nail gun is the same device that installers use when sealing cracks with polymer foam. All that remains is to press on the handle and close the hole as unnecessary.
The use of self-tapping screws is not without its own advantages. In particular, the home master is confident in their strength and the fastening of the wall panel in the kitchen is reliable. However, the appearance of MDF will be spoiled by microchips. Deciding whether liquid nails are better or self-tapping screws can only be done experimentally.
Beautiful furniture goes well with an apron made from nature
What is the difference between chipboard and analogues
It is necessary to distinguish chipboard from fiberboard - wood-fiber board, which has low mechanical stability, is fragile, breaks easily and is a dense cardboard of varying thickness. On one side, the fiberboard sheet has a flat and smooth structure, and on the other, it has a rough, loose and corrugated surface, with notches applied. Not used as a decorative material.
Boards made from chipboard, MDF and HDF are similar to each other both in production method and in quality characteristics. However there are a few differences:
- The chipboard structure is less dense than MDF and HDF;
- Chipboard boards are more susceptible to moisture than MDF and HDF;
- Chipboard boards are cheaper.
A common disadvantage of the products is poor resistance to high temperatures and susceptibility to fire.
Installation of panels: using skirting boards and more
There are two ways to independently attach a wall panel in the kitchen.
In this case, the MDF kitchen apron will not wrap its edges behind the upper cabinets and countertop. Do this:
- Move the set close to the wall and mark the places for attaching the baseboards. The walls must be prepared - cleaned, puttied and primed.
- Measure the resulting distance from the bottom of the cabinet to the countertop and place it on MDF kitchen panels. Cut off the resulting piece.
- A manual gun for liquid nails is charged with a tube of the composition and applied around the perimeter of the wall and the cut piece. It is advisable to spread the glue with a spatula if the MDF board is thin.
- Immediately strengthen the baseboards. Liquid nails for wood or plastic are applied to them, depending on the texture, and pressed against the edges of the installed apron.
The good thing about this method is that the installation is carried out without removing the furniture from the kitchen. The work takes several hours. Install sockets and other components, perhaps a day after the MDF apron was attached to the kitchen.
A glass apron looks perfect in a kitchen with furniture
For self-tapping screws
The panel is mounted on a frame made of metal profiles or wooden slats. In this case, the set is removed from the kitchen - it will interfere. The wall is prepared in a similar way as described above. Then, checking the level, install the frame box. The thickness of the profile is no more than 0.5 cm (the panel parameter is also taken into account), otherwise it will not be possible to install an MDF apron in the kitchen under the cabinets and countertops.
The formed frame of wooden planks is subject to mandatory antiseptic treatment - a humid environment can reach the natural material and develop favorable conditions for the growth of mold . Therefore, the choice of a metal profile is dictated by necessity.
How to attach correctly:
A measured MDF board is drilled for inserting self-tapping screws. If you screw them in right away, there is a risk of getting chips around the fastening - this is noticeable on a dark panel. Then they begin to symmetrically attach the laminate to the wall, gradually tightening the screws. The work takes a long time, however, the durability of the kitchen apron is beyond doubt.
Calculation of the width and height of the apron
The width of the apron depends on the size of the kitchen space. With height the situation is somewhat more complicated. This parameter is influenced by the following factors:
- the distance between the lower and upper tier of the headset. The height of this gap is most often no more than 112 cm;
- the presence of a domed independent hood - in this place the apron is laid out at a higher height, and if a skinali is used, the hood itself should be placed at a lower height;
- design features of the upper cabinets - if the facades are equipped with lifting mechanisms, a low apron with dimensions of 45-55 cm looks great.
Caring for a finished MDF kitchen apron
The coating is not too capricious, however, it is worth knowing some features of caring for it so that the panels last as long as possible. So:
- Do not moisten the panel too much. A smooth or textured coating can absorb moisture and then begin to swell or bend. It is especially worth monitoring the edges of MDF where liquid nails were attached - detergents affect adhesion.
- The use of coarse abrasives is excluded. They are able to scrape an attractive surface. And if the MDF was not purchased of the best quality, then very soon the panel will become ugly. It is recommended to varnish inexpensive panels after installation - this way the surface will last much longer.
- Do not wash kitchen aprons made of MDF with aggressive compounds - alkalis, acids. Even if they are heavily soiled. This will cause the panel to delaminate, and glue will not solve the problem - a complete replacement will be required.
- There should be no “hot” household appliances – toasters, microwave ovens – on the countertop in front of the MDF apron. Constant heating will cause the panel to delaminate, fade and move away from the wall.
WATCH THE VIDEO
Compliance with these simple rules will make your work durable at low installation costs. You can choose finishing options for your own kitchen online or use your own imagination, and then the common family room will truly become the center of the house.
Varieties
Today, there are a large number of varieties of kitchen aprons made from a variety of materials. They expand the possibilities for renovation, allowing you to bring bold design solutions to life.
PVC panels
PVC panels used to install a splashback in the kitchen have the following competitive advantages:
- easy to install;
- affordable for any family;
- they are easy to care for;
- high moisture resistance;
- nice appearance.
Flaws:
- the area of the apron located in close proximity to the stove needs additional protection;
- During use, scratches and abrasions quickly appear on the surface of the apron.
ABS
Advantages of using an ABS apron:
- a wide variety of colors and patterns;
- low weight of material;
- resistance to moisture;
- hygiene.
Flaws:
- poor protection from mechanical damage;
- poor fire resistance;
- with prolonged exposure to sunlight, the material begins to fade;
- quickly deteriorates with constant contact with aggressive detergents.
Polycarbonate
Polycarbonate is an inexpensive material, thanks to which apartment owners can decorate their kitchen without spending large sums from the family budget. Despite its apparent fragility, polycarbonate is resistant to various types of damage. The polycarbonate surface is easy to clean from dirt, and its water resistance allows you not to worry about the safety of the repair during the operation of the room.
All-sheet
Kitchen aprons made from a single sheet of plastic are more practical than their competitors, as they do not have connecting seams. You will get a smooth, uniform surface that is easy to clean. Disadvantages include large dimensions, as well as the need to cut out recesses for various kitchen decor elements before direct installation.
MDF
By choosing MDF as the main material for the apron, you get:
- material resistant to mechanical damage;
- high protection against high humidity;
- quick and easy installation;
- the material is cheap, which saves money.
Note! It is not recommended to install an MDF apron behind the stove, as under the influence of high temperatures the material begins to deform
Chipboard
Chipboard has a denser material structure, in contrast to panels made from MDF. They are very cheap, but they are not exposed to moisture. The material also reacts poorly to high temperatures, easily flammable during prolonged contact with fire.
Glass
A glass splashback is considered the best choice for any modern kitchen, and its only serious drawback is its high price. Otherwise, the material has a large number of advantages, expressed in:
- quick installation;
- ease of operation;
- beautiful appearance;
- a wide range of possibilities open to the interior designer.
Self-tapping screws: main nuances
They are especially relevant when a special frame is attached first, and then the panels themselves come.
The main thing is to take care of the markup where each element will be depicted. Wood always requires additional antiseptic treatment.
How to diversify your decor
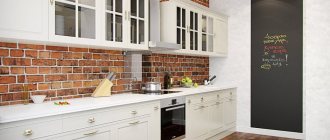
A continuous decorative surface that recreates natural wood, marble or granite is beautiful in itself.
If this is not enough, you can find a studio and place an order for photo wallpaper of appropriate sizes, selecting a bright image from the collection for these purposes. Large photographs of fruits and vegetables, exotic fish will greatly decorate any kitchen.
The monochrome surface can be complemented by a set of kitchen utensils, which, by the way, belong here, since they will always be at hand. Against any background, shiny metal ladle, large spoons, ladles and colanders of different sizes will look perfect.
Choice by design, colors
Here you need to rely on the personal preferences of the owner and the free space that is available inside the room. Shades that are too dark will not look good in small kitchens.
Aprons made using photo printing are widely used. The main thing is to take a closer look at how the drawing is applied.
Just glued. They may have an attractive appearance, but are short-lived.
Application to acrylic plastic. Additionally, a varnish layer is used to provide protection.
"Hot lining". It is she who is recognized as the most reliable. First, the chosen picture is covered with plastic. Varnish is applied on top, which comes in several layers. Everything is sintered, forming a durable, glossy surface.
You can choose ready-made products, but many prefer to place individual orders.
