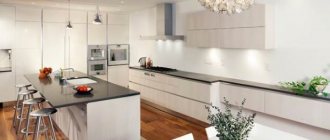
A modern and functional kitchen, regardless of its size and configuration, cannot be imagined without properly organized lighting. Usually, one chandelier or lamp is not always enough, since during cooking or washing dishes, the light flow is blocked. LEDs will help organize additional lighting. Let's look at all the information about the LED strip for the kitchen, find out how it is connected, and what main characteristics they have.
Choosing an LED strip
There are a number of requirements for choosing a tape. Most often, installation on cabinets is carried out using SMD LEDs. They are classified according to the following criteria:
- number of crystals (there can be from 1 to 4);
- monochrome or full-color glow;
- size (range can be from 1.06x0.8 to 5.0x5.0 mm).
To illuminate the dining area and work area, SMD LEDs with three-crystal diodes are suitable. Their colors can be selected by marking. For example, white is designated as BA512, 515, BB515, 811, blue – BA512, 515, BB515, 811, green – BA585. You can choose a color to match your kitchen interior. To create decorative lighting for the kitchen, you can install a single-crystal strip on the cabinets.
LED SMD with three-crystal diodes
You can opt for the LED strip option. Here the LEDs are located under the cabinet on one plane and are small in size; it will decorate the cabinet well. This lighting also differs in appearance. One meter of strip can accommodate 30, 60, 120 and 240 light bulbs. Brightness and energy consumption will depend on the number of lamps with which the kitchen will be equipped.
LED strip
It is important to pay attention to the moisture resistance of the tape. What degree of protection exists:
- IP20 – cannot withstand high humidity, so you should not choose this LED strip for the kitchen;
- IP65 – can be installed in the kitchen, as it has average resistance;
- IP68 – has the highest protection against moisture, can be used not only in kitchen cabinets, but also in swimming pools.
In order to make LED lighting in the kitchen with your own hands, the second and third types of tape are suitable.
Advantages of LED lighting
The advantage of the LED strip is its ease of installation.
An increasing number of owners of private and commercial real estate strive to ensure that their property looks original and presentable. One way to fulfill this desire is to install an LED strip in the kitchen.
This solution is supported by the advantages of this light source:
- High color rendering index. Crystals recreate the natural colors found in nature.
- Flexibility. Products can be given complex shapes and used to decorate items and objects with angular and curvilinear configurations.
- Easy to install. Fastening is done on an adhesive base.
Dimmer for LED strip - Durability. High-quality products have a service life of up to 15 years.
- Wide ambient temperature range.
- Possibility of dimming and setting different lighting modes.
- Safety in terms of electric shock.
- Resistance to moisture and organic vapors.
The set of equipment has an affordable price for all categories of the population.
Linear type backlight
Linear lighting is usually located in the kitchen directly under wall cabinets located above the table and sink. Fluorescent lamps are often used for its arrangement. They are placed under the bottom of the cabinets in one line at a minimum interval from each other. They can be attached to the bottom of the cabinets with ordinary screws. Installation is simple and does not require cutting niches, as is the case with mortise-type spots.
Fluorescent lamp 21W G5 T5 L 903/905mm
Such illumination provides uniform and fairly intense illumination. The light flux is directed equally in all directions, and if left as is, it can cause some discomfort for those in the kitchen. To avoid this, the luminous flux of the backlight must be redirected. To do this, install a reflective border screen on the outside of the lamp; it can be beautifully decorated and turned into another element of kitchen decor.
Lamps for such lighting are usually chosen with a G13 base; the length can be different - 60, 90, 120 or 150 cm. Manufacturers offer models of both traditional and original designs. The advantages of such lighting include moderate energy consumption with good luminous flux brightness, long service life, and a different spectrum of light. Linear fluorescent lighting is connected to a 220 V electrical network. The disadvantage of fluorescent lamps is their mercury content. This increases the importance of careful operation and requires specific conditions for the disposal of such lamps after they fail. In addition, fluorescent lamps are characterized by a pulsating glow, which can negatively affect human eyes.
A more progressive and fashionable solution for linear kitchen lighting is the installation of LED beams. These linear lighting devices are made in the form of tubes, their design is quite simple. Such lamps are installed on fixing magnetic clips mounted on furniture. Tubular beams provide bright, intense light and can be used to optimize the illumination of any area of the kitchen. Their most common use is to attach them to furniture above the kitchen work surface. Light beams last longer than other lamps, but their cost is very high.
Modular LED lamp ERA LM-5-840-C3
Methods and places of interior lighting in the kitchen
LED lighting for kitchen hood
Connecting lighting in the kitchen allows you to give this room a new and unusual look, making it a center for family gatherings and special events.
To create interior lighting you can use the following places:
- a box in which the pipes are disguised;
- hood;
- furniture set;
- wall cabinet;
- dinner table;
- apron over the tabletop;
LED lighting of the kitchen unit creates a floating effect - corner rack;
- plastic profile around the perimeter of the ceiling;
- Kitchen Area;
- window hole;
- floor plinth;
- cornice.
The products can be installed in any place where they will not interfere and will not suffer from external influences.
Classification and comparison of LED strips
Appearance of SMD LED strips
LED strips are available in monochrome and multicolor versions. Products of the first type have LEDs of the same color.
The second row models consist of crystals of three or four colors:
- RGB - red, green, blue;
- RGB+W - red, green, blue, white.
Each row of diodes is connected to a separate channel. There are from 30 to 240 light bulbs per linear meter. Using dimmers of various designs, you can set the operating parameters of the device in overflow, pulsation or even lighting modes.
Classification of degrees of protection
According to the degree of protection against moisture, products are divided into the following categories:
- Open. Conducting lines are on the surface. When water gets on them, a short circuit occurs. Can be used for finishing objects located at a sufficient distance from the stove, window and sink.
- One-sided. The conductors are covered with silicone on top. The products are splash-proof and can be installed almost anywhere.
- Double sided. The strip is packed in plastic. You can attach and connect even inside sinks and hoods.
When choosing a tape, you should pay attention not only to tightness, but also to filling. It is advisable to illuminate the tabletop in white. For LED lighting for the kitchen under cabinets, it is better to choose RGB and RGB+W models.
Spotlights for kitchen lighting
This type of lighting is aesthetically pleasing. Spots can be embedded into the bottom of hanging cabinets or a special false bottom can be attached to install them. Carefully mounted lamps look impressive. The brightness and color spectrum of the backlight can be adjusted by choosing lamps - halogen, LED, etc. Incandescent lamps cannot be used, as they, together with the light, intensively generate thermal energy and become very hot, which makes them a fire hazard.
In addition to recessed spotlights, you can use surface-mounted lamps to provide lighting in the kitchen. They are varied in shape and easier to install; either single lamps or grouped in one line can be used, in which case the distance between them should be 30-45 cm.
Kitchen lighting with spotlights looks impressive; its intensity can be adjusted not only by choosing lamps, but also, for example, by installing a relay on a switch. The direction of the light flux can be changed if you choose luminaire models with a rotating mechanism. The design of spotlights is varied, so you can easily choose spots designed in a style that matches the style of your kitchen set in a regular or online store.
Selecting a power supply
Ecola power supply, for LED strip, 6 W, 220-12 V, IP20
The LED backlight operates on 12 V DC. To obtain it, an electronic transformer is used, receiving power from a 220 V household network.
Power supplies are divided into the following categories:
- Regular. The electronic filling is located in a steel case, which has holes for cooling. They can be mounted in dry areas of the room.
- Sealed. The products have a closed aluminum or plastic case that protects the contents from moisture. Such products can be mounted anywhere, without restrictions.
To calculate the power of the converter, you need to multiply the indicator of 1 m of tape by the number of meters (according to the standard there are 5) and add another 30-50% to the result, since the current consumption parameters change during the operation of the product.
How to calculate the power of a diode strip
LED strips for the kitchen are purchased separately from power supplies and do not come in sets. It is important to choose a power supply of the correct power. And to do this, first of all, you need to know the power of the entire selected LED strip for the kitchen and add at least 20% of the reserve to it.
To make the calculation, you need to find out the power in the tape, or more precisely in its meter. Typically, information about what characteristics an LED roll has is indicated by the manufacturer on the packaging. If the LED strip was sold without packaging, you can determine the approximate power from the table based on which diode is in front of you and how many there are in one meter.
Diode power table
Measure all the sections of the LED strip that you plan to connect to the power supply. We multiply the indicator by the number of Watts consumed to obtain the power consumed by the LED strip in the kitchen.
Connection diagrams
The principle of operation of LED strips in the kitchen is identical and does not depend on voltage. However, multi-color lighting in kitchens has its own four tracks, which are designated B, G, R and V+.
Connection diagram for multi-color tape 5 meters long
Single-color tape can be connected directly to the power supply. But if there is more than one color, then additional devices called controllers will be required.
Connection diagram for single-color tape
The device sends a signal to the tracks and the proper color is output. Let's look at several connection schemes for tapes. Choose the one that suits you. Let's start with how a simple connection is made, for which a 12 V tape and a power supply with a power of 600 W are used.
Simple connection diagram
According to this scheme, the connection can be made even by someone who has no experience in the field of electricity. This option applies to LED wiring that uses open wiring. To turn off such lighting in the kitchen, a regular switch on a cord is suitable.
The following may be preferred to the simple method chosen. A more complex scheme that includes in its description a multi-colored tape and a controller for a kitchen cabinet.
Connection diagram to the controller of a 5-meter tape
In this diagram, LED strips with a controller also use a power supply. The block will supply energy to the controller, and then in turn directs it to the LED strip. For long LED backlights, use other circuits.
Tools and materials necessary for installing LED lighting in the kitchen
You can make kitchen lighting yourself using special components and tools:
- the tape itself, electrical cable, power supply, switch;
- rosin, solder, electrical tape (can be replaced with a hair dryer and heat shrink tube), tape measure, soldering iron;
- a special profile for lighting made of aluminum or corners made of PVC;
- if necessary, have a drill, screws with countersunk heads;
- double-sided tape, scissors, installation brackets.
The selected tools from the list may vary. Having them, you can begin work on installing lighting in the kitchen.
Selection of cable cross-section
Often the power supply has to be placed far from the cabinets and voltage drops occur. To prevent this from happening, and to ensure that the lighting in the kitchen works without interruption, you need to calculate the cable cross-section. The indicators must meet the requirements of the tape that is selected.
Standard wire and cable sizes
Sometimes the LED strip is connected directly to a network in which the voltage indicator is 220 V. Such installations require additional protection, when choosing which the main indicator will be the current strength. Consider the relationship between current and cable in the table below:
| Cable (mm2) | Current (A) |
| 0,5 | 6 |
| 0,75 | 10 |
| 1 | 14 |
| 1,5 | 15 |
| 2 | 19 |
| 2,5 | 21 |
Based on these indicators, you can calculate which machine is required for your kitchen lighting, if the strips are powered by a charge above 220 V. If the kitchen lighting was made from low voltage, then the difference is not terrible.
When you are going to select a cable, focus on the voltage drop at the distance from the power supply to the contacts of the tapes. It is advisable that you reduce the length of the 12-volt lines, it is this that affects the difference in performance at the output and at the end of the selected cable and can supply more energy.
Illumination of the tabletop, dining area
To illuminate the workspace, it is advisable to use bright monochrome strips with white crystals. To achieve maximum brightness, you should use tapes with a density of 120 or 240 diodes per linear meter. To prevent light from blinding your eyes, you need to use a U-shaped profile, which will create a narrow strip of light directed at the desktop. It is better to connect the tape and the profile before attaching it to the cabinets.
To decorate the dining area, it is better to use low-power colored products. You can attach the strip to the end of a wooden table or from the bottom along the perimeter to the glass. Run the cable along the leg and connect to the nearest outlet.
What is required for installation
Connector for connecting the tape
The basis for the work is the diagram according to which the tape should be connected to the network.
To perform installation, you need to purchase the following equipment:
- Dimmer;
- power supply (1 x 5 m);
- switch (mechanical, touch, infrared);
- headset for connecting parts of the system;
- controller;
- connector for joining sections.
It is advisable to shop in a store where you can select products from one manufacturer. Such electronics work better and last longer.
Algorithm for installing lamps
It is necessary to mark the mounting location of the LED strip.
Installation is carried out in the following sequence:
- Drawing up a project.
- Marking.
- Degreasing surfaces.
- Screwing boxes (if provided).
- Gluing tape.
- Connecting wires to the controller.
- Connecting the power supply and dimmer.
- Installation of the switch.
- Connecting the line to the network.
Before starting work, you need to de-energize the room, checking the absence of voltage with an indicator.
LED backlight connection diagrams
To avoid uneven illumination with high wear and tear, do not arrange LED strips in series. Proper connection will increase the light intensity and also reduce the risk of voltage surges.
Rules for connecting diode strip:
- When connecting several tapes, it is important to maintain polarity.
- Install the power supply at a distance of at least 10 m.
- Do not bend or twist the tape. If it is necessary to carry out installation in a difficult area, it is better to cut the backlight and solder the corner.
- Thick wire sections, as well as a small number of tapes, will help prevent loss of electric current.
- If the backlight has a high output power, it is better to install it in a profile in the form of a box.
- Long tapes (from 5m) are connected only in parallel;
- The power supply should not be placed in a place with high temperatures.
You only need to connect a long strip in parallel.
Usually, manufacturers indicate the places where the cut is made. They also show how best to connect the backlight.
- With direct connection, light sources are connected in parallel to one power supply.
- Dimmers are used to adjust brightness. They are connected in series to the power supply unit assembled with the tape.
- When installing several light sources and dimmers, it is important to use amplifiers, connecting them in series to the backlight.
- When installing RGB strips, controllers with 4 wires are used. The connector will ensure ease of installation - with its help you will not need to solder the controller and tape. It is also connected to a separate power source.
Tools and materials for installing LED strips
Tool for installing an LED strip with your own hands
To install an LED lighting system in the kitchen, it is enough to have a standard set of household tools.
To work you will need:
- perforator;
- level;
- roulette;
- tester;
- pliers;
- soldering iron;
- stationery knife;
- insulating tape;
- pencil;
- screwdriver;
- alcohol;
- cotton pads.
If you are designing the upper level of the kitchen, you will need a stable stepladder. To avoid injury, wear safety glasses and gloves.
Selection of cable cross-section
Wire calculation table for connection
The cross-section of the cable cores is selected based on the total load created by the assembled structure when operating in full mode. Models of monochrome tape SMD-3528 and color SMD-5050 at 1 m consume up to 15 W. To this is added the power of the dimmer and power supply, which consume 75-150 W each. The total is up to 400 W. Considering that 1 mm² of copper wire can withstand 2 kW, to connect the tape to the network you need to take a cable with a wire cross-section of 0.3-0.5 mm. In this case, you need to pay attention to the quality of insulation. Preference should be given to fire-resistant products that do not support combustion.
Tips for choosing equipment
When choosing equipment, you need to know important points; this will protect you from unreasonable expenses:
- When choosing a white color, pay attention to the glow temperature. It is better to choose from 3000 K (warm shade) to 6000 K (neutral shade). In this range, the color combines favorably with the organs of vision and does not distort color rendering. Choose the average value - 4500 (daylight shade).
- Power – the more, the better. Low power strips are used for decorative lighting. Take a luminous flux value of 1000 Lm/m, which is perfect for basic lighting. For decoration, it can be weaker.
- Use diffusers (we talked about them earlier). They perform two functions: the aluminum body removes heat well from the tape, this will have a beneficial effect on its service life; distribute light evenly. The diffusers are made not only with corners, but also with straight strips.
- The power supply should be selected depending on the load in the circuit. Take with reserve, do not skimp on it. Weak power supplies overheat and quickly fail. 5 meters of glowing coil creates a load of 1 to 7 amperes. It is measured by connecting an ammeter in series to the circuit, or using the formula I = P/U , check this parameter when purchasing. The reserve is 20% of the power consumption. For example, for 10m of tape, you will most likely need a 12A power supply.
Installation of LED strip under kitchen cabinets
A special feature of the room is the large number of hanging cabinets, which create a feeling of cramped space. The problem can be solved visually by decorating furniture with monochrome and colored ribbons.
They can be connected in an open or semi-closed way. In the first case, colored stripes are glued to the bottom of the shelves in one or more lines, creating soft diffused lighting. The closed version is used to solve two problems: illumination of the work area and decoration. The tape is fixed in the box at a distance from the apron.
Kitchen lighting: types, features, DIY
A modern kitchen is not only beautiful, fashionable furniture and functional household appliances that make cooking easier and faster, or, for example, washing dishes, but also competent multi-level lighting. Today, designers, when developing kitchen interiors, pay great attention to illumination of the work area, the space inside cabinets and drawers. Furniture lighting from below creates a feeling of lightness and airiness of the interior. Furniture makers often offer their own options for kitchen lighting, supplying the market with kitchen sets with already built-in lamps. If your furniture does not have such an “option”, and the kitchen lighting is far from ideal, you can correct the situation by making kitchen lighting yourself.
First you need to decide on the type of backlight. The kitchen work area can be illuminated with spotlights, linear lamps and LED strips. The choice of the type of backlight for self-production should be made by objectively assessing your skills and capabilities. If they are completely absent in this area, it is better to invite a specialist. If you have never done anything like this, but are still eager to fight, we advise you to make kitchen lighting using LED strip: it is easy to install, it looks great, and works effectively with the right selection of components.
