Previously, when the world of technology was not so developed, people used home phones. And in almost every house there was a certain place where he was located. Usually the place was a convenient ordinary shelf for the phone. It provided space for a telephone book and a pen.
Today, when cell phones are in trend, home phones have faded into the background. But they still need a specific place in the house. More often the device is installed in the hallway. But for convenience, many people move it into the living room and place it next to the sofa.
Types of shelves for home telephones
If there is a closet in the hallway, then it may already have a shelf for a home telephone set. And in the living room, a coffee table can serve as a phone stand. But it happens that there is no specific place for the phone; in this case, you need to purchase or make a special shelf for your home telephone with your own hands.
So, the shelves are:
- Shelf for home telephone made of laminated chipboard and chipboard.
The shape is complex - with a box . This design is convenient because it has a built-in drawer for necessary, small things. On the side there is a special compartment for a telephone notepad, and at the bottom there is a shelf for something necessary - the same cell phone.
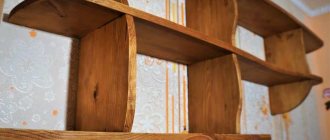
- Double wall shelf for telephone made of chipboard. This type of telephone stand was common in Soviet times. It does not have any drawers or complex elements. Just a base with a compartment at the bottom for a phone book. It has convenient sizes that allow it to fit on any model of device.
- Wooden stand - shelf for a landline telephone with a carved ornament
. This can be ordered from a professional woodworker. It costs a little more than a regular shelf, but it is made to order. The quality and beauty of this design justifies itself. It will serve you for a very long time.
- Glass base for a telephone on wooden corners with a beautiful ornament
. Unusual exclusive option. You can order such corners in a workshop, and find a piece of glass of the required size yourself. And use these materials to create a wall stand for your telephone with your own hands.
- Base for home telephone made of metal with forged ornament. This base model will look beautiful on the wall. You can hang clothes on the bottom hooks. And the top serves as a shelf for the device. You can order one from a metal craftsman. This design will take longer to make than the standard one, but then it will please the eye for a long time.
- This design is a little difficult to implement. But you can do just this with your own hands. The main thing is to make the right calculations and have the necessary tools. At the top there will be a base for a home telephone set. At the bottom of the wall there is a vertical compartment for a telephone directory, and next door there is simply a compartment for keys. More often than not, it is in the corner that it is possible to set aside a place for a phone, in which case a shelf of this option will be just right.
- This option is ideal if there is suitable free space for it in the apartment. It is convenient because if there is an urgent call to you, you can receive it, and if the conversation is going to be long, then sit and talk quietly. The box can be used to store small necessary items. And a shelf above it for storing a telephone notebook. You can store shoes and slippers on the shelf under the seat. There is a wide variety of just such models.
What can you use to make a shelf for your home phone?
There are many shelf options. You can purchase a ready-made shelf at a furniture store, and you can make an individual one as you like, make it yourself or order it from a craftsman. It’s just that an individual one will cost more.
Material used for manufacturing:
- From old unnecessary furniture, from unnecessary boards.
- Made of plastic.
- Made of metal with forged elements.
- Made of wood.
- From chipboard, chipboard.
- Completely made of glass and metal, or glass and wood.
The main thing is to have desire and imagination if you decide to do everything yourself. If you don’t know where to start, then contact a professional, or consult with friends.
Classic version
We suggest you find out how to make a shelf for a telephone in the hallway.
A special feature of the product is the shelf at the bottom, on which a reference book or notebook can be placed.
For production we will need:
To complete the job successfully, follow these simple steps:
We make blanks for the sides. Use a jigsaw to cut strips up to 30 cm wide and identical in height.
If you want to give the product an aesthetic appearance and protect others from constant bruises, you can file off the sharp ends and rub them with sandpaper.
The perimeter can also be covered with elastic tape.
The parameters of the upper surface are usually as follows: about 45 cm in length and 25 in width.
We fasten the top and side elements using corners. We attach the clamps with screws, and place the upper part on them.
Let's start forming the bottom shelf. To do this, cut a rectangle from a sheet of laminated chipboard with suitable parameters (to do this, you need to measure the thickness of the wood, outline it on the future bottom shelf and then cut it down).
Advice! In order not to spoil the product with sloppy cuts for screws, we recommend using a special drill with an additional attachment.
This tool makes a hole exactly the same size, so it will look more aesthetically pleasing.
Fix the bottom shelf. The phone stand is ready.
Do-it-yourself shelf for a landline phone
To make the simplest version of a shelf for a telephone, we will need:
- A small sheet of chipboard or laminated chipboard.
- Metal corner.
- Jigsaw.
- PVC edge.
- Glue.
- Drill, self-tapping screws.
- Screwdriver or screwdriver.
It is convenient to install such a design in an unsightly place that will not be very noticeable.
Let's get started:
- We take a piece of chipboard and use a jigsaw to cut out the desired shape (round, square) according to the finished dimensions.
- We seal the edges with PVC edge so that unevenness and grins are not visible after cutting with a jigsaw.
- We attach a corner to the finished shelf and use a pencil to mark the places of attachment to the wall and to the shelf.
- We drill holes on the wall with a drill and on the stand too.
- Using a hacksaw, we make small grooves for the wires on the back side of the shelf.
- We attach the shelf to the wall and lay the telephone wire.
- Using a screwdriver, attach the corner to the shelf, then to the wall.
- The shelf is ready.
This is the most budget option. The same shelf can be made of metal.
The main thing is that the base is installed efficiently and in the right place. You need to install it in a place where you are often and often talk on the phone.
If you want an exclusive shelf, it is better to order patterned corners from a wood or metal craftsman. You can order a ready-made design. Choose a design model so that it pleases you and serves you for many years.
Shelves are often used not only to complement and decorate the overall interior of the room, but also for a clearer and more expedient organization of space. Thanks to their use, the apartment owner has the opportunity to conveniently arrange a huge number of small things that would simply get lost in closets.
Today, there are a lot of different models on the market that are made of different materials. They also differ in design.
You can choose not only products with classic designs, but also ultra-modern designs.
But more and more often people prefer to make such interior details themselves. Wondering how to make a shelf with their own hands, they re-read a lot of literature and look through many catalogs.
However, this does not mean that making a shelf yourself is difficult and is beyond the capabilities of a person who does not have special skills. No, that's not true at all.
In this case, familiarization with the literature is necessary in order to create a product with a beautiful design that will fit into the overall interior. Let's take a closer look at what kind of shelves there are.
Simple shelf with rope fastenings
Let's see how to make a simple shelf attached to the wall with ropes. This is an ideal decorative item for a room in a country style, loft, etc.
Step 1. The first step is to purchase all the necessary materials. To create one such shelf you will need a wooden board about 2.5 cm thick, rope rope (8 mm in diameter), a drill, hooks and dowels. You also need to take or buy a puncher, a tape measure, and to apply markings you will need a pencil.
What you need for work
Step 2. You need to make 4 holes in the corners of one board, one in each corner. The fastening ropes will be threaded through them. It is better to apply the markings first with a pencil, and then drill 4 holes at the marked points using a drill. You should not make holes at the very edge; it is better to retreat 2-3 cm from the edge of the board.
Step 3. After this, the board needs to be sanded and coated with a primer and then paint, or you can get by with varnish or stain. You can continue to work with it only after the paint and varnish composition has dried. If a primer was applied, it is important to dry the primer thoroughly before applying a coat of paint.
Applying primer mixture
Step 4. You need to make holes on the wall for the hooks on which the shelf will be hung. First you need to apply level markings (the points should be located at a distance equal to the distance between two holes located along the length of the shelf). Next, you need to drill holes in the wall, insert dowels into them and secure the hooks to the wall.
Next, holes for the hooks are drilled
Step 5. The piece of rope needs to be cut into 4 pieces of the same length, it is important to tie one of the ends of each piece with a nice neat knot, and then thread the ropes through the holes so that the knots are at the bottom of the shelf.
Beautiful knots are tied at the ends
Step 6. Now you need to tie the free ends of the ropes in pairs on each side and hang the shelf on the hooks in the wall.
The shelf is hung on hooks
This is what the finished shelf looks like
Such a shelf can be made very quickly, and it will look quite nice. It is suitable for arranging souvenirs or flower pots.
Types of shelves
Any specialist will tell you that before you start creating a product, you need to decide for yourself what kind of design you want to get and whether it will be combined with the interior. And only after that you can start creating the product.
After all, for a house decorated in a classically styled style, it is completely unacceptable to use trendy and modern shelves. They will look extremely ridiculous.
The most popular and widely known subtype of shelves is the classic shelf. This is due to the fact that it is quite easy to install, and the appearance, thanks to its simplicity, seems refined and sophisticated.
Both open and closed shelves are used successfully. Closed products are most often used for decoration and installation in rooms decorated in more modern styles. Glass and sometimes plastic are used to construct them.
Open structures can be used both in modernly decorated houses and in apartments with a classic design. Over the past few years, this particular type of shelf has gained enormous popularity and is therefore gradually replacing the classic options.
In small rooms, you can often see corner shelves that have a special method of fastening. They are mounted on adjacent walls that are adjacent to each other. They are most often used in bathrooms, kitchens and utility rooms.
In addition to the above types of shelves that are mounted on the wall, there are suspended and floor-mounted structures. Hanging shelves are mounted in an unusual way.
They are installed using cables and vertical posts, and attached directly to the ceiling. This mount looks quite unusual and original.
Floor structures are most often used in hallways. After all, hand-made floor shelves for shoes not only look beautiful, but also help you organize the space of a small hallway. At the same time, making them is quite simple.
Additional Information
You can use an element that will suit both cases above - this is an edging running along the outer edge. To attach it, you need to find some kind of heating surface, for example, an iron. Apply it with simple movements and secure the edge.
Be sure to try to hide any exposed connections. Before drilling, you need to remove a small area. Its diameter should match the diameter of the screw head. After you have drilled everything successfully, you can drip glue onto the wood, and then the cut element is pressed.
If you do all this carefully, nothing will be noticeable. You need to drill with a specialized drill, which ends in a special head that helps create a groove just the size of the head.
Usually, a wall-mounted shelf for a telephone, when made from laminated chipboard, also has a special design applied. First, they make a small hole, and then manually cut out, for example, a gnawed apple with a jigsaw. In this case, working with your own hands is justified.
When attaching to the wall, you need to screw a couple of fasteners on the back side, and for a good fit, you can take 3-4. If everything went well, then don’t rush to rejoice. The shelf must be disassembled and reassembled again, gluing all the joints with glue. Then you can safely forget about the service life of this item in the apartment. Everything will hold out calmly for 20, 30, and 50 years. The main thing is that your eye is pleased with the final finished product.
Source
How to make a simple shelf?
To create the claimed product, you should purchase or prepare some tools and materials in advance. As connecting elements, you can use whatever suits you best. But the most popular are ordinary screws, brackets and dowels.
Note!
For example, let's take a photo of the shelves with our own hands, which is presented below. It shows a product with the following parameters: width 250 mm, height 300 mm, length 1100 mm. For convenience, the manufacturing process will be divided into stages.
Chipboard shelf
You can make a more complex shelf using chipboard. Here you will have to work longer, but the result will be beyond praise.
Step 1. In this case, you need to purchase the following tools and materials. This is a jigsaw, iron, screwdriver, grinder, screwdriver, drills, hex key, pencil, tape measure, square. You will also need chipboard, edging tape of the required width and color, screws, confirmations, plugs for them, and hinges.
Tools for work
Step 2. Next you need to make a sketch and drawing of the future shelf. It is important to immediately put all the parameters on the diagram - this will make life much easier. It’s easier to do something based on a specific diagram, rather than by eye.
This is what the shelf will look like
Drawing of the future design
Drawing of the future design (part 2)
Step 3. Now you need to make the side parts of the shelf. To begin with, you should draw the outlines of the blanks on the chipboard sheets.
The contours of the workpiece are drawn
Step 4. Next, the shelf parts need to be cut along the contour using a jigsaw.
Parts are cut out with a jigsaw
Step 5. The edge will most likely not be perfect. So the edges of the workpieces need to be sanded using a special machine.
The edges were far from perfect
Step 6. Now the edges need to be covered with edge tape. It can be glued using an iron. You need to iron the edge through the fabric to prevent it from sticking to the iron.
Gluing edge tape
Step 7. Excess edging tape can be easily and simply cut off with a sharp knife. And then it is better to sand the edges with fine sandpaper so that they become completely smooth. The side parts and racks are ready.
Trimming the edge tape
Step 8. According to the drawing, you also need to make shelves and an internal crossbar. Having marked the future holes, you can immediately drill them. The drawing will help you find the necessary points for marking.
Step 9. On one of the internal racks you need to make cutouts for shelves. Adding such a stand to the design will give it originality. This move will also make the shelf more reliable.
This will make the shelf more reliable.
Step 10. Racks and shelves need to be secured with confirmations. The holes for them must be drilled at a distance of 8 mm from the edge. The holes should be such that when the confirmat is screwed in from above, its cap will be recessed into the wood, that is, two-level.
Confirmations are used for fastening
Step 11. The shelf parts need to be connected with confirmations, screwing them all the way and placing plugs to close the holes.
Confirmats are screwed all the way
Another photo of the process
Then the holes will close
Video – Simple shelf
Video - Original shelf
Video - The fastest and most reliable way to make a hidden shelf
Stages of work
At the first stage, you need to complete the markup. To do this, you should lay the boards on a table or any other flat surface and transfer the measurements from the drawings. The side walls must be exactly 268 mm high.
This marking is optimal because the side walls will be located between the two parts.
The second stage requires cutting the boards. To get smooth and neat cuts, you need to use a jigsaw. After cutting, you will end up with 2 fairly long pieces and 2 shorter ones.
At the third stage, you can begin processing the resulting workpieces. The resulting sections should be coated with a special protective varnish or stain, having previously sanded them.
Note!
If you only plan to paint the shelf, you can get by with treating it with a regular antiseptic primer. This way you will not only increase the service life, but also achieve a more uniform distribution of paint.
At the fourth stage of making a wooden shelf with your own hands, you begin to directly assemble it. The bottom board should be laid on a flat surface. Step back 8 mm from the ends of the workpiece and draw two lines parallel to the cuts.
2 points should be marked on them with a distance of 5 cm from the edge. At the marked points it is necessary to drill holes for self-tapping screws. The same manipulations must be done with the second workpiece.
After this, you should install the side blanks on the lower section of the board and secure them. Once you are done with attaching the side panels, proceed to install the top panel and secure it.
At the fifth stage, you should attach the brackets to the ends of the side panels, and make several holes in the wall for the dowels. After this, screw in the screws so that they protrude by 5 mm. And now your shelf is ready.
You can make acoustic shelves in the same way, but you need to take into account the size of the equipment itself. Measurements should be taken carefully, because if you make a mistake, the work will have to start again.
Note!
Preparing plywood for the stand
Plywood material is very easy to process. It can be brought into the desired appearance using several options: hand tools or electrical equipment. Before processing, it is worth considering the fact that this material has an adhesive in its structure that glues several sheets of veneer together. It has a bad effect on the properties of the cutting tool and can dull it. Therefore, you need to choose a durable type of cutting equipment for processing the plywood surface.
Cutting plywood requires durable equipment.
If you need to cut plywood, then you should use a circular saw. If you use the tape type, then it is impossible to guarantee an excellent result; a wavy cut may form. It is necessary to saw the material as follows: you should cut across the fibers and their direction on the upper side of the material, then make a cut along the fibers.
You need to cut plywood across the grain.
When drilling, to obtain an accurate and neat hole, choose a sharp drill bit equipped with a front cutter. You need to drill from the front side, which is more durable. If you want to avoid splitting, you need to place a backing under the plywood when drilling.
DIY hallway shelves
In most cases, when creating such a product, there is no back wall, because its main function is to support other objects - support.
Depending on the orientation, they can be of several varieties:
- horizontal - have an elongated shape in length, either with one surface (console) or with several (multi-tiered);
- vertical - the narrow part includes several small shelves.
Corner options, floor-mounted and so-called bookcases are no less popular. All of these varieties can have special glass display cases or a mirrored back.
Recently, shoe shelves in the hallway with built-in lighting have been considered especially fashionable.
When creating a shelf in the hallway with your own hands, you can use a combination of several options at once, which is shown in the photo of the shelf in the hallway, which will give your hallway greater unusualness and originality.
All types of furniture directly depend on individual needs and the amount of free space. So, for example, if you have a dressing room, you can limit yourself to a minimum set of furniture or even a few hooks.
In any case, a mandatory element is a shoe shelf in the hallway. The design can be created completely independently. There may be several methods for placing this item.
An important factor here will be the total number of pairs of shoes. You can install it as follows:
- vertical;
- horizontally.
As for the material for manufacturing, plastic is considered the most optimal and suitable. It has a number of positive and significant qualities:
- inability to deform;
- does not change when exposed to water;
- ease of care.
If necessary and desired, you can combine plastic with other materials.
If desired, you can install a banquette in the hallway with shelves or decorate the shelves with doors, but in this case you will need to take care of sufficient ventilation in the upper and lower parts.
To save overall space, you can use a completely unusual version of shelves, on which shoes are located at a certain angle.
In this case, the depth of the shelf will directly depend on the shoe size of your household members. Also in this case, a good solution would be to install a hanger with a shelf in the hallway.
Step-by-step manufacturing instructions
Since many technologies have been developed to create this organizer, we suggest you familiarize yourself with the most popular ones. It only takes a few hours to create the stand. The product is quite affordable. In most cases, all the necessary materials are at hand.
Paper origami
Recommended sequence of actions:
Purchase a square sheet for scrapbooking measuring 10*10 or 15*15 cm depending on the phone model and fold it in half
Fold in 2 parts on the other side
Unfold the sheet and fold the bottom and then the top half in half
Unfold the paper and make a bend on the other side
Repeat the steps described on the reverse half.
Unfold the sheet and check the evenness of the folds
Rotate the paper 90°. Lift one corner and place it inside the structure. It will look like a pocket
Press the 2 corners together. In this case, the paper will wrap naturally
Tuck the central area under the previously made pocket
Repeat the above steps on the opposite side. At the final stage, you need to create the middle fold, since this part accounts for the main weight of the smartphone
Ready-made stand
Miniature easel
It is a classic telephone stand, similar in appearance to a subframe clamp.
To process the product you will need fine-grained sanding paper.
Make a mark on a wooden stick with the length and height perpendicular to the crossbar of the easel
Cut the part according to the marks
Glue to the crossbar. Cut and fix several pieces of stick so that the width of the organizer is equal to the width of the telephone. Use sandpaper to remove all roughness
Facing stage. Draw the length of the perpendicular strip on a stick, mark the center and retreat 13 mm from it in each direction. From the obtained points, draw diagonal lines outward
Cut and glue this element to the front of the easel
Cover with paint and decorate with decorations
The stand is ready for use
Binder stand
Stationery is one of the best options for making an organizer.
Required materials and tools:
BOPP tape dyed in various colors is available at any office supply store.
Use tape to cover the binders
Place the staples opposite each other, lift and thread
Flip over and place on work surface
Open the connected elements and place a small bracket on top
Finished design
Video tutorial on how to make a chaise longue for your phone
Panda shaped stand
An original product, especially relevant for children. For all its utility, it is a cute toy.
Appearance of the device
Terry socks are suitable for this device. They are hypoallergenic in composition because they are made of 100% cotton. The only difference from cotton is the technology of weaving the fibers.
Step 1. Cut out 12 oval elements from cardboard paper and divide them into 3 groups with an equal number of shapes. Take 1 stack and on one of the parts trace the outline of the bottom of the smartphone, including the hole for the charging wire. Cut according to the markings made. Using this template, do the same with the remaining 3 sheets and glue the 4 parts together.
You should get three options for blanks
Step 2. The second group of cardboard ovals is intended to design the part of the phone in which the wire is located.
Step 3. Set aside 1 piece from the remaining 2 groups. Glue the remaining ones to the workpiece.
Hole for cord
Step 4. Fix cotton wool on unused elements. Cut a white sock and glue it onto the fluffy mass.
Glue a white piece of fabric
Step 5. Glue half of the black sock onto the main part of the product.
Glue on a black sock
Step 6. To decorate the ears, cut out 2 ovals, cover them with cotton wool and decorate them with a black sock. For the eyes, cut out 2 semicircles and decorate with a black sock.
The finished muzzle remains to be glued to the base
Step 7. Glue all the parts together. Fix the set aside white piece at the back. If desired, you can make a tail from a sock and cotton wool. Decorate your cheeks with blush.
Video - Panda phone stand. Master Class
Stand made of oak planks
Required tools and materials:
You will also need a planer-thicknesser machine for initial and final sanding of wooden surfaces.
Step 1. Adjust the parts according to thickness, trim and trim to width.
Adjusting the planks to size
Step 2. Glue the 4 pieces together.
Step 3.
Process the workpiece with a planer-thicknesser and cut it.
We adjust the blank to the size of the phone
Step 4. Divide one of the resulting elements, glue it into a block and trim it.
Step 5. Glue the blanks together.
Step 6. After the glue has dried, sand the product and cut the support strip at an angle.
Step 7. Sand the edges and coat the stand with mineral oil.
Finished design
Wooden organizer
The design feature is that the shelves for storing smartphones are located horizontally. Externally, the product is a vertically oriented box with a closed front wall. Despite the fact that this part increases material consumption, it ensures the safety of storing the phone.
The stand is assembled from a sawn slab using Euroscrews. Using a hot iron, the end parts are closed with a self-adhesive edge. The bottom can be made from cheaper raw materials. If the base of the previous model was taken from scrap materials, then for this stand you need to purchase it.
Step 1. Material selection
Table 1. Analysis of timber materials in demand for the manufacture of organizers
| Variety | Characteristic |
| A popular material for making various home organizers. Considering that the minimum thickness of commercially available boards is from 20 to 25 mm, this is not the best choice. Given the miniature design, to create it you will need planks with a thickness of 12 to 15 mm. Otherwise, the stand will look bulky. Reducing parts to the required size is possible only with the help of professional equipment, a planer-thicknesser, for example. | |
| A multi-layer board produced by gluing together pre-treated veneers. | |
| It is a cladding board made of natural wood. | |
| The best choice. Timber made from several layers of small wood particles bound together with synthetic resins. Made from first-class chipboard. |
Due to the specifics of the creation technology, laminated chipboard has a number of advantages over the raw materials listed in the table. This concerns good aesthetic qualities and environmental friendliness.
Laminated chipboard is not afraid of moisture
Is laminated chipboard dangerous for health?
Step 2. Preparing tools and equipment
In addition to the above, you will need self-adhesive furniture edges, an iron and glue.
Products fastened with confirmations do not withstand repeated installation
DIY crafts made from tree branches are an excellent and easy-to-implement way to decorate your home and make the interior truly unique. Such crafts can also become an original gift for loved ones, and if you involve children in the process, the activity will become a true field for creativity!
Step 3. Familiarize yourself with safety regulations
Before you start making a stand, you need to familiarize yourself with the basics of carpentry:
Carpentry tools may only be used for their intended purpose.
Wall shelves for hallway
Shelves located on the surface of the wall are no less useful and functional. In this room, you not only enter the main part of the apartment or house, but also pay attention to your appearance.
An excellent addition would be to use a mirror with a shelf in the hallway. Such furniture also has its own shaped features:
- elongated – makes it possible to display a person in full height;
- small size - framed in an unusual frame similar to a picture baguette.
The depth may vary and depend on the total number of things that will be placed on it.
To ensure that the things stored in the hallway have some harmony, the common space can be divided into so-called zones using special partitions.
The hanger can also be a shelf for clothes in the hallway. It has one fairly long surface on which the required number of hooks are located for direct placement and storage of clothes.
In this case, it is important to consider the material for manufacturing, since it must be as strong as possible and not be subject to deformation under the influence of gravity.
In the upper part you can place boxes or wicker baskets, which, if necessary, can be easily removed and used for their intended purpose.
Another option could be a corner shelf option. It has a relatively small surface with a certain number of holes.
At the bottom there is a container for collecting water, which makes this piece of furniture in demand in any season.
What you need to make a wooden phone holder
The main element is the basis of the future stand. Any board or piece of wood of suitable thickness will do. A long structure will take up too much space, but it should be enough to give the model stability.
The lack of length is compensated by the thickness of the base - this will make the stand more stable
You need to select a workpiece based on your phone model. The groove for long smartphones will have to be made deep, with a slope. Before starting work, you should make a small cutout and install the device into it, expanding it to the required size. A right angle is also acceptable, but working with the device will be less convenient.
The minimum kit for preparing to create a stand includes:
- The basis. Wide beam of required thickness. There is no particular difference in the choice of wood, but some varieties are more difficult to process.
- Tool. A wood hacksaw, ideally a router, to create a recess. Sandpaper and files will help give the stand a nice appearance.
- Marking supplies - pencil, marker, ruler.
- Additional materials for creating complex and unusual models. Varnishes, paints, glue, decorative elements.
A simple design can be created using ready-made diagrams.
Photo of a shelf in the hallway
Mobile communication devices are found in every home; they have become almost indispensable for modern people and perform many functions. Therefore, quite often they need to be kept not in your pocket, but on the desktop, so a smartphone stand is a necessary thing for everyone. There are many ways to make a phone stand, but one of the best options is, of course, wood, since, despite its hardness, it will not scratch the smartphone and will look good both in the office and on the table at home.
The easiest way to make a wooden phone stand with your own hands is to simply make it from an ordinary plank. The design of such a product is as simple as possible - a groove of the required width is made in the board and the stand is already ready. Since the board has a large plane, after you put your mobile phone in the slot, it will stand firmly and securely on the table.
The most important thing in this wooden phone stand is the base area that will be in contact with the table; it must be large enough to cope with the functional load. As a base, such a homemade phone stand can have any wood and can be given any shape. But the manufacturing process itself is limited to the fact that a groove is simply made in the board using a router. The groove can be made flat or sloped, depending on the angle at which the device should be positioned.
When you make your own smartphone stand, it is important to sand it well, especially in the groove area where the mobile will sit. After all, if there are irregularities, you can scratch the glass, and this will ruin the appearance of your gadget.
Main types
The base of the stand can be made of any material, most often it is wood, cork, cardboard, rubber, etc. It can have any shape, and hot pads are divided into types:
- Stands for cups and glassware;
- Plate stands;
- For frying pans and pots;
- For Dummies;
A stand made at home will be unique and inimitable. It will help refresh the interior and bring a little warmth to your kitchen.
Complex design
If you want your mobile device to always be in sight, not get lost in documents, and at the same time your desk looks beautiful and solid, then the stand should be appropriate. To do this, you can make it not just from a plank, but from several parts. Don’t worry, you don’t need a lot of tools or material for this either. The most important thing is not to rush and carefully think through the design that your homemade product will have.
A good do-it-yourself smartphone stand, which is suitable not only for any phone, but also for a tablet, and at the same time will be as stable as possible, can be made from two small planks.
The design of such a stand is as simple as possible; two identical rectangular wooden blanks are taken. On one side, approximately a quarter from the edge, a slot is made to the middle of the board. It is important that the slot does not go at a right angle, but obliquely, so that the stand is more stable and has the correct slope of the plane that will support the phone. On both workpieces, a slot is made up to half the width of the workpiece.
For someone just starting out, it can be challenging to find the right angle for the slot. But this is not difficult to do, just attach two parts to one another at the planned angle and simply make marks on the side at the end. Well, in addition, to prevent the phone from slipping, you need to make a groove on a horizontal board, or glue a small strip that will be a stopper.
After all the slots are ready, you just need to sand the stand well so that the bumps don’t scratch the phone’s body, and cover it with tinting or just varnish.
There are many ways to make a phone stand of this design; for example, you can make the vertical part of the stand shaped, which will significantly improve its appearance. The shapes can be a wide variety of hands, leaves, animals and in general anything you can think of, since a tree can be given almost any shape.
Classic version
We suggest you find out how to make a shelf for a telephone in the hallway.
A special feature of the product is the shelf at the bottom, on which a reference book or notebook can be placed.
For production we will need:
To complete the job successfully, follow these simple steps:
We make blanks for the sides. Use a jigsaw to cut strips up to 30 cm wide and identical in height.
If you want to give the product an aesthetic appearance and protect others from constant bruises, you can file off the sharp ends and rub them with sandpaper.
The perimeter can also be covered with elastic tape.
The parameters of the upper surface are usually as follows: about 45 cm in length and 25 in width.
We fasten the top and side elements using corners. We attach the clamps with screws, and place the upper part on them.
Let's start forming the bottom shelf. To do this, cut a rectangle from a sheet of laminated chipboard with suitable parameters (to do this, you need to measure the thickness of the wood, outline it on the future bottom shelf and then cut it down).
Advice! In order not to spoil the product with sloppy cuts for screws, we recommend using a special drill with an additional attachment.
This tool makes a hole exactly the same size, so it will look more aesthetically pleasing.
Fix the bottom shelf. The phone stand is ready.
How to choose a stand design
There are quite a few ways to make a smartphone stand, but wooden options are not only durable, but also beautiful in appearance. In addition, they look much more noble than other materials, since a properly selected wooden accessory will decorate any design, regardless of its style.
Therefore, to make your handmade mobile phone stand beautiful and original, try to choose the right design, size and color. Of course, you should not forget about such parameters as functionality and stability, since if a cell phone falls, it may simply be damaged.
You can make a variety of phone accessories at home and you don’t need to have a special tool to do this. In most cases, with due diligence and patience, you can get by with a simple hacksaw, chisel, sandpaper and a piece of plywood. Then just glue your sample from small parts and at home this will also be easy.
Don’t be afraid to experiment and imagine so that the stand you make is unique and not like everyone else’s. After all, mass production is organized in such a way that anyone can afford to buy beautiful and seemingly varied things. But truly bright individuals prefer unique things in a single copy. Such things are not sold in stores; you can only order them or make them yourself. The second option is much better, not only in terms of savings, but also in terms of expressing individuality.
Even if you do not have experience in making any crafts from wood, do not be upset, as there is nothing complicated about it. It is enough to plan everything carefully, calculate what tools and materials will be needed, and only then begin the work itself. If something doesn’t work out for you, you can try again, rarely does anyone succeed in doing everything correctly the first time, everyone learns and everyone makes mistakes. But this is the only way to gain experience and learn to do everything right.
In our progressive times, it is difficult to meet a person who does not have a mobile phone. Even when sending a child to first grade, parents provide him with the necessary means of communication. We use modern mobile devices not only for communication, but also for gaming applications, typing, reading, as well as watching videos and much more. Often, an owner who wants to always have a phone at hand wants to position it in a convenient way. Various expensive holders are offered in stores, but from our article you will find out what you can make from
Advantages of a homemade stand
You can make a whole list of factors that testify in favor of hand-made coasters:
- Price. Of course, you will only pay for materials and, possibly, the necessary tools, when the cost of store goods includes a much wider range of services.
- Choice of material. Here you are free to choose the color, shade and texture that you like, and not based on the assortment already offered by the store.
- Variety of shapes. No one limits you in creating your own unique stand. Moreover, you always know how and what it is made of. In addition, you always know what design you need for a particular room.
Stationery binders
Surely those who study or work in an office will have several office clips called binders on their desktop. Next, let's look at how to make a phone stand from these devices. To create a strong holder, you can use 1, 2, 3 or even more binders. Some craftsmen assemble three-dimensional structures from many different sized clips. But such stands look bulky and are inconvenient for temporary use. It is enough to fasten two binders together and do not forget to bend one metal end of the holder slightly towards the phone located on it. Even one piece with a curved ear will be enough to support a mobile device.
You can build another structure from the same binders by placing the clamps opposite each other so that the ears point to the sides. The telephone is inserted into these ends, like into grooves. To keep the clips stable, clamp a small piece of cardboard on both sides.
What stands you can buy - a review of popular stands
It is most convenient to store the outboard motor in a vertical position in order to comfortably carry out maintenance and repair work.
Manufacturers offer various types of stands, from which several of the most relevant positions can be identified:
Trem outboard motor rack
A simple, budget-friendly stand for one engine weighing up to 60 kg. The design is folding and compact. Galvanized steel pipes are resistant to moisture.
The weight of the stand itself is 7 kg, the price is 3500 rubles.
Stand for 2 PLMs
Convenient stand for hanging 2 outboard motors. The permissible weight in terms of load is 120 kg. The structure is made of steel, the surfaces of the pipes are powder coated.
The simplest stand costs 5,700 rubles.
Stand for 3 PLMs
Massive design for storing and servicing several outboard motors. Permissible load – 150 kg. The stand is made of powder coated steel. Thanks to this, the base is reliably protected from moisture and temperature changes.
The cost of the device is 5940–6236 rubles.
Mobile stand for 2 PLMs Poseidon
A stand designed for hanging, storing and transporting outboard motors whose total weight does not exceed 120 kg. The structure is made of steel and protected with powder paint. The main feature is the presence of swivel wheels with a stopper for easy movement and fixation.
The price of the stand is on average 8084 rubles.
Mobile stand for 3 PLMs Poseidon
Similar to a stand for two outboard engines, but can support a weight of up to 150 kg. Therefore, it can accommodate three motors. There are swivel wheels with a stopper for moving engines around the workshop or garage.
Price — 8546 rub.
All the racks for outboard motors presented in the list are convenient, but expensive. Is it worth spending money on them if you can make similar stands for PLM with your own hands in a few hours? And it will cost much less, maximum - 500-1000 rubles.
We use pencils
If you don’t have any binders at hand, the question may arise: how to make a phone stand out of pencils. Before building this structure, prepare 4 erasers and 6 pencils. In fact, you need to assemble a three-dimensional geometric figure - a tetrahedron. The principle is that you need to fasten two pencils with an elastic band, and insert the third between the turns. It is recommended to use pencils with an eraser at the end to prevent slipping on the table and provide a stronger grip on the phone.
Tools
To work with wood and metal you will need the following devices and tools:
- Level;
- Roulette;
- Screwdriver;
- File;
- Jigsaw;
- Screwdriver;
- Hammer;
- Welding machine (for metal elements);
- Construction pencil.
When choosing fastenings, proceed from the position that the more weight the structure must withstand, the better and more powerful the fastening you select.
Bottle models
In the household we use a lot of cleaning products and detergents. Most of them are contained in plastic containers. It can be used as a mobile device holder. Let’s look further at how to make a phone stand out of a bottle.
The type of device will depend on the shape of the container. This could be containers for shampoo, shower gel, cleaning products and others. Take a bottle twice as long as your phone. Cut off the neck and part of the container on one side approximately to the middle. All sizes are relative - measure at your own discretion. On the opposite area of the bottle, cut a hole corresponding to the parameters of the charger. You should end up with a piece that resembles a handbag or pocket with a handle. Place the phone in the stand and connect the adapter to the network through the hole. Your mobile communication device will not lie on the floor, and there will be no risk of crushing it. You learned another way - how to make a phone stand. If desired, this holder can be painted or covered with beautiful paper or fabric.
Cardboard and plastic cards
How to make a phone stand out of cardboard? You will need a cardboard sheet from which you will need to cut a strip measuring 10 x 20 cm. Then you need to fold it in half along the short sections. Next, draw a figure as shown in the photo below. The fold line must remain intact. Having opened the part, you will see that you have a comfortable and stable phone stand.
If you have an unnecessary card lying around (any discount card), it will also make an excellent phone stand. It is very easy to make such a device at home. Step back 1 cm from the edge of the card and bend the piece along the short side. Fold the remaining part of the card in half in the opposite direction. You will get a zigzag shape. Place the phone on the resulting ledge. The stand is ready.
Laptop table drawings
Full-fledged laptop tables are made according to traditional drawings:
- a wooden table up to 50-60 centimeters high with a stand for a mug, telephone and other accessories;
- tables with a hollow body that houses a fan for cooling;
- stands on an inclined structure, inside of which a fan is placed.
You can make a drawing for a table on wheels or a bedside table yourself by measuring the height of the bed or sofa, as well as assessing the parameters of the laptop.
Information! If you have no experience, it is recommended to start assembling the simplest structure.
Unusual coasters made from simple things
Savvy people began to use ordinary glasses as a phone holder. They only need to be turned over with the arms up, which, in turn, need to be crossed. The mobile device is located between the frame frame and the temples that hold the phone.
How to make a phone stand from a children's construction set? In this case, everything depends on your creativity and imagination. To create such a model, you need to use a platform and several bricks of various shapes. A stand made of parts can hold the phone in both vertical and horizontal positions. The tilt of the screen can be adjusted by adding or removing additional bricks.
Another interesting detail that will help keep the phone in a vertical position is the old cassette holder. It is necessary to open it and tilt the lid back, thereby turning the box inside out. You can place your communication device in the hole that once served as a pocket for an audio cassette. The convenience of the stand is that it is quite durable and transparent, and does not interfere with the use of the phone. In addition, it can be easily washed.
As you can see, from the simplest items found in every home, you can make such a useful thing as a phone stand.
Why do you need a hot pad?
When hot tea is brewed and a mug of this drink is placed on the table, many notice the traces that remain after this. They are difficult to remove, sometimes almost impossible. This problem is especially relevant when a thin oilcloth, susceptible to high temperatures, is laid on the surface. Putting a cup of hot tea on a special surface is much more practical than purchasing a new film for the table. Plywood stands in this case are the best option.
A plywood stand will protect the furniture covering from marks.
