- May 4, 2020
- Plumbing
- Anna Gorbenko
Replacing a faucet in the kitchen is, in fact, an ordinary situation. Like any plumbing fixture, a kitchen faucet with all its components tends to wear out, break, and fail over time. And since calling and waiting for a plumber may be inconvenient for some reasons, users try to fix the problem themselves, with their own hands. But how to change the faucet in the kitchen without experience and specific skills in this field of activity? And what does this require?
Everything is quite simple: you just need to have the necessary tools for repair on hand and have basic knowledge of installing a crane - we will talk about them today.
Causes
Any defect that appears on kitchen plumbing has some prerequisites. And each specific breakdown has a different degree of severity. But for the most part, the malfunctions manifest themselves in approximately the same way. And in fact there is only one solution for plumbing: it is its complete, categorical replacement.
Due to frequent use, the kitchen faucet is subject to all kinds of mechanical stress the most. As a result, over time, corresponding gaps and cracks appear, rubber gaskets, which are responsible for the tightness of fixation of the individual components of the mixer, wear out, etc. As a result, the faucet simply leaks. And this gap can be formed both in its device itself and in the connecting tubes. Therefore, the occurrence of such a problem requires the initial identification of a critical location, after which an appropriate decision is made directly to eliminate the problem.
Types of mixing devices for the kitchen
Regardless of the design, any mixer performs the same function - it mixes hot and cold water supplied by pipes suitable to it in a certain proportion and regulates the pressure of the resulting flow.
The most common types of mixers are:
- single lever, or ball;
- two-valve;
- thermostatic;
- sensory.
Single lever
Bali was developed in the second half of the 20th century and quickly gained well-deserved popularity. Both the temperature and the pressure in them are regulated by a single handle-lever, which can move up and down, adjusting the pressure, and left and right, adjusting the temperature. The design is based on a ceramic ball with shaped holes for hot and cold water and for the outflow. By turning the ball by the lever, the owner aligns these holes with the corresponding windows in the body, creating more or less clearance.
Design advantage:
- long service life;
- Convenient one-handed operation.
Flaws:
- work only with water free from mechanical impurities, which requires the installation of additional filters;
- high price.
Replacing a single lever faucet is easy and simple.
Two-valve
This structure is over two hundred years old. Traditional faucets were invented in Great Britain by Lord Cavendish, a famous scientist. The design still remains popular due to its simplicity and affordable price.
The pressure of hot and cold water is regulated by separate valves. They mix in the outlet pipe.
The valve is controlled by a handwheel-handle, its rotation through a worm gear is converted into the translational movement of a poppet valve, increasing or decreasing the clearance between the gasket and the seat.
Double valve mixer
Advantages:
- undemanding to water quality;
- cheap mixer
- cheap gaskets
The disadvantages of such mixers include:
- inconvenience of use
- the need for frequent replacement of gaskets.
The improved design of the two-valve mixer uses ceramic discs instead of rubber gaskets. The tap opens completely with half a turn of the handle. However, such faucets are sensitive to water quality.
Thermostatic
A mechanical temperature-sensitive element regulates the proportions of mixing hot and cold water so that the temperature of the outlet stream corresponds to the set temperature. The user sets a comfortable temperature once and then only needs to turn the water on and off, adjusting its pressure.
Sensory
In such faucets, a proximity sensor is added to the thermostat. It is enough to bring your hands or someone else to the faucet - it will turn on the water at the specified temperature and pressure. When hands or an object are removed from the sensor's coverage area, the water turns off. Such faucets have long been used in public toilets, and recently they have begun to spread in private households. The device is powered by a battery that lasts for at least a year.
The advantages of the design include:
- ease of use, after initial setup the mixer works automatically
- saving water, it is supplied only when hands are within the sensor’s coverage area;
- safety, eliminating the risk of flooding your neighbors due to a forgotten tap.
The disadvantages of the device are the following:
- the complexity of the design excludes independent repairs;
- the need to periodically replace the battery;
- very high price.
With the growing popularity of the device, experts predict a decrease in prices for sensor faucets.
Stages of repair work
Since the range of existing varieties of kitchen faucets is represented by a fairly wide choice, the nuances of repair work in the event of defects in the operation of the faucet may also differ. In general, the installation structure is carried out in three main directions. This includes:
- dismantling the old mixer;
- checking and preparing new equipment before installation;
- direct installation of a new mixer and installing it in place of the old one.
But each of these stages may be partially different due to existing differences between specific plumbing fixtures and their components. Therefore, having decided to change the faucet in the kitchen with your own hands, you will need to decide which model you will install in place of the old faucet.
Types of mixers and selection rules
Having already had relevant experience in using previously installed and ultimately broken plumbing fixtures, you need to approach the issue of selecting new equipment with all responsibility. You need to decide for yourself what exactly your new plumbing fixture should be so that it can satisfy your main needs:
- aesthetic appearance that fits into the interior design;
- optimal service life;
- reliability of the chosen design.
In view of this, you should decide what the design form of your future crane will be, what its installation configuration will be, and what material it will be. It is better to choose a kitchen faucet based on these three parameters.
- Design. From the point of view of reliability or service life, this factor is not considered important, since the main role of this parameter is the aesthetic component. It will solely influence your mood and your like (dislike) for the appearance of a given plumbing fixture.
- Configuration. This criterion provides for the possibility of installing a kitchen faucet in the two most common ways: wall-mounted or table-top. The second option is considered optimal for the kitchen, since it is the most convenient way to locate plumbing fixtures on the side of the sink or on the utility panel of the sink. The wall-mounted option is more typical for luxury interior solutions in kitchen design.
- Material of manufacture. Mixing plumbing fixtures are usually made of silumin, bronze, brass or ceramics. If we are talking about silumin, then its level of reliability is the lowest compared to other components. The same can be said about brass. They can be easily distinguished from ceramics and bronze by their weight: the weight of such plumbing fixtures has the lowest values among other appliances. Bronze and ceramics have a much higher price tag compared to silumin, but the service life of such cranes is promising. From this point of view, it would be more economical to choose a higher quality product, so that in a year or two you will not have to overpay for new silumin as the basis for the mixer.
Another factor that differentiates between kitchen faucets is the way they control water flows: these can be faucets with a single-lever design, or they can be installations with two taps (herringbone). But this comparison parameter can rather be attributed to the visual component, since the functioning of both the first and second options is carried out at a quite decent level in both types of construction.
Recommendations for choosing flexible hoses
The flexible hoses included in the kit are usually 300 mm long. This may not be enough; moreover, during installation, in order to avoid rapid wear from pressure drops, it is recommended to leave a slight slack in the liner.
In addition, low-quality hoses are found in the set of budget faucets, so sometimes it is advisable to additionally purchase new ones.
When purchasing, you should pay attention to the following points:
- The diameter and type of fastening must correspond to the main pipes.
- Length. If the distance between the attachment points is 520 mm, you need to choose a liner with a length of at least 600 mm.
- The faucet should only be purchased in specialized stores.
- The type of liner varies according to temperature conditions. Accordingly, hoses are marked by weaving red and blue threads into a metal braid. Universal ones are considered more durable.
- You need to pay attention to the quality and thickness of the union nuts. Reputable manufacturers have a nut thickness of at least eight millimeters.
- The fittings must be made of high quality brass. Other materials are acceptable, but usually have a shorter service life.
- The eyeliner should be heavy - light weight indicates low-quality metal.
The smell of the product is also an important criterion. If the chosen eyeliner has a strong odor, this means that technical rubber was used in its manufacture, which can negatively affect health.
Tools
Having decided on the type of faucet to replace the old one and having purchased it, you can safely begin the preparatory work. And the first thing you will need is to collect the necessary tools to dismantle the old faucet and install a new one.
To remove a kitchen faucet and replace a faucet, you will need:
- adjustable gas wrench (first);
- wrenches 13 x 14 and 10 x 12;
- socket wrench with deep bed 13 x 14 or 10 x 12;
- wire brush, coarse;
- fluoroplastic tape (PFTE);
- rubber gaskets (set);
- connecting hoses;
- nuts;
- screws;
- washers, etc.
As auxiliary equipment, you need to prepare a container for draining water during dismantling, as well as a flashlight or other lighting device that will help you carry out work unhindered in a darkened space (under the sink, under the sink). In addition, instructions must be included with each purchased plumbing equipment.
You will be able to change the faucet in the kitchen by successfully completing three key stages.
Dismantling
The first step to replacing your kitchen faucet is removing the old, worn-out unit from the sink. Dismantling a kitchen faucet involves a sequence of specific actions:
- It is necessary to stop the supply of water (hot, cold) to the mixer. You must make sure that no water flows in; to do this, simply turn the valves of each of the taps (or move the lever).
- If, after carrying out the manipulations, you observe a water leak from the tap, this means that the linear shut-off valves have worn out. You will have to replace the corresponding taps on the supply lines and only then continue work.
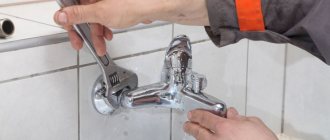
- You need to remove the connecting hoses located under the sink. Usually these are flexible tubes 40-60 cm long. To do this, you need to unscrew the union nuts that connect the flexible hoses to the centralized line. This is done using an adjustable wrench.
- You should unscrew the tubular fittings, due to which the flexible hoses are fixed to the mixer body. For these purposes, you will need to use a wrench (which wrench is needed for the kitchen faucet specifically in your case depends on its modification, usually it is either 13 x 14 or 10 x 12).
- After removing the connecting hoses, you should proceed to the direct dismantling of the mixer device. Its fastening to the sink is based on hex nuts 50-60 mm long, as well as a special pressure washer. To remove the nuts, you will need to use a socket wrench. To do this, accordingly, you will need to go under the sink, since the fastening unit is located precisely at the bottom of the mixer.
- By unscrewing the screws and removing the support washer from the studs, you can easily remove the mixer.
If you have completed all the described points successfully, you can be congratulated - the first part of reinstalling the mixer is completed.
How long does it take to replace a kitchen faucet?
It depends on your skills and craftsmanship. If you have had this experience before, replacing your kitchen faucet can take less than an hour. When you first see what an adjustable wrench looks like, it may take a whole day of work to replace the faucet. We hope that our instructions will make the process much faster.
Please note that the information in our article is presented for advisory purposes only and is provided without any liability. The article is for informational purposes only and is not an instruction manual.
Checking new equipment
After you have managed to unscrew the faucet in the kitchen, do not rush to install a new one immediately. First you need to check it. What set of actions consists of a preliminary check of a crane being prepared for installation?
- Remove the new replacement device from its packaging. Inspect it carefully for damage and defects. If you find any problem, contact the supplier and request a replacement using the warranty card (or return the device using the saved receipt).
- Compare the components with the parts listed in the equipment installation instructions: all components should be shown schematically there. Each part has its own functional significance, so the lack of at least one of them may simply result in the impossibility of installing a new faucet.
- Carefully examine the mechanical parts for functionality: inspect the rotation of the flow regulator, pay attention to the integrity of the threads at the corresponding connection points, look at the quality of the flexible hoses. Everything must be in good working order, without defects.
- Check the on and off lever or taps for smooth movement: it should be unobstructed. Otherwise, when you install screws into a common assembly by tightening the nuts, even a slight rotational tightness will manifest itself as a serious obstacle to the turning mechanism.
- Pay special attention to the protective metal casing that covers the flexible hoses - it should not be damaged.
- Carefully inspect the nickel-plated finish of the faucet: it should not be covered with bulges, scratches, or dents. If there are any, you can safely take the low-quality product back to the store with a demand for a refund or replacement of the equipment with a non-defective version.
A thorough check of the purchased mixer can protect you from unpleasant surprises during its further installation and operation.
DIY repair
Mixers can have different designs. We will analyze the repair of each type of faucet separately.
Single lever
Eliminating leakage from these types of taps requires their complete disassembly.
According to tradition, before starting work, we turn off the water and drain the remaining water.
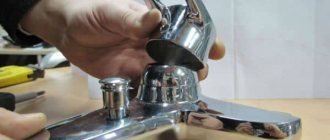
- Remove the plug using a knife and unscrew the screw hidden behind it.
- Completely remove the lever and cap.
- Then we take out the cartridge and inspect it for signs of obvious defects.
- We check all the remaining small details of our design. We clean the rubber seals, gasket, and spring from accumulated deposits. If we find a broken part, we replace it with a new one.
If the problem was in the cartridge itself, then it should be replaced with a new one.
It is important to buy a similar part so that all the recesses and holes match. In cases where the cause of the faucet leakage is wear of the gasket, it should be replaced with a new one in the same way
Please note that the diameter of the gasket must be selected so that it is slightly larger than the socket.
In cases where water flows out directly under the spout, you need to pay attention to the O-rings. They are most likely the cause of this breakdown.
Two-valve (classic).
Two-valve faucets are the most common. Here is the order of their repair work:
- First of all, turn off the water.
- In order to relieve the tap from strong pressure, turn the valve to the on state.
- Remove the caps and unscrew the screw securing the flywheel.
- Unscrew the securing nut and remove the neck.
If the problem lies in the valve head of the faucet itself, replace it with exactly the same new one, or of a similar size.
Installation
After the process of dismantling the old faucet and checking out the new equipment, you can finally get to work and change the faucet in the kitchen. The order of work is determined by the following sequential actions:
- Before starting installation, clean the internal holes of the pipes from any rust and scale that has formed: using a coarse metal brush, clean the threads on the pipes and remove any remaining sealing material. Using the same brush, treat the area where the faucet sits on the sink.
- If your sink can be easily removed from its base, remove it from the countertop during installation for your own convenience.
- Place rubber gaskets on the tubular fittings that are included with the new mixer; they are also provided by the manufacturer as mandatory components.
- Screw two armored flexible hoses onto the mixer until it stops (first with your hands, and finally with a wrench).
- Lower the mixer into its installation location, first inserting the flexible tubes into the mounting hole of your sink.
- Go down again and reach the bottom of the faucet: you should put the sealing washer on the studs and then tighten this washer to the sink cloth with nuts. Do this with a slight under-twist until the end. This is done so that later you have the opportunity to install the device clearly at the central point of the mounting hole. When the device is centered, you can easily tighten the nuts on the studs until they stop.
- After installing the faucet on the side of the sink, connect the ends of the flexible pipes to the main pipelines. Modern flexible hoses are equipped with existing fitting nuts with rubber gaskets.
- The final touches involve screwing the fitting nuts exactly along the thread onto the ends of the pipes until they stop. Then you need to tighten these nuts two or three turns with a gas wrench - and your new mixer is ready for use.
Answers from experts
Michael:
if you reach it, you need to use pliers to grab the rim around the hose under the mixer and unscrew it and buy one in the store, just not a cheap one, screw it back with your hands and pull it with pliers, but not very tightly (sometimes it’s enough to tighten it by hand and then screw it to the pipe with a wrench. don't pull too hard on the pipe, otherwise you will overtighten the nut and it will burst, perhaps not right away. But first unscrew it from the pipe, if the woman does not have an adjustable wrench, then you can use large pliers to grab the nut. PS, be sure to unscrew the nut, perhaps if the the water will flow slowly, make sure that the valve that shuts off the water doesn’t turn, and look at the condition of the pipes and valves, if they are rusty and don’t spin, then it’s better that Maria correctly said, don’t climb in yourself
Vitalban1:
Buy a new smestak - the higher its price, the quieter it works. All plumbing fixtures are designed to last for a maximum of 5 years, buy a new one rather than have to deal with this faucet in six months. the cartridge or axle boxes will be covered.
Maria:
Call a plumber, otherwise you will flood all your neighbors. But they unscrew it with a special wrench, and the diameter of the pipes is different, if you don’t go anywhere you don’t know, it will only cost more.
BOSS:
Key No. 11.GO!!! What's included in the mixer? Buy the same one you unscrewed...
Valery Golda:
turn off the water, choose a nag that is the right size, unscrew both hoses, buy the same ones and put them in place
Wanderer:
Hold the PP coupling with a wrench (a Swedish wrench, for example). This is how it should be poured so that the nut of the flexible liner rusts: I have had them for 10 years and nothing...
Siyell:
Use this key and line the contact area with rubber or something dense and non-slip.
Aibolit:
Once it is rusty, if you screw it in further, the liner hook will burst. After this it will easily unscrew. The second option is to heat it with a lighter. The metal expands, the gap increases, and the nut unscrews. You can try a VD-shku, but it’s not very effective
Alex Weiss:
“Fill it in” with anti-rust spray, let it sit and spray it back and forth again, you can heat it - but plastic is dangerous.
Stas Shabanov:
Also hold the water pipe with a key.
Sergey Dmitriev:
You need to work with two keys. Unscrew the nut with one wrench, and hold the thread on the pipe with the second.
Pavel Kharlamov:
How does the pipe rotate? Where is the eyeliner screwed? Here's the eyeliner with one key, the adapter with the other, and in different directions, chick-chick...
tuev:
I would carefully saw the rafter with a turbine. You can even do it with a hacksaw. The main thing is to halve the nut, and it will easily unscrew or simply come off. If you damage the thread a little (but only a little!) it won’t be fatal. I don’t recommend heating it, the PPR will melt.
LLC SoyuzDomStroy:
try a belt wrench or a chain wrench
Useful tips
Changing the faucet in the kitchen will not be difficult if you follow the instructions exactly. But there are a lot of nuances that can interfere with the process and simply make you stall in one place. How to avoid this?
- Follow the rule of experts: hoses should be allowed to sag. Since flexible wires for kitchen plumbing are available in different lengths, you need to position them in such a way that they sag: do not allow strong tension - this will negatively affect the attachment of the hoses to the mixer itself and the centralized water supply, as well as strain the axial connections.
- Use thread sealing tape. It will provide you with the proper level of sealing of the structure at critical points.
- Watch the position of the tap: the mixer must be installed strictly evenly, perpendicular to the base of the canvas. Otherwise, you run the risk of cracks appearing on the faucet - this is especially true in cases where the body is made of fragile material (the same silumin, as well as ceramics).
- Try to tighten the nuts tightly, but do not overdo it: you can damage the threaded connections and sealing elements (gaskets). Subsequently, this will result in secondary water leakage and repeated replacement of components.
- Before putting into operation a newly installed mixer, flush the pipeline to remove any oxides, scale, or rust particles that have formed there. To do this, before using the faucet, remove the aerator from the gander - this is a small round filter in the form of a mesh. Open the tap and wait a while - running water will wash away the remaining contaminants without settling on the filter. At the end of the rinsing procedure, install the filter in place and check the flow of water from the tap - it should not splash, and the stream should be smooth.
Methods for unscrewing plumbing nuts
This procedure, as already mentioned, should be carried out as carefully as possible so as not to damage the pipes. The easiest way to unscrew rusted nuts is, of course, to use a special liquid. But what to do if such a remedy is not at hand?
If necessary, you can replace purchased scale softening liquid with:
- kerosene;
- vinegar and soda.
When using such products, you must first thoroughly clean the problematic joint with a wire brush, trying to remove all rust and dirt. Next, you should take vinegar or kerosene into a syringe and inject it under the nut from all sides.
The next step is to wait two hours, leaving the kitchen tap alone. During this time, the chosen home remedy will eat away the rust and soften it. Thanks to this, the nut will most likely unscrew quite easily in the future. If the problem area was treated with vinegar, all parts should be wiped with a soda solution at the final stage.
Final steps and commissioning
At the finish line, when you have already managed to change the faucet in the kitchen with your own hands, check the correctness of the work done. Experts recommend first assessing the tightness of the structure. For this purpose, the crane is crimped:
- the rotary lever of the tap (screw) is turned to the “off” position until it stops;
- Linear taps are opened alternately on the cold and hot water mains;
- after supplying water to the pipes, all installation connections are carefully inspected to identify leaks (or lack thereof);
- wait 15-20 minutes: if no drops are detected, it means that you performed the installation efficiently.
The crane can now be safely put into operation.
Theoretical knowledge
In most cases, bathrooms already have female end fittings for . If you do the wiring of highways with your own hands, consider the following important points:
- The axes of the hot and cold water supply inlet fittings should be installed at a distance of 15 cm from each other.
- Hot water is supplied from the left, and cold water is supplied from the right.
- It is most convenient to use a mixer installed at a height of 15-20 cm from the bathtub and 60-80 from the floor level. Therefore, it is best in this position.
- Recess the inlet fittings into the wall. This must be done in such a way that when laying the tiles on the wall, the ends of the fittings are located flush with the front side of the ceramic tiles. Thanks to this, you can hide the connection points of the plumbing fixture behind decorative cups.
It is best to use plastic pipes for plumbing. They are cheaper and more practical than steel and cast iron products, and even a person without experience can cope with welding such pipes.
Mistakes when installing a kitchen faucet
Often, mistakes and miscalculations when installing or repairing plumbing fixtures are expensive. Wasted time, lost funds, suffering during operation after incorrect installation - all this can be avoided if you avoid common mistakes. What mistakes are we talking about?
- "Budget" components. When using collectors made of silumin or brass, you must understand that such an alloy will not last long. And all because these materials are not resistant to zinc leaching. It is always better to overpay a little for higher-quality components than to overpay later for their complete replacement.
- Provoking water hammer. In most cases, water hammer can lead to a water pipe break. The prerequisites for its occurrence are sudden closing of the mixer (especially if it is a single-lever), emergency shutdown of the pump, activation of the pipeline protection system, etc. The first signs that the system is overloaded are alarming strange noises that occur when opening and closing the tap.
- Incorrect selection of gaskets. If you do not completely seal the connection between the parts, your plumbing will leak (even if it is new).
- Incorrect use of the lever. If you roughly operate the levers for opening and closing the faucet, if you turn them at the wrong angle, sooner or later this will inevitably lead to the faucet leaking.
To avoid repeated replacement of plumbing fixtures in the kitchen, make it a rule to treat them with care. Then your equipment will last you longer.

