In the process of making furniture yourself, the contractor may need to cut or trim the laminated chipboard for subsequent use. Of course, it is best to perform this operation by sawing, but if necessary and to reduce labor intensity, it is quite possible to cut laminated chipboard at home (using a jigsaw). Moreover, it is very important to implement this procedure in such a way as to minimize the number of chips and thereby create an even cut.
Why do chips appear?
Before cutting laminated chipboard or laminate using a jigsaw, it is advisable to understand why chips form when cutting sheet material. And the answer here is simple: everything lies in the design of the jigsaw, or rather in the design of the nail file.
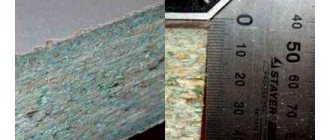
So, during the cutting process, the file receives return movements (up and down). And if when the saw moves along the teeth (usually downwards), chips practically do not form, then when the tool moves in the opposite direction, the teeth seem to tear out the top layer of material, thereby forming an unpleasant chip. That is why you can observe an almost perfect cut on the bottom side of the chipboard and a chipped cut along its upper edge.
Ensuring a clean cut
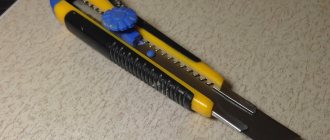
In many cases of material processing, the size of chips can be reduced to half a millimeter. Such minor imperfections are not noticeable; they can be removed by chamfering with sandpaper or covering up the chips with a correction pencil. You can also sand the end with sandpaper or cut through the top layer of the surface with a utility knife.
To begin, make 2 cuts half a millimeter deep on both sides of the part, indicating the thickness. Two grooves should be marked along the edges of the cut, which can be done using an oblique shoemaker or segment knife (for uncoated wood material or chipboard), or using a sharp drill and a pobedite cutter (for laminate).
Ways to minimize chipping
An additional reason for the formation of chips may be misalignment of the saw teeth. Therefore, the first thing you need to do is purchase a tool with a straight cut (often Bosh files). However, it should be taken into account that during prolonged use, such files overheat and may even bend during the cutting process. Therefore, it is necessary to take breaks from work to cool the cutting tool.
However, just replacing the saw blade is not enough and in order to cut laminated chipboard (laminate) with a jigsaw without chipping, you need to make minor modifications to the power tool. Namely, make sure that when the saw moves against the inclination of the tooth, the material does not pull out. For this purpose it is enough to make a persistent platform. You can come to this conclusion by trying to cut two sheets of chipboard at the same time. So there will be practically no chips on the lower element.
In order to make a stop pad for a jigsaw, it is enough to cut out a rectangle from any dense material (for example, laminate) with dimensions identical to the dimensions of the sole of the power tool.
Then, along the larger center line, you should make a notch and secure the resulting equipment to the sole of the jigsaw using insulating tape or double-sided tape. All modifications are ready and finishing work can be carried out in compliance with certain recommendations.
Types of jigsaw blade shanks
The first thing you should pay attention to when choosing a jigsaw file is the type of shank. And this is logical: if your tool is not designed to work with this variety, then you simply will not be able to use the new blade. There really aren't that many options:
T-shank.
It is often called “Boschevsky”, since it was this company that developed files with this type of shank. Since BOSCH is the market leader in jigsaws and accessories for them, and other industry giants are trying to switch to this standard, it is not surprising that T-shank files are currently the most common. The T-shank fits most modern jigsaws - Bosch, Makita, Metabo, Hitachi, Skil, AEG, DeWalt, Sparky, Interskol, etc.
U-shank.
The second most popular type of shank is the American standard. This is a universal shank for older models of jigsaws Skil, DeWalt, Wolf, Ryobi, Stayer, Black&Decker, etc. These files are suitable for all jigsaws with block and screw clamps.
Makita shank.
Files with this shank are only compatible with older Makita jigsaw models.
Bosch shank.
It differs from the T-shank only in the presence of a second stop. These files are only suitable for older Bosch models.
The last two types of shanks can already be classified as rarities. Finding such files in domestic stores today is almost impossible.
Recommendations for cutting without chipping
Firstly, as mentioned above, you should use a jigsaw file with a straight cut.
Secondly, in order to better control the cutting process, it is justified to apply a marking line on both sides of the chipboard and check the accuracy of the processing from above and below.
And thirdly, take constant breaks from work to cool the cutting equipment.
Sometimes the solution to this issue can be simply cutting through the laminated layer of material using a mounting knife, and subsequent work with a jigsaw will no longer cause large defects in the form of chips. However, this work requires the performer to have some experience and accuracy.
If you liked the material, I will be grateful if you recommend it to friends or leave a useful comment.
Source: domgvozdem.ru
Application of adhesive tapes
Adhesive tape (for example, ordinary tape) is used to protect the back side of the material. It is necessary to glue a tape to the cut line to protect the processed fabric from tearing off large elements. Masking tape cannot be called a very effective option for preserving material when cutting with a jigsaw, since its strength indicator is extremely low.
A fairly wide (each side of the cut material should be covered by at least fifteen centimeters) aluminum or fiberglass reinforced tape is best suited. In addition, the adhesive tape must be pressed with a dry cloth to eliminate the risk of wrinkles.
What tools to use?
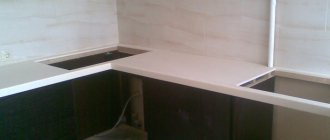
If the question arises of how to cut a tabletop, then first of all you need to decide on a cutting tool, and most often several tools are used.
For example, using a circular saw, you can get the perfect result, but this is quite an expensive pleasure, because a high-quality tool costs a lot of money. Therefore, this unit can be found mainly only in special factories.
Grinder - has similarities with the previous tool, but the result will be far from ideal. When working with an angle grinder, many chips may form.
Usually, to cut a tabletop, two main professional and interchangeable tools are used - a jigsaw and a jigsaw.
Construction specialists divide blades or, as they are also called, saws into two main categories:
- tearing little by little on both sides;
- tearing strongly, but only on one side.
When working with a tabletop, you will need the option that breaks on one side.
Before starting the main work, it is necessary to thoroughly sharpen the blade of the tool so that chips do not form during the work. With a sharpened blade, before you start cutting the material directly, you need to make a groove, the depth of which will be about 2-3 mm. This will make it possible to complete the job without injuries or chips.
By the way, chipboard in the furniture industry and construction began to be used only in 1940 in the United States of America, but after a fairly short time the popularity of this material increased and spread throughout the world. Thanks to this, the industry has made a significant step forward, and all sorts of varieties of this material have appeared.
One of the most popular and frequently used types is laminated chipboard, which is not just a product of pressing sawdust with glue, susceptible to high temperatures, but also acts as an additional chemical and physical protection in the form of a melamine film.
Usually, when cutting chipboard, no complications arise, but with laminated chipboard, this seemingly simple process can become complicated. The fact is that countertops are often coated with multilayer HPL plastic from the manufacturer. This significantly complicates the sawing process. This coating can vary significantly in quality and basic properties, and it is not always a polymer coating. Therefore, when processing this material, many different nuances arise.
Step-by-step description of the process itself:
- Using a well-sharpened blade, a groove 2-3 mm deep is made. If there is a polymer coating of various types, it is recommended to slightly warm up the blade, and then immediately begin direct use. Due to the resulting pressure of cold steel on hard plastic, even if the sharpening is very good, minor microcracks and chips may occur, which is best avoided if possible.
- Using a tool called a jigsaw, you need to make the cut carefully and smoothly. During operation, it is important to carefully adjust the direction of the blade. If there are places where the direction changes, it is better to use an ordinary hand jigsaw as a secondary, auxiliary tool. Or you can use the thinnest file in a jigsaw. But this is not always convenient.
After the work has been done, you can proceed to the final stage of sawing the chipboard.
Sawing with a format saw
To cut with a machine, the workpiece is placed on the left fixed table up to the adjustable stop. The required length is measured. The saw unit starts. When the disk reaches the required speed, the table moves forward.
The workpiece, together with the table, is fed onto the disk for sawing off the desired piece.
Basic machine settings:
- workpiece position;
- depth of cut;
- cutting angle.
There are three types of machines:
- light (designed for a workload of five hours);
- medium (8-10 hours);
- heavy (16-20 hours).
Design
The most popular models are Mj 45kb-2, JTS-315SP SM, Woodtec ps 45, Altendorf F 45. Despite their different features, they have a common design.
Required components of a cutting machine:
The bed is the basis on which all mechanisms are attached
Heavy beds eliminate vibrations and vibrations, which is extremely important for precise cutting. A saw unit consisting of two disks. The first disk is located in front of the unit and is used for preliminary filing of the workpiece. The second is for completely sawing the slab. Three desktops
The first one is stationary; a node is located on it. The second, format, is movable; it feeds the slab onto the disk. The third supports the parts to be sawed off. The carriage is a part that allows the format table to move. Stops and rulers that secure the workpiece in the required position.
The second is for completely sawing the slab. Three desktops. The first one is stationary; a node is located on it. The second, format, is movable; it feeds the slab onto the disk. The third supports the parts to be sawed off. The carriage is a part that allows the format table to move. Stops and rulers that secure the workpiece in the required position.
Depending on the model, price and cutting features, machines may have different design nuances.
Additional components of the machine:
- a pipe that removes shavings and sawdust and connects a dust removal system;
- clamps for securely securing the workpiece to the table;
- a rotating ruler and corner stops, with the help of which the cut is made at the desired angle and without markings;
- frame with a stop leg for cutting long workpieces;
- ball and roller carriages.
The first formatting machine with a moving carriage was assembled in 1906 by the German carpenter Wilhelm Altendorf.
Final stage
At the final stage, it is necessary to use another tool. To do this you will need a rasp or file, sandpaper, GOI posts, adhesive tape and a decorative corner made of duralumin.
The first step is to sand the wood. For this purpose, you can use a rasp or file, with which you want to remove excess. After this, use a sanding machine or regular sandpaper (zero grade will do) to bring the wood into a nice looking state. It is recommended to carry out this work even if you are not going to do anything after it. Due to the torn elements of the wood, the material will attract moisture much faster, which will cause faster wear of the material.
Having brought the tree back to normal, it is necessary to bring the plastic to the same condition. Usually, the use of special polishes is sufficient for this. But if one is not available, then you should not buy a new one, since to process one tabletop you will need very little of this product, and then it would be a pity to throw away the polish, and it is not economical.
The ideal option for processing plastic is GOI paste. It is available in almost every home, and is an absolutely universal remedy and quite effective.
Even if the cutting was successful and the grinding was of high quality, it is still better to play it safe so that even small millimeters do not make themselves felt in the future. Therefore, it is recommended to use a special furniture corner made of duralumin for decoration. It should be attached to its place, while the appearance will become neat.
Another little tip: when cutting a tabletop at home, you can use a guide tape with an adhesive layer, which will help the blade not deviate from the route.
Trimming sawing method
This method also involves using a circular saw, but a plunge-cut saw is more suitable.
You will need a double ruler: it is fixed to the workpiece with clamps. The principle of operation is the same as that of a format-cutting machine: two cuts are made along the same line.
This is what the ruler-bus is used for. It is installed along the marking line, the laminate is lightly cut without disturbing its texture. Then the material is sawed along the marked trace.
By the way! Thanks to the cut on the laminate, no chips will form during the second deep cut.
The cut area can be sealed with an edge.
Using this method, you can cut the tabletop into one or more parts. Minimal chips are possible, but they can be easily removed by regular sanding or hidden with a decorative overlay.
Round cuts can also be masked.
Disadvantage: This method can only make straight cuts.
How to cut a countertop using a circular saw
When working with a tool called a circular saw, you need a finishing saw blade with a fine tooth. A circular saw is more convenient than a jigsaw for making long straight cuts. However, during such work, much more chips are formed, since the side with the teeth cuts into the material and breaks off pieces.
But even when working with a finishing disc, many chips form on one side of the tabletop, which then must be subjected to lengthy processing. Moreover, it is not a fact that after processing there will be no millimeter chips or microcracks left, which in the future will render the material unusable or highly susceptible to moisture.
Therefore, it is better not to use this option for cutting tabletops. Better leave the use of a circular saw for another job. If this is the only option for you, then you will have to work hard at the stage of final processing of the sawn material.
The milling cutter allows you to get the cleanest possible edge of the workpiece, while the quality will not be so easy to distinguish from the formatter, and sometimes it will be even better.
First, you need to cut the workpiece with a jigsaw, making an indentation from the marking line by 2-3 mm, and then align the line according to the template. Usually, for this purpose, a second piece of laminated chipboard is used, sawn on a format saw, so that it is of a suitable size.
It is necessary to use a copy cutter, that is, one with a bearing. This way you can get a very clean cut. Among the disadvantages of working with a router, there is a lot of hassle, since there is a need for precise markings, preliminary filing of workpieces and setting templates for the router.
Tabletop connector - euro saw: hidden docking (photo)
A method of processing ends that uses patterns. To create it you need a milling machine. Only with high-quality equipment it turns out flawless.
Sometimes euro-sawing is produced on a cutting machine - this significantly reduces the cost of production, however, with such economical production, the ends are obtained with fluctuations of a millimeter or more. Therefore, when purchasing, you should check this point very carefully, especially if the price of a prefabricated kitchen surface is significantly reduced. A poorly made joint will not connect as it should, leaving gaps.
Correctly executed ends after assembly form a surface on which the gap is not visible at all - it is there, but its width is a fraction of a millimeter. If the coating is dark in color, it will not be easy to find where the euro-cut table top was cut (photo).
Such ideal quality can only be obtained using a router, and the patterns must be new or at least not worn out.
Summing up
If you are faced with the issue of cutting a table top, then do not be afraid, since it is quite possible to do it yourself. If possible, then it is better, of course, to use the services of specialists and take the material for processing to a workshop, where all work will be carried out using special equipment and with particularly high quality.
When sawing a tabletop at home, to avoid chipping, use a suitable tool - a jigsaw, adhering to maximum precision and accuracy when working with the workpiece.
Basic rules for cutting plywood or chipboard
More suitable tools might have been circular saws or band saws.
There are many cutting tools, and not just one, but several are used.
To get a clean cut, you must follow the rules:
- Fine-tooth saws are suitable for work;
- First, the material is sawn across the grain, then along. This method will free you from splitting corners
- The front side of the material is sawn with a hand or band saw;
- From the seam side. Saw with contour or circular saw;
- When working with a circular saw, you need to watch for high speed and low material feed;
- The teeth of the saw blade should penetrate finely to the surface;
- In order for fewer wrinkles to appear on the board, it is necessary to run the saw along the bevel strip of the cut, using light pressure and a slight rollback;
- Adhesive tape attached to the bevel strip will protect the material from chipping.
In practice, two professional interchangeable tools are used. Jigsaw and jigsaw.
In a home workshop you can achieve an even cut. But it is better to entrust the work with dimensional sheet materials to experts with special equipment.
hunter_cbx
Honestly, the title “How not to cut a countertop” would be more correct

