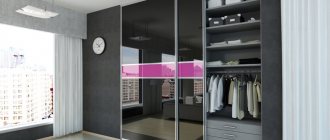
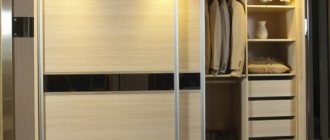
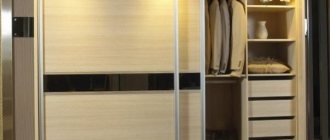
A large selection of ready-made furniture, pleasing the consumer, is overshadowed by the impressive cost of designs or difficulties in selecting a model that fully satisfies requests. For many, searches on selling sites and trips to furniture stores end not in a successful purchase, but in the clear realization that making the desired cabinet is easier than buying it. The reason may be either the very high cost of the item you like, or the lack of furniture from a trusted manufacturer on sale. Making an individual order to a specialized company is also not a cheap pleasure. Users of the FORUMHOUSE portal are not afraid of difficulties and undertake to make furniture themselves, and share their successful experience with like-minded people.
Preparing all parts of the wardrobe
After determining the room in which you plan to install this furniture, you should prepare the place. There must be free space so that all parts and tools can be placed. Furniture should be unpacked carefully, trying not to deform the parts.
There is no difficulty in making and assembling it yourself.
To prevent scratches on the cabinet itself and the floor, you can lay packaging material or any fabric on the floor. Next you need to find the assembly instructions. Each furniture part and fittings are marked by the manufacturer. In the schematic diagram, the numbers correspond to the cabinet elements.
Carrying out the work yourself will not only bring pride and pleasure, but will also allow you to save on the services of a specialist.
The main thing is to follow the assembly sequence, otherwise you will have to disassemble what was done incorrectly and start the process all over again. After unpacking:
- Inspect for the presence of all components. The furniture must be intact and fully comply with the manufacturer’s stated parameters;
- The parts are laid out in the order in which they will be assembled. Some parts are similar in appearance, so it is important not to confuse them. This applies to top and bottom, back and front;
- Small parts, namely screws and fittings, should be placed separately in the box.
To assemble the purchased cabinet, you must follow the instructions supplied with the product by the supplier.
During assembly activities, nothing should interfere. If possible, it is better to move everything unnecessary to another room.
Note! The cabinet is assembled lying down, so free space is required.
Materials
Today, the bulk of wardrobes are made from laminated chipboard (LDSP). It differs from ordinary chipboard in its protective and decorative coating, a laminated layer with a surface that imitates various types of wood. Laminate not only increases the decorative effect of the material, but also protects it from external influences, and protects us from formaldehyde used for gluing slabs together. For the production of furniture, chipboard of two classes is used - E1 and E2. The first class emits a minimal amount of resins and is conditionally safe, while the second is prohibited as a raw material for furniture in children's rooms. To minimize the harmful effects of resins, cuts on cabinet parts should be sealed with a special edge. One of the forum members was convinced of this by contacting the government agency.
ISMaksFORUMHOUSE Member
There is a lot of talk about the fact that furniture emits harmful substances - you need to roll up all the ends of the parts and there will be no emission (checked, the furniture was handed over to the SES).
The laminated edge prevents resin release, preserves the cut from external influences and improves the appearance of the product, but is somewhat inferior to the plastic edge in terms of practicality and durability. Plastic cladding has higher strength and rounded edges, which significantly reduces the likelihood of chips and scratches. The standard sheet height is 1830 mm, the width is 2440 mm, 2500 mm, 2750 mm, 2800 mm, depending on the manufacturer.
The facade of the cabinet can be made either from the main material or from a more decorative one - mirror, glass, hardboard, plastic, with inserts. Unlike swing doors, the maximum leaf width for a sliding door is practically unlimited, but one that is too wide may warp over time, and one that is too narrow will begin to pop out of the guides. The optimal width is 90 cm for steel systems, there are also aluminum ones - 120 cm each. But when choosing a facade, the limitation is not so much the size of the doors as their weight - door systems are designed for a certain load, and a square of chipboard and a square of glass, hardboard or plastic, weighs differently. If you exceed the permissible limit for the guides, they will quickly fail.
Models of cabinets made of natural wood are less in demand, since even those made from laminated boards, and not from solid wood, are much more expensive even if manufactured independently.
More information about furniture made from natural wood is described in the article “Do-it-yourself wooden furniture and utensils - Shrek style from a portal participant.”
Assembling the cabinet frame
The first step is to install the base. The slab must be attached to a support running along the long part of the furniture. This is done using European screws. Then you need to correctly place the internal partitions. There are special holes at the bottom into which dowels should be installed.
You need to adjust the legs so that the bottom is level.
At the bottom of the podium there are non-through openings provided for such rods. Next you need to connect them by placing them in the holes. For the stability of the structure, the shelves acting as stiffeners should be fixed. Confirmations are used for this. The main thing is to tighten everything tightly at this stage.
After you have determined the “bottom” of the cabinet, place it in a vertical position and, using Euroscrews, screw the plinths (the height of which is 60 mm) to it.
To complete the frame assembly, you need to install the side parts and the top. These elements are installed immediately, since the features of the entire system will depend on the quality of this work.
Common mistakes when assembling yourself
- The doors are confused. . A very common mistake if the fronts are made in the same style. Additionally, they are generally identical in width, with the exception of the three door systems. If one door gets caught on the other and has trouble moving, it means they are tangled. The only way to solve the problem is to reinstall the doors.
- The stopper is not positioned correctly on the inner belt . Stops help prevent injuries when using the wardrobe. When the mechanism is installed correctly, the facade is motionless and motionless. If an error occurs during installation, the profile cannot be folded back. Reposition the stopper as instructed to correct the error.
- The back wall of the compartment does not accommodate . Some models are attached to the wall using self-tapping screws to prevent them from falling and protect themselves. This ensures that the sliding door system works correctly.
- Incorrect screwing of parts . Not all screws and bolts are tightened to the maximum limit, only those on which the integrity of the product directly depends. For example, the method of screwing a screw into a profile depends on the level of fit and the smooth movement of the blade. Caution. The materials from which furniture is made (MDF and chipboard) do not withstand rough processing - they can crack and crumble. Therefore, drilling additional holes in the parts is not allowed.
- door trim . The optimal value is 25-30 mm. It's easy to see that this value is overstated: the wheels on the front panel in mirrored models are reflected in the door located close to the back of the cabinet.
Installation of walls
On the sides, it is worth pre-trimming the edges, ensuring a smooth and tight fit to the back wall. It is advisable to sand the ends of the walls. Using a level, you will be able to align the side parts perfectly evenly.
At this stage, you will most likely need an assistant to hold the installed parts of the case.
Sometimes a cabinet model is sold without side elements, suggesting placement between walls. In this case, you will have to mark it in such a way as to attach the shelves under the mark. Next, you need to work with a hammer drill to make holes in the walls just below the level markings. Then the fasteners are inserted and the corners are secured. Shelves will be placed on them. It is necessary to install the rear pillars according to their level.
The side wall is placed on the already installed pins and thus attached to the base.
Installation of internal partitions
There are small holes along the edges of the furniture partitions; you need to place choppers in them, strengthening the wooden joints. Then you need to align the dowels with the holes in the base. This way the vertical partitions are put in place.
The frame is assembled, now we need to install the internal partitions.
It is important that the attached partitions do not tilt until the cabinet is completely assembled. To add rigidity to the system, you need to secure the parts with screws or self-tapping screws. Insertion into grooves is also allowed.
If the holes for the dowels are not prepared, they will have to be drilled
It is recommended to install parts during assembly of the structure strictly according to the drawing, horizontally or vertically. At each stage, it is important to prevent distortions of the connecting parts. In a room with low ceilings, it is better to work vertically. Since the finished cabinet will not need to be lifted.
Sliding doors
Probably the most difficult stage is installing a sliding door system. But if you prepare well and buy all the materials for the opening mechanism, then there should be no problems.
The first thing you need to do is secure the top door track. You can see how to secure it yourself in the instructions, since such systems usually come with an installation diagram. The easiest way to fasten is with dowels or anchor bolts.
The second stage is attaching the lower rollers to the doors. The rollers themselves should be chosen very carefully, since they are the ones that hold the doors on them. They should not wear out quickly and have a reliable mechanism. Since the breakdown of at least one roller will make using the cabinet difficult.
Once everything is ready, you can install the bottom rails and put the doors in place. The lower guides should be exactly under the upper ones. To accurately measure their location, it is best to use a plumb line. If the door is skewed, this will lead to increased wear of the fittings, so you need to be very careful when making doors.
If you carry out all the work yourself, then you should be as attentive and careful as possible so that the cabinet you make does not break and is comfortable. Wardrobes are a must-have attribute in every home, and if it is possible to build it into the wall, this will significantly expand the space in the house. Even small cabinets hidden in the wall will be very useful in the house.
Fastening the shelves
First you need to place the shelf holders and guides into the frame, then insert the shelves. Fastening will not be difficult; horizontal levels must be observed. Otherwise, uneven distribution will result in more stress on one fastener than on the other. Which will cause the shelf itself to fall and the cabinet wall to deform.
For installation, the cabinet is turned over into a vertical position.
The easiest way to assemble a wardrobe is to fix the shelves using self-tapping screws. You can choose any, for example, with hidden hats or press washers. To install the shelves you will need a screwdriver and a screwdriver. You should carefully make mounting holes on the product to prevent cracks from appearing.
European screws are popular for installing shelves. The most popular sizes are fifty and seventy-five millimeters.
They are suitable for chipboard thicknesses of sixteen and twenty-six mm, respectively.
It is better to install shelves using a hexagon or a confirmatory drill. This will allow you to simultaneously drill both parts for the threads of the head and screw. The advantage of this fastening method for Euroscrews is:
- the ability to tie elements together;
- sufficient fixation;
- looks much more aesthetically pleasing compared to self-tapping screws.
It is advisable to use dowels together with tightening parts, which gives the fastening greater strength.
Rear wall installation
Further assembly steps will be the installation of sheets and fixing them to the back wall of the furniture. The canvas essentially acts as a strong wall, firmly holding the entire system throughout its operation.
Before installing the back wall, you must first measure the diagonals of the structure - this way you can check the correctness of the angles.
Often the front side of the sheets is decorated with colored surface lamination. Fixation is performed using miniature nails. They must be carefully hammered into the ends of shelves and internal partitions.
The back wall of the fiberboard is nailed to the body. In this case, it is necessary to maintain the same indentation.
The main thing is to accurately determine the nailing area. Due to the fact that the cabinet elements are not noticeable from the reverse side, but if damaged from the wrong choice, the product may lose its appearance. The back wall is usually screwed on with self-tapping screws. It's much more convenient than just nailing it down.
Drawing up details
For your convenience, on our website you can “Cutting chipboard”.
The first size indicates the length (along the direction of the fibers of the material), the second the width of the part (across the direction of the fibers), then we indicate the number of identical parts, then comes the edge, we use PVC edges with a thickness of 2 mm (designation in the table - X) and 0.4 mm ( designation in the table - O), on the front side of the part we put a 2 mm edge, on the back side of the part we put a 0.4 mm edge. The sides of the part that are joined to another part do not need to be edged.
So, let's fill out our table:
This is the set of parts we received.
Note:
Part No. 1 and No. 2 - lower and upper false panels, since the cabinet is built-in and the width of our niche is different, we give the part with a margin of + 50 mm (we cut off the excess, adjusting the part to the width of the opening).
Part No. 3 - False side panels, also provided with a notch in height +50 mm, since the ceiling is different in height.
Part No. 4 – Mezzanine shelf, also provided with a +50mm undercut, adjusting their size to the location.
How to calculate boxes correctly? Let's take this example as a basis:
The width of the opening is 600, the height of the opening is 400, from these parameters we will consider 2 drawers, 2 mm - gaps in height and width.
- Drawer front 400-2-2-2/2=197mm (height size of the drawer front), 600-2-2=596mm (width of the drawer front).
- The side panel of the drawer is equal to the length of the guide, the height of the side panel is calculated: the height of the facade minus 30 mm.
- The drawer partition is calculated by the formula: the width of the opening for the drawers minus two thicknesses of the guide, minus two thicknesses of the sides. drawer panels, that is, 600-13.5*2-16*2=541mm.
- The bottom of the invoice is made according to the size of the box 450x573 mm
Let's make a table with dimensions for our second option (pictured below).
As we see in the photo above, when detailing a cabinet cabinet with your own hands, the parts are sawn without allowance, that is, to size.
I would like to note, as you can see in both the first and second tables, we enter the length and width of the parts without taking into account the thickness of the edge, that is, the thickness of the edge must be subtracted from the dimensions of the part, this applies to an edge of 2 mm.
I would also like to note the calculation of the rear walls made of hardboard. The rear wall is calculated as follows: cabinet width minus 2 mm, cabinet height minus base height minus 2 mm. If the cabinet is wide, then we divide the back walls into several parts, connect them at the back with partitions, in our case the height of the back walls is 2602-60-2=2540mm, the width of the first back wall is 638+15+8=661mm, the width of the second back wall is 718+ 8+8=734mm, width of the third rear wall 600+8+15=623mm.
Installing guides
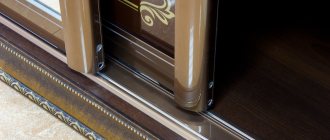
One of the critical moments in the assembly process is the installation of door rails. The lower part is equipped with two grooves that ensure smooth movement of the rollers. There are also two compartments at the top of the part. The first step is to drill the compartments for the screws that will serve as fasteners to the base.
You need to drill holes in the guides yourself, since manufacturers do not do this.
When creating such holes, it is imperative that a chamfer is made for screwing in the screw. Four holes in each plank will be enough. Next steps include:
- fixing the bottom rail with preliminary marking of fastening points;
- leave two and a half centimeters from the edge of the pedestal to the front rail;
- to avoid jamming of doors and their uniform movement, the cabinet should be placed horizontally;
- The top rail is mounted identically. The only thing is that the holes are made in a checkerboard pattern.
The fixing elements are the screws that come with the furniture product.
The guides are attached to the body using self-tapping screws. It is necessary to make a 15 mm indentation of the bottom guide from the edge of the bottom part of the structure.
Note! The distance from the edge of the rail to the front of the cover must be at least two millimeters.
Built-in
A closet either extends from one wall of the room to another, or is limited by a physical partition. The name “wardrobe” in this case is very arbitrary, since in fact you are simply separating some part of the room for storing things.
Note!
Do-it-yourself screen: a step-by-step master class for creating it yourself. Types of screens, manufacturing materials + design ideasDo-it-yourself installation of interior doors - preparation of the structure, selection of doors, installation step by step + instructions from professionals
DIY shoe rack - types of designs, manufacturing materials, step-by-step master class with simple diagrams and drawings
One of the advantages is that dust does not accumulate above the cabinet, since it goes from the floor to the ceiling, you save on materials. The downside is that such furniture cannot be moved, and its installation requires fastening to the wall and ceiling. Almost always the doors of such a cabinet are sliding.
Installation of rods and fittings
This stage of the assembly process involves placing a rod for convenient distribution of the wardrobe. Thanks to these details, things do not wrinkle, while the internal space is fully used.
Next, shelf holders, a pipe for hangers and guides for drawers are installed.
The point taken into account is that the rod must be fully placed on the supporting planes of the holder. In the case of the oval version, the length is equal to the distance that is equal to the side walls of the opening. If the product is round, it should be slightly less than the distance between the walls.
The holder is secured to the base using suitable screws. The first step is to determine the fixation areas for the first bracket. It is secured with three screws. You need to drill the grooves, then tighten the screws firmly.
After this, you can install the rod on the second holder, while pressing it with a screw.
The completed structure must be tried on and leveled horizontally. Then you can make notes and attach them using self-tapping screws.
Filling
If you make a transformer yourself, then you need to think about its contents. To make the task easier, you can use a ready-made drawing. Often shelves and drawers are made from plywood, but if finances allow, then they, like the frame of the device, can be made from natural wood.
Most often, a do-it-yourself wardrobe consists of two sections. In one of them there are shelves and drawers, and in the other there is a rod for trempels. If you are making a cabinet yourself, then do not forget that the drawers should be installed no higher than chest level and not near the floor, because the drawers have to be used quite often.
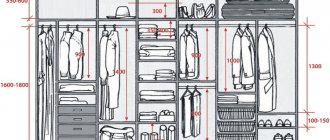
Calculating the size of a compartment with shelves is not difficult - its width is on average 40-50 cm. The size of a compartment with a rod is slightly larger - from 60 to 120 cm. At the same time, it is not advisable to make the compartment for tramples too large, because the rod can bend under the weight of clothes.
If the owners plan to hang a lot of things in the transformer, then a simple way out of the situation is to install the rods at two levels: near the ceiling and a few tens of centimeters from the floor.
The standard drawing provides for the installation of shelves at intervals of 30-35 cm. A compartment with a bar can be made with a height of 80 to 160 cm. To calculate the specific height of the compartment, you need to decide what things will be located in it. When you make a transformer yourself, you can change many parameters to suit the needs of your family.
Door installation
Initially, gutters located in the lower strip are inspected. They must be clean and free from contamination. Otherwise the rollers will not move well. It is better to check all connecting elements for strength once again. Next, the door is placed in the upper rail, while the end rollers in the lower channel must be correctly positioned.
Fastening the sliding doors - facades is the final stage of assembly.
The remaining canvases are installed in the same way. Everything is clearly described in the instructions supplied with the product, so you should follow the schematic images and descriptions.
A point that deserves special attention:
- first screw the upper guide, leaving the lower part intact;
- Next you need to insert the doors, stepping back from the bottom guide.
The canvases must stand straight, only then can the bottom be screwed on. When doors are inserted, the upper part is wound up first, followed by the lower part. Using a hexagon, be sure to correctly adjust the tilt of the doors.
If the cabinet is installed at the correct level, the doors will close freely and smoothly, regardless of which direction they are moved.
After making sure that the doors are installed correctly, you can begin equipping the furniture with special sealing brushes. It is better not to touch the pasting area, otherwise the fastener will not give the desired result. Usually, when purchasing a sliding wardrobe, the doors are already assembled by the manufacturer of this product. Of course, it also happens that you have to study additional instructions on how to assemble a wardrobe yourself.
The completion of the work will be the placement of external hooks on the sides of the panels, if provided for by the modification. You also need to remove the cabinet collection area. After this, you can calmly put your things in the compartment you assembled with your own hands.
If the instructions were followed during the process, there is no need to worry about the strength of the structure. The part will not fall off and the clothing will not be damaged.
Interesting decor solutions
After the tedious installation process, a more enjoyable and creative activity awaits you - decorating. You can decorate facades in different ways.
Stained glass technique
Stained glass is an ancient method of glass decoration that has existed for almost 1000 years. Initially, stained glass windows were used to decorate glass in churches. They painted biblical scenes and portraits of saints. Today there are more than 24 types of stained glass art.
To paint on glass cabinet doors, use acrylic paints. They are sold in every art store.
How to make stained glass by hand at home:
- Start your idea with a sketch on A4 sheet. If you don't have experience in the artistic field, don't take on large drawings or patterns just yet.
- Before work, be sure to degrease the glass or mirror.
- Apply the contour in a thin layer. Take your time. Then let the paint dry (time indicated on the tube or packaging).
- Apply each color alternately.
- After completing the drawing, secure it with acrylic varnish.
Sandblasting patterns on mirrors
The technique for painting on mirrors allows you to create light patterns that beautifully decorate wardrobes. The beauty of this decoration is that modern sandblasting technologies make it possible to apply any image to a mirror surface. Right down to the portrait of the owner.
Sandblasting patterns are predominantly white, but there are also color variations.
Please note that if you want mirror plywood with a sandblasted pattern, you will have to pre-order it. To get sandblasted glass, contact a specialized workshop in your city.
Vinyl stickers
A popular element of home interior decor is vinyl stickers. They have won the love of customers due to their ease of use and removal. As soon as you get bored with a sticker, throw it into the trash with a slight movement of your hands.
Decoupage
The essence of decoupage is gluing paper patterns onto any objects: vinyl plates, glass vases, boxes, chests of drawers. The decoupage technique is suitable for products on a wooden base. Interior items after decoupage look vintage and interesting.
Drawings for decoupage are created from:
- old wallpaper;
- napkins.
Summarizing
As can be seen from the described process of assembling a sliding wardrobe, the process is not complicated. To solve this issue you will need desire, a basic set of screwdrivers, tools and a tape measure. Further, following the instructions step by step, even a beginner in this matter will cope one hundred percent.
Any model of a sliding wardrobe is always equipped with an assembly diagram that is understandable even for a beginner.
The first steps in assembling the cabinet will be to prepare the parts after unpacking. Here it is important to put everything in its place; it is better to immediately highlight the small elements in a box. Then you can start making the frame. Shelves, internal partitions, fittings and guides will then be placed on it.
Try to fasten everything evenly without distortions. This is especially true for doors.
If you have doubts about the correct execution of all stages, you can periodically check the drawing, which will help you do everything properly. In addition, there are many video lessons on the Internet.
It is important to carefully and carefully approach the installation stages, check the calculations and work carefully.
Stationary
Most often, a do-it-yourself wardrobe in a hallway is made to be stationary. It can be moved and installed after the renovation is completed.
Doors can be either sliding or hinged. The downside is the large dimensions and the need to take into account the space in the room. Fitting such a cabinet into the interior is more difficult than a built-in one.

