Owners of small apartments often opt for cabinets installed in the corner, but before ordering such furniture, you need to have a drawing of a corner cabinet with dimensions on hand. After all, such structures must stand clearly on the wall, without deviating even a degree from the angle.
Corner cabinet drawing with dimensions
Corner cabinets are popular because they are quite ergonomic and allow you to save space in a small room. In addition, you can make a cabinet with your own hands using a drawing and detailed instructions. We will talk about this below.
Designing a corner cabinet according to the drawing
Types of corner cabinets
In order to create a unique, functional design, furniture makers are experimenting with different shapes of cabinets. There are the most popular product configurations that should be studied before drawing.
Table No. 1. Types of corner cabinets.
| Illustration | Description |
| Such structures are installed in the corners of small rooms. In this case, most often they are fixed directly to the wall - this shape allows you to properly smooth out the corners. The cabinet does not have full side walls, so its shelves are triangular. | |
| In this design, there is a wall on one side. Therefore, such a cabinet is considered more practical than the previous option. There is more free space inside. | |
| One of the most popular forms of cabinets. The design consists of two parts that connect at the corner. Such products are distinguished by their spaciousness. | |
| A special feature of the design is the presence of small but functional side walls. Due to this, additional modules can be placed inside the cabinet. |
The most difficult design for self-production is a triangular or trapezoidal cabinet - due to the fact that the product involves the presence of diagonal elements, which it is advisable to prepare in the presence of a professional.
Table No. 2. Types of corner cabinets according to installation method.
| Installation method | Description |
| Hull | Such cabinets require a back wall; they are not tied to just one place. If necessary, they can be quickly transferred. |
| Built-in | The cabinet is assembled and secured directly in the place where it is planned to be installed. It is quite difficult to move such a structure to another place. |
| Modular | The design consists of several sections that are assembled into one cabinet. Such products can be dismantled and rearranged quite quickly (if necessary). |
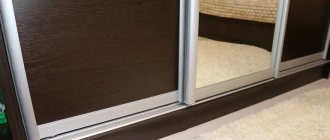
The designs differ from each other and in the type of doors. They can be hinged or sliding (compartment). In the first case, door leaves should not be made larger than 45 centimeters, otherwise the load on the hinges will be too strong. In the second case, the doors can be quite massive, even more than 45 centimeters wide.
Drawing of a wardrobe with hangers for clothes
It’s a good idea to use the corner closet space completely for clothes on hangers.
This option is quite appropriate in a spacious hallway if the shelves are placed in a separate cabinet. A shoe rack, an open hanger for seasonal clothes, a chest of drawers for accessories and other small items will help expand the functionality of a furniture set for the hallway. Still, it’s more convenient to store all your outerwear in a separate place where there is simply nothing else (well, maybe a couple of shelves for shoes, in a section designed for long clothes).
Material selection
Table No. 3. The most common materials for making cabinets.
| View | Description |
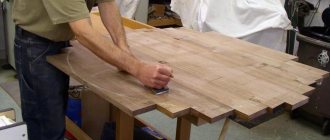
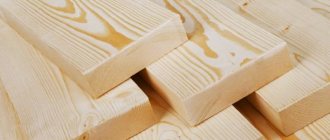
| Natural wood | This is the most environmentally friendly and expensive option for making furniture. Cabinets of this type are distinguished by their strength, durability, and at the same time they have an impressive weight. In addition, wood products have an unusual decorative appearance, they have a unique texture. It is recommended to choose the most durable wood options - oak, pine. It should be taken into account that such material is deformed when exposed to high temperatures and humidity. In addition, it is exposed to pests. |
| MDF | This material is a mixture of wood chips, various fibers and resin. The main advantage of the material is its affordable cost. Thanks to proper processing, MDF boards are durable and quite easy to process. In addition, they do not deform over time and have a very fine texture that does not stand out. Another obvious advantage is the large size of the slabs. |
| Plywood | This is a fairly strong material that is suitable for creating a cabinet frame. It is recommended to use only multi-layer plywood for such purposes. Like natural wood, this material can become deformed as a result of exposure to moisture. |
| Drywall | This material is often used to cover the frame of corner cabinets. It is lightweight, so installation will not seem difficult even for a beginner. In addition, some types of drywall have good resistance to humidity and temperature changes. |
Minimum and maximum cabinet door size
For a swing facade, the dimensions are strictly limited by the ability of the furniture hinges to support its weight. If the load is disproportionate, the cabinet doors will inevitably sag and adjusting the hinges will only give a temporary effect. The weight of the facades is capable of tearing fasteners out of the side walls. Therefore, at the design stage it is necessary to correlate the desired dimensions of the facades with the possible ones, according to the technical characteristics of furniture hinges.
Usually, when determining the number of hinges and the size of the cabinet doors, they rely on the following table:
The maximum permissible width of the facade is about 500-600 mm. For large sizes, it is worth considering the option with two swing doors or sliding systems.
The maximum permissible height (length) of the facade is about 2200 mm. If you make the door longer, it will be inconvenient to open it.
The minimum dimensions are limited only by considerations of aesthetics and functionality. If the cabinet body is narrower than 300 mm, the hinge mounting pads should be screwed in before assembling the body itself.
Creating a Project
Before you start creating a drawing of the future structure, it is important to determine the place where it will be installed. At this stage, the following points should be taken into account: the number of shelves, drawers (if required). All this will allow us to develop the most detailed project.
It is important to observe the following nuances:
- Not all apartments have standard, smooth walls and ceilings. This is why measurements should be taken from all sides, especially when designing a built-in wardrobe.
- The depth of the finished cabinet should be at least 60 centimeters. Otherwise, such shelves will not be spacious.
- Measurements should be immediately transferred to the drawing in order to correctly calculate the amount of materials.
- If necessary, you should first level the floor in the place where you plan to install the cabinet.
- To apply markings, you must use a building level, a square and a tape measure.
Sample drawing with dimensions
The diagram of a corner cabinet is drawn starting from the sides, because they are load-bearing and represent the appearance of whole boards. Then you should determine the height of the structure (usually from 2.2 meters).
Only then do you need to calculate the dimensions of the horizontal parts and the rods (if it is a wardrobe). Most often, large shelves are installed at the top of the cabinet, and a bar directly in the corner. The last step is to add additional designations to the diagram where mirrors, lighting and other elements will be located.
Drawings of sliding wardrobes
For those who have seriously decided to make a wardrobe with their own hands, first of all you need to acquire cabinet drawings with dimensions and a list of necessary parts and accessories. You can use ready-made sketches, or you can make an individual project. To do this, you will need to measure the place where you plan to install the future cabinet. After receiving the required data, we transfer it to paper. This will allow you to determine the dimensions of the product. We draw a sketch with our own hands, this will allow us to visually determine the thickness of the chipboard. On the resulting drawing you need to put all the dimensions, now the drawing has turned into a drawing of the cabinet.
Corner cabinet made of wood or MDF
To manufacture and assemble the cabinet you will need the following materials and tools:
- processed wood or MDF sheets;
- euroscrews, dowels;
- glue;
- corners or ties;
- accessories;
- drill;
- screwdriver;
- measuring tape;
- level;
- a circular saw;
- hammer.
Construction fasteners
Video - How to assemble a corner wardrobe
Manufacturing of elements
Experts do not recommend cutting the material at home, because there is a high probability of getting crooked parts. It is advisable to contact a furniture shop with your cutting diagram, where specialized equipment is available.
At the same time, some craftsmen prefer to prepare parts for the cabinet themselves. In this case, you must have at least minimal experience in furniture making.
MDF cutting process
Step-by-step instruction.
Step 1. We cut out the parts of the walls, shelves, doors, drawers from the sheet. For such purposes, a circular saw or hacksaw is usually used. In this case, the second option is chosen very rarely, because damage may remain on the parts.
Sawing out wall parts
Step 2. It is necessary to process the edge of each part using polymer tape. It is applied to the edge and then fixed with an iron or hot air.
Edge processing
Step 3. The edge tape will need to be carefully smoothed using a cloth. After that, the remaining pieces of tape must be carefully cut off with a sharp blade.
Smoothing the tape with fabric
Assembly of the structure
When all the parts and tools are ready, you can begin the process of assembling the structure.
Table No. 4. Assembling corner cabinet parts.
| Illustration | Description |
| Measurements | You need to double check that the dimensions are correct. Therefore, before starting work, it is necessary to measure the walls. |
Installing the feet | Next, you should install the legs on the bottom of the corner structure. They are fixed using self-tapping screws. Moreover, some models require the presence of a special base at a distance of 5 to 10 centimeters from the floor. In any case, the doors should not touch the floor, so installation of a support is required. |
Support placement | The bottom with support must be placed in the corner. It must be stable, so it should be installed level. To do this, use a building level, which can be used to raise and lower the legs. |
Installation of walls | Installation of the walls of the structure. They are secured with special ties or metal corners. In most cases, the first option is used, because such fasteners securely fix the parts and remain invisible. |
Lower segment fastening | Fastening the subsequent lower segment of the structure. The legs are installed on it, and then it is fixed to the main body. To do this, it should be installed flush against the corner structure of the cabinet and leveled using a building level. |
Side panel installation | Installing the sidewall. It is fixed at the junction of the lower parts. In this case, it is better to install it even before fixing the parts of the bottom. |
Connecting elements | Connecting base elements using furniture ties. To do this, pre-drill holes. |
| Wall installation | Installing the next side wall. At this stage it is necessary to install the top panel of the frame. This will give it more stability. Otherwise it may become loose. |
Sidewall fixation | Sidewall fixation. Before securing it with furniture ties, you need to adjust the position according to the level. |
Installation of panels | Other panels of the structure are installed in the same sequence. Their number will depend on the size of the cabinet. It is worth noting that it is much easier to assemble a cabinet with such small fragments. |
Completing the build | It is necessary to complete the assembly of the frame and then check its stability. |
Installation of internal parts and doors
Table No. 5. Stages of installation of internal elements and fastening of doors.
| Illustration | Description |
Installation of vertical elements | Installation of vertical elements and drawers. There are two ways to install shelves. In the first case, they are fixed using metal corners and euroscrews, but then they will be motionless. In the second case, you can install special holders on which shelves are installed on top. Drawers are mounted on guides, thanks to which they will slide out quickly and smoothly. |
Securing the rod | Fastening the figured rod to the brackets. Install it on a shelf, which is then connected to the structure. |
Shelf installation | Installing a shelf with a rod. It should be secured inside the corner structure. In the same way, you need to fix another shelf in another corner. |
| Door installation | Door installation. This process consists of the following stages: 1. Parts of hinges (furniture) are attached to the walls of the frame. 2. After which another part of the hinges is installed on the doors themselves. 3. Then the hinges must be connected and secured with screws. After which you will need to adjust the position of the valves. |
Eliminating the top hole | Next, you need to eliminate the hole between the ceiling and the structure. |
| Eliminating the Bottom Hole | The lower hole is covered with a chipboard panel or plinth of the appropriate size. |
Checking the stability of the cabinet | Upon completion of work, it is necessary to check the stability of the cabinet again. If there are no flaws, then the design can be used. |
Features of the corner design
Typically, in rooms with non-standard dimensions or a small area, corner-type structures are installed. Such furniture is designed to provide comfort and add originality to the interior. Corner cabinets have design features, among which there are pros and cons.
To assemble this cabinet yourself, without installers, you need to highlight the product features:
- The cabinet has 4 walls, unlike standard models: 2 of them are pressed against the wall, the rest serve as support strips on the sides of the cabinet;
- Dimensions must be accurate - before choosing a model that will fit the room, it is necessary to accurately measure all dimensions: depth, height, width of the furniture;
- Patterns can have different shapes: g-shaped, pentagonal, triangular and trapezoidal;
- The corner wardrobe is equipped with hinged or sliding doors.
Each product usually comes with installation instructions—some companies insist on calling assemblers rather than completing models with diagrams. If this is the case, this should be reported to the dealer at the time of purchase.
Corner cabinet made of plasterboard
Before manufacturing and assembling a plasterboard cabinet, you must prepare the following materials and tools:
- sheets of drywall of the required size;
- metal profiles (racks and guides);
- accessories;
- measuring tape;
- scissors for metal and drywall;
- corners for fixing protrusions;
- self-tapping screws (for drywall);
- set of dowels;
- building level;
- screwdriver;
- putty;
- putty knife;
- sandpaper;
- jigsaw (for cutting sheets);
- additional elements;
- hammer drill (for holes for screws);
- decorative plaster for finishing cladding.
If you have the above materials and tools, you can begin the process of manufacturing the structure.
Video - How to make a built-in wardrobe from plasterboard
Frame installation
Step-by-step instruction.
Step 1. It is necessary to apply markings to the walls. At this stage, you should mark the installation locations of the structure to the wall using a pencil. For greater reliability, it is recommended to double-check these values several times.
Marking the walls
Step 2. You need to start attaching metal profiles (guides) to the wall using self-tapping screws. At this stage, accuracy is especially important, so do not rush. Each element must be securely fixed, because the metal frame will carry the entire load. The screws are screwed in increments of no more than 100 millimeters, thanks to which the entire structure will be stable.
Each element must be recorded
Step 3. It is necessary to install the rack profiles into the guides. To do this, use self-tapping screws or Euroscrews. Since this is a corner cabinet, the profiles will need to be given the necessary bend so that they fit into the structure without any obstacles. To do this, a notch is made on the beams with metal scissors. Such actions will allow you to quickly bend any profile.
Installing profiles
Step 4. If you plan to install a large cabinet, then it is recommended to further strengthen the structure of the profiles. This can be done using the remaining profiles from which the jumpers are formed.
Strengthening the structure
Step 5. Before starting the process of covering the structure with sheets of plasterboard, it is necessary to secure the corners. They are made from fragments of the remaining profiles, but if desired, they can be purchased at any hardware store.
Securing corners
Important point! Instead of metal profiles, wooden blocks are sometimes used to make the frame, but this is not the best solution. After all, wood tends to shrink, which means the plasterboard structure can become deformed, causing cracks to appear in the plaster.
Sheathing of the structure
When the frame is completely ready, you can begin the sheathing process. This is quite easy to do if you follow the instructions.
Step-by-step instruction.
Step 1. It is necessary to fix the plasterboard sheet in the inside of the cabinet structure using self-tapping screws. After which, you should completely cover this part with sheets. It is important to remember that the pitch between the screws should be more than 150 millimeters. At the same time, they are deepened into the sheet by 1.5 millimeters so that the fasteners do not show through from the outside. You can read more about how to make fasteners for shelves with your own hands in our article.
Fixing the sheet
Step 2. Then you need to finish the outside of the structure with plasterboard. Such actions should be performed especially carefully to avoid mistakes.
Finishing the outside of the structure
Exterior finishing
When the plasterboard frame is ready, you should begin finishing its exterior using putty.
Large putty manufacturers
Step-by-step instruction.
Step 1. First, you need to apply a fairly thick layer of putty to hide the drywall seams and uneven areas. The structure must be left in this form for some time until the putty hardens.
Applying putty
Step 2. You will need to carefully sand the dry surface. This is done in order to remove sagging.
It is necessary to remove sagging with sandpaper
Step 3. The last layer is the final one, so it should be applied especially carefully.
Need to work carefully
Step 4. When the surface has dried, you need to go over it again with sandpaper in order to prepare for decoration.
Preparing for decoration
Step 5. The last stage is decorating the cabinet. Finishing can be done using decorative plaster and various moisture-resistant paints.
Cabinet decoration
Do-it-yourself hinged wardrobe in the hallway
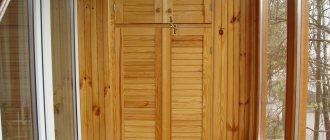
See how to make a neat closet with hallway doors with your own hands. It's not hard, you just need to assemble wooden boxes and secure store-bought doors, all this can be done in a weekend. Each locker is large enough to fit coats, backpacks, boots, and hats. Since it is a modular design, you can make one locker for each family member, including the dog (leashes, toys, etc.). Now everyone has a personal place to store things - and the responsibility for organizing it. A louvered door is made from one of two bifold doors that you can buy at almost any furniture store. In any case, before you start making a closet for the hallway, buy doors. There are many different types of doors. If additional ventilation is needed, use full blinds; if ventilation is not an issue, buy solid doors. They may not be the same as shown in the photo, so you may have to resize the blocks.
Overall dimensions for this example: width 40 cm, height 205 cm, depth 32 cm
How to make a hinged wardrobe in the hallway, see below, step by step photos. If this information is not enough, use the link under the gallery and read the detailed instructions on the website.
Photo source: www.familyhandyman.com/woodworking/projects/how-to-build-mudroom-lockers/view-all/
Structural additions for corner cabinets
In order to create a complete look, open modules are installed in the side parts of the corner structure. They are a type of various shelves that are attached to the cabinet or installed end-to-end without fastenings. Thanks to this solution, you can make any large-sized product more interesting. In addition, such shelves are functional elements; they are often made of glass or plastic.
Additional shelves
Quite often LED lamps are built into cabinets. It is important to consider the total number of lighting fixtures in the room. Otherwise, this is a good addition, thanks to which the contents of the cabinet will be clearly visible, especially in five-wall structures.
Lamps in the corner cabinet
Preparing all the details
Most often, the closet has two compartments: a wide one with a hanger bar and a narrow one with shelves. An open pencil case can be located on one or both sides.
Open shelves are necessary for souvenirs and figurines.
The standard sizes of the basic elements are as follows:
- cabinet height – 180-220 cm;
- width of sections – 45-80 cm;
- distance between shelves – 30-35 cm;
- width of shelves and drawers – 40-45 cm;
- The depth of the drawers is 25-30 cm.
Don't forget to think about the interior of the cabinet.
When the drawing is ready, the parts are prepared. It consists of cutting materials into pieces of the required size and cleaning the cuts. If you have insufficient experience in such work or do not have suitable equipment, cutting can be done in a workshop.
Frame assembly
Before starting work, markings are carried out. Most often, built-in cabinets are made (especially from plasterboard), and therefore the designation of the position of parts and fasteners is applied directly to the wall.
Trust a professional to assemble your cabinet.
Installation of the frame is carried out as follows:
- Connecting electrical wiring to the place where the lamps are fixed. This is necessary if lighting is planned in the closet.
- Bonding rubber insulation to the guide profile. It should be located on the side that will be laid on the base of the furniture.
- Fixing the guides along the marking line. Dowels are used for secure fastening.
- Fixation of direct hangers.
- Installation of fasteners for hangers. Its choice depends on the base material. Dowels are suitable for concrete or brick, and screws or nails are suitable for wood, gas or expanded clay concrete.
- Inserting racks into vertical guides. They must be secured with hangers in the form of short self-tapping screws with a press washer.
- Installation of stiffeners between rack profiles. The stability and strength of the structure depends on their number. Most ribs should be installed in places where heavy items are stored.
When creating diagrams, first indicate the external dimensions of the product: the dimensions of the cabinet box, its height and width.
How to arrange the inside of a closet
For comfortable use, the closet must be properly zoned. This is especially true for a dressing room located in the hallway or bedroom.
Before making a cabinet, you need to take into account various nuances.For this purpose, internal content may include:
- shelves that can be retractable or stationary, half or full depth, solid or ventilated;
- hanger rod;
- hooks;
- shoe shelves;
- drawers;
- belt hanger;
- trouser;
- tie bar;
- retractable baskets.
How to make a door
Most often, a corner closet is equipped with a swing door. For it, you need to install two fastenings - top and bottom. If the door is heavy, additional fasteners can be used, but no more than five in total.
Often the closet door is made of a mirror.
They should be located at least ten centimeters from the top and bottom corners to prevent the screws from coming out of the grooves. The step-by-step installation of fasteners is as follows:
- Make markings. To do this, the doors are fitted to the sidewalls. The length of the indentation from the edge of the sash to the center of the hinge should be about 2.2 cm.
- Drill the holes necessary for attaching the cups in the fixed sash. The recesses should not exceed 1.2 cm.
- Insert cups into holes. They should fit in without distortion. Screw the screws to the door part of the fastening.
- Install connecting parts. The drill must be held vertically.
- Connect the sash and side frame. At this stage you need to get help.
- Lubricate the mechanism with a small amount of oil. Wipe the surface with a cloth with good absorption.
Think carefully about your steps when creating a cabinet.
When planning how to make a corner cabinet with your own hands, you need to carefully calculate all the parameters so that the product looks organic. With careful, unhurried work, you can get an attractive, high-quality design.
Universal recommendations for making furniture
Making furniture is always more difficult for beginners, so experienced craftsmen recommend listening to the following recommendations:
- If natural wood is used in the manufacture of the cabinet, it should be pre-treated and dried (humidity no more than 15%).
- There is no need to save money on accessories. In the case of swing doors, it is advisable to purchase European-made hinges, despite the fact that they have a higher cost. Otherwise, low-quality products can quickly fail.
- When making a built-in wardrobe from wood or plasterboard, you will need to carefully level the floor. It should be borne in mind that even due to the slightest deviations, the design will be crooked.
- For beginners, it is better to first experiment with the manufacture and assembly of smaller structures. For example, it could be a small cabinet. Then you will have at least the slightest experience in making furniture.
- In a hurry, you can easily confuse different panels and install them incorrectly. Therefore, there is no need to rush; it is better to assemble the structure gradually. It is recommended to roughly divide the work into several stages in order to have a clear plan.
Before starting the manufacture or assembly of any structure, it is better to consult a professional
It is also worth noting that the assembly of large-sized structures should not be done by one person. Therefore, it is better to take care of this in advance and involve another person in this matter.
Storage Dimensions
An important criterion when arranging a dressing room is the correct calculation of places for storing things.
It is important that the systems do not occupy a large area, but at the same time accommodate a lot of clothes. Every thing should be in its place and at hand
For clothes on hangers
Typically, most of the dressing room is occupied by the area with hangers. This area is intended for hanging coats, jackets, down jackets, and fur coats. Also in this area should be placed hangers with trousers, dresses, skirts and other items that are intended to be hung on hangers.
In order to correctly calculate the size of the area for hangers, you need to pay attention to the following important criteria:
- the dimensions of the hangers, which are intended for an adult, are approximately 45 cm;
- for hanging a shirt, the distance from the floor to the bar should be 100 cm, for a suit - 140 cm, for a long dress - 180 cm;
- each hanger with clothes will require at least 7 cm;
- To save space, you can use elevator-type mechanisms or lifting rods.
Shelves
Storage systems must have shelves. On the shelves you can store various bed linens, blankets, rugs and other bulky items. Shelves can be stationary or retractable.
If the shelves are deep, then they should move forward. This requirement allows you to access things that are stacked closer to the wall. To prevent the contents from falling out, it is desirable that they have a limit.
A few recommendations for a dressing room with shelf sizes:
- for beds, towels and other bulky items it is worth using shelves with the maximum width;
- for small items and accessories - hats, bags, small shelves with a height of 15-17 cm and a depth of 25 cm are suitable;
- When choosing shelves, you should consider how much space the folded items will take up. Typically this figure is 25-30 cm.
Shelf sizes
For shoes
You can store different types of shoes in your wardrobe - winter, summer, autumn, spring. The shoe storage area should be arranged according to the following characteristic qualities of shoes:
- the average length of men's boots size 43 is 28-30 cm;
- The width of men's shoes is 25 cm;
- the standard height of women's and men's boots is not higher than 15 cm, high-top winter boots can be 25 cm in height;
- The height size of women's boots can be from 45 to 60 cm;
- shoes with heels in depth can take from 29 to 34 cm, width from 19 to 26 cm, height from 16 to 21 cm;
- shoes with flat soles can be from 29 to 34 cm in depth, width from 19 to 26 cm, height from 16 to 21 cm;
- high shoes - depth from 31 to 36 cm, width from 21 cm to 31 cm, height from 26 to 36 cm.
You can store shoes in boxes, on open shelves, on special stands, or in a suspended state. Shoe racks with a retractable design are considered a good option. They are quite roomy and do not take up much space.
What to consider when calculating the size of a shoe rack
Drawers
Drawers with a sliding mechanism are considered convenient and spacious. To make them slide out easily, I install special mechanisms on these products. Due to this, you can easily push the structure into place, without applying much effort.
Drawers are produced in different sizes. Large boxes are convenient for storing linen and bedding. In smaller drawers you can store small things and various small accessories.
Honeycomb baskets
Cellular baskets are considered convenient places for storing various things - outerwear, bed linen, blankets, pillows, and so on. The baskets are attached to the wall using special guides and brackets. They occupy a small area, have good capacity and versatility.
Due to the fact that these products have a lattice design, the laundry stored in them is constantly ventilated and is not affected by mold. In addition to baskets, honeycomb shelves, rods, trouser racks, and shoe shelves are produced.
Dimensions of honeycomb baskets:
- width varies from 25 to 90 cm;
- depth from 8 to 28 cm;
- the size of each cell can be from 2 mm to 2 cm.
Special accessories
In addition to shelves, drawers, hangers, baskets and other important components for storing things, it is necessary to provide important accessories for storing small items. Accessories include the following:
- devices for hanging trousers, trousers, skirts;
- special holders for ties and belts;
- hooks for umbrellas, bags;
- stands for hats, caps, various headdresses.
Ideal design for built-in wardrobes
A corner cabinet fills a corner. Suitable for any size room, as long as it is square or similar in shape.
Having chosen a suitable design, you can begin to create a project for the future cabinet. Since this piece of furniture lasts for many years, it is worth considering what functionality may be required from it. It is better to build a drawing on whatman paper, recording all measurements there.
Decide on the location and dimensions of the cabinet. If there is a niche in the room - ideal, but if it is not possible to build it in, choose a place where nothing will interfere with it.
Consider the internal content: the location and number of shelves and drawers, their sizes, additional elements such as mezzanines or interior lighting.
Do not forget about the choice of external decoration and decorations. The colors “oak”, “alder”, “beech” are the most popular today. Or you can choose wood with an interesting pattern and leave the original pattern. Get creative and decorate the doors with a carved pattern.
Selecting a location and marking
It is advisable to determine the installation location of the cabinet in advance, since the structure itself is made according to the existing parameters of a given angle. It is usually installed in the living room, but can be intended for a bedroom or children's room. The filling and dimensions depend on the number of things that will be stored in the furniture.
After determining the installation location, markings begin, which allows you to determine where the main elements of the cabinet will be located. Since the product will be created from plasterboard, all frame elements will have to be attached to the wall, so fastening areas are outlined. You will have to navigate by them during fastening and creating the frame.
Surface preparation and marking
Design
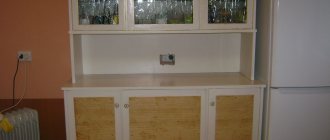
Such a cabinet can be selected depending on the interior of the kitchen as a whole. Moreover, you can choose a model that will be made of the same material from which other elements of the kitchen furnishings are made, such as a countertop, chairs or other cabinets. You can even make such a cabinet yourself based on the design of your kitchen; as a rule, their design is very simple, and they are usually made from wood, chipboard, plywood, glass and other building materials. And if you decide to purchase such a wall cabinet, then all you have to do is choose the cabinet of the most suitable color, shade, design and model for your kitchen. As for color, designers present cabinets in both neutral white and beige shades or warm tones of pink, green and yellow, as well as bright colors: red, lilac, orange models, and there are even wall-mounted corner cabinets in black.
What to consider when choosing a cabin
When purchasing a cabin, be sure to pay attention to the following nuances:
If the bathroom is more than modest in size, choose a compact corner shower measuring 800x800 or 900x900 mm; If the sewer outlet is located at a considerable height, give preference to a deep tray; to install a low one, you will still have to build a pedestal in which the communications will be hidden; Does the manufacturer produce separate components (glasses, guides, trays, rollers), and in general, is the cabin repairable; Buy cabins that do not require the use of sealant during installation. How to recognize such patterns? There should be a continuous edge around the circle of the pallet, the height of which is at least 10-15 mm. It will prevent water from flowing out onto the floor, and it will flow back into the pan bowl. What's wrong with sealant? When using the product, vibration inevitably occurs, which means that if the joints are coated with sealant, it will begin to come off over time. In addition, due to high humidity, mold and mildew develop on it.
The sealant needs to be replaced periodically (every one to two years); If you live on the 8th-9th floor of an apartment building or higher, and you have problems with pressure, be sure to pay attention to the technical characteristics of the selected model, in particular, the minimum operating pressure.
Styles and placement
First, let's figure out what type of furniture is preferable in a particular style. Of course, everyone has their own preferences and tastes, but some generally accepted measures still exist.
For example, structures made of MDF or fiberboard are great for a traditional interior. In this case, a plastic or film coating that imitates natural materials would be a good addition.
And if you delve a little deeper into human psychology, it turns out that the use of mirrors in a room visually makes the room more spacious, and also removes some inaccuracies and unevenness in the room.
A very important question about self-assembling a corner cabinet in the kitchen. Here it serves as a storage area for cooking utensils and will often be on display, so its harmony with the rest of the furniture is very important.
It must be correctly connected to the other modules. For example, for connecting to a sink, it is preferable to use a connection angle of 45 degrees, but with the rest you can use a right angle.
Examples of kitchen sets with dimensions ↑
The construction and design of a kitchen is always based on the overall dimensions of the room. After all strategic objects (pipes, sockets, protrusions, etc.) have already been placed on the drawing, you can begin arranging cabinets for household appliances. Next, standard furniture should be placed, and only then non-standard structures.
When developing your own kitchen drawing, you can rely on ready-made kitchen designs with dimensions, while correlating the actual dimensions of the room with those indicated in the sketch.
Standard kitchen set with dimensions:
Drawing of a straight kitchen with custom cabinets:
It is recommended to start drawing a drawing of a corner kitchen from the bottom corner cabinet. Next, furniture and household appliances are arranged, and then non-standard cabinets are calculated.
Standard corner kitchen with dimensions:
Standard corner kitchen with dimensions
Designing a kitchen with a trapezoidal corner element:
Kitchen design
Drawings of a corner kitchen of a custom size:
Detailing of main kitchen cabinets: drawings and dimensions
- Calculation of detailing is carried out taking into account the thickness of the chipboard.
- The standard thickness of laminated chipboard for the manufacture of kitchen furniture is 16 and 18 mm.
- The lower kitchen drawers are mounted on adjustable supports 10 cm high.
- It is recommended to make the support bar (lower plinth) one-piece - inseparable for the entire kitchen set.
- The details and drawings of the kitchen below are designed for 16 mm chipboards and a 28 mm countertop.
- The height of the lower tier is 850 mm including the tabletop, the upper tier is 720 mm.
Cabinet drawing: 600x500
| the name of detail | Dimensions | Quantity |
| Side | 500x722 | 2 |
| Bottom | 500x568 | 1 |
| Shelf | 500x568 | 1 |
| Lower plinth | 100x600 | 1 |
The width of the cabinet varies depending on the length of the sink.
Drawing of a kitchen cabinet for a sink 800 mm
| the name of detail | Dimensions | Quantity |
| Side | 500x722 | 2 |
| Bottom | 500x768 | 1 |
| Upper plinth (supporting frame, strip) | 80x768 | 2 |
| Lower plinth | 100x800 | 1 |
The width varies according to the specified dimensions of the room or the wishes of the customer.
Sketch of a cabinet with 4 drawers, size 400x500
| the name of detail | Dimensions | Quantity |
| Side | 500x722 | 2 |
| Bottom | 500x368 | 1 |
| Drawer side slats | 140x500 | 16 |
| Lower plinth | 100x400 | 1 |
The size can be varied in width within the range of 300...1000 mm.
Drawing of a kitchen cabinet with two doors, width 600
| the name of detail | Dimensions | Quantity |
| Side | 500x722 | 2 |
| Bottom | 500x568 | 1 |
| Shelf | 500x568 | 1-2 |
| Lower plinth | 100x600 | 1 |
Sketch of an L-shaped corner section 900x900
| the name of detail | Dimensions | Quantity |
| Side | 500x722 | 2 |
| Bottom, roof (the sink cabinet is made without a roof) | 884x884 with cutting at an angle of 90⁰ | 2 |
| Shelf (there is no shelf in the corner sink cabinet) | 884x884 with cutting at an angle of 90⁰ | 1 |
| Lower plinth | 100x420 | 2 |
| Vertical plinth | 100x806 | 2 |
Drawing of a lower corner cabinet in the shape of a trapezoid 900x900
| the name of detail | Dimensions | Quantity |
| Side | 500x722 | 2 |
| Bottom, roof (the sink cabinet is made without a roof) | 884x884 with cutting at an angle of 45⁰ | 2 |
| Shelf (there is no shelf in the corner sink cabinet) | 884x884 with cutting at an angle of 45⁰ | 1 |
| Lower plinth | 100x600 (cut to size) | 1 |
| Vertical plinth | 150x806 | 1 |
The width of the cabinet varies depending on the width of the hood; the height is calculated relative to the dimensions recommended by the manufacturer of household appliances.
Project of a wall kitchen cabinet for a standard 600 mm telescopic hood
| the name of detail | Dimensions | Quantity |
| Side | 300x720 | 2 |
| Roof | 300x568 (corrugated cutout) | 1 |
| Shelf | 300x568 (corrugated cutout) | 1 |
Drawing of a top drawer with hinged fronts 800x720
| the name of detail | Dimensions | Quantity |
| Side | 300x720 | 2 |
| Roof, bottom | 300x768 | 2 |
| Shelf (not in the cupboard with a drying rack) | 300x768 | 1-2 |
Drawing of a corner L-shaped cabinet 600x600
| the name of detail | Dimensions | Quantity |
| Side | 300x720 | 2 |
| Roof, bottom | 584x584 with cutting at an angle of 90⁰ | 2 |
| Shelf | 584x584 with cutting at an angle of 90⁰ | 1-2 |
| Vertical clamping plinth | 150 x 688 | 1 |
Sketch of a trapezoidal corner upper cabinet 600x600
