Things that are made by hand and not in production are valued much higher. This applies to everything: clothes, jewelry, furniture. By the way, recently more and more people are trying to decorate their home with their own hands. If earlier it was various small things, today with great pleasure people are not averse to using scrap materials to assemble a wall-slide for a living room or a children's sofa with their own hands.
Of course, buying furniture is both faster and easier, but sometimes you really want to create something big and useful with your own hands, especially if we are talking about your own child, for whom parents want only the best.
Choosing the optimal size
When choosing the size of the sofa, you should remember that the child grows quickly, so the length and width of the product should be generous. The sizes of children's sofas depend on their purpose:
- 60 x 120 cm - the best option for a child from birth to three years;
- 140 x 70, 160 x 70, 80 x 190 cm - suitable dimensions for children from 3 to 5 years old, emphasis should be placed on personal preferences;
- 80 x 190 or 90 x 200 cm - teenage options, best used after 10 years.
When choosing a sofa for a child, you first need to sketch out a general plan of the room, measure its parameters and the sizes of the pieces of furniture that are already located in it. A visual diagram will help you get an objective idea of how best to arrange the sleeping area and what dimensions will be optimal for a particular room.
60 x 120 cm
80 x 190 cm
140 x 70 cm
What are the shapes and sizes of children's sofas?
Shape and size may vary. It depends on the age of the child and the design. By age, sofas are divided into:
For babies. The difference between this piece of furniture and others is that it does not have sharp corners. All edges are rounded. It is also better not to leave hard surfaces on it. Everything should be upholstered with soft material. Children's options must have sides to protect them from falling at night. Their other function is protection from cold air currents.
Furniture for teenagers
In such decisions, attention should be paid to design aspects. The child can be involved in this process
Let him make his own choice in favor of color, fabric, pattern. Safety elements are important, but not as important as for a baby.
By design, the following options can be distinguished:
Folding. Another name for them is “folding beds”. A simple and common type of design.
Retractable. This type of mechanism is also called withdrawable. The retractable part can be equipped with drawers in which bedding is stored.
Corner sofas. Among the furniture for children there are corner sofas. They save space and are very spacious.
Peculiarities
Everyone knows that a sofa plays an important role in any residential or non-residential premises. On it, people receive guests, relax in the company of their nearest and dearest while watching TV or playing board games, and sleep at night.
Recently, instead of the usual straight models, people prefer to install corner sofas, which are distinguished by functionality and rational use of free space. Before you start making a sofa, you need to decide on its:
- Appointment. Think in advance about which room the product will be placed in. The dimensions and design of the furniture will directly depend on this. A corner sofa can be built for a comfortable family time in the living room, or you can make a small product for the kitchen.
- Shape and size. Here it is worth starting only from personal wishes and preferences, as well as from the features of the room where it will stand. For small rooms it is better to make compact and ergonomic models, and in a spacious living room it is worth installing a roomy and large corner sofa. As for the shape, it can be varied: in the form of the letter L, U-shaped, with or without armrests.
- Filler. As a rule, foam rubber, padding polyester and holofiber are used as filler for upholstered furniture. Their choice must be taken with full responsibility. Here, the thickness of the material, its density, elasticity and resilience, as well as rigidity play an important role.
- Functionality. Some consumers prefer furniture with spacious drawers where they can store bedding or personal items. Also, corner sofas are often equipped with shelves and bookcases.
How to make a folding sofa for dolls with your own hands
There are more complex options that require more time. To make it you will need:
It is better if such work is carried out by a person who knows how to work with a jigsaw. Otherwise, the parts may be damaged or the toy will quickly break.
Instructions for implementation:
- The necessary parts are cut out with a jigsaw: back, sides. You will need 3 bases. One will become a seat, the other 2 will pull out as a bed. The design will be a book.
- The moving parts are connected to each other using small canopies.
- Connect the remaining parts with nails. They can be held together like puzzles if blanks for such a design are cut out in advance.
- Foam rubber is placed on the plywood and upholstered with fabric. Each part is stitched separately.
Drawings of the main back of the sofa
The main back is made of 16 mm plywood. We drill holes for the bolts securing the backrest to the frame (d. 8 mm) according to the template. At home, you can do without a template; you must first attach the back to the box and temporarily secure it with nails or clamps, simultaneously drill the back with the box according to the pre-applied markings). The roller that frames the contour of the back from above and from the sides is made of a 30 mm polyurethane foam strip, which we wrap around the edge of the plywood and secure with staples No. 10 (we beat the staple in a line, without gaps). On the front side of the plywood plane we glue 10 mm polyurethane foam, pre-cut to the shape of the back. The foam roller framing the back is upholstered with a strip of furniture fabric. Lastly, we install and nail (staple No. 10 into the line under the edging) an insert of companion furniture fabric made with edging along the contour (you can sew in a clothesline). The edging is needed to hide the staples. The back surface of the back can be covered with spunbond or calico. To simplify the design, you can do without rollers and inserts, just cover the plywood with 10 - 20 mm foam rubber. and upholster with furniture fabric.
Reclining drawing
The technology is similar to the manufacture of a roll-out seat. Differences:
- In place of 30 mm polyurethane foam. (position 2) 20 mm polyurethane foam is used. in order to compensate for the overall thickness of the pillow and prevent a difference relative to the plane of the roll-out seat during transformation (since fiberboard (11), 10 mm polyurethane foam (12) and padding polyester are added from the bottom).
- The frame bars are covered from the bottom with fiberboard (11), onto which 10 mm polyurethane foam is glued. and padding polyester.
- The furniture fabric cover is not nailed with staples to the frame bars, but is put on and fastened using a “Zipper” lock, after which a card loop No. 538 zinc (2 pcs.) is screwed to the folding backrest using self-tapping screws ШСГД 50 mm. according to pre-made markings (chalk on furniture fabric).
The article belongs to the site NovaMebel74.ru
Card loop No. 538 zinc:
To reduce time costs and the range of materials used - (see ROLL-OUT SEAT) similarly.
Drawing of a roll-out sofa seat
- The support frame (position 15) with plastic supports (14) is attached to the support frame fastening bars (12) using 50 mm SHSGD self-tapping screws.
- The synthetic winterizer (1) is attached to the polyurethane foam point-by-point, using “Tapicer” foam rubber adhesive (if not available, you can use regular “Moment” in tubes or “Titan” type ceiling tile adhesive).
- PPU 30 mm. (2) attached to heat-pressed felt (3) pointwise, using “Tapicer” foam rubber adhesive (you can, again, “Moment” or “Titan”).
- Heat-pressed felt (3) is attached with a fold to the Bonnel spring block by stitching with a needle and nylon thread (fishing gear) with wide ties.
- Spring block “Bonnel” L. x W. x H. = 1330 mm. x 660 mm. x 100 mm. /1 r./ (one frame) (position 4) we fasten along the perimeter of the frame bars with a stapler (staple No. 16) two staples on the right and left of each spring, corner springs - on 6 staples (right, left and corner). In the absence of a stapler, you can use a hammer and 32 mm nails, one nail per spring, corner springs - 2 (we hammer the nails halfway, then bend them).
- Fiberboard 2.5 mm. the rigid base (11) is secured around the perimeter of the frame bars (6) (9) and the span bars (10) with a stapler (bracket No. 16) or 25 mm SHSGD. (at worst - with the same 32 mm nails.).
- Spring-loaded flooring - heat-pressed felt (11) is attached to the fiberboard using glue or staples.
- Frame (6) (9) (10) - pine bars placed on edge, connected with a tenon (possibly without a tenon, with 75 mm SHSGD self-tapping screws. 2 pieces per end with simultaneous gluing of the ends with PVA wood glue).
- PPU 20 mm. (5) glue from the top to 30 mm polyurethane foam. (2) and from below - to the plane of the frame bars along the perimeter (or with a stapler, staple No. 10).
To reduce time costs and the range of materials used, you can:
- use polyurethane foam with a thickness of 100 mm. instead of a Bonnel spring block and heat-pressed felt.
- Do not use tenon joints for frame bars.
- use chipboard or laminated chipboard instead of the support frame (15) and supports (14), which are screwed using a 35 mm SHSGD. to the plane of the frame block (6).
Wheel support No. 493:
Options for attaching the Bonnel spring block to a rigid base (using 32 mm nails and No. 16 staples); option of attaching heat-pressed felt to the Bonnel spring block using nylon thread:
Please note that the photo above shows the mounting of the spring unit not on a children's sofa, but on a sofa of a different model. But the principle is the same: first the batting, then the spring block is nailed, and the top is sheathed with felt. And then the foam rubber is glued.
Basis of design
The shape, size and other characteristics of the frame may vary depending on your preferences. It can be made from several slats or bars of wood or other material. In order to increase the strength of the frame, you can reinforce the structure with chipboard sheets (plywood is also suitable).
To assemble the parts into one whole you will need a screwdriver or screwdriver. First, coat the surfaces with wood glue, and then fasten everything additionally with self-tapping screws. For greater strength, use metal fasteners. They will strengthen the structure, reduce mobility and make your future sofa more stable.
Now start making the frame for the mattress. Make sure that it is smooth and does not damage future upholstery.
The sides and back should be hollow. You can make them straight, or you can make them at an angle. To do this, you need to adjust the width of the ends - it should decrease towards the top.
Selection of tools and materials
First of all, you need to decide what design the planned couch will have. Does it need a backrest (or maybe two), what height will the legs be, is it supposed to have a linen drawer. Well, other nuances need to be taken into account. Depending on the model, the amount of materials and their type are calculated.
However, as a rule, either wood boards or furniture panels are used to make the frame of an ottoman. The first option is cheaper, and the second is better in terms of strength and environmental friendliness. You will also need wooden blocks, steel furniture corners, and screws to connect the parts.
As for the tool, you should prepare:
- sharpened simple pencil for marking;
- tape measure, ruler, square;
- electric jigsaw;
- screwdriver (or screwdriver);
- furniture (construction) stapler for fastening upholstery.
Stylish homemade sofa for the cottage
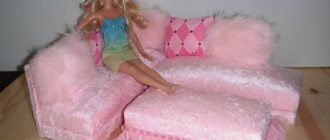
Step-by-step making of a simple sofa for Barbie
The simplest sofa can be made from cardboard from a box. If the sofa is being created for the first time, then it is recommended to first draw the drawing on paper, carefully measuring the dimensions of the furniture, then transfer it to the material. For easy creation, all parts are cut out separately and then glued together.
Calculation of the length of parts based on the size of the doll. For example, Barbie is 24 cm long and 6 cm wide, then:
- the length of the bed is - 20 + 2 = 24 cm;
- width of the bed - 6 + 2 = 8 cm;
- seat height - 24: 4 = 6 cm;
- the height of the backrest is 6 + 6 = 12 cm, and its width is 1.5 cm greater than the width of the seat - 24 + 1.5 = 25.5 cm.
- the height of the armrests is 6 * 1.5 = 9 cm, and the width is 0.5 cm less than the width of the sofa - 8 - 0.5 = 7.5 cm.
- Prepare the necessary set of materials to create a sofa. It’s easier to concentrate when everything is already at hand and you don’t need to be distracted.
- Draw a drawing where all the lines of the back, handles, seat, as well as the places of cuts and folds will be marked.
- Transfer the drawing onto cardboard. Cut out the details. Attach the scraps with glue or a stapler to the bottom of the future sofa, so it will be more stable and dense.
- Fasten all the parts together using glue or a stapler.
- If you plan to make upholstered furniture for dolls, then you need to cover the outside of the cardboard with foam rubber on the sofa. It can be replaced with a dishwashing sponge or any other soft filler.
- Cut out the fabric that will become the upholstery of the sofa. Each piece of furniture is cut out of fabric separately and glued with glue. If the material does not hold, then use a needle and thread. It is recommended to close all seams inward so that the child cannot unravel the sofa upholstery by pulling the thread.
- The last stage is decoration. The furniture can be decorated as desired: decorate the fold lines with satin ribbons, sew pads from sponges, diversify the color scheme with fabrics.
Preparatory work
In order for a child to enjoy using this piece of furniture in playing with dolls, the baby needs to be involved in the manufacturing process itself. The child will be able to show his creative talents and will be interested in the result by making a sofa for a doll with his own hands.
The work proceeds according to a given algorithm, but first you should decide on several nuances. They are preparatory in nature:
Select the material for the base of the future product. The body of this furniture can be made from many things: sponges for washing dishes, boards, fabric rollers, cardboard shoe boxes.
Prepare the material that will serve as upholstery for the body. You should also consider decorative finishing to decorate the product. The intricate shape of the sofa and elements will do just fine.
Select the parameters of the sofa in accordance with the size of the doll. Think over the very shape of upholstered furniture, design features.
Select the assembly method and materials with which production will be carried out. Most often it is glue, a needle and thread, a construction or office stapler.
Auxiliary tools for technical operations.
A doll sofa must be strong and safe. The baby should enjoy playing with such a toy. You need to think over the most striking design for finishing children's furniture: use sequins, beads, ruffles, lace. Using permanent markers, you can create a design directly on the fabric.
Wood as a material for making furniture yourself
After making a sketch and a drawing based on it, you can proceed to the selection of material. Before choosing a particular material, you need to study the features of working with it and learn about its performance properties.
Solid wood stools
Natural wood
Due to the wide variety of natural shades, patterns and textures, natural wood is very popular in the manufacture of furniture. Wood is malleable and allows you to create objects of interesting shapes, decorated with artistic carvings.
The advantages of the material include the following:
- Strength and durability. Solid wood furniture lasts for decades.
- The array can be easily restored by removing scratches and gouges.
- Environmental friendliness and naturalness are the main advantages of the array.
- Solid wood furniture looks expensive and will be appropriate in any interior.
- When making a chair, table, chest of drawers or cabinet from natural wood, you are guaranteed to obtain a piece of furniture with excellent performance properties.
Solid wood furniture looks rich and luxurious
Properties depending on breed
Soft and hard wood is used to make furniture. Soft wood (alder, poplar, aspen) is used to make parts that will not be subject to stress during operation - decorative elements and facades with an original design.
Modern style bedroom set
Table 1. Popular wood species for making furniture
| Breeds | Description |
Oak | The most popular type of wood for making furniture, which is characterized by high strength and wear resistance. The advantage of the material is the presence of a beautiful natural pattern. |
| Beech | It has a creamy yellow tint with brown specks. Due to its high flexibility, it is used for the manufacture of furniture of complex, including round, shapes. |
| Pine | The material is durable, low cost and accessible. Contains natural antiseptics, so it lasts for many years and has a positive effect on the indoor microclimate. |
Cherry | An expensive type of wood with a characteristic reddish tint, which becomes more saturated over time. |
Walnut | A material with a luxurious brown tint, allowing you to create exclusive interior items. |
Sequence of actions when making furniture
Table 2. Manufacturing of furniture from solid wood
| Illustration | Description |
Step 1 | Markings are applied to the wood material. |
Step 2 | Cut out the details. |
Step 3 | Perform grinding of parts. |
Step 4 | The parts are treated with antiseptics. |
Step 5 | Connecting holes are made. |
Step 6 | The parts are painted. |
Step 7 | The parts are varnished. |
Step 8 | Start assembling furniture. |
Prices for popular models of eccentric sanders
Random orbital sander
When making furniture from solid or glued solid wood, two methods of connecting elements are used - detachable and permanent.
Wood based materials
Working with wood requires skill and knowledge about the properties of the material; moreover, the cost of high-quality raw materials is quite high and it is not rational to “get your hands on” with it. Beginning craftsmen prefer materials that are easier to process and inexpensive.
Table 3. Wood-based materials
Name Description
Chipboard
Used for the manufacture of cabinet furniture. Has a low cost
It is important to choose high-quality material that contains an acceptable amount of formaldehyde that is not dangerous to humans. It is also necessary to use protective edges on the cuts of parts, which not only protect the environment from the release of formaldehyde, but also give the product a neat appearance
laminated chipboard
Has a protective laminated layer that protects the material from mechanical and thermal stress
The laminated surface is not afraid of moisture. It is highly decorative and allows you to create furniture not only in different colors, but also using photo printing. Can imitate any material.
Fiberboard
Used for making furniture of curved shapes. The material is inexpensive, durable, with good thermal insulation properties. The disadvantage is low moisture resistance. This material is recommended only in dry rooms with normal humidity.
MDF
It is environmentally friendly due to the reduction in the percentage of formaldehyde in its composition. The material is durable, resistant to moisture and fire. The material is available for fine processing. However, its cost is higher than the materials listed earlier.
Plywood
It is widely used as a material for making furniture - very durable, reliable and easy to process. Often used to make children's furniture.
Algorithm for making simple models
The simplest models for a novice craftsman are sofas and folding sofas made of plywood (timber). You can also assemble original country furniture from garden pallets. This material is resistant to moisture, so the product can be used outdoors.
Sofa
The model is low, so it is great for older people, because it is easy to get up from such a surface. How to make a sofa step by step:
- Put together a frame from boards or timber in accordance with the selected dimensions.
- Secure the seat with glue and nails.
- Connect it to the back.
- Cut and secure the legs. Even at the preparatory stage, you should consider their height and thickness.
How to sew a sofa cover with your own hands, step-by-step instructions for beginners
A fabric of variegated colors with a dense texture is well suited for upholstery. It needs to be folded under the bottom of the sofa so that the ends do not stick out. You can additionally sew an inconspicuous zipper into the back so that you can carefully pull out the old filling and fill it with a new one instead. A self-made children's sofa can also have the shape of a sofa, but its dimensions will be slightly smaller.
Simple folding
This is the easiest model to make; for example, making a roll-out sofa is much more difficult. For work, you can use chipboard, timber, furniture board; a high-quality product is made from wood. How to make a folding sofa with your own hands step by step:
- Cut out the armrests, covering them with foam rubber for softness.
- Assemble the right and left side panels in turn.
- Cut out the parts for covering the frame from foam rubber and attach them in place.
- Pull a pre-sewn textile cover over the frame.
The folding version of the sofa does not take up much space. It is very convenient and functional. The extra bed can be pulled out easily and silently.
Cut out the armrests
Cover them with foam rubber for softness
Assemble the sides
Install the base and backrest
Cut out elements for the seat and back from foam rubber, attach them to the frame
Cover the frame with a pre-sewn textile cover
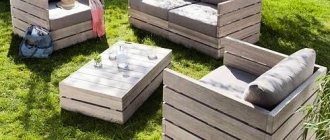
Garden made from pallets
Pallets, or garden pallets, are an excellent material for creativity. They make original outdoor furniture for the dacha. Pallets can be of three types. Those that fall into the first category have a beautiful light shade. They also have screw fastenings. Visually, such material can be distinguished by the absence of mechanical damage on the surface. Pallets that belong to the second and third grades can have any color, from dirty gray to brown. Before you begin assembling furniture, you need to conduct a thorough visual inspection of all structural elements. Loose connections are secured, otherwise during the installation of the sofa, nails may fall out of them and cause injury.
It is best to choose a European modification of pallets. They look impressive, and the image of the manufacturer’s mark enhances the overall original impression of the non-standard sofa. High-quality garden pallets are made in Scandinavian countries, for example, in Finland. They are durable and resistant to various types of deformation.
The step-by-step instructions are quite simple; to make country sofas you need:
- Treat pallets with an antiseptic compound to prevent them from rotting. Application is carried out in layers, a maximum of 4–5 times, because the product is subject to long-term use in the open air. After the final layer of disinfectant, you should wait several days until it dries completely. If you do not maintain the recommended time and start installing the structure earlier, the protective coating will begin to quickly deteriorate and lose its properties.
- Saw a fully prepared wooden pallet, forming a seat and back from its parts. A sofa made from garden pallets can be without a back, in which case you get an interesting ottoman in an oriental style. Such products are compact, they do not take up much space and can be placed in any corner of the garden plot.
- Make armrests from bars and fix them on the sides. Secure the legs with corners - it is better so that the pallet does not come into contact with the ground.
Development of a drawing of a corner sofa, DIY assembly step by step
An original garden modular sofa will decorate any garden plot. You can put a bright mattress and pillows in colorful covers on it. This design loosens the back quite quickly, so it is better to install it close to the wall.
Treat pallets with an antiseptic solution
Make the necessary measurements
Cutting wooden pallets
Assemble the seat and backrest
Make armrests and fix them on the sides
Garden sofa made from pallets
Types of sofas by purpose
All types of this upholstered furniture can be roughly classified according to their intended purpose:
- On office sofas.
- For the living room.
- For kitchen.
- To the hallway.
- For a children's room.
At the same time, the types of sofas and their mechanism may differ, so you need to decide on a specific model that is suitable specifically for your purposes. Most often, it is the material with which the sofa is covered that determines its purpose.
So sofas covered with leather or similar cheaper materials are usually intended for offices or kitchens.
Sofas for children's rooms are usually covered with bright, but at the same time practical materials from which stains can be easily removed.
Manufacturing instructions with drawings
Introduction: On the furniture forum sdelaimebel.ru, user Eskander shared his experience in making children's sofas, for which many thanks to him.
I found this instruction interesting for a wide range of readers and, with the permission of the author, I am posting it here. This is the only material in this section for which I am not the author, but only the editor. This sofa model is mass-produced by the author in production, but it is quite possible to make such a children’s sofa yourself, with your own hands at home. In this particular case, we are considering a sofa based on a roll-out Bonnel spring block with a folding headboard segment. Instead of springs, you can use foam rubber in a children's sofa. This is what a children's sofa you can make yourself looks like:
Making a sofa frame
Now let's get to work. First, draw a template on one piece of cardboard and cut out the first blank. After this, we make the remaining parts using the finished workpiece. You choose the number of such parts yourself, but the more there are, the longer the sofa or chair will be.
Another piece of furniture will be somewhat lengthened due to additional pieces of cardboard, which will need to be glued between the main pieces where the heaviest load is expected. All this will look approximately the same as in the diagram (Fig. 1). This figure shows two parts of the sofa: it can be either two armchairs, or subsequently one sofa, if these parts are glued together.
Figure 3. The cover is pulled over the lining or stapled on several sides.
Now such a blank is completely covered with ordinary unnecessary sheets of A4 paper. This is necessary so that the cardboard does not spill debris, and also so that the foam rubber lays softly on the furniture and does not cling to anything. Immediately after pasting, take all measurements to make a high-quality lining and upholstery of the sofa.
Now, while the structure is setting and drying completely, work with the foam rubber. Using your measurements, cut out pieces of the required size. Please note that all parts of the piece of furniture must be treated with foam rubber: both the sides and back, as well as the seats.
FAQ
What should you do if, when stretching the fabric, its edge crumbles and falls off?
You need to treat it with an adhesive base after the fabric is attached using a stapler.
What to do if the sofa itself is large, and the width of the fabric roll is not enough to create the desired pattern?
There are two options here: either look for similar fabric in another store, where you can choose the desired width, or create a pattern from two pieces of fabric. It's good if the fabric is plain. If you have a drawing, you will have to work hard.
If you make a seat filling in the form of a sandwich, do all the layers (I decided to choose 3 layers) need to be held together with something?
Yes, they should be glued together using a special odorless glue. To do this, you first need to cut out all the fillings according to the template, then glue them together sequentially and allow them to dry thoroughly before installation.
Mechanisms of transformation
When choosing children's sofa beds, special attention should be paid to the furniture transformation mechanism. Its characteristics will directly affect the possibility of comfortable placement of furniture
Manufacturers offer consumers a wide range of products with various ways to transform an ordinary sofa into a full-fledged bed:
- Roll-out is an ideal option for a child’s daily sleep. The mechanism is characterized by increased strength and wear resistance. Unfolding furniture is carried out using simple manipulations. There is a hidden strap inside the sofa; by pulling it, you can move the front part, which activates the extension of all the others. This children's sofa is quite reliable and compact.
- Accordion" - features a wide, high, comfortable and flat sleeping area. Ideal for those who value comfort and functionality. To arrange the furniture, you need to lift the seat until you hear a characteristic click, and then pull it towards you. The sliding mechanism has several significant advantages - ease of transformation, small size. In addition, the sofas come with a storage compartment for linen.
- “Dolphin” is a mechanism typical for comfortable and laconic furniture. The folding of this model is based on a special section, which is raised using a loop-strap and sets the backrest plane at the same level as the main berth. The sofa is quite easy to fold and unfold and can withstand significant loads. Many models with this mechanism are orthopedic.
- “Tango” - all sofas with this mechanism are necessarily supplied with drawers, which are subsequently used as storage systems. Lifting the bed can be made even easier by installing couch springs.
Each of the transformation mechanisms has its own characteristics. When choosing one option or another, you need to take them into account. This is necessary so that the folding sofa does not create obstacles to the full use of the children's room, does not clutter up the space and does not limit freedom of movement.
"Accordion"
Roll-out "Dolphin"
"Tango"
Furniture and interior items
Each of us has the right to choose, including the purchase of furniture. For some, it is better to buy a children's sofa of good quality, with fairly expensive upholstery, while others will opt for cheaper options. But there is, however, a category of citizens who will make a children's sofa with their own hands very quickly and without problems, and even with pleasure. Buying such furniture, of course, is easier and faster, but you can show a little imagination and make something very original and unique for your baby.
Table of contents:
Types of children's sofas
Children's sofas have a fairly comfortable design, and from the point of view of their transformation, they are reliable. Their assortment is very rich and quite varied. They have positive functions, they can easily be folded out into a very spacious double bed, and they are also compact when folded and can be suitable for any child, even older ones. You can make a model that is not just comfortable, but even original, fashionable and beautiful in its design.
Sofas for a children's room are furniture that usually requires careful selection, because the child should love his personal resting place and go to bed with great pleasure. Sound sleep is very important for your baby.
Children's folding sofas are in greatest demand. We can say this is the most practical and convenient option. Today there are many folding mechanisms.
You can choose a transforming sofa for a children's bedroom - small or large in size. During the day it will turn into a chair and will not take up much space. Many transforming sofas have sides that protect your child from falls, and such a sofa can “grow” with the child.
If you plan to lay out the sofa every day, then the designs of such children's sofas as “click-clack”, “book” and “eurobook” are better suited. When unfolding, they do not use the lower part, which touches the floor. With this sofa, the floor covering will remain in place not only intact, but also undamaged. The mechanism of these sofas is quite simple and durable, and they themselves are durable.
Very popular and beautiful children's sofas with a roll-out mechanism. They are suitable for everyday use and have a fairly diverse range of models. When arranging a room for two children, it is better to use children's bunk beds along with a sofa. There is a sofa below and a bed on top. The design of this bed will allow you to save space in an excellent way. The sofa mechanism itself, which is located in the lower tier, is usually folding, and can be of any design.
For the most caring mothers and fathers, there are special orthopedic children's sofas. They do an excellent job of sleeping in the correct position, very accurately following all the curves of the body. This has benefits for overall well-being and health.
Of course, when unfolded, this sofa will take up more space than usual, so you need to take a closer look at its size relative to the dimensions of the room. If you buy a children's orthopedic sofa, you need to pay special attention to its quality, which may be due to its relatively high cost.
Large children's sofas include baby, toddler, and mini, which are perfect for very little ones. This sofa is less expensive in price and, of course, will require replacement in the future with an even more spacious sleeping place. But mini-sofas for the youngest children are very light and compact. There are also frameless sofas among them; the sleeping place when folded out is located very low.
Drawings of the main back of the sofa
The main back is made of 16 mm plywood. We drill holes for the bolts securing the backrest to the frame (d. 8 mm) according to the template. At home, you can do without a template; you must first attach the back to the box and temporarily secure it with nails or clamps, simultaneously drill the back with the box according to the pre-applied markings). The roller that frames the contour of the back from above and from the sides is made of a 30 mm polyurethane foam strip, which we wrap around the edge of the plywood and secure with staples No. 10 (we beat the staple in a line, without gaps). On the front side of the plywood plane we glue 10 mm polyurethane foam, pre-cut to the shape of the back. The foam roller framing the back is upholstered with a strip of furniture fabric. Lastly, we install and nail (staple No. 10 into the line under the edging) an insert of companion furniture fabric made with edging along the contour (you can sew in a clothesline). The edging is needed to hide the staples. The back surface of the back can be covered with spunbond or calico. To simplify the design, you can do without rollers and inserts, just cover the plywood with 10 - 20 mm foam rubber. and upholster with furniture fabric.
Selection of materials
A kitchen sofa, as well as a model for a bedroom or living room, can be made from different materials. Each option has its own advantages and disadvantages. Solid wood is considered the most expensive, chipboard is the cheapest. Furniture panels are very popular; they are often used to make the sidewalls of upholstered furniture.
Frame
Making a sofa starts with the base. For the frame you can use plywood, metal or chipboard. But it’s best not to spare money on purchasing natural wood. Solid wood structures not only look impressive, but also retain their presentable appearance for a very long time. This material is also environmentally friendly, reliable and safe. Popular and affordable types of wood:
- pine;
- birch;
- beech;
- alder.
Framing a regular or corner sofa with wooden slats is widespread. For rigidity, plywood or chipboard is usually used. Slats can be used, especially for orthopedic structures - such a sofa frame will certainly last a long time.
PlywoodMetalLDSPWood
Transformation mechanism
In master classes on assembling a sofa with your own hands, home craftsmen always emphasize the need to choose reliable mechanisms made of high-quality metal that can withstand heavy loads. The most wear-resistant options are the classic “book” and its Euro modification. If you don’t want to scratch the linoleum when using furniture, you should choose a retractable option - a pantograph. With this design, the folding part slides out without contacting the floor.
PantographBookEurobook
Upholstery and filling
For upholstery, you should choose textiles with a dense texture, reminiscent of a tapestry. Natural or artificial leather is also suitable, but it is more difficult to work with at home. The cheapest filling option is foam rubber, but it quickly begins to collapse and does not tolerate moisture well. More durable and practical options are padding polyester, holofiber; it is better to make your own sofa with just such fillings. In general, the choice of fabrics for upholstery and materials for the inside of the sofa is huge - the choice is limited solely by a person’s financial capabilities.
TapestryFlockSinteponHolofiber
What tools will you need?
First of all, for work you will need diagrams for assembling the sofa and the tools necessary to take measurements. This is a tape measure, a simple pencil, a square and a compass for constructing a drawing by hand. For most models, you will need to purchase furniture legs, but sometimes wheels (casters) are installed instead.
| Assembly tools | Screwdriver, ruler, square, miter box, stationery knife-cutter, furniture stapler |
| Consumables | Self-tapping screws and wood screws, nails, staples, wood glue |
If you decide to use foam rubber to upholster your sofa yourself, you will need a separate paste for it. To work with upholstery fabric you will need a sewing machine. It is better to replace nails with self-tapping screws; they last longer, and the finished structure is much stronger.
Standard Wooden Sofa Bed Model
Table 1. Materials and tools for the sofa bed
| Raw materials | Tools |
| 1. Wide board for the frame. 2. Wooden slats for connection. 3. Furniture screws. 4. Flax oil or Danish colorless – suitable for wood processing. 5. Dowels. 6. Putty for woodwork. 7. Ready-made pillows. | 1. Miter saw. 2. Drill. 3. Grinding machine. 4. Screwdriver. 5. 2 drills corresponding to the diameter of the screws and dowels. 6. Large vice. 7. A jig, with which you can make holes in parts at a certain angle. 8. Clamps of different sizes. 9. Spatula for processing holes for screws. 10. Lint-free fabric for working with wood. 11. Carbon ruler. 12. Pencil. 13. Construction tape. |
Wooden frame sofa bed
Standard model unfolded
Stage 1. Preparing raw materials for work
The first step is to work on the wood. If you use a wide board, you need to cut it with a miter saw. This is due to the fact that when making furniture, the parts must be even. At the end, the master receives the required number of parts for the base and its reinforcements in the form of slats for the sofa and a folding part. In order for them to get a marketable appearance, they need to be sanded with a grit of at least 220 - a special tape is used for this. This is especially true for those parts of the structure that will be covered with oil. Before applying stain, the surface must be in perfect condition.
Preparing parts
Stage 2. Assembly work to form the base
For assembly, dowels and a grooveless joint-to-joint method are used. A special jig is used for the holes. The drill is taken based on the requirements for the diameter of the dowels. The fit into the groove should be tight. The criterion for a correct connection is that you have to use a hammer to adjust the hole.
First, the back and flat side are connected and glued together using clamps. Next, they assemble the volumetric shelving and shelves into one whole. The upper part of the first is attached to the frame and dowels are used for this.
Precision required when working
You need to join the parts on a flat surface using dowels and glue. To proceed to the next assembly step, you need to wait until the surface is completely dry.
Wooden dowels and glue are used for assembly.
Attaching the side bar
Assembling the second side panel
Stage 3. Puttying and oil treatment
The holes are puttied and a spatula is used to ensure that the composition lies evenly. The mass dries and then is sanded.
In order to improve the structure of the wood, it is treated with oil. You can use Danish Watso brand oil, which dries quickly enough and gives the structure protection from moisture. The composition itself is colorless and emphasizes the natural structure and shade. It is possible to use tinting oils. The oil is applied in 1-2 layers and each layer is allowed to dry. It is advisable to use a dry, lint-free cloth to remove excess oil without compromising the appearance of the sofa. To process wood efficiently, you will need a wide brush, a cloth or a kitchen sponge (not the smallest size).
Processing is carried out with special compounds
Stage 4. Arranging the base of the sofa bed
The base for the lamellas is made by alternately connecting the parts and the frame joint to joint. The corners must be fixed during drying, using support from the remains of the board. Such temporary support will prevent the frame from moving in the wrong direction.
Screw the strips to install the base
Next, the slats are attached to the base. The distance between them is adjusted naturally - between the two slats, one is placed flat and two on the edge. Glue is used for fixation.
Next, the slats are attached to the first half of the bed
The glue provides additional fixation of the lamellas
Stage 5. Operation of the sliding system
In order for the sofa to be used as a sleeping place, the main part is first attached - a wide front board. Create 2-3 stops on the floor and lower the frame onto them so that the board is pressed tightly and does not move.
Next, lay the remaining lamellas with a gap. It is imperative to check the operation of the entire system. If the sofa does not turn in the desired direction without problems, the retractable part can be equipped with wheels. At the same time, the façade becomes narrower.
It is necessary to check the distance between the parts of the base of the sofa bed
The assembly is completed by testing the layout mechanism
The assembly of the sofa bed has come to an end. All that remains is to sew sofa cushions or lay two narrow mattresses on the base so that you can sit comfortably on it.
Unassembled sofa
Assembled sofa
Pillow
In my case, a cover made of furniture fabric with a “Zipper” lock with a linear Velcro fastener was used. Pillow size (finished) 400 x 600 mm. The filler is Super Pooh balls, which we place in a low-density spunbond case and then stitch it on a sewing machine, cutting off the excess with scissors. You can use other types of tightening - point or using buttons. As a filler, you can use Super Pooh comb (holofiber, as we did when stuffing pillows for the back of a corner sofa). Many (to save money) use a mixture of foam rubber crumbs and padding polyester; in this case, it is better to sheathe a spunbond cover with padding polyester in several layers. The cover for the filler (instead of spunbond) can be sewn from calico fabric.
Living room sofa: do it yourself
To make a sofa for the living room with your own hands, you first need to make a drawing and calculate all the dimensions. Then, taking this data into account, parts of the future sofa are cut out of wood slabs or thick plywood.
The parts are assembled into a frame, fastened with self-tapping screws. They make a retractable part, attaching the necessary fittings and wheels. Guides are installed in the frame.
Foam rubber and padding polyester are cut to size. The foam rubber is glued to the base, covered with padding polyester on top and covered with fabric. The fabric is secured on the underside with a stapler. This mattress is used for the pull-out part. For the rest of the structure, soft pillows and mattresses are also made. A detailed video will help you make a sofa for the living room with your own hands.
Options for converting a bed into a sofa
When planning to make a sofa out of a bed, keep in mind that its size and shape will directly depend on the dimensions of the bed and its external characteristics.
The design of the headboard, the method of fastening the parts, the material used in the manufacture - all this matters and influences the selection of options for converting the bed into a sofa. There are several available ways to modify a bed on your own.
Let's look at the simplest and least expensive, but suitable for novice craftsmen:
- Straight two-seater sofa with wooden elements. This option is suitable for those who have an antique sleeping bed, with a beautiful wooden and carved headboard. If the bed is broken, tired or does not fit into the updated interior, you should not throw it away. Update and remake it into a Provence style sofa. We use the headboard as the back of the sofa, the opposite part will go to the sides of the updated product. A comfortable seating depth for the sofa is from 70 to 100 cm. Adhering to the given dimensions, saw off everything unnecessary from the sleeping area. Fasten all the elements, strengthen the frame if necessary. The wooden base for the sofa is ready. All that remains is to sew the seat covers and back cushions. Cut out the thick foam rubber prepared in advance and cut the covers according to its size.
- Straight single sofa made from a crib. A good way to add something that has gone out of use. The children have grown up, but they don’t get around to putting them in the attic. With the help of simple manipulations, the crib will turn into a comfortable place for an older child to read or play. All you need to do is unscrew the front wall of the crib, leaving the back and sides in place. Additionally, place a sheet of chipboard cut to size on the seat, fasten the structure with bars or metal corners. This is necessary for the stability and strength of the product, since the children's bed is not designed for heavy loads. Place the mattress in place. It will become a soft seat. Several pillows of different colors and sizes will add special comfort.
Making a sofa book
The easy-to-use sofa model is very popular. In addition to boards, beams, MDF sheets and various consumables for its assembly, you will need to buy transformation mechanisms.
The first step is to prepare the wood for the wooden frame of the book (seat, back, armrests, drawers for linen). We twist the bars, reinforce them with transverse slats, and nail a sheet of plywood to the bottom. The resulting cells will be drawers in the sofa.
We begin assembling the sliding base from the seat. You will need to make two identical structures with slats that will hold the mattress. We cut the armrests out of chipboard boards strictly according to the size of the drawing, then we knock down a frame for them. When all the parts are ready, you can begin assembling the Eurobook folding sofa and installing the transformation mechanisms. All that remains is to make it soft and stylish using foam rubber and upholstery fabric.
What should you know before you start creating a sofa?
It’s not at all difficult to assemble children’s furniture with your own hands according to the drawings. To make a sofa you do not need any complex devices or special materials. There are numerous stores where you can purchase chipboard and natural wood beams, as well as all kinds of components, transformation mechanisms, upholstery and everything else that may be required.
Assembling the sofa
– Installation of the reclining backrest – install the reclining backrest in the “sleeping” position, aligning it with the side bars of the box and the end of the roll-out seat, secure the card loops to the end board of the box with 32 mm SHSGD self-tapping screws. (8 pieces for 2 loops). – Installation of the main backrest to the frame is carried out with bolts M 8 x 85 (+ washers d. 8 with an increased field, 2 pcs. per bolt). Before installation, it is necessary to install bars 30 x 60 x 200 to the back wall of the box (or to the main back - as it suits you), securing them with self-tapping screws (drill holes for the bolt in the bars along the existing ones). These bars are necessary to distance the main back from the box and the roll-out seat, so as not to have a braking effect with the plane of the back relative to the roll-out seat during transformation.
The article belongs to the site NovaMebel74.ru
You can leave your comments and questions in the Guest Book
Drawing of a sofa box
- The end and side boards (1) (2) are made of pine, connected with a tenon (possibly without a tenon, using self-tapping screws ШСГД 75 mm, 3 pieces per end, while gluing the ends with PVA wood glue). Instead of boards, you can use 16 mm. Chipboard or plywood.
- The fiberboard of the bottom is attached around the perimeter and to the bottom block (6) with bracket No. 16 (can be 25 mm SHSGD or nails). The bottom can be decorated with fabric, or instead of the usual fiberboard, you can use a treated one (laminated or painted). When decorating the bottom with fabric, it is necessary to fix the box boards at an angle of 90 degrees. (checking the equality of the diagonals), upholster with fabric with slight tension around the perimeter and then install and secure the fiberboard bottom.
- The guide bars of the rollers (3) are attached to the planes of the side boards (2) with 50 mm SHSGD self-tapping screws. The bars have cutouts for fixing the rollers and at the same time allow you to remove the load from the rollers (in this case, the rollers work only during transformation; in other cases, the load is taken not by the rollers with guides, but by the box boards and the bars of the roll-out seat frame).
The support bars (4) are attached to the plane of the side boards (2) with 50 mm SHSGD self-tapping screws. Plastic supports ST 35 ШБ (35mm) (5) are screwed into the support bars (from the bottom).
- PPU 10 mm. (8) is attached to the boards (2) using bracket No. 10 (can be glued point by point with glue)
- Do not use tenon joints on workpieces.
- use laminated chipboard or plywood instead of solid wood blanks.
- do not use cutouts in the guide bars of the rollers (3); you can install straight bars, securing on them any clamps that prevent the rollers from rolling back
To reduce time costs you can:
