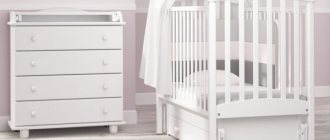
With the arrival of a child in the family, the life of his parents changes radically, new worries and concerns appear, because it is necessary to provide the baby with everything necessary. A newborn spends almost all his time in a crib for the first six months, so choosing one is one of the main issues that worries new mothers and fathers. The wide range makes choosing much more difficult.
It has long been known that a child quickly falls asleep to rhythmic movements, so it is recommended to choose a crib with a rocking function. If the child is worried and wakes up, you can rock him to sleep without getting out of bed. Now specialized stores sell improved traditional models - cradles and rocking chairs on runners. Such cribs have many disadvantages: they move by inertia from rocking for a short time, the movements are uneven, non-rhythmic, and marks remain on the floor.
A more modern and convenient option is a crib with a pendulum mechanism. It contains bearings that make movements soft and smooth; the bed (lower part) remains motionless.
There are two directions of movement of pendulum beds: longitudinal - from head to feet and transverse - left and right. This article will help you decide which pendulum is better - longitudinal or transverse. We will use the opinions of doctors as the main criterion. In addition, detailed instructions for assembling the longitudinal pendulum are given here. So let's get started.
Crib with longitudinal swing mechanism
When a mother rocks her baby, she makes longitudinal movements - from the legs to the head. When rocking in a stroller, similar movements are also performed. That is, such rocking is more familiar for the child, so he falls asleep faster under it, sleep is stronger and healthier.
These cribs are not compact. They take up a lot of space due to the fact that they have to make an indentation from the wall, taking into account the amplitude of the swing.
How to disassemble a children's bed
The easiest way to disassemble a bed is in the form of a playpen.
The model is bought for a child. Assembling and disassembling the playpen does not take much time. To quickly disassemble the playpen, you will need a wrench and a furniture wrench of the required diameter. Initially, you need to disconnect the base with the drawers, after which the side panels and backs are removed. Next, the fastening of the base under the mattress and the long sides are disconnected.
Every man can disassemble a bed, regardless of the model. One of the main rules when dismantling children's furniture: you absolutely cannot rush. If you rush, you can damage the wooden covering.
It is best to disassemble in accordance with the instructions included with purchase. If problems arise and you cannot disassemble the bed yourself, we recommend that you contact a specialist.
Crib with transverse pendulum
These cribs are perfect for those who count every square meter, because they take up less space than the previous model.
Another advantage is their autonomy: upon waking up and tossing and turning in their sleep, the child sets the crib in motion, and it begins to rock, thereby lulling the baby to sleep. But children learn to roll over only by 3 months. This option is very convenient for mothers, because they don’t even have to go near the crib.
A house-shaped bed is a preschooler's dream. You can do it in just half a day
Step 1. Making the walls of the house
We took four wooden blocks, each 1200 mm long. They will act as supports, the vertical structure of our bed.
To make the gable roof beautiful, you need to saw off the top edge of each of the supports at an angle of 45 degrees. First we marked the cutting line using a square and a pencil.
Step 2. Making the roof
For the roof, take four wooden blocks 730 mm long and repeat the same procedure: the outer edge of each block must be cut at an angle of 45 degrees.
Advice:
Go through all cuts immediately with sandpaper.
We glue the joint between the roof and the vertical support and additionally secure it with a 4.5x30 mm self-tapping screw. Screw in the self-tapping screw, departing 3 mm from the joint line of the two wooden roof parts. Screw in smoothly, without pressure, so that the wood does not delaminate.
Advice:
Use a vice to hold the structure in place while you drill. Use good drill bits and try not to drill too fast.
When you screw the two roof slats to the two supports, you should end up with a house frame like the one in the photo above. The children's bed in the shape of a house is gradually taking shape.
Pendulum selection criteria
When choosing which pendulum is better - longitudinal or transverse, you should pay attention to the following aspects:
- the location of the mother relative to the crib during rocking;
- the size of the room where the child’s bed is located;
- baby's reaction to different swing directions.
It is more convenient to rock the crib in the direction away from you - towards you, rather than left and right. Therefore, if the place for mom is located on the side of the crib, then it is better to choose a transverse pendulum, and if at the head, then a longitudinal one.
If there is plenty of space for a crib in the bedroom, then you can afford to install a crib with a longitudinal pendulum, and if the room is small, then a transverse pendulum is recommended.
As for the baby’s reaction: it can only be known if the pendulum is universal. You need to observe how the baby falls asleep while swinging in each direction, and determine which is better for him - longitudinal or transverse. But this selection criterion is unreliable, because many different factors (for example, well-being) can influence how a baby falls asleep.
Hinged
A crib with hinges is a “classic” option for children under three years old. Smooth rocking motions soothe the baby, promoting healthy, sound sleep.
The bed on hinges is assembled as a classic option
Assembly of the hinged version takes place in several stages:
- To assemble the base, you will need three main sides: two sides and one back, attach to the bottom. At the same time, it is worth considering that the grooves on the sides should go outward ;
- The rear and front backrests are attached to the body with screws;
- The bottom can be installed at two levels , providing different depths;
- Firmly secure the sides to the base of the crib;
- For stability, it is recommended to install fixing elements at the bottom of the sides.
Doctors' opinions on pendulum beds
The main factor determining the choice of a pendulum is its effect on the baby’s health.
Doctors advise avoiding swings and pendulum beds altogether. They argue that the child should be able to fall asleep on his own, without any additional outside influence. Doctors recommend rocking a child to sleep only if there is a need: babies have a very excitable nervous system, and sometimes it cannot slow down on its own.
But if you have to choose which pendulum is better (longitudinal or transverse), then doctors recommend the longitudinal one. The vestibular system in children is not yet developed, so it must be handled with care. With longitudinal rocking, the baby's head does not rotate left and right, and, accordingly, there is no negative impact. In addition, if you pump from head to feet, intracranial pressure is normal.
Solid wood bunk bed. Detailed drawings.
The question of buying a bunk bed arises in families with two or more children and a small living space. It will significantly save room space and thereby leave more space for children to play. And it’s not at all necessary to run to the store to buy something. It can be done by any craftsman with a minimal set of tools.
What models of bunk beds are there?
- Traditional model
The design is quite simple. It is made entirely of solid wood, which is important for a children's room. Such a bed must be stable, as it will serve not only as a sleeping place, but also as a playground for children's games. To increase stability, it is recommended to attach it to the wall.
Drawings and step-by-step manufacturing will be discussed below.
The design can be improved by adding drawers to it. You can store children's toys or, for example, bed linen in them.
- Bed with three berths
It has three sleeping places and is quite stable due to its widely spaced legs. The space in the room will take up exactly the same amount as a regular double bed or a fold-out sofa.
- Bed with a pull-out fourth bed.
It is an improved version of a bunk bed with three sleeping places.
The height will be like a two-tier one, and the functionality will be like a three-tier one. It has four sleeping places and will be more difficult to make than a traditional one, but it is worth it. This bed takes up a little more space than a traditional one, but it has a convenient staircase to the second tier and children will be provided with their own lockers for storing things or toys.
- Bed with table and separate work space.
They are also called loft beds. It is convenient because it has dual functionality. There is a sleeping area on top, and a spacious workspace with a table and cabinets below. This eliminates the need to purchase a separate bed, desk and cabinets. It significantly saves space in our apartments. Its disadvantage is that it has only one sleeping place. As a rule, they are made of plywood and chipboard.
A loft bed can be significantly improved by adding another pull-out bed. This way you get two sleeping places and plus a workspace area. True, there is a significant drawback here too. It is impossible to use the table until you roll out the lower berth.
Drawings of a classic bunk bed
This option is the simplest and is suitable for both children and adults. Inside the bed measures 2005 x 705mm. This size is necessary to fit a standard mattress with dimensions of 200x70cm.
Below is the simplest design, which is made without grooves and various cuts. It can be made by almost any craftsman with a minimal set of tools.
The boards can be secured using wood screws. You can use yellow galvanized screws or hex head screws. Hex screws are also called “capercaillie”. Screws will be needed in two sizes - diameter 6mm, length 110 and 160 mm. Do not use black wood screws. They are fragile and do not hold shear loads well.
If hex head screws are used, then to hide the hex head, you will need to drill holes in the boards with a feather drill according to the picture below. An oversized flat washer must be placed under such a screw. This washer has an outer diameter of 18mm and an inner diameter of 6.5mm. Taking into account the washer, the hole should be 20mm.
Which pendulum is better - longitudinal or transverse?
When deciding on the type of pendulum that is suitable for a child, you need to take into account all the factors listed above. And if the dimensions of the room are small, then parents will most likely choose a transverse swing pendulum. And the child can fall asleep under it faster and sleep more soundly. But the baby’s health should come first, so it’s better to choose a crib with a longitudinal pendulum (and even if the size of the room does not allow it, it is advisable to save space on some other piece of furniture). In addition, when rocking longitudinally, the child gets the feeling that he is being rocked by his mother, because this is more familiar.
In order to “re-make” a crib we will need:
- long ruler
- marker
- a piece of cardboard or stencil paper
- drill with attachment for cutting round holes
- brushes with synthetic bristles
- gloves
- optionally, a tray or other container for paint.
We carefully select paints and varnishes.
- Paint-glaze: be sure to check the certificate for permission to paint children's furniture and toys. We took Belinka Interier glaze in different colors, like this;
- Safe water-based varnish for furniture : it must be especially resistant to mechanical stress so that the baby cannot break off a piece. We took Belinka Interier Lak, here it is.
Assembling a crib with a pendulum
Having decided which pendulum - transverse or longitudinal - is more suitable, you can begin assembling the crib. Its main parts include: body, supporting part of the mattress, sides, legs, pendulum.
As for the preparatory work: you need to start assembling in the room where the crib will be, so as not to move it later or scratch it. When unpacking, small parts should be placed on a white cloth or paper to avoid loss. After reviewing the instructions, you need to check the presence of all parts and fasteners. All parts should be inspected, including parts of the pendulum mechanism. If some are missing, there are nicks or damage, you need to exchange them or return them to the store. After all, the baby’s safety depends on it.
Assembly begins with studying the diagrams, photographs, drawings in the instructions (if this is not in the instructions, you need to contact the store or look at the store/manufacturer’s website).
You need to start assembling from the back wall: determine where the top and bottom are, put it with the inside facing up and screw the sides. They must be screwed very tightly, because the safety of the child depends on this.
Then the bed (the supporting part of the mattress, which is a wooden or plywood rectangle) is screwed on. The boards are placed on the grooves at the back of the crib. The screws are loosely screwed into the stock (lightly tightened).
The front part is inserted into the side grooves, the screws on the supporting part are tightened.
This structure is inverted to accommodate the pendulum.
Required Tools
To assemble a crib correctly and efficiently, you will need to prepare the following tools:
- scissors or a stationery knife - for unpacking boxes;
- a set of screwdrivers and a ring wrench (a screwdriver with a set of attachments would be a convenient replacement);
- durable equipment, hexagon, cross bit;
- tape measure for accurate sizing;
- pliers for removing incorrectly inserted fasteners.
Many modern cribs are equipped with Euroscrews with hidden heads and internal hexagons, so special keys are useful when assembling them. The level will help to achieve perfect evenness of the connected parts. Depending on the type of children's furniture, the components vary, so the composition of the tool set may vary.
Assembling the frame
Let's start with a 40x95 mm board. Let's cut it for the legs. We should get 2 elements 910 mm long and 2 410 mm long.
Blanks for legs
From a 45x20 mm board we will make the perimeter of the bed and a couple of blanks for the headboard. Since the factory cut of the workpieces is not very even, I will trim the workpieces manually with a Japanese saw. The peculiarity of this saw is the presence of very small teeth and their “multi-directionality”. This saw gives a beautiful thin cut.
I trim blanks with a Japanese saw
The following frame parts: 200 cm and 165 cm. We made them from boards with a section of 145x20 mm.
Blanks for the frame
We will also prepare the parts on which the slatted bottom of the bed will rest, an element for supporting the slats and a stand. The stand will be attached to the support in the center of the bed. It is needed for greater reliability.
1. Two sidewalls on which the slatted bottom will rest; 2. a beam in the middle that will take on part of the load
All ends and rough surfaces should be sanded. We will also soften the edges of the details. Using self-tapping screws, we attach the slats to the longitudinal walls of the frame, on which the slatted bottom will rest.
I attach supports for the slatted bottom
To fix the legs to the bed, I used corners that would provide rigidity in the diagonal direction, and in some places I fastened the parts with an oblique screw.
We assemble the structure using corners and fastening with an oblique screw.
I highly recommend buying a jig for fastening “on an oblique screw”. You will need it more than once
The legs of the bed protrude 1 cm above the frame. We make the appropriate markings and attach the parts to the base of the frame. We connect all the parts of the bed frame. I assemble the parts at the headboard using an oblique screw and a corner, at the foot - only with an oblique screw.
Assembling the frame
The frame is ready
I'm trying on the slatted bottom. 6 hours have passed since the start of work
The bed frame was coated with teak oil on site. I brushed the boards for the headboard to emphasize the active wood grain. I use nylon brushes for this. As a result, we obtain a surface ready to be coated with a decorative composition.
I didn’t start dusting the apartment. Brushing boards for headboards outdoors
I connect two boards to each other “with an oblique screw” and fix them on the frame.
Connecting the headboard and legs of the bed
Cover the finished frame with oil.
Simple DIY wooden bed. If you don’t drink your husband, go ahead and drink it yourself!
A large, comfortable wooden double bed costs less than 4,000 rubles. Is this possible? Of course available! We will need a minimum set of tools, pine boards, screws and wood oil.
Convenient can be cheap. I made a bed that cost no more than 4,000 rubles.
People often tell me something like: “If we had such tools or such equipment, we would also do a lot of things!” I have a lot of tools in my arsenal that I use in my work. But in this case I would like to show how to make a good bed using only the most necessary ones.
Individual instructions
The bed assembly manual is the main document included with the furniture. You need to follow all the rules to avoid serious mistakes. Otherwise, the bed will have to be reconstructed, otherwise the safety of the child will be in danger.
Instructions for assembling the bed clearly show how to connect all the components together. The backs, railings, bases and even the parts of the boxes are marked with numbers. They are easy to distinguish. Devices and devices have their own designations.
The process of how to assemble a bed is usually shown in the drawings. On them you can see parts attached to the side and rear walls. There are diagrams showing the correct installation of the bottom and box.
The process of assembling cribs must be carried out in accordance with all the rules of the application. There is no need to rush during installation.
Preliminary work
The design of children's beds varies. For example, pendulum-type options are slightly different than transformer models, rocking chairs or furniture with hinges. The process of assembling purchased products occurs in 2 steps. It includes preparation of components and installation of parts.
In order to assemble the bed in convenient conditions and perfectly, you must do the following:
- remove unnecessary children's items;
- move excess furniture, thereby freeing up space, which is important for ease of installation.
Carry out assembly in the place where the bed will stand later. In this case, there will be no need to drag it to another room after finishing work.
It is important to carefully check all the iron and wood components that are included in the kit. Their number must correspond to the information indicated in the annotation. If you find a missing item, you must call the store immediately.
It is also worth making sure that there are no defects in the wood surface. To do this, all pieces of furniture are carefully checked for integrity. If chips or old cracks are found, it is necessary to return the product, as damage threatens the safety of the baby.
Then you should sort all the parts. Walls, side parts and other elements must be assembled below on the floor into separate groups, taking into account shape and size. If there is no diagram for assembling the bed, then you need to find it in available sources of information. Compliance with the assembly method will help avoid problems, especially for those people who are faced with similar work for the first time.
Any rules described in the instructions for assembling a children's bed must be strictly observed. Each specific model has its own personality.
Video
Sources
- https://dolio.ru/kak-vybrat-i-kak-sobrat-detskuyu-krovatku-doma-svoimi-rukami/
- https://okcomfort.com/mebel/krovati/kak-sobrat-detskuyu.html
- https://mblx.ru/kojka/malysh/1005-kak-sobrat-detskuu-krovat.html
- https://bezkovrov.com/detskaja/sobrat-krovatku.html
- https://kakchistim.ru/mebel/instrukcii-i-sxemy-po-sborke-detskix-krovatok.html
- https://otvali.ru/master-klassy/kak-sobrat-detskuyu-krovatku-mayatnik-instrukciya-foto/
- https://babyplayroom.ru/mebel/sborka-detskoj-krovatki-s-mayatnikom.html
- https://weller.ru/svoimi-rukami/kak-sobrat-detskuyu-krovatku-mayatnik-instrukciya/
- https://valis-mebel.ru/krovati/sborka-krovatki-s-mayatnikom.html
