When creating your own subwoofer and for its high-quality and loud sound, you should take into account a large number of important nuances. For example, what kind of speaker for the subwoofer you purchased, how correct is your box, is the amplifier power enough, is the amplifier enough power, etc.
In this article we will touch on one of the many issues that will help you get closer to louder and better bass. Namely, we will answer the question, from what material is it best to make a box for a subwoofer?
Why doesn't a subwoofer play without a box?
If we remove the speakers from the box of a working subwoofer, we will find that the bass that it reproduced efficiently will disappear. That is, a subwoofer without a box (acoustic design) does not play! Why is this happening? The subwoofer creates sound vibrations in both directions, i.e. forward and backward. If there is no screen between these sides, the sound vibrations cancel each other out. But if we place the subwoofer speakers in a closed box, we can separate the front and back of the subwoofer and get good quality sound. By the way, in a bass reflex box the box works on a slightly different principle; it reproduces sound in one direction, which increases the volume by about 2 times compared to Z/Y.
The principle of operation of subwoofer boxes
You say, why do we need this mess with frequencies, waves and boxes? The answer is simple, we want to clearly and simply demonstrate to you how the material from which the box is made affects the quality of the final result.
What happens if the box is made of poor quality material?
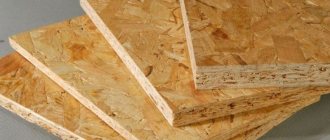
Now let's imagine that you made a box from your grandmother's closet, that is, you used chipboard material, which is only 15 mm thick. After that, a medium-power subwoofer was made from it. What will be the result?
Due to insufficient wall thickness, the rigidity of the box is reduced. When sound is reproduced, the walls of the box begin to vibrate, i.e. the entire box turns into an emitter; the sound waves that the box resonates, in turn, dampen the waves that the speaker emits from the front side.
Remember we said that a subwoofer speaker without a box simply cannot produce bass. Likewise, a low-rigid box will create only partial shielding, which will not be able to completely prevent the interpenetration of sound waves emitted by the subwoofer speakers. As a result, the output power level decreases and sound distortion occurs.
Hinge installation
Required:
- detachable or permanent hinges;
- chisel;
- carpenter's hammer;
- drill;
- self-tapping screws
Door frame assembly.
Before starting work, choose which direction the MDF door will open, i.e. towards or out of the room. Then door hinges are purchased, which have different types and, because of this, their own characteristics when inserting. To install interior doors you will need 2 hinges. And if this is an entrance structure, then to increase its strength, 3 loops are used. In this case, an additional element is mounted just above the middle of the door to distribute the load.
Next, 20 cm are measured from the lower and upper edges of the structure, and marks are made at these places. After this, the products are applied to the end of the MDF door, aligned with their beginning and traced along the contour. Then, using a sharp knife, cuts are made along the marked lines. The place for installing the hinge is cut out using a chisel and a carpenter's hammer. To do this, a recess is carefully made in the marked area with tools, the depth of which should be equal to the thickness of the loop, i.e. on average 3-5 mm. This is necessary to ensure that the loop is securely fastened and does not protrude beyond the structure.
The work of installing the loop is carried out in stages. First, small notches are made along the perimeter of the structure, of which there should be several pieces. Then excess material is removed from them. Cutting is not carried out in 1 approach. It is necessary to apply the loop to the structure each time to check, with this it is easier to achieve an ideal recess. After this, markings are applied to the places where the hinges will be secured using self-tapping screws. Then the second side of the hinges is secured to the door frame in a similar way. At the end, the MDF box is laid horizontally on the floor, and a door leaf with already embedded hinges is inserted into it. Next, using a 3 mm thick school ruler, the canvas is aligned inside the box so that there is an equal gap on all sides.
What should a subwoofer box be like?
The answer is simple. The main requirement that a subwoofer box must meet is its rigidity and strength. The stiffer the walls, the less vibration the subwoofer creates during operation. Of course, in theory, a box made of a ceramic slab or cast of lead with 15 cm walls would be considered ideal, but of course, this can be considered nonsense, since such subwoofers will not only be expensive to manufacture, but also enormously heavy.
Types and comparison of materials for a subwoofer.
Let's look at real options for materials for making a subwoofer and try to give a short conclusion on each of them.
Plywood
Better moisture resistant. In our opinion, this is one of the most worthy materials for the manufacture of acoustic equipment.
But there are a couple of downsides;
- This is the most expensive material.
- It is difficult to find plywood with a thickness of more than 18 mm.
- If the wall area is large, it begins to “ring” (additional stiffeners or spacers are needed)
MDF
Now it is gaining great popularity. It is a kind of gap between plywood and chipboard. Its main advantage is its lower price than plywood (about the same as chipboard) and good rigidity (but not as good as plywood). Easy to saw. Moisture resistance is higher than that of chipboard.
- It is problematic, but possible to find, a thickness of more than 18 mm.
Chipboard
Cheap, common material. Every furniture company has it, and you can order cutting from the same companies. This box will cost you 2-3 times less than one made from plywood. Flaws:
- Very little rigidity of the material (example about grandma’s closet above).
- Not moisture resistant. Absorbs moisture well and crumbles. It is especially dangerous if water gets into your trunk.
Assembling a box from MDF
Installation of door panels.
Required:
- roulette;
- hacksaw or circular saw;
- miter box;
- hammer and nails;
- electric drill;
- self-tapping screws
To obtain a high-quality result, the assembly of an MDF door frame must be carried out on a flat horizontal plane. There are several ways to make a door frame. Firstly, it can be assembled using a tenon joint. To do this, spikes are mounted in adjacent beams, equal in height to the thickness of the beams. Moreover, both horizontal and vertical beams must have spikes with which they are connected to each other.
Secondly, the assembly can be carried out at an angle of 450. In this case, a cut is made at an angle of 450 on the vertical beam only on one side (where it is connected to the horizontal element). In the case of a horizontal beam, the same cut is made with both sides. When determining the length of the vertical bars, which should be the same, the height of the doorway, the size of the gaps, and the thickness of the bars used must be taken into account. The length of the horizontal beam is the sum of the width of the door leaf, the size of the gaps and the thickness of each of the vertical elements. To secure the structure, you need to use nails or screws. They must be screwed in at an angle of 450.
Thirdly, the structure can be assembled at an angle of 900. To do this, a horizontal beam is simply applied to a vertical element and connected using self-tapping screws. In this case, the narthex is sawed off on parts that are located vertically. To prevent the MDF from cracking, holes are pre-drilled, the diameter of which should be 2-3 mm less than the diameter of the screw. To obtain a rigid and reliable structure, each connection point is secured with 2 self-tapping screws.
How to increase the rigidity of the box?
- The first, the simplest and most obvious. This is the thickness of the material, the thicker the material, the greater the rigidity. When making a subwoofer, we recommend using materials of at least 18 mm, this is the golden mean. If your subwoofer has a power of more than 1500w RMS, then it would not be superfluous to choose a material thickness of 20 mm or more. If you have difficulty finding thick-walled materials, you can use the following recommendations.
- An option that will add rigidity to your box is to make a double front wall. That is, the front part in which the speaker is installed. This part of the subwoofer is most subject to stress during operation. Therefore, having a material width of 18 mm, making the front wall double we get 36 mm. This step will significantly add rigidity to the box. You should also do this provided that your subwoofer has an RMS (rated power) of more than 1500w. If you have a subwoofer with a lower power, for example, 700w, the front wall can also be made double. This makes sense, although the effect will not be very large.
- Another tip is to use spacers inside the subwoofer to add extra rigidity. This works especially well when the subwoofer has a large volume. Let's say you have two 12-inch subwoofers (speakers) in a box. In the middle, the rigidity of the box will be the smallest due to the large area. In this case, it would not hurt you to strengthen the structure and install a spacer in this place.
That's all we wanted to tell you about materials for the subwoofer. If this article helped you, please rate it out of five below.
Do you want to try to calculate the box yourself? Our article “Learning to count a subwoofer box” will help you with this.
Purchased or made yourself
Making boxes for a subwoofer
Making a subwoofer box is a responsible process, but at the same time very interesting. Of course, you can always go to the store and buy a ready-made sub in a housing. But this is a matter for beginners. A professional always buys a subwoofer head separately and then makes the box with his own hands.
Note. The latter option is suitable not only for professionals, but also for people who are passionate about car audio and want to get the most out of the speaker. A subwoofer head placed in a homemade box will produce incredibly strong low-frequency sound.
Before we move on to the manufacturing process, let’s again dwell a little on the topic of purchased subwoofers complete with a housing. As has already become clear, there is no hope for quality here, but the price can attract a buyer. For some models of ready-made cases, the price is only 1 thousand rubles. Needless to say, the material of such a box cannot be expensive. The plywood is always thin, and the box itself cannot even boast of rigidity.
Note. A purchased subwoofer will not give you the right sound. And the same head, if you move it to another box you made yourself, you can connect it so that it sounds much stronger and of better quality.
Band pass loudspeaker
The third type of subwoofer, quite often used in car installations (although less often than the previous two) is a bandpass speaker. If a closed box and a bass reflex are acoustic high-pass filters, then a band-pass filter, as the name implies, combines high- and low-pass filters. The simplest bandpass loudspeaker is a single 4th order (single vented). It consists of a closed volume, the so-called. rear chamber and a second one, equipped with a tunnel, like a conventional bass reflex (front chamber). The speaker is installed in the partition between the chambers so that both sides of the diffuser operate in completely or partially closed volumes - hence the term “symmetrical load”.
Of the traditional designs, the bandpass loudspeaker, in any version, is the champion in efficiency. Moreover, efficiency is directly related to bandwidth. The frequency response of a bandpass loudspeaker has the shape of a bell. By choosing the appropriate volumes and frequency tuning of the front chamber, it is possible to build a subwoofer with a wide bandwidth, but limited output, that is, the bell will be low and wide, or it can be with a narrow bandwidth and very high efficiency. in this strip. At the same time, the bell will stretch in height.
The bandpass is a capricious thing to calculate and the most labor-intensive to manufacture. Since the speaker is buried inside the case, it is necessary to go to some lengths to assemble the box so that the presence of a removable panel does not violate the rigidity and tightness of the structure. The impulse characteristics are also not the best, especially with a wide bandwidth.
How is this compensated? First of all, as stated - the highest efficiency. Secondly, the fact that all sound is emitted through the tunnel, and the speaker is completely closed. When assembling such a subwoofer, considerable opportunities open up for installing it in a car. It is enough to find a small place at the junction of the trunk and the passenger compartment where the mouth of the tunnel can be placed - and the way is open to the most powerful bass. Especially for such installations, JLAudio, for example, produces flexible plastic tunnel sleeves with which it offers to connect the subwoofer output to the cabin. Like a vacuum cleaner hose, only thicker and stiffer.
Which box you choose for your speaker is of course up to you. And our auto studio will make this box for you.
Source: shuma43.net

