For every parent, sooner or later the question arises of increasing the functionality of children's furniture. All interior items in the nursery must become real transformers in order to justify the money spent on them and not stand unused. In addition, modern inventions can partially free the hands of busy mothers, turning them into a chair, a swing, or a whole set of furniture.
The first step is to assemble the chair, and then you can move on to assembling the table, which will be much easier to assemble.
Often, such devices can complicate the life of parents while they figure out how to assemble them after purchase. An ordinary children's high chair will be no exception. Of course, it is easy to assemble a high chair as indicated in the instructions, but it is not always included, and even if it is, it is not always clear to the user.
DIY manufacturing steps
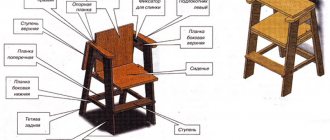
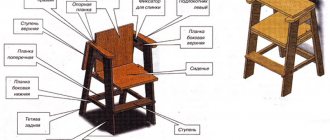
When making a wooden chair, beginners should use step-by-step instructions with diagrams, indicating the necessary tools and materials. A detailed description will help you avoid many mistakes, as well as financial losses. You can make a transformer, a stool, or a folding chair with your own hands.
Transformer for feeding
Transformable children's furniture should be as stable and reliable as possible. The model is made from wooden beams and boards, the elements are fastened with dowels and screws; the tools you will need are a hacksaw and a grinder. The work is carried out in stages:
- The beams are cut in accordance with the diagram, the cuts are carefully polished.
- Curves are cut out of the boards. The easiest way to do this is on a carpentry machine, so it’s better to turn to specialists.
- At the joints, holes are made corresponding to the parameters of the dowels. The depth should not exceed 40 mm.
- The assembly of a children's chair begins with fastening the legs with the lower crossbar, and the curves are fixed on the upper one. Finished parts are connected using wood glue.
- For the seat you need 6 elements with parameters 300x250 mm, which are connected with screws and a metal strip.
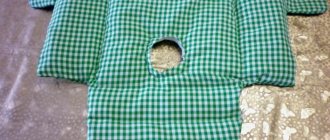
To make the high chair even more comfortable, the furniture is complemented with a soft seat. To do this, you need to stick a layer of foam rubber on the back and seat, then trim the surface with textiles. Preference should be given to practical fabrics that are easy to clean from dirt.
Stool
To make a chair with your own hands, you need to prepare wooden boards or plywood, self-tapping screws, a sander, a jigsaw, and paint and varnish compounds for finishing. The work is carried out as follows:
- The material is carefully polished, sawn in accordance with the diagram, and the joints of the elements are marked.
- All edges of parts are processed with a grinding machine.
- Wood blanks are coated with stain and varnish.
- All elements are connected to each other using self-tapping screws.
Making a stool with your own hands is pretty quick. The model is considered one of the simplest, so it is suitable for beginners. Such furniture should always be placed on a flat surface, otherwise the risk of falling increases.
Folding chair
Models for children often have a practical folding design. Such furniture is made from wooden boards, the parts are connected with bolts, the tools you will need are a jigsaw, a grinder, and a drill. Instructions will help you make this cute children's highchair with your own hands:
- All parts are cut out in accordance with the selected drawing. The surface is carefully polished.
- The slats are fixed to the support bars that form the seat.
- The two front legs and the back form a frame; slats are attached to the supports.
- Two crossbars are attached to the rear legs. Both frames are connected with bolts.
- The seat is fastened to the front frame using bolts screwed into specially made holes. This ensures the process of folding the structure.
The need for a high chair
A huge number of both young and already wise parents will tell you with confidence that such a chair is simply necessary for activities with their baby. It is not surprising, because this design has a huge number of positive properties:
- Small dimensions - this will save space in the room.
- Ease of use and versatility - at this table your baby can eat and play.
- Saving money.
- Physical and psychological safety - the mother does not worry that something might happen to her baby, because as long as he sits on the high chair, he is safe.
- The ability to have contact with your child while doing household chores saves a lot of time.
- The child feels like he belongs when sitting at the table with his parents.
- The baby unconsciously learns the basics of etiquette - this will help him in the future, for example, when he goes to kindergarten.
Device Features
The kit includes a special removable mattress for the seat, which allows you to quickly change a dirty one. Thanks to the simple and reliable design of the fasteners and the presence of the necessary removable parts and footrest in the kit, the table will be very convenient not only for the baby, but also for parents. The chair's seat has several positions. So, it can be secured in the position of a rocking chair, a low or high chair. It is worth noting that the chair is made exclusively from safe materials, and due to its strength and high quality, it is quite resistant to shocks and falls.
Let's move on to assembling the table
Many parents, having made a purchase for their child, cannot figure out how to assemble a high chair. This is understandable, because all models, as a rule, are sold disassembled.
Before the assembly procedure you will need the following materials:
- Wooden crossbars.
- Soft seat for baby.
- Small and large tabletops.
- Euroscrews and a key for them.
In order to assemble such a mini-installation, you must first remove all the parts from the packaging. As a rule, the chair itself is assembled first - the rest of the work will not be so difficult.
This model of chairs has two armrests, which in turn have triple vertical wooden rods. The edge located closest to these rods is called the anterior edge.
- Connect the armrests using a wooden crossbar. You need to turn it with two bolts from the front side of the armrests from below.
- Attach a wooden crossbar to the bottom of the seat.
- Place the soft pad in the base so that the seat belt is on both the front and bottom.
- Secure the seat with four bolts, the back and armrests with two.
- Now all that remains is to assemble the feeding table. For this purpose, the tabletop must be placed on top and snapped into place with grooves in its bottom directly on the armrests.
- Place the almost finished structure on its legs, screw the very last part with the wall - the structure must remain stable.
- Connect the legs of the structure using the remaining jumpers and secure everything with bolts.
“Baby”
Before assembling the “Baby” high chair, you need, as in the first example, to lay out all the parts in front of you. There will be much more of them here than described above, but the advantage of these details is that they are all already numbered (2-9 - parts of the tabletop; 11 and more - parts of the chair).
The collection process is as follows:
- Arrange all the parts by numbering separately from each other.
- Align and twist parts with holes that have the same serial numbers, starting with the number 12.
- Connect the parts numbered 13.
- Fasten the holes of parts 11 and 14 respectively. The end result will be a 4-piece part.
- Now it is possible to assemble a high chair by attaching a soft seat for your child to a wooden base - the crossbar should be between his legs, and the safety strap should hang down. The seat must be secured with six bolts.
- The last stage of the initial assembly of the structure is attaching the table to the armrests using two bolts.
- Next, the stand for the table is assembled. To do this, select 4 elements with cell numbers 3, screw them together with bolts. As a result, you will get a part that resembles the letter H in appearance.
- The second part is twisted in the same way according to the numbering of the same cells.
- Ultimately, all that remains is to assemble the feeding table by connecting the main assembly parts.
For every parent, sooner or later the question arises of increasing the functionality of children's furniture. All interior items in the nursery must become real transformers in order to justify the money spent on them and not stand unused. In addition, modern inventions can partially free the hands of busy mothers, turning them into a chair, a swing, or a whole set of furniture.
The first step is to assemble the chair, and then you can move on to assembling the table, which will be much easier to assemble.
Often, such devices can complicate the life of parents while they figure out how to assemble them after purchase. An ordinary children's high chair will be no exception. Of course, it is easy to assemble a high chair as indicated in the instructions, but it is not always included, and even if it is, it is not always clear to the user.
Materials
In terms of ease of processing and environmental friendliness, among materials for the manufacture of children's furniture, wood and its derivatives undoubtedly hold the palm. Therefore, it is most often found. However, you cannot choose just any tree - this is also worth thinking about before starting to make it. The most popular among all types of wood is beech. It has the strength of oak, but it is easier to process and costs less. In general, it is deciduous trees that are considered priority. Among inexpensive options, birch is often chosen; linden can also be considered.
Spruce and pine are suitable for making furniture from coniferous wood, but the resin contained in any such wood is dangerous - it can stain clothes, and it can also pose a health hazard. Regardless of the specific species, choose a uniform tree, without knots or cracks, with an even texture.
The seat material may be similar to the body material, or it may be fundamentally different. In order to save money and achieve greater flexibility, the seat is also made of plywood, and even chipboard. When choosing them, give preference only to the most durable types, but remember that in any case they are inferior in durability to solid natural wood.
There is also a seating option made from bottles - both whole and cut. Harmful plastic, present as garbage in any apartment and polluting the environment, could get a second life, especially since its strength and durability are very high. This option is still much less common due to the difficulty of securely fastening individual parts, as well as the not very attractive appearance of the finished product.
Assortment of chairs
Nowadays in children's stores you can find models of high chairs for feeding in various configurations and from different manufacturers. But how to choose the best chair in this situation? First you need to decide on the standard classification of the types of this feeding furniture.
Wooden high chair
This is the standard model discussed earlier. It is a seat with high legs that can be placed next to a common table or left alone if it is equipped with a table top.
Thus, children's high chairs with a table top are very convenient to use anywhere, and if it is also removable, then this is additional comfort for both the baby and the mother. Children from six months to three years old will feel great in such a high chair.
The advantages of this type of feeding furniture are:
- hypoallergenic and absolutely environmentally friendly material;
- affordable price;
- the ability to fit into any room design.
But, such designs have significant disadvantages, among which are:
- the possibility of rapid damage to glued fasteners;
- difficulty in cleaning untreated wood;
- lack of adjustment of seat height and backrest position;
- difficulties during transportation.
Plastic chair on wheels
These models of feeding seats are equipped with wheels, which makes it easy to move the product and place it in a convenient place. In such a seat, a child can eat even up to five years old due to the versatility of the design.
This children's furniture is large in size, but due to the presence of a folding mechanism, there are no problems with storage and transportation. The vast majority of these children's high chairs are equipped with mechanisms for adjusting the position of the backrest and seat height, which makes them as convenient as possible to use.
It is very easy to care for the plastic model. Typically, just wiping it with a damp cloth is sufficient. If necessary, the seat cover can be removed and washed.
Among the disadvantages are the possibility of plastic wheels leaving marks on the floor covering and the high cost of such furniture. Regarding the first disadvantage, we can say that various models of children's high chairs are now being produced with both plastic and silicone wheels. This allows them to be used in rooms with any floor covering.
Transformable baby high chair
Transformers are commonly called high chairs, which, if necessary, can be disassembled into two full-fledged items: a table and a chair. They are convenient to use when the child has grown up and no longer needs a high chair.
Advantages of this type of children's highchairs:
- versatility;
- resistance to various types of damage and impacts;
- unique appearance;
- low cost, if we talk about models of this type:
But such furniture takes up quite a lot of space, so it is not suitable for a small kitchen. In addition, transformable chairs do not have backrest and height adjustment. Also, such products are difficult to transport due to their massiveness and impossibility of folding.
Wall chair
This version of furniture for a child will be an excellent solution for those who have cramped conditions and cannot afford a more massive model. This type of chair is a seat attached to the edge of a table.
This version of children's furniture is compact, allows you to significantly save space, and is inexpensive. But its popularity is not so great due to the impossibility of attaching to some tables, the exclusion of use for active children and the presence of weight restrictions. By the way, not every mother will decide to install such a structure and leave the baby in it while feeding.
Travel high chair
Chairs of this type are made entirely of fabric, making them easy to fold and easily transported. This highchair can be attached to any adult chair and can be adjusted for children of different weights and ages.
Booster chairs
These models are very convenient if there is not enough space in the kitchen for a full-fledged model. The booster is simply attached to an adult chair, but it differs from the road model in that it is made of plastic. A booster chair has its own frame, often supplemented with metal elements and equipped with a tabletop.
Criterias of choice
When choosing the right baby high chair for feeding, it is important for parents to take into account a number of nuances that will help them get maximum comfort from use. Safety
It is important to immediately check the high chair for stability. It is necessary that there is a jumper between the legs, and the wheels are equipped with a locking mechanism.
A useful addition would be to adjust the seat height, which will allow you to leave your child in the chair without fear of him falling. Seat belts are also needed for the same purpose.
It is best to purchase models of children's high chairs with smooth outlines, without sharp corners. In addition, a footrest is needed so that the baby can lean on it. It wouldn't hurt to have a bridge between the legs to prevent the child from slipping.
Tabletop
It is best to buy baby feeding seats with removable tabletops. This will allow the child to sit at the common table. If you can remove the seat itself and the tabletop, it is easier to wash.
It is necessary that the tabletop be equipped with high sides to prevent the contents of plates and mugs on it from spilling or spilling onto the floor.
Seat cover
As a rule, all children's high chairs are equipped with bright, soft covers. It is necessary to choose ones that are made not from ordinary fabric, but from leather or its substitute, so that dirt can be dealt with faster.
Backrest adjustment
This is an important aspect for those mothers who plan not only to feed the baby in a high chair, but also to leave him there for independent play and even rest. Most often, children's products of this type are equipped with several adjustment options that allow them to be expanded to an almost horizontal position.
Folding mechanism
This addition to a children's high chair is necessary if parents plan to transport it or store it assembled. So, having assembled the chair, it will be convenient to put it away in a secluded corner, and, if necessary, take it out and disassemble it again.
Important! The mechanism must be checked in the store for serviceability and speed of operation.
Step-by-step instruction
You and I will make a combined high chair for feeding your baby with our own hands. That is, this model consists of a low table, on which a small chair with restrictive rings is installed. This is the most common and convenient option for a high chair.
During the work we will need to separately build a small table and chair. It can easily be transformed into a high-legged chair for dining, and when the baby grows up, it can be used as a table with a chair for playing games.
Manufacturing of wooden parts
So, the work of making a high chair begins with the preparation of the necessary parts. We will make them from:
- timber with a cross section of 20 by 20 cm. These parts will be used to make legs and crossbars;
- small boards 2.5 cm thick for making armrests;
- fiberboard sheet for making a back and seat;
- plywood and countertops.
To assemble the highchair you will need the following parts:
- legs (4 pieces, length 39 cm);
- cross bars (3 pieces, 20 cm long);
- 4 rounded elements;
- table top dimensions 20 by 34 cm
- top crossbars (2 pieces, 22 cm each);
- lower crossbars (2 pieces, 34 cm each).
To make the table we need the following parts:
- legs (four pieces, 50 cm each);
- cross slats (four pieces of 34 cm each);
- plates (four pieces, 41 cm each);
- tabletop dimensions 38 by 45 cm.
After preparing all the parts, they must be thoroughly cleaned with a grinder or sandpaper. If desired, the parts can be stained and varnished or simply coated with water-based enamel.
Attention: you can round off the parts of the highchair using a special machine or using an electric jigsaw. In no case should children's furniture have sharp corners so that the child cannot be injured by them.
The parts are fastened together with dowels (purchased at any furniture store) or self-tapping screws.
How to assemble?
After manufacturing the parts, you can proceed directly to assembling the product. The high chair is assembled in the following sequence:
- Assembly of the chair begins from the sides. To do this, you need to prepare 2 legs, 2 curves and two upper and lower strips for each of the sidewalls. Each side panel is assembled separately: the legs are connected to the bottom crossbar. Next, the rounding is attached to the top crossbar and the two parts are glued together. The second side is assembled in the same way and the parts are set aside for a day until the glue has completely dried. Next, all parts are sanded again with sandpaper to accurately get rid of all irregularities and flaws.
- Now let's start making the seat. To do this, rectangles measuring 30 by 25 cm are cut out of chipboard. We round off their two corners along the longest side, sand all the ends and glue the two plates together. Next we put it under the press. Afterwards, we secure the finished parts with screws. We connect the sidewalls with transverse strips.
- The table is assembled according to the same principle as the chair. Upper and lower strips are attached to the legs.
- The side parts of the table are fastened with transverse bars 34 cm long.
- All sidewalls are sanded with medium-grit sandpaper.
- The tabletop is screwed to the end of the structure.
Important: in places where individual elements are attached, holes are made using a drill for fastening elements up to 3 cm deep
How to make children's furniture soft?
To make the highchair more comfortable to use, its seat and back can be made soft:
- We take thin foam rubber no more than 20 mm thick.
- We prepare a wear-resistant fabric or a beautiful film (it will be much easier to care for, because a small child will smear it not only on himself, but also on the high chair while eating).
- We cut out the foam rubber along the contour of the back and seat and glue it with PVA glue to the chipboard.
- Next, we make a pattern for the back and seat from fabric, not forgetting to allow allowances of a few centimeters on each side.
- We put the fabric on the seat and nail it with a furniture stapler on the back side.
- We do the same with the back of the chair.
That's the whole simple process of making a baby high chair.
Tip: As your family size increases, you may need a sand painting table, a children's table, and later, a student's desk.
Choosing a design and shape
The shape of furniture created by yourself can be absolutely any and depends only on your imagination. However, given that the furniture is intended for a child, it is better to choose a standard square tabletop with rounded corners and a chair with a classic square seat, which is the most comfortable and practical.
Children's folding table without sharp corners.
An important point is the height of the back of the chair. In order for the child to sit comfortably, leaning against it, it should not be too low, as in the photo below.
There are many materials from which you can make a children's table and chair. Traditional, of course, is wood, but such a set will be quite heavy and more expensive.
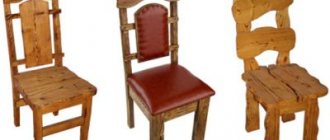
Chairs made of wood (solid wood).
Therefore, it would be more rational to use thick plywood. Despite the lighter weight of the table and chair, the structure is stable and is not inferior in strength to solid wood furniture. Therefore, we will take as a basis this kit, which we will make from plywood.
Since furniture, as a rule, is intended for a specific child, its sizes are best selected individually, in accordance with the height and age of the little owner. It’s also better to involve your baby in the decor. Here are some tips on how to beautifully and simply decorate homemade furniture:
1. When decorating such an exclusive piece of furniture for your baby, do not forget to take into account the opinion of the main exploiter and involve him in the creative process.
2. Use your child’s favorite colors, but don’t lose sight of the overall color scheme of the interior of the room in which the furniture will be placed.
3. A good option for furniture decor is images of your favorite cartoon characters on the tabletop or in other parts of the chair. You can use the decoupage technique or paint the surface of the furniture yourself.
4. A simple and quick way to decorate a craft is regular varnishing. This type of furniture processing looks natural and harmonious in almost any interior.
We'll look at other decor ideas and life hacks a little further, but for now let's decide what we'll need in our work.
Making a wooden high chair
Before making a high chair, you should prepare the following tools and materials:
- saw;
- hammer;
- beams with a section of 400x200 mm;
- board (thickness 20 mm);
- fiberboard sheet;
- nails;
- batting;
- dowels;
- textile;
- glue;
- brush;
- sandpaper;
- gloves to protect your hands from splinters during work;
- plywood.
You will also need to purchase paint and varnish material. But you need to choose a non-toxic one. The one with an acrylic base will do. Such paints are modern and safe.
Stage 1: making parts
Drawing of a children's high chair.
You need to start making a high chair by making parts for it. You will need to do the following:
- 4 legs (length 390 mm);
- 2 lower crossbars (length 340 mm);
- 3 crossbars (length 300 mm);
- top bars (length 220 mm);
- 1 small tabletop (dimensions 200x340 mm);
- 4 rounded elements.
To make such parts, you need to take the bars and saw them in half. From these, the legs are first created, then the upper and lower crossbars, and then the crossbars. They will need to be treated with sandpaper to prevent the baby from getting splinters, because he will grab all the parts of the chair with his hands.
Now you can move on to creating rounded elements for the sidewalls. They need to be cut out of a board to get the most durable and reliable chair; a drawing of these parts is presented.
It will be necessary to make similar markings on a wooden board. The diagram must be drawn so that the fibers of the material are located perpendicular to the bend angle. Then the finished part will not lose its strength over time.
The back and seats need to be cut from fiberboard. You will need to make 6 parts from it. Their size should be as follows, 300*250 mm. Their two corners should be rounded. The ends of such parts will need to be thoroughly sanded. After which you will need to glue 3 identical parts together and then put them under a press. The last thing you need to do is cut out the plywood tabletop. Its size should be: dimensions 200x340 mm.
Stage 2: we assemble the high chair
Now you can start assembling the high chair. You will first need to make rectangular dowels. They are carved from wood. Their size should be 8*20*50 mm. Under them, you will need to make holes in the parts with a depth of up to 40 mm.
Diagram of a children's high chair.
You should start assembling the high chair from the side. It consists of 2 rounded parts, legs and lower crossbars. First of all, the last 2 parts are fixed together using glue, dowel and nails. Here it is necessary to ensure that the connection occurs at an angle of 90 degrees. Then you can assemble the top crossbar and 2 curves together. The second sidewall will need to be made similar to the first. In this case, during assembly it will be necessary to compare both elements several times to make sure that they turn out identical. The created sidewalls will need to be sanded.
Next, you will need to connect the seat and backrest together. Here you can use screws and a corner. After which you will need to wait until the glue on all parts is completely dry, and then you can assemble the entire high chair.
The sidewall is connected using crossbars (length 300 mm) and dowels. You will first need to make holes for them. Then the structure is additionally fixed with nails. Then you will need to attach the legs to the lower and upper slats, and then install the crossbars. A tabletop is fixed at one end.
After this, the finished structure is further processed with sandpaper. Then it is covered with paint and varnish material and left to dry. Then you will need to cover the seat and back with fabric. But first you will need to lay batting under it and secure it with a stapler. This covering will allow the baby to sit on the high chair with maximum comfort. This will complete the work on its creation. This means you can use the finished product for its intended purpose.
Which material to choose?
The choice of manufacturing material is of no small importance. Of course, it will depend on the financial capabilities and skills of the master, but one should not miss the factor of its naturalness and safety for the child’s health
In the production of children's furniture, it is best to use raw materials from deciduous trees. The advantage belongs to beech, since its wood has good density, hardness, and is easy to process (for example, compared to oak). You can also use linden and birch. Coniferous species - pine, spruce, but to prevent resin stains from forming on the surface of the product during operation, the wood must be deresined.
When choosing wood for a chair, be sure to ensure that the pieces are free of knots. Such areas of wood are less amenable to processing and are less strong.
Active use of the high chair can lead to breakage at the knot, resulting in injury to the child.
Inexpensive wood materials include plywood. It consists of several layers of veneer of coniferous and deciduous trees. In addition to its low price, the advantages of plywood include light weight and ease of use. The elasticity of the material allows you to create original curved shapes of various parts
Chipboard is considered the most short-lived but cheapest material. A significant drawback is the use of formaldehyde and phenol-formaldehyde resins (6-18%) in its production. Also, chipboard does not have a dense texture; because of this, the fastenings are not reliable. In children's furniture, flat parts are often made from chipboard (as well as from plywood): seats, backs, table tops.
How to make a wooden table with your own hands. General step-by-step recommendations
Before making a table from boards, plywood or solid timber, you need to have a clear idea of the final product, think through the design and drawings. Stylish wood products look beautiful in the garden landscape, due to their naturalness and environmental friendliness. However, furniture made of wood goes well with the interior of a city apartment if it is made in Scandinavian, rustic or Provence styles.
In addition, modern designers know how to combine wooden tables with loft and hi-tech styles.
Table drawing - where to start
But before starting work, a detailed drawing is drawn up.
It comes with a step-by-step assembly guide to ensure a high-quality end result. A large number of drawings are available on the Internet, but if you want to create something original, you will have to use special computer software.
Making table parts
Any table made of wood, regardless of its shape and external features, consists of several key parts. If the drawing was drawn up correctly, problems will not arise during their assembly.
It’s easy to make the following furniture options yourself:
- Dining table made of wood.
- Round table in the living room.
- Desk.
- Carved timber table
Details of the future design are created according to the following instructions:
- Initially, the initial raw materials (boards or solid wood) are prepared. The canvas is sanded, polished and treated with antiseptic agents.
- When making a structure from wood cuts, you need to make sure that the material has the required moisture content. If there are cracks and defects, they are repaired.
- The lines from the drawing are transferred to the workpiece and marked with a pencil. These will be used to cut out key parts such as the legs, stopper and table top.
- Those parts that act as supports are shortened by 3 cm.
- Horizontal cuts are made on both sides of the legs.
When the process of preparing the main parts is completed, assembly begins.
How to make a countertop
Tabletop assembly diagrams will simplify the work ahead. The simplest, but most expensive option is a countertop made of chipboard with a laminated coating or laminate. Modern furniture laminate models are characterized by environmental safety, which is why they are actively being used to create kitchen tables.
The table top is made from boards and is glued together in plank frames with wedges and attachments.
Drawer
When creating a desk, country or kitchen table with your own hands (photos and diagrams will make the work much easier), you need to start making drawers. Before starting construction, the workpiece is processed by gluing the edge. To do this, use a heated iron and a dry cloth. The edge must be applied with the decorative part up to the desired end and heated with an iron. Next, you need to run a dry cloth over it to achieve tight pressing of the edges. You will need to remove any excess edge using a dull knife. The ribs are additionally sanded with sandpaper.
Making legs
An important step in creating a table from boards with your own hands is making the legs. They are necessary not only to ensure reliability, but also to emphasize the originality of the product. If the design is simple and uncomplicated, there will not be any particular difficulties in assembling such structures. The bars are divided into 4 equal parts, taking into account the desired size and height of the structure. First of all, one leg is cut off, and then the rest are aligned based on it.
Assembly of the structure and processing of the finished product
The assembly of parts of the future product is carried out in several stages. First of all, you need to combine the planks using the groove-to-groove method, then the crosspiece and legs are secured. To increase the reliability of the structure, before connecting the legs to the main part, the upper base is coated with glue.
It is not recommended to use nails as fasteners. Instead, they use self-tapping screws or confirmats, which are easily unscrewed and guarantee maximum fixation strength.
Decoration of the structure
Products made from natural wood require protection from external factors. Varnishing helps solve this problem. Experts recommend choosing the acrylic version of this material. It creates a coating that is not afraid of any childish pranks - spilled water, paint.
If you want to make the product more interesting, you can paint it. You should give preference to bright, but not harsh colors. Muted light green, mint green, pomegranate, coral and others are suitable.
It is not recommended to decorate the table and chair with voluminous decor. First of all, due to the fact that it is one of the most common causes of injury to a child. The best decoration would be hand or screen painting. Appliques and drawings of fairy tale and cartoon characters are suitable for young children. Curly legs will look interesting. If the chair has a back, various figures are cut out on its surface with a jigsaw.
General requirements
To make a useful and comfortable high chair for your baby with your own hands, you first need to take ergonomics into account.
First, the chair for younger children should not be too soft: in order for the child’s skeleton to grow properly and muscles to develop, his body must feel reliable support. It is advisable to make the play chair generally rigid, but on the high chair and work chair, relatively thin soft pads on the seat and back are needed. A gaming chair and a work chair are most often the same, so what should we do?
These conditions can be combined by sewing cushions of the following structure according to the size of the seat and back (from bottom to top): canvas or burlap - padding polyester 5-7 mm - flannel, calico or flannel - decorative fabric. To secure them, you will have to sew on straps that tie/fasten under the seat or behind the back, but this makes making the chair itself and caring for it easier.
Second, avoid plastics. For children's items today, the safety of high-density polyethylene (produced without the use of catalysts) and PET has certainly been confirmed, but there are no suitable blanks made from them for home craftsmanship. PVC seat upholstery is a relic of the past: when there were no diapers, without it diaper rash in babies was more common.
Dimensions of high chairs for babies
The next point is the size of the chair. The table of recommended sizes of children's chairs for games and activities is shown in Fig. The main parameter for choosing it is the growth group. The back height is obtained by subtracting the seat height from the total height of the chair; in a high chair it must be determined separately, because his seat is raised for the mother's comfort. The table has been compiled for child care institutions; the dimensions of a chair for a child in a family can be found more accurately and simply: we look carefully at who he matches in height and build; about eyes, eyebrows, etc. disputes later. Then the prototype parent shows which chair she/he is most comfortable in, we take the dimensions from it and multiply by 0.55. A child on such a seat will be fine from about a year to 4-5.
How to make a mobile high chair?
It is not always possible to take a wooden high chair with you to feed your baby. After all, it is quite large and cannot be transported. And here many parents may have a question: how to make a mobile high chair with your own hands? Here, too, you can’t do without step-by-step instructions. But first you will need to prepare the following:
- fabric (cotton, linen, lining fabric) - about 3 m;
- slings – 2.5 m;
- carabiner buckles – 3 pcs;
- thick and durable braid – 3 m;
- scissors;
- needles;
- threads;
- sewing machine.
Step 1: make a pattern
To make a high chair for a child from material, you should use the pattern given
Please note that it involves the creation of a product that consists of a child seat and an attachment to a chair. Having placed the baby in such a device, he can be securely fixed on a regular adult chair, using wide straps for this.
You will need to cut out 2 parts from the fabric, which are shown in the figure. For this, you can take multi-colored material to make the mobile highchair less stainable.
Step 2: sewing a high chair
The two cut pieces will need to be sewn together. If you look at the pattern, you will see that it has a fold (upper rectangular part). Therefore, in this place you will need to bend and stitch the fabric. As a result, you will get a kind of “bag”. You will need to attach straps to it, and put carabiners on them. Such a simple device can be easily fixed on a chair. As a result, the child will be securely seated, which means that he can be easily fed at a party or in a restaurant. And since the mobile chair is compact in size, you can easily find a place for it in your bag.
As you can see, making a mobile or regular high chair is not at all difficult. Therefore, you can safely make it yourself. Step-by-step instructions will help you with this. After all, they tell in detail how to make a chair with your own hands and get an excellent result. Thanks to the recommendations presented, you will be able to complete such work in the shortest possible time. At the same time, you can be sure that you will get a reliable and high-quality product. The finished high chair will last for many years, which means you can also use it to feed the children you will have in the future.
Tips and nuances
Children's things are very often exposed to various mechanical and other influences, so it would be better to protect the surface and apply several layers of varnish. In extreme cases and when there is an urgent need to protect the surface of the table, you can use epoxy resin, which, when hardened, forms a thick film similar to a glass surface. But this should only be done if the table will be used for drawing or will be frequently subjected to wet cleaning with chemicals.
The heads of nails and screws need to be “hidden”. This can be done in several ways: “plant” them deeply in wood, attach special “caps” made of plastic, or use the same epoxy resin or varnish applied in several layers. These “hats” are made from both plastic and rubber. It was said above that it is better not to upholster the high chair, but if the child has already reached a conscious age, you can make the high chair leather upholstery. The leather covering on the bottom will need to be secured especially well. Its presence will greatly facilitate the care of the chair.
It is not necessary, but it is advisable to purchase two types (coarse and fine) sandpaper for sanding. After processing each of them, you can achieve a flat and smooth surface. The process of making a high chair and a children's table can be exciting not only for an adult, but also for a baby. The main thing in this process is patience and work, which, as you know, will grind everything down.
To learn how to make a chair and table with your own hands, see the following video.
