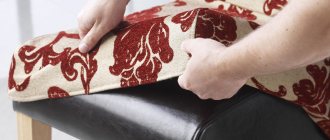
I had stools from Ikea in my kitchen, beautiful ones with holes, but because of these slits in the seat they were terribly uncomfortable. I don’t know what the Swedish designer was thinking, but I had to think about how to sew covers for stools with an elastic band with my own hands
It took me exactly two hours to work while my youngest enjoyed his afternoon nap. Even a novice seamstress who has a sewing machine at home can repeat my master class today.
Selection of materials
The main criteria influencing the choice of fabrics for sewing covers are practicality and stylistic design.
It is worth giving preference to materials that are pleasant to the touch. In this regard, everything is individual, so you need to touch the surface to make the final choice. Fabric covers are easy to clean and are chosen for soft chairs in living rooms. The most popular materials and their features:
- Gabardine has a high density. Artificial textiles are a little inferior to it, they quickly wear out and get dirty.
- Thin crepe-satin has elasticity and softness, a pleasant shine.
- Elastic lycra has an attractive appearance and is easy to care for.
- Spandex is not afraid of moisture, allows air to pass through freely, and lasts a long time.
- Heavy, thick brocade looks luxurious, but you will have to hire specialists for cleaning.
Kitchen covers are made from reliable materials that are resistant to moisture, temperature changes and various contaminants. The best option would be leather and leatherette, which are easy to clean and look presentable. A good option would be spandex, which is waterproof.
Gabardine Fine crepe-satin
Lycra
Spandex
Brocade
Leather Leatherette
Before choosing a suitable filler, you need to carefully study the features of each material and give preference to the optimal option:
- Sintepon. Artificial fabric, elastic and light. Pros: quick restoration of its original shape, elasticity, high thermal insulation properties, affordable cost. Cons: poor air permeability, not suitable for use at temperatures below -10 ºС.
- Holofiber. It consists of spring-like fibers, is plastic, and can withstand hand and machine washing. Pros: breathability, hygiene, quick restoration of shape, ease of care, softness, lightness. Cons: does not absorb liquid well, more expensive than some analogues.
- Foam rubber. Dense lightweight material with sufficient rigidity. Pros: hygiene, hypoallergenic, moisture resistance, high level of sound insulation, elasticity, preservation of consumer properties in the temperature range from -40 to +100 degrees. Cons: service life up to 7 years, not considered environmentally friendly due to the addition of various additives in production, fire hazard.
In the process of creating stool covers, you will also need threads, lining, elastic bands, and decorative elements.
Sintepon Holofiber
Foam rubber
Fabric selection
The main criteria are functionality and stylistic combination.
In addition, it should match the curtains and tablecloths. It is recommended to buy covers with fabrics that are pleasant to the touch; they are perceived differently by people, so an individual approach is needed. It is important to pay attention to the ability of the material to maintain high quality after washing and be resistant to stains (depending on the color).
There are about 6-8 commonly used types of fabrics.
- Gabardine has a dense structure.
- Synthetic materials are worse in all respects: they quickly get dirty and dry out.
- Crepe-satin is elastic and soft, quite thin and has a shine.
- Lycra (supplex) is elastic, looks beautiful, and is easy to care for.
- Spandex does not allow water to pass through, but breathes well, so it is durable.
- The brocade is heavy , thick and looks expensive. It is difficult to care for, so it is better to use dry cleaning services.
Options that are easy to use
Let's look at all the options that you can easily do with your own hands. All the nuances and step-by-step implementation are below.
We sew a cover for a chair with a back
After we have measured the height of the back, legs, and width of the chair, we make a pattern of three elements: rectangles covering the sides and the back with the seat. Don't forget to add a couple of centimeters to the seams.
- Transfer the pattern to the fabric. Since we are dealing with rectangular parts, you can use a ruler for greater accuracy.
- Carefully cut out all the details, taking into account the shared thread.
- First of all, we sew the side edges.
- Then we move on to the side and bottom sections of the back of the back. They should be folded and then stitched.
- Sew the side parts to the seat.
- We tuck and stitch the sections of the side and front parts of the product.
- Ready-made covers can be decorated with a bow or other decor on the back of the chair.
We sew a simple seat
The easiest option, which is suitable even for beginners, is a regular stool seat. It's fairly quick to sew.
- We make a template from cardboard or other material according to the shape of the stool seat;
- using the resulting pattern, we cut out three parts of the same shape and size from the fabric (for the front, back side + padding polyester);
- We place the padding polyester between two pieces of fabric and secure it with pins;
- to quilt the future seat, you need to sew even lines parallel to each other;
- we baste the pre-prepared bias tape for edging, leaving the ends as future ties;
- We carefully fold the ties in half and stitch them on a typewriter;
- We sew bias tape on the sides of the product using a machine.
Elastic cover for a round stool
- First, as usual, we make a pattern. In order not to bother with measuring instruments when calculating the diameter, you can simply attach a sheet of cardboard or newspaper to the surface of the stool, then cut it along the contour.
- We transfer the drawing to a new sheet of paper, adding a few centimeters along the contour.
- Based on the resulting template, we cut out the piece from the fabric.
- We put an elastic band on the edge of the fabric, fold the fabric, and stitch it.
- Our cover is ready - all that remains is to put it on the stool.
- To add softness, you can sew foam rubber or padding polyester into the seat.
Crochet chair covers
A knitted cover can be an interesting option for decorating a room. Crocheting will take more time than sewing a simple pattern, but the result will be a special and original item.
Most often, round or square models are crocheted for seating stools. Let's look at an example of knitting a simple round cover:
- We make the upper part from rows of lush columns, separated by short chains of air loops.
- We make the hem by knitting several rows in stitches without adding. This way they will form an even side (for greater stability we make the side higher).
- In the last row we knit air loops - at the end you can insert a fixing elastic band or cord into them to secure the product to the stool.
Using various knitting patterns, you can knit absolutely any model with your own hands. For example, the so-called flower cover or models crocheted from motifs (they can also be decorated with crocheted flower appliqués).
Cover made from an old sweater
If knitting is not your thing, but the beauty and comfort of knitted covers haunt you, try making them from an old sweater. Any item of the desired size and color, knitted with knitting needles, large or medium knit, is suitable for this.
Depending on the size of the sweater, you can sew a cape only on the seat or on the back, or you can get a whole accessory, for example, by using several old products.
You can also sew models not only from knitwear, but also from other old things in good condition. For example, from jeans or coats that have become too small. The main thing is that the style of the resulting product matches the interior of the room.
On a children's chair
Chair covers in a children's room are more relevant than anywhere else. Bright, elegant fabrics can decorate the interior of a nursery and interest little fidgets. In addition, they are indispensable in protecting furniture from dirty handprints, spilled drinks or traces of children's creativity.
The product is sewn according to a standard pattern, as for a regular stool. All measurements are taken in advance. Very often, for children's furniture, capes are sewn only on the back: two rectangular pieces are cut out and sewn in three places. At the end, you can apply a design or decorate it with fabric, sew on “bunny ears” or, for example, design it in the shape of a snowman.
On the inside, so that the cover does not slip, you can sew decorative laces that will be tied behind the legs of the stool. You can also use buttons, ribbons or elastic.
Decoration options
The style of the interior in which the chair will stand dictates the methods of decoration. Laconic minimalism or modernism do not tolerate overload, but will accept a combination of fabrics by color or texture, discreet details: pockets, folds.
To decorate cases in a classic interior, the following are suitable:
- long frills;
- edgings emphasizing the clarity of the form;
- thin golden or woven braid;
- imitation of antique lace.
This trend is generally characterized by ceremonial decor and regular geometric shapes.
Rustic style, country and Provence suggest natural fabrics and very cozy finishes:
- frills, ruffles;
- crocheted lace;
- braid with ornament;
- lacing.
In banquet halls, chair covers with backrests are decorated according to the general style of the room. Beads, satin ribbons, rhinestones, and brooches are used for decoration. Artificial or fresh flowers will also come in handy.
Such “clothing” for furniture will protect new chairs and stools from dust and damage, and will give old ones another chance.
In addition, hand-made chair covers will add comfort and beauty to your beloved home. And if you create several sets, then with their help you can update the interior every season.
How to take measurements and make a pattern?
The first thing you need to do when sewing is to take measurements of the furniture. The pattern directly depends on the design and dimensions of the chair or stool. To take measurements, take material that holds its shape well and cover the chair with it, securing everything with pins. At this stage, they take into account: how much the legs of the chair will be covered, whether there will be fasteners on the back, and so on.
Luxury and functionality combine in brocadeMeasurements can also be taken using tracing paper. To do this, a layer of paper is first applied to the seat and secured with pins. After this, a stroke is made along the contour. For allowances, add one and a half centimeters on each side. Subsequently, the parts are cut out. The back is measured in the same way if sewing is done for a chair.
For the front of the cape, measure the length of the legs and the width of the front edge of the product. After this, a given rectangle is drawn on tracing paper, adding 5 cm at the bottom and 10 cm at the sides. To all this add a 1.5 cm seam allowance at the top edge.
Practical and stylish capes
Patterns for the sides of the “skirt” are made in the same way. Add 15 cm to the edge adjacent to the outer part of the back. The pattern is made in several copies. Measuring the outer part of the backrest is done as follows:
- A large sheet of tracing paper is applied to it at the top of the backrest;
- The edges of the outer side are marked;
- Lines are drawn along the legs to the floor;
- Add 5 mi at the bottom and 1.5 cm for the seam allowance.
Translucent cape on the back
Important! At the top and bottom of the patterns, centers are marked, along which the fabric is then folded and cut into two even parts
Schemes, patterns and sewing steps
Pattern patterns can be found on the Internet or in specialized publications. Usually the surface of the stool is measured for the pattern. After this, cut out a part of the required size from cardboard, apply it to the filler, trace it with chalk or a pencil, and cut out a piece according to the intended markings. The same actions are carried out with fabric. However, in this case, you will need to indent 1–2 cm on each side + add an additional 6 cm for the thickness of the product (due to the filler). After this, the drawn element is cut out using sharp scissors.
You might be interested in this All about patterning and sewing a sundress with buttons on the front
The type of cutting may vary depending on the shape of the furniture. The entire sewing process is divided into the following stages:
- preparation of materials;
- choosing a sewing pattern, preparing cutting;
- sewing process;
- foam insert.
Case pattern
Important! The final stage is decorating the manufactured accessory.
Learn to crochet a beautiful and patterned chair cover with patterns
1) We start knitting the rug from the first row. We take a hook and a white thread in our hands. The first step we need to make is a sliding ring. We place the thread on the finger as shown in the diagram.
2) We wrap the thread around the finger of our left hand three times, take the hook in our hands and pass it under the first two threads, grab the third and pull it through the other two. This creates a ring.
3) Then, into the resulting sliding ring, we cast a double crochet and 2 chain loops, after which we tighten it. To do this, pull the tip of the non-working thread.
4) We knit 12 double crochets into the base of the resulting ring, and then tighten the ring tightly by again pulling the end of the non-working thread.
5) Now we begin to knit the second row. To do this, make a single crochet, then 2 chain stitches, then a double crochet.
6) When knitting subsequent stitches, we follow the principle: two stitches in one half-loop. In other words, you need to knit two double crochets at once into each half-loop of the first row. As a result, you should get 24 columns in a row, that is, exactly twice as many as in the first. At the end we make a connecting loop into the second air loop.
7) Let's move on to the third row. In the back half-loop of the next stitch we knit a double crochet, two chain stitches and one single crochet. In subsequent rows we observe alternation: 1 Dc – 2 Dc (in one half-loop of the previous row) – 1 Dc and so on. There should be 36 double crochets in total. The connecting loop is again made into the second air loop.
9) We knit the last row in a different way. When knitting, we grab both half-loops of the previous row, make a connecting loop, in the next we knit a double crochet and 2 chain loops, skip 2, and in the third we make a single crochet and 2 chain loops, and so on. In other words, we repeat the following sequence: RLS, 2 VP, 3DC (in the third loop) – RLS, 2VP, 5DC (in the fifth loop), etc. Thus, we get arches, in each of which we knit a double crochet, 2 air loops, 3 double crochets.
10) Now we move on to knitting the petals. Change the color of the thread and start the first row with a slip stitch. The method of its addition can be seen in the diagram.
11) Using it, we attach the thread to the first row of the front half loops and knit a single crochet.
12) In the same loop we knit 5 chain loops and a single crochet. Thus, an arch was created.
13) Then we make one air loop, through two loops we knit a single crochet, 5 chain loops and a double crochet (all in one loop) and one air loop. We repeat the sequence RLS, 5VP, RLS, VP two more times. At the end of the row we make a connecting loop in the first single crochet. The result should be 4 arches.
14) We begin tying the resulting arches. We repeat the following sequence of actions: single crochet, 2 chain crochets, 4 double crochets, 2 chain crochets, 5 double crochets and a connecting loop in the first double crochet. Thus, we have the first petal, after which we need to make a single crochet.
15) We continue in the same way: 5Dc, 2VP, 5Dc in the arch, RLS from the first VP and a connecting loop in the first Dc. This is how the first row of leaves turned out.
16) The second row needs to be knitted in the same way as the first, but with minor changes: 5DC, 3VP, 5DC in the arch, RLS from the second VP and a connecting loop in the first SC. We continue until the end of the row.
17) The third row is knitted similarly to the second, but again with changes: 5DC, 3VP, 5DC in the arch, RLS from the third VP and a connecting one in the first SC.
18) To avoid the petals losing their shape, it is worth making a small fixation for them. To do this, you need to make a connecting single crochet and at the same time use the middle loop of the three passed between the arches.
Preparing fabric and foam
Before sewing the cape, you will need to carefully smooth the fabric so that there are no wrinkles on it. You will also need to prepare foam rubber for softness. There are several types of fillers that are used for sewing furniture covers. The most popular of them are:
padding polyester Artificial and durable foam rubber that does not lose its shape, has good elasticity, and shows high thermal insulation properties. Sintepon is inexpensive, which is why many users choose it for upholstering stools. The downside is that the material allows air to pass through and loses its properties at low temperatures;
Sintepon for capes
- holofiber. The material is made of springy fibers, it shows good ductility. Hollow fiber can be washed in a washing machine. The fiber is breathable, easy to clean, does not require special care, and holds its shape for a long time. Disadvantages - the material can absorb liquid, it does not tolerate increased humidity levels in the room;
- foam rubber Dense material that holds its shape well. Foam rubber is flexible, practical, hypoallergenic. It withstands temperature changes in the room and retains its shape at sub-zero temperatures. Disadvantages - the fiber is not environmentally safe, and foam rubber is also quite fire hazardous.
For your information! Before you start sewing, you also need to take measurements of the furniture in order to cut the fabric to the right size.
Filler for accessories
Required materials and tools
To sew a cape, you will need to prepare the following tools:
- soap or chalk for marking;
- ruler or centimeter;
- awl (when using leather);
- pencil;
- pins.
The seams of the product are sewn on a sewing machine. The pattern can be made on a cardboard or plastic sheet. Its dimensions must exceed the dimensions of the future cover. In the process you will also need an elastic band (at least 3 cm wide) and threads (according to the color of the future product).
Sewing tools
Knit a cover for a stool: what do you need for this?
A set of identical covers for stools, made by yourself
Almost always there will be leftover yarn of different colors in the house; the more, the more elegant and brighter the cover will turn out. If there are no unnecessary balls, you can buy yarn. This stool will fit perfectly into a rustic, country interior. You will get the feeling that you have come to visit your beloved grandmother.
Knitted covers for stools of different shapes in the same style
Knitted round seat covers
Even a beginner in needlework can knit such a cape. The main thing is to learn how to knit simple pattern elements, which are made from chain loops, simple stitches, and stitches with slip stitches. There are many instructions on the Internet, follow them and you will succeed.
Beautiful chair covers using the African flower knitting motif
Square cover for kitchen stool
For a crocheted stool cover, it is best to use thick acrylic yarn and a large hook. The thing will be voluminous, softer, and sitting on such a stool will be a pleasure.
DIY voluminous cover for a stool
Airy and light case with floral pattern
Knitted cover for a stool: basic methods
Different options for knitted chair covers
The easiest ways to knit a cover for a round stool.
- Start knitting from the center and continue in a circle.
You reach the desired diameter and stop adding loops, and then knit the side. If desired, you can attach it to a chair with a cord and decorate it with tassels. Bright round covers for children's high chairs in a simple design - Any large ornament is knitted in the center, according to the pattern for a round stool. Here it is appropriate to use a pattern of a flower, an interesting ornament or an animal.
Round cover for a stool made of yarn of the same color with a flower in the centerCrocheting seats and rugs for chairs
Square seat design options
DIY square covers for stools
- A case made of several elements. Pre-knitted small square, round, hexagonal elements are connected to each other by columns of air loops. This is where leftover yarn of different colors comes in handy.
Square cases made from elementsBeautiful case made of multi-colored hexagons
- A cover woven from multi-colored strips, knitted with a post and loops.
Calculate the number of strips yourself, depending on the size of the stool. We connect half of the strips together and tie them along the narrow edge. We perform the same actions with the other half of the strips. We intertwine the resulting strips with each other in a checkerboard pattern. We tie the entire fabric and decorate it with fringe. Cute crocheted stool cover made from multi-colored stripes - Case with a three-dimensional pattern of “popcorn” elements.
Knitted cones from columns. They add airiness and originality. You need to knit from thick acrylic yarn. Choose the color at your discretion, based on the color scheme of the interior. The case looks more successful when the center of the product is made in a bright color, and becomes darker towards the edge. For example - yellow, blue, and then brown. A pattern for knitting a square of cones is easy to find on the Internet, on the websites of needlewomen. Original case with a three-dimensional pattern
Crochet stool cover: diagrams
Crochet pattern for a round stool cover
In order for the product to turn out beautiful, you must strictly adhere to the scheme. Only then can we talk about successfully obtaining the desired result. By following the instructions, you will not only knit the cover yourself, but also will not have to remake it.
Knitting pattern for a cape for a square stool
Such cheerful covers, in addition to beauty and mood, have practical benefits. They protect the seat from wear, provide comfort to the sitter, and are easily removed and washed. The ability to crochet gives you endless possibilities in creating beautiful, exclusive things for your home.
A simple scheme for a square case that even a beginner can handle
Having mastered crocheting and first knitted a simple cover for a stool with your own hands, you will forever remain a fan of this craft. You will definitely want to continue mastering highly complex patterns, making masterpieces to please yourself and your loved ones.
Interesting pattern for a knitted cover
A beautiful set of leftover yarn made using the freeform technique
Design and construction
Your products will be shaped like the seats. If these are stools intended for the kitchen, then it is better to sew not cushions, but capes with elastic that can be easily removed for washing.
Such covers for stools are very practical: they can be removed and washed, which is important for the kitchen.
If the seats are made with your own hands, then you can choose any textiles and filling. These are unnecessary scraps, foam rubber, tapestry with a large pattern and other materials.
The seats can be decorated in one color or use an ornament.
The latter looks quite stylish and interesting if the color scheme is matched to the interior.
Decorating the product
A homemade cover for stools should be attractive in appearance. If a tapestry is used to decorate the cover, a fabric decorated with floral patterns with a large flower in the central part will be an excellent decoration. Thanks to muted colors, the combination of shades does not look pretentious, but stylish.
Combinations of different materials and textures look interesting. Round or square covers are complemented with braid, flounces, and lace inserts. Satin stitch embroidery is popular; in most cases, floral patterns are used around the perimeter of the product, flowers in the central part, and abstract patterns.
You can decorate the stool cover using decorative zippers, buttons, and snaps. The use of decor is limited only by the imagination of the master. The legs of the chair can be painted to match the capes or varnished, preferably in two layers. It is better to apply the compounds before sewing the seats to allow the surface to dry.
Homemade covers for kitchen stools help to update and decorate furniture and make the operation process more convenient. Stylish throws or soft pillows with ties will add freshness and novelty to the interior. Not only experienced seamstresses, but also beginners can handle the work; you just need to follow the master classes and recommendations on the choice of materials and tools.
Interior style where chair covers are appropriate
Chair covers for the dining room, kitchen, and children's room look most organic. In order for the covers to fit perfectly into the design of the room, you need to take into account the design features and color palette of the textiles.
Provence
Romantic style always remains popular.
Many people like soft natural shades (pale pink, blurry lavender, blue, light green). Characteristic features of this interior trend: textiles with small floral patterns, decorating furniture with knitted and sewn products (tablecloths, covers).
Designer textiles in the Provence style (tablecloths, curtains, napkins) are decorated with ruffles and lace.
At first glance, the interior may seem shabby, and things old and abandoned. However, vintage antiques are not without sophistication. Openwork tablecloths, chair covers decorated with lace, decorative vases, and cute trinkets look elegant in the setting. The color palette is based on light shades.
Warm beige, faded pink and blurry pearl gray tones will add tenderness to the interior.
Country
The color scheme of the style is based on natural shades (milky, beige, light brown). Accents are emphasized with contrasting tones (gray, black, burgundy, bottle green). A balance of opposite colors must be maintained. Wooden furniture of simple shapes and forged products are welcome.
Natural fabrics (linen, tapestry) fit organically into the decor. Textiles with large floral patterns or checkered patterns bring home comfort to the room.
English style
The interior with an English character is the embodiment of elegance and restraint. The stiffness of the setting is softened by textiles with floral prints or small patterns. Furniture upholstery uses both soft plush or exquisite leather, as well as chintz with a printed pattern.
A combination of materials with large and small prints is welcome. To furnish the room, select dark or light products from oak, pine, and mahogany.
American style
The multinational peculiarity of the country is reflected in the interior of the premises. The design mixes and harmoniously combines Oriental, European, and African decorative features. Furniture is most often placed in the center of the room, so an island or peninsula is the hallmark of an American-style kitchen.
Most often, bar stools with high legs are used indoors. Common colors are shades of beige, olive, and white.
Knitting methods and deciphering the pattern
Knitting covers and covers for chairs seems difficult. If you decide on the basic designations in the diagrams and analyze the types of loops, then it is not so difficult. There are reading rules that you should remember:
- The regular knitting pattern is read from bottom to top, while circular knitting is read from the center to the edges.
- Odd rows are counted from right to left, even rows are counted from left to right.
- When knitting round capes for stools, the draping begins from the center. To prevent the radius from increasing, lifting loops are used. The number of columns that are added to the next row is equal to their number in the previous one.
When crocheting with patterns, it is important to understand the conventions:
- Oval - air loops.
- Cross - single crochet (used to increase density).
- The letter “T” is a half double crochet.
- The crossed out letter “T” is a double crochet stitch.
- The letter “T” crossed out twice is a double crochet stitch.
- The “T” symbol crossed out three times means three double crochets.
- The letter "X" with a loop on top means a twisted column. Used at the end of knitting.
- “X” with a dash on top – knitting with a connecting loop, used for circular knitting.
In simple patterns for crocheting rugs and chair covers, only the main types of loops are used: air stitches, stitches with or without crochets, connecting stitches, lush stitches. This limitation does not prevent you from creating a beautiful and original cape with a pattern.
Tips for beginners
In order for a knitted product to serve for many years and delight its owners, you should take care of the yarn. For work, it is better to choose synthetic yarn, for example, acrylic or cotton with the addition of synthetic fibers. For the crocheting process, it is recommended to use thicker threads. This is necessary to ensure that the rug fabric is dense and warm. Accordingly, you need to choose a larger hook. Before starting work, you need to knit a sample, a small square, wash and iron it. This technique will help with determining the size of the finished product. When the sample has dried, you need to measure it and, using a simple arithmetic proportion, calculate the number of loops that are needed to obtain a rug of the required size.
You can choose any knitting pattern. The main criterion is its attractiveness. You can even use a diagram for a napkin, or any other one you like, as well as use the diagrams and descriptions presented below.
Small scraps of yarn of different colors will make a rather attractive and interesting rug. This technique will allow you to use the accumulated remnants of threads that are a pity to throw away, but you won’t be able to knit anything from them. But it is worth remembering that the thickness of the thread should be the same over the entire surface of the product.
Related article: DIY credit card wallet
In order for the product to serve longer and maintain its appearance, you need to make a base for the future rug from dense fabric. If the rug is of insufficient size, the situation can be quite easily corrected with the help of a border. The rug must be tied around the perimeter with the required number of additional rows.
In order not to have to unravel the knitted rug and redo part of it, you need to carefully follow the icons in the diagram.
Which option to choose
You can buy covers, however, it is much more interesting to create them yourself. To sew one cover you will have to spend about 1-2 meters of fabric.
If you don’t have sewing skills, then you can turn to professionals who are ready to create a unique version of the case. They will be happy to create the required product after listening to the customer’s wishes.
Master class on sewing a seat using the “Biscuit” technique
The “Biscuit” technique consists of a large number of voluminous small pads that form a general covering. For manufacturing you will need the following materials:
- cotton fabric as the main material, it is best to choose shreds with a small pattern that match in color;
- base material;
- tape measure, scissors;
- holofiber;
- sewing machine, iron;
- safety pins, threads, needles.
A DIY chair cushion is easy to make:
- First, you need to measure the surface of the seat and add 5 cm on each side (after stuffing, the seat will shrink). Using these measurements, cut out the base.
- The size of one square is determined as follows: the base of the seat is drawn into squares. They should not be too large (6-8 cm). The size of the outer square will be larger; allowances and folds are taken into account, so another 3 cm is added to the base square on each side.
- The squares are laid out on a flat surface. According to the intended pattern, they are sewn in horizontal rows.
- The first row is pinned to the base. The side seams are shifted according to the markings on the base.
- The top lines are ground down. In this case, you need to make symmetrical folds on all sides of the square. Then vertical seams are laid.
- You end up with pockets that need to be filled with holofiber.
- The next strip of squares is applied to the underside of the stuffed pockets, wrong side up. Sewn on.
- Then the algorithm is repeated: vertical lines are laid, pockets are filled with filler. So until the end of the base.
- A border is sewn along the contour to hide the seams. It can be braid, ruffles, lace. The product is ready.
The independent process of making a seat for a chair or stool cannot be called difficult. Even a housewife with minimal sewing skills can handle this. As a result, you can get a comfortable and functional product that will decorate furniture that has lost its attractiveness.
Drawing and transferring the pattern to fabric
The paper is applied to the seat of the chair, secured with tailor's needles and traced around the edges. Make a reserve of about one and a half centimeters for allowance. Next, the part is cut out.
The pattern from the back is done in the same way.
Then a rectangle is drawn on the sheet, corresponding to the length of the legs and the width of the seat at the front of the “skirt”, and 10 cm of the pattern on the side, 5 cm at the bottom and 1.5 cm allowance for the top seam are added to it. The sides are drawn in a similar way. 15 cm is added to the edge next to the outer part of the back. A long, wide sheet is applied to the outer part.
- In the drawing of the back legs of the chair, 5 cm is added at the bottom and 1.5 cm for the allowance.
Patterns are smoothed out because any unevenness will interfere with sewing. Next, the drawing is transferred to the material, taking into account the position of the shared thread. You can draw on fabric with a pencil, a bar of soap or chalk. The pattern is made in two samples.
Case shape and size
The parameters are selected for a specific chair. Most cases are round and square. The first option is universal and suitable for almost any seat. For any model, first of all, they come up with a convenient mount. For children, they knit thick covers that will not be hard on them. Knitting is used to achieve shapes that correspond to the main models of kitchen covers. Among them are Zilla, Justina, Ulla-Mai, Admete, Malinda, Anvue, Bertil, Popthorpe, as well as Maivor, Sita, Seglora and Harriet. The cilla has a round shape with a clearly defined perimeter. Justina is a trapezoid with cut corners for fastenings. Ulla-mai is a thick product with a perfectly square shape. Anvue has a similar appearance, but is rounded at the edges. Bertil is a large round option for any chairs. The sieve looks like a thin square with prominent edges.
And finally...
The covers are ready, all that remains is to put neat knitted “feet” on the stools to protect the parquet from scratches and enjoy the updated furniture!
Now you can change the covers on your stools every season. We also recommend that you see how to make elegant flower pots from scrap materials. Perhaps you are still looking for a cute kitchen apron? Make it yourself from unexpected materials!
Previous article Next article
Photo of DIY chair covers
"Granny Square"
The essence of this technique is the constant alternation of threads of different colors. You can take five shades of the same color or five completely different colors. The choice depends entirely on your imagination, the main thing is that together they look beautiful and harmonious. Below we present several diagrams from this technique that will help you figure it out.
Please note that the yarn should not be very thick, as in the previous version. In this case, the finished rug will look rough and the design will be inexpressive. You can use acrylic or wool mixture, and take a hook one and a half times thicker than the thread.
Using this pattern, you can knit individual squares. Then they are carefully connected and you get a cute and beautiful rug.
There is also an openwork version using the granny square technique.
If you don’t want to spend a lot of time fiddling around and connecting different elements, you can knit a rug from one piece. The diagram shows this clearly. It can be used for both single-color and multi-colored products. But the pattern looks more beautiful and expressive when using several colors or shades.
As you have seen for yourself, knitting a seat mat for a chair or stool is not at all difficult. In addition, it is small in size, so you can finish knitting very quickly. But the result will delight and warm you for a long time!
Crochet covers for round stool
Products made from multi-colored acrylic yarn
Plain seats made of knitted yarn
Crochet seats for a square stool
How to make stool covers with your own hands
You can make a furniture cape from the following materials:
- gabardine. A soft fiber that has good strength. This fabric has a slight shine and is water-repellent. However, it has a significant drawback - during use the material slips a lot;
- crepe-satin. Soft and silky fiber with good wear resistance. The material practically does not wrinkle or stretch. Satin crepe looks elegant and is suitable for decorating stools in the living room;
- lycra. Dense synthetic fiber, characterized by wear resistance. Lycra is a budget-friendly and durable material;
- spandex. Polyurethane fiber, which is most often used for upholstering kitchen stools. The material does not absorb moisture or odors and can be easily cleaned with plain water.
Filling for covers Furniture covers are also made from linen, brocade, and faux fur.
It is recommended to make products from durable and moisture-resistant materials that respond well to high indoor humidity and periodic temperature changes. Important! The best option is leather or spandex. You might be interested in this Ready-made pattern of hares with long ears: sewing with your own hands
You might be interested in this Ready-made pattern of hares with long ears: sewing with your own hands
Seat care
The soft removable part of the stools must be washed periodically as it tends to get dirty regularly. This is especially true for kitchen stools.
Washing should be carried out in a gentle mode at a temperature of 40 degrees, so as not to deform the base.
It is recommended to dry the product flat out, in a place where there is no direct sunlight, otherwise the design will fade.
Knitted covers
Knitted chair covers look very cozy. When knitting, be sure to make a test pattern to take into account corrections for the deformation of the future product. Crocheted chair covers are denser and do not stretch during use.
Braids
As the basis for any cover for a rectangular chair, you can take a model with braids made of cotton yarn. By experimenting with patterns, you will create a cozy atmosphere in your living room.
The description is based on measurements.
Knitting density:
- stockinette stitch – 17 stitches x 23 r. = 10×10 cm;
- braids – 22 p.x25 r. = 10×10 cm.
For the seat at the specified knitting density, cast on 102 loops. Perform the “Braids” pattern (according to the diagram).
Knit to a height of 42 cm. This will make a seat. Next, move on to the back: in every 46th row, 2 loops are evenly reduced. As a result, there should be 94 loops left on the knitting needles. At a height of 97 cm from the beginning of knitting, all loops are closed.
Along the edge of the first row of seats, 102 loops are cast on and knitted with a 10 cm “Braid” pattern. This will be the front edge. Next, 93 loops are picked up on each side of the seat and also knitted with a “Braid” pattern of 10 cm.
For the back of the back, cast on 102 loops, knit in 10 cm braids, and then decrease to narrow the back in the same way as they did in front. There are 94 stitches left on the needles. Knit to a height of 65 cm and close the work.
The side piece is knitted on 11 loops in stockinette stitch (knit stitch - all knit stitches, purl stitch - all purl stitches). After 10 cm, decrease 1 loop 2 times in every 42nd row. Continue to the level of 107 cm, and then in every 42nd row add 2 times 1 loop. At a height of 172 cm the work is closed.
Before assembly, all parts must be moistened, laid out and allowed to dry. Next, sew the cover and tie it in a circle with two rows of single crochets and one row with a crab step. In order for the cape to fit tightly on the chair, it is recommended to sew a fabric base made according to the main pattern from the inside out.
Similarly, you can knit a cover that will cover the chair to the very floor.
Hook options
Small crocheted capes are also held in high esteem by needlewomen. The sets of seat pads and back pockets look original.
The most popular style is patchwork. It will require leftover threads of different colors. It is advisable to select yarn of the same thickness.
For such an accessory, you need to knit an even number of multi-colored strips 7-8 cm longer than the length/width of the seat. For each of them, cast on a chain of 5 chain stitches and knit with double crochets to the required height.
When all the strips are ready, they begin to be connected to each other, tying them along the narrow edge with single crochets.
You should end up with a pair of interconnected strips. They are intertwined with each other in a checkerboard pattern.
The finished square is tied with single crochets, at the beginning of the row 2 lifting air loops are made and several rows are knitted with double crochets. The height of the binding is made individually, focusing on the height of the side of the chair. The last row is knitted next to arches of 3 air loops, which are made every 4 stitches.
The following patterns are suitable for knitted accessories.
How to take measurements from a chair correctly
As in most cases, the first measurement is taken along the longest side - the height of the chair. If necessary, the length of the cover can be adjusted. After this, the height from the floor to the seat is measured. If the base of the chair is solid, without legs, then the sides are measured, and if with legs, then the distances between them, taking into account their own thickness.
Measurements should be taken at the widest point, usually near the floor.
Many people make the mistake of measuring the backrest in width and height between the frame - you need to find out the full parameters. You need to measure the seat in a different way. If it is raised relative to the level of the frame, then the readings are taken along the boundaries of the seat. And if at the same height, then along the edges of the entire structure, but if you need to sew a cape only on the seat, then it is better to measure only the soft part.
A seat of this size will be enough for comfortable sitting.
