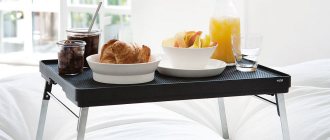
A folding table is a useful attribute for the home. It can save space, be useful in everyday life and be a beautiful addition to your interior. The functionality of folding tables allows them to be used not only inside a house or apartment, but also outside - on a terrace or balcony, in a gazebo and in a garden. There are many variations in furniture stores with complex mechanisms, materials and designs to suit every taste. It may not be easy to replicate a complex model from a store on your own. But working on your own table will allow you to get away from mass models available to everyone and make an absolutely unique and inimitable copy.
You definitely won’t find such a table when visiting your friends. You also don’t have to worry about the wrong size or the wrong shade of oak - everything is in your hands and depends only on tastes and preferences.
A photo of a do-it-yourself folding table is often found on specialized forums on furniture assembly. Inspiring selections of interior design solutions can also make you think about a folding table.
Attention: To avoid mistakes and mistakes, you should make accurate calculations and follow the step-by-step instructions.
Brief overview of the article
What to choose?
DIY folding table ideas are endless. There are a lot of variations on the theme of the folding design, choose the one you need:
- Table and bench;
- Table with folding mechanism when turning;
- Popular table-book;
- Folding coffee table;
- A table combined with shelving for a children's room, office or utility room.
Why do you need a folding table?
On the one hand, a folding table is unnecessary problems. On the other hand, it’s a great chance to save space and make the room more functional.
The advantage of a DIY folding table is its financial attractiveness. Such a table will be cheaper than factory analogues, and will serve no less than tables made by professionals.
Advantages of a folding table according to your own design
Working on a table with your own hands will allow you to acquire a number of positive qualities:
A unique table is inimitable and not replicated to the masses; it is not furniture from popular brands found in every second apartment;
Thoughtful design - the choice of additional drawers, the type of legs, the color of the product, the texture of the material - everything is selected specifically for your room design project;
Decorating is a paradise for craftswomen. You can age such a table, give it spectacular scuffs and roughness, you can make a table using the decoupage technique - it all depends on your imagination and sense of style.
Note!
- Do-it-yourself wardrobe: a review of ways and methods on how to build a stylish and original wardrobe (video and 145 photos)
Do-it-yourself furniture restoration - removing chips and scratches, restoring surfaces. Instructions with photos and video tips
DIY ottoman: how to make it at home. The best ideas, master classes. Photo + video review of beautiful ottomans
Quality - the choice of a folding mechanism and control of work at all stages - is a guarantee of long service life of the table.
Cover edging
1. Prepare material for edge trims N, O with a cross-section of 19*41 mm. (We used hard maple wood as it resists wear and tear longer than pine. Birch trims will also last a long time.) Saw two 1220mm long strips and glue them to the two opposite edges of the lid L as described in the "Tips for Craftsman" below.
Master's advice
Soak the MDF before gluing the overlays. Unlike the dense, smooth faces, the porous edges of MDF absorb glue like a sponge. To ensure a strong bond when attaching trims without using nails or screws, first prime the edges with an even layer of adhesive. Let it soak in for 10 minutes. Apply another layer of glue and then clamp the edge strips to the MDF using clamps.
Quick tip! Let the pads protrude a little. Glue the wooden edge strips to the lid so that their edges protrude slightly above the surface of the MDF board. This allowance will be removed later.
File the second pair of trims to the required length and glue them in place.
2. When the glue has dried, use a router with a copy cutter to remove the protruding edges of the trims N, O flush with the surface of the cover. Soften the sharp edges with a sanding block or plane. (You can use a router bit to make small chamfers or rounds instead.)
Cons of a DIY table
After reading the pros, it seems that nothing could be better than such a solution, however, it is worth remembering the disadvantages of a table made by yourself:
- Time spent – shopping can take little time, the choice online is even smaller. Assembling your own table can take quite a lot of time, especially if you have no previous experience of such work. In addition, something may not work out the first time, and this work will have to be redone.
- If there are technological errors, the table may break.
First make the base
1. Cut out the side platforms A and the central beam B of the base ( Fig. 1 and “List of Materials”). Draw a straight line along the central beam, 76 mm from one of the edges. Glue one of the side platforms to the beam, aligning along this line, and additionally secure it with screws.
2. Cut out crossbars C , side and middle posts D, E , as well as hinge strip F with a small allowance along the length and sharpen on both sides to a thickness of 32 mm. Quick tip! First the length, then the thickness. Regular pine boards are often warped, so first roughly cut them into pieces, leaving an allowance along the length, and then plan to the required thickness. Short workpieces are easier and faster to process in thickness; By removing defective areas by planing, you won’t have to remove too much material.
Then saw the posts and crossbars to the final length and width ( Fig. 1 , “List of Materials”). Now set the loop bar aside.
3. Using glue and screws, fasten the racks D, E with the crossbars C (Fig. 1) .
4. Cut out the side sheets of sheathing G and attach one of them to the frame assembled from posts and crossbars C/D/E using glue and screws. Then secure this assembly to the A/B (Figure 1, Photo A).
Slide the vertical frame C/D/E/G onto the already installed side platform A and screw it to the base beam B.
Lay the assembly on the workbench with the base hanging over the edge and add a second sheet of G plywood to the other side of the vertical frame.
5. Attach the remaining sheathing sheet G to the frame C/D/E (photo B) . Finally, use glue and screws to attach the second platform A to the center beam of the base B, flush against the vertical frame.
Place the wheel supports on the side platforms A, leaving a gap between them and the center beam B.
6. Attach the rotating wheel supports to the underside of the base, two of which should have a brake (Fig. 1, photo C) .
Tools and materials
What is needed to make a folding table? Before starting work, check the availability of the necessary tools and buy everything you need for the job:
- Fastenings (depending on the table material and assembly method). Common fastenings are self-tapping screws, furniture locks, and aluminum corners.
- For the legs, you can use 4 metal pipes or 4 wooden balusters, depending on your idea. The diameter of each should be about seven hundred millimeters.
- Glue for working on wood or plastic - depending on the material.
- Use a jigsaw to cut sheets of compressed wood.
- Screwdriver.
- Drill with drill bits about 4.2 millimeters.
Design features.
It is recommended to use metal or hardwood for the countertop; doors left over from an apartment renovation are quite suitable. A wooden beam is used as a mounting frame and stops. The table is lowered and raised using door or piano hinges. The constructive system is simple, the main thing is to understand the principle of its operation. As an example, let’s take a closer look at the version of the folding table presented on our website.
We offer reinforced frames and brackets for wall-mounted folding workbenches.
The system is easily transformed with one movement. The table cover simply rises to a horizontal position until it clicks, and lowers using two locking handles. To reduce the load during transformation, 4 gas elevators with a five-kilogram force each are used.
The material of manufacture is a steel profile with a thickness of 2 mm, which allows the bracket to withstand a load of up to 300 kg. Powder painting reliably protects metal structural elements from corrosion.
The frame comes complete with a wear-resistant tabletop made of 20 mm thick finger-jointed oak.
By the way, you can purchase the bracket and tabletop from us as a set or separately. If you have your own materials, you can attach surfaces made of plywood, metal, chipboard, wood, and other materials to the bracket.
Without going into small technical details and nuances, let’s look at the basic rules for making a folding workbench yourself. To do this, you will need a tabletop, a wall mounting system, a swivel mechanism and stops.
General rules
- Ruler, square, building level for marking the installation site;
- Hammer with 8 mm drill;
- Hammer;
- Keys (heads) 10 mm;
- Phillips screwdriver.
Algorithm for assembling and mounting the workbench on the wall:
- Decide on the installation location, taking into account that the mounting surface is strong, can withstand the weight of the planned load, and that the process of transforming the workbench is not interfered with by foreign objects;
- We drill holes in the frame beam, which will be attached to the wall, at intervals of 20-30 cm;
- Place the timber on the wall surface, mark the location for the first hole at the required height;
- Drill a hole with a diameter of 8 mm, 10-15 mm deeper than the length of the mounting anchor;
- Attach the beam to the anchor so that it can move freely;
- Align the beam horizontally, mark and drill the remaining holes in the wall;
- Install the expansion anchors and tighten them. The frame base for our workbench is ready;
- Using door hinges, fasten the stop legs to the edges of the tabletop, so that when folded they do not interfere with the table's tight fit to the wall surface;
- We fix the hinges on the tabletop and, using self-tapping screws, mount the tabletop to the frame beam;
- We install the tabletop in the working position, place the stop legs against the wall, mark the locations of the locking bars, which we securely fasten to the wall using anchors.
- We are conducting a test test.
Step-by-step instruction
Despite the various design solutions and variations, the list of actions will be approximately the same everywhere, so step-by-step instructions for a folding table will look something like this:
- We collect all the necessary components of the future folding table: legs, tabletop, folding mechanism;
- Select a drawing. It’s easy to choose do-it-yourself drawings of a folding table on specialized websites about repair and design;
- We cut the material for the future table ourselves or in a furniture workshop according to the drawings;
- The frame is assembled;
- For beautiful and invisible joints we use a heat gun.
Final touches
1. Before reinstalling the cover and legs, sand all surfaces smooth and apply a finish coat. We used a semi-gloss polyurethane varnish, applying it with a swab, with sanding in between using 320-grit sandpaper.
2. Using the bolts, reinstall the legs (Fig. 2). Use self-locking nylon insert nuts, but do not tighten them all the way—the legs should turn smoothly on the axle bolts.
3. Having invited an assistant, lift the lid and move the legs down, placing them on the floor. Roll the previously assembled base under the lid and align the hinges in place. If necessary, adjust the height of the cover using the screw supports in the legs. Attach the hinges to the supporting frame with screws, screwing them into the previously drilled holes.
How to calculate a bench table?
For a beautiful and harmonious table as a result, you need to adhere to simple calculations:
- The thickness of the tabletop should vary between 20 and 30 millimeters.
- The length of the tabletop should be proportionate to the height.
- The legs must be able to support the tabletop and the dishes on it.
- For reliability, we use zip ties.
When starting to create your own dream folding table, remember the precautions and safety precautions. Perform complex work outdoors or in a free, well-ventilated area.
Choose beautiful colors and stylish decor for your future table according to the overall style of the room. Do not forget that such a table is easy to use in a country house and is especially easy to transport and move.
Note!
- How to make a backlit mirror with your own hands: necessary materials, tools. Tips for choosing lamps and LED strips
- A simple and beautiful DIY bathroom shelf made of MDF, glass, plasterboard: straight and corner options. Photo instructions, tips, video master class
How to make a computer desk with your own hands from wood or chipboard. Photo/video master class + description of models
Choose a table for your balcony or terrace. Design the book-table as a decorative console if you do not plan to use it every day and create it only for receiving guests on holidays.
General description of the workbench design
This version of the workbench has the simplest design. It is attached to the wall on one side, has two support legs and can be folded (retracted) into a vertical position. Thus, this design is well suited for rooms that have limited space, since free space can be organized by transforming such a workbench.
A homemade workbench consists of the following basic elements:
| Name | Purpose and description |
| Tabletop | Working surface of the table |
| Frame | The supporting structure on which all other elements are based. |
| Support element | It is firmly attached to the wall and is one of the supports of the working surface. |
| Legs | Two support legs, structurally interconnected |
| Retainer | An element that is attached to the wall and serves to secure the folding workbench in the folded position |
All these elements are made of solid wood (pine) and plywood.
