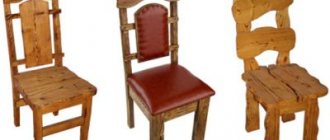
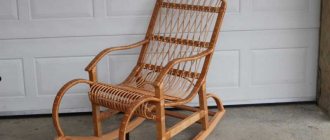
If you want to freshen up the decor in your home and also dream of trying your hand at carpentry, these two desires can easily be combined. An excellent solution is to make wooden chairs with your own hands, photos of which are presented below. These pieces of furniture are always appreciated for their practicality. They will come in handy in a city apartment, in a private house, and in a country house. The usual design is simple and quite within the power of a novice carpenter. And for those who have experience, you can choose a more complex drawing of a chair with a backrest. In any case, the homemade product will certainly be in demand.
Current wood species
Wood is easy to machine. In particular, we are talking about sawing, drilling, planing, etc. But before you make a chair with a wooden back with your own hands, you need to decide on the type of wood from which each lumber will be made. For furniture it is recommended to use:
- Pine;
- Larch;
- Cedar;
- Oak;
- Hornbeam;
- Cedar;
- Maple;
- Ash;
- Nut;
- Pear;
- Apple tree.
Moreover, it is not necessary to choose expensive and durable oak, hornbeam, and walnut. They are luxurious for making something as humble as a chair. In addition, in addition to them, there are coniferous species that are resistant to moisture and convey a wonderful aroma. If only this breed did not have a tree with many knots. Birch and poplar should also be avoided - the first one turns black over time, and the second one quickly rots and turns into dust.
Decorating the product
You can transform a boring chair using various decorating techniques. The simplest and most popular methods:
- Pasting with colored film. The range of colors is so wide that it will satisfy even the most capricious buyer. The decorating process itself does not require any special skills. In addition to the film, you will need scissors, a metal spatula and a degreaser.
- Using ready-made stickers for decoration - they are attached to the surface of the furniture and smoothed out. However, over time, the products lose their attractiveness and will need to be replaced with others.
- Dyeing through a layer of tulle. You will need acrylic paint and a piece of scrap fabric with beautiful lace. The tulle is fixed with tape, paint is applied over it (it is better to use a spray can), and after drying the material is carefully removed.
Besides painting, there are also other ways to decorate furniture. A familiar and win-win decor for a chair is beautiful pillows, covers and capes. They come in a wide variety of shapes and colors. To turn an ordinary chair into an exclusive piece of furniture, you can use old curtains and tablecloths, things that are out of fashion, lace, ribbons, bows and much more. For example, pillows can be sewn using old padding polyester jackets as a basis.
It is important to remember that all decorative elements must be made removable so that they can be washed or cleaned
Emphasis on quality lumber
It is convenient to assemble chairs from ready-made parts. But if the latter are not available, then they have to be made from lumber in the form of bars and boards. The corresponding workpieces can be called high-quality if they lack:
- Knots;
- spots;
- Dents and holes;
- Roughness.
If unevenness can be smoothed out and dents can be repaired, then with knots things are more complicated. The fact is that they contribute to a break in the structure of the array. Therefore, when choosing furniture, the target audience should take a closer look at the legs and the supporting frame as a whole. The same applies to the choice of lumber for making thematic elements.
Chair design: general idea
At first glance, a wooden chair seems like a simple piece of furniture. However, looking at the drawings of a wooden chair, a combination of different elements becomes clear:
- Seat – allows you to sit down;
- Backrest – allows you to lean back and fix your back in a comfortable position;
- Rear crossbar - strengthens the load-bearing parts of the backrest and prevents the back from falling back;
- Tsargi - strengthen the fastening of the supporting legs on the sides;
- Side crossbars – help secure the load-bearing legs from above;
- Legs – raise the product above the floor to a certain level.
For more comfortable sitting, the finished product can be upholstered and filled with filling. Moreover, the upholstery, depending on its composition, definitely contributes to the style of the chair. The upholstery is made of textile or leather. The filler is foam rubber, synthetic fluff, and fabric scraps.
The back may have one or more crossbars. In this case, the crossbars are arranged lengthwise or crosswise.
It is recommended to supplement the legs with soft liners at the bottom. The latter prevent the formation of dents on the flooring from the load of the legs and chair, respectively.
Note!
DIY furniture made from pallets (140 photos) - step-by-step master class with diagrams and drawings, design ideas
DIY coffee table - manufacturing guide with a full description of the steps, choice of materials (120 photo ideas)
Do-it-yourself laundry basket (130 photo ideas): step-by-step master class for making it yourself, choice of materials, design options
Variety of shapes and options for making wooden chairs
Wooden furniture comes in different shapes, sizes, and designs. The choice of models depends on the style of the interior and the functional purpose of the room.
DIY designer chairs are made from solid wood; options with soft inserts and upholstery are also common. Solid wood models are appropriate in many interior styles (modern, art deco, country). In rooms with high humidity conditions, models with a simple frame are optimal, because the fabric base will quickly be damaged.
Upholstered furniture is suitable for bedrooms, living rooms, and offices. Fabrics for decoration are selected taking into account the texture of the walls and textiles. Wooden chairs can be made with armrests.
Chairs in Provence style are produced with or without upholstery. Models with smooth surfaces are painted and complemented with decoupage techniques. The upholstery of products for the Provençal direction uses fabric with floral patterns.
Chair models vary in design. Products with square or trapezoidal seats look strict and elegant. The models are optimal for modern and classic styles.
Chairs with rounded seats and backs are elegant and romantic. The legs of the models are complemented by fine carvings. Options are optimal for Empire, Baroque, Vintage styles.
Models are available with the ability to transform or stationary. The choice of product type is affected by the intensity of use. Fixed chairs are selected for organizing permanent seating in living rooms and kitchens. Transformable products are ideal as additional items when holding events or receiving guests.
Type of chair design
Chairs differ from chair to chair, even if thematic products are made from the same type of lumber. The variety of designs contributes to the corresponding assortment. The problem of how to make a chair out of wood with your own hands must be solved, guided by the characteristics of the future project, as well as the factors that allow the chair to be special:
- Strength - type of wood, number of crossbars, quality of fastening, thickness of lumber;
- Functionality – the form of the model and its ability to be transformed (specifically, folding products should be highlighted);
- Convenience – product dimensions, back height, upholstery;
- Style – breed, upholstery, painting, shape.
Low, high, soft, dark - a wooden chair can be made in different types. The main thing is that the corresponding event welcomes an independent approach (without the help of joiners and carpenters).
Preparing for work
There may be a lot of improvised items on the farm, left over after construction, renovation, donated by neighbors and relatives. You can make a garden chair from the following base:
Tree. The material is always on sale, it is easy to process with household tools and give it a wide variety of shapes. With regular technological treatment, wooden garden chairs can last for decades.
Metal. The materials used are profile and round pipes made of coated black iron, aluminum and stainless steel. The metal frame is highly durable, but working with such material is much more difficult.
You should prepare the following tools:
- level, tape measure, pencil;
- plane, chisel, hammer, saw;
- scissors;
- screwdrivers, wrenches;
- paint brush.
List of required materials:
- timber and boards, waterproof plywood;
- self-tapping screws, bolts and nuts;
- wood glue;
- paint and varnish compositions, impregnation, antiseptic;
- sandpaper.
To work, you need a flat area and good weather. The best place is in the gazebo, on the terrace or under a canopy. If you have to work indoors, you need to cover the interior elements with dust film and put cardboard on the floor. For your own protection, you should prepare a respirator, gloves, mounting goggles or a visor.
Optimal sizes
The normal height of a chair seat is 75-80 cm above floor level. The seat itself has an area of about 30x30 cm.
The height of the backrest is calculated depending on the height of the user. However, it should only support 1/2 or 2/3 of the back length.
If you need to make a children's chair with your own hands, then the height of the product is increased so that the child can freely hold his elbows above the table top. The exception is the youngest children. A transformable high chair with an integrated seat will suit them. The latter should be located above the floor at a height of 45-50 cm. Moreover, crossbars for the back and legs are required.
Add a seat
To make your own upholstered L seat, follow the instructions below. Having finished upholstering the seat, place it on the chair close to the back legs B and in the middle between the side frames E. Using the countersunk mounting holes in the corner braces K, drill pilot holes in the seat L. Attach the seat to the corner braces with screws.
- Step 1. Using spray adhesive, glue a piece of sponge to the seat with side trim allowances. Trim off any excess by running a knife blade along the edges of the seat. Try to make the cut strictly vertically.
- Step 2: To ensure the edges of the seat are rounded, cut off the top sharp edges of the sponge. To do this, use a marker and a ruler to draw lines 100 mm from the edge into the seat and 25 mm down.
- Step 3. Cut the top corners according to the markings made. Maintain a constant angle of the blade, aligning it with the lines on the top and side of the sponge.
- Step 4. Place a piece of thick padding polyester measuring 540x540 mm on the workbench. Align the sponge seat with the center of this piece. Wrap the edges of the padding around the seat and secure them with staples. Trim off excess padding at the corners.
- Step 5. Align the padded polyester seat with the center of a piece of upholstery material measuring 540x540 mm. Secure the edges of the upholstery with staples in the middle of each side of the seat. Working from the middle of the sides to the corners, pull the edges of the upholstery material taut and secure with staples.
- Step 6. Gather the material in the corners and trim off the excess, leaving about 20 mm from the seat. As you stretch the rest of the upholstery, spread it evenly with staples. Trim off any excess material.
Required Tools
One copy of a real wooden chair, i.e. seats made from solid wood are relatively expensive - 6,000-20,000 rubles. The cost is affected by the brand and the complexity of manufacturing the structure.
Note!
Do-it-yourself illuminated mirror - step-by-step master class on how to make it yourself, photos of types of lighting
DIY flower stand - TOP 100 photos of stand options, detailed instructions, diagrams and drawings from the masters
Do-it-yourself furniture restoration: restoration methods, step-by-step master class, necessary tools and materials
It is easier for the target audience to make a wooden chair themselves than to pay an average salary for the entire furniture set. The question is whether the creator has the necessary tools:
- Measuring objects - ruler, square, meter, level;
- Fixation items – vices, clamps;
- Impact devices – hammer, mallet;
- Items for cutting – jigsaw, hand saw for wood;
- Smoothing accessories – electric planer, grinder, emery machine;
- Devices for drilling and fastening – drill, screwdriver;
- Painting accessories – brushes, roller, containers.
Additionally, you will need a workbench and consumables - sandpaper, screws, choppers, wood glue.
Assembly
Chair assembly procedure
A wooden chair is assembled without a seat twice: first dry and without wedges, and after adjusting the parts and checking the configuration by measuring the sides and pairs (oblique diagonals from the lower corner to the opposite upper one), finally with wedging and gluing. In both cases, the so-called. an apron made from the rear legs, back and longitudinal drawers, and the “apron” is already adjusted to it
Note: Note the way the tenons are inserted into the front legs here and below when we get to the seat posts. With equal spikes, like in a stool, the sides of the chair do not cut into the legs, and there will not be adequate strength.
About frame details
All parts of the chair are made from solid wood. The temptation to make the rear legs prefabricated to save material is great, but don’t: they will soon break. It’s better to take on the set right away, marking the contours on the surface of the board according to the template with a shift. If the chair is for dining, then in this case the longitudinal drawers should also be slanted/curved, and the question arises: how to make tenons with grooves? It is very difficult to mow at home, and it is not necessary. You will have to spend a little more material, but oblique/curved drawers with straight tenons can be obtained without much difficulty from a board as thick as the drawer height, see fig.:
How to make slanted/curved drawers with straight tenons
Only now you need to mill the tenons, using a mandrel with the required angle, and always in a bag: remove the fold from the long sides, transfer the bag and fold the short sides. The corners of the studs are rounded separately, this is no longer critical.
Back
The back of a chair, as you know, can be solid, hard, stacked, or soft. Solid rigid - just a curved bar. It is cut out, like curved drawers, as well as details of hard inlaid backs, pos. 1-3 in Fig.; We won’t talk about the backs of Viennese and other complex chairs for now. The back parts are assembled on spikes; We’ll leave chairs with backs with screws in museums of Soviet consumer goods.
For a simple soft back, pos. 4, you need a straight top bar and, possibly, an intermediate support (purlin, “backrest”). The base of the back is made of 4-6 mm plywood. They cover it in the same way as the seat, see below, but use foam rubber no thicker than 7 mm or use batting/felt. The soft padding is placed on glue, not reaching 15-20 mm to the edges. The decorative lining is sewn into a pocket, placed on a base with padding and stitched at the bottom. Place the backrest in the grooves selected in the top bar, rear drawer or purlin and rear legs; select the grooves by measuring the thickness of the back covered with fabric. The sequence of chair assembly changes:
- assemble the left (right) part of the apron with the back drawer, top bar and purlin for dry use;
- put the backrest, perhaps with adjustment;
- they complete the apron by installing the missing rear leg with its own longitudinal drawer;
- the front part is attached to the apron;
- after checking the configuration and final adjustment, they go through everything with glue (optionally with wedging) in the same sequence;
- The soft insert of the backrest is finally placed either dry, or with a minimum amount of glue added only to the grooves so that it does not squeeze out onto the fabric.
Seat
How the chair cushion is arranged is shown in Fig. with a drawing at the beginning. Unlike the seat of a stool, the upholstery in this case does not stretch as much when the sitter fidgets, so the inner upholstery of the base is not required. The base is made of plywood or a solid board with a thickness of 12-30 mm. But the seat of a chair is more difficult to clean than a stool, so the foam padding must be covered with felt or, worse, batting that absorbs sweat. Solid particles of dried sweat are subsequently squeezed out of the seat.
Correct upholstery of a chair seat
The upholstery of the chair seat also does not need to be fastened as carefully as that of a stool; you can get by with pinning it with a furniture stapler without gluing. Cover the pillow with decorative fabric in the usual way, trimming the scars that form at the corners. But the cladding made as shown in Fig. will last much longer. If the chair is covered with much more elastic and expensive leather than fabric, this is a must-have option.
Laths or jibs?
Chair brackets for seat installation
Drawings of chairs most often show the fastening of the seat to slats, embedded in the legs along with the longitudinal drawers and additionally attached to them with self-tapping screws. This highly technological and low-labor method is widely used in industry, but for yourself it would be much better to lay the seat on the jibs, see fig. on right. The chair will be much stronger, the seat will get dirty less and will be easier to remove for cleaning.
How to install the seat?
A seat simply laid on top of the support frame loses all the advantages compared to a stool, and the chair frame experiences increased loads. Therefore, it is better to place the seat of the chair in a tray formed by the drawers; To do this, if the seat is on jibs, they are placed lower by the thickness of the base of the seat without a cushion. So that the front drawer does not interfere with the legs, it is lowered to the same thickness, which will only make the entire frame stronger, and the seat itself is moved forward by the thickness of the drawer or a little more. Then the front jibs cut into the front frame flush with its top.
About curly legs
I really want to put a homemade chair on curly wooden legs. This is not at all as difficult as it might seem, you just have to spend money on thick beams: for the front legs, taking into account the margin for processing, a 150x150 beam will do, and for the rear legs - from 250x250.
How the figured legs on the bars are marked is clear from Fig. Basic conditions: you need 2 identical templates, with their heads and heels meeting on the inner (relative to the finished leg) edge of the beam. However, the convergence of the heels is not necessary, then they will turn out to be wide, like hooves, and the trace of their supporting surface will look like a horseshoe. The technology itself does not require art education: they simply remove the excess from the side of the inner edge and alternately from the outer edges.
Relevance of painting
Many people are in a hurry to paint a wooden chair, but this is not necessary. The fact is that the chemical composition only spoils the naturalness of the forest. The latter ceases to emit a pleasant aroma.
Another thing is a worn-out model. It can definitely be painted with quick-drying and hygienic water-based silicone paint marked “For wood”.
