Wood is a favorite material among furniture makers.
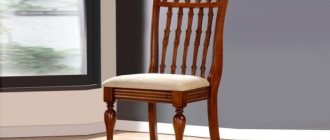
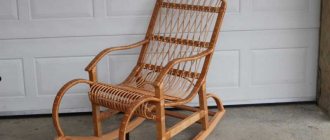
After all, each piece of furniture made from natural solid wood is unique and inimitable in its own way. You don’t have to be a professional furniture maker to make a beautiful and practical chair for your home. The main thing is to choose the right materials and tools, show your imagination and stock up on free time and patience. By deciding to make chairs for your home from wood, you will fill the interior with a special atmosphere of warmth and comfort. This material combines harmoniously with glass, stone, textiles and even metal .
Current wood species
Wood is easy to machine. In particular, we are talking about sawing, drilling, planing, etc. But before you make a chair with a wooden back with your own hands, you need to decide on the type of wood from which each lumber will be made. For furniture it is recommended to use:
- Pine;
- Larch;
- Cedar;
- Oak;
- Hornbeam;
- Cedar;
- Maple;
- Ash;
- Nut;
- Pear;
- Apple tree.
Moreover, it is not necessary to choose expensive and durable oak, hornbeam, and walnut. They are luxurious for making something as humble as a chair. In addition, in addition to them, there are coniferous species that are resistant to moisture and convey a wonderful aroma. If only this breed did not have a tree with many knots. Birch and poplar should also be avoided - the first one turns black over time, and the second one quickly rots and turns into dust.
Types of chairs
There are many types of chairs. We will look at two of them: a kitchen chair for dining and a living room option. They both have a similar shape, but the dining chair has a narrower seat.
The following materials are used to produce chairs:
- Metal blanks;
- Wood;
- Polyamides;
- Composite materials.
There are special versions of chairs made of glass or rare stone. Such designs have, first of all, decorative value.
Of the above materials, the most practical is wood - it is easy to process, has high strength characteristics and looks aesthetically pleasing.
Emphasis on quality lumber
It is convenient to assemble chairs from ready-made parts. But if the latter are not available, then they have to be made from lumber in the form of bars and boards. The corresponding workpieces can be called high-quality if they lack:
- Knots;
- spots;
- Dents and holes;
- Roughness.
If unevenness can be smoothed out and dents can be repaired, then with knots things are more complicated. The fact is that they contribute to a break in the structure of the array. Therefore, when choosing furniture, the target audience should take a closer look at the legs and the supporting frame as a whole. The same applies to the choice of lumber for making thematic elements.
Useful tips
Building a hut at home is not difficult if you adhere to the following recommendations:
- The easiest way is to build a hut from just pillows. However, such a design will not be durable. It will last for a few minutes of play. If you plan to spend more time in the hut, you should take care of other components - blankets, furniture and means that will hold it all together into a single whole. This design will be durable.
- If the size of the room itself is large, you can increase the hut itself that is being built in it. In this case, it will be possible to divide it into compartments - several small rooms. To divide the hut into compartments, you can use chairs, pillows, and boxes.
- To illuminate a house that will be dark without windows, you can use a battery-powered flashlight. So that you don’t have to constantly hold it in your hands, you can choose a place for it on the ceiling or floor, prepare elements with which it will be secured in the chosen place.
- The constructed hut will have many cracks. Pillowcases and towels will help eliminate them. It is enough to fill unwanted holes with them;
- Since the hut is made mainly of soft objects that do not conduct heat well, it can become very hot inside. It is recommended to take care of installing a portable fan here in advance. It is important to be careful: under no circumstances should you cover it with blankets, otherwise a fire may occur.
- It is not necessary to leave the inlet open. Here you can install an element that will act as a door. This could be, for example, a pillow or a large sheet of cardboard.
- Those who want the construction to last not a few minutes, but several hours, are recommended to use lighter items. This is especially true for the blanket, which will act as a roof.
- To build a hut, you need to try to take items that none of the household members will need in the near future.
- Do not use fragile items that could break or cause harm to health.
- Plastic sheets should not be used as they emit an unpleasant and toxic odor.
- There is no need to use light bulbs that get very hot, as they create a fire hazard.
- If the fortress is large, you can put a mattress in it so that you can sleep fully in it.
- You need to place the hut so that it does not block the doors. Otherwise, if something happens, it will be impossible to leave the room.
A small hut, built from a blanket and pillows at home, is great and simple entertainment for children, family or a group of friends. It’s a pleasant place to spend time in this cozy place: play, communicate, fantasize.
Chair design: general idea
At first glance, a wooden chair seems like a simple piece of furniture. However, looking at the drawings of a wooden chair, a combination of different elements becomes clear:
- Seat – allows you to sit down;
- Backrest – allows you to lean back and fix your back in a comfortable position;
- Rear crossbar - strengthens the load-bearing parts of the backrest and prevents the back from falling back;
- Tsargi - strengthen the fastening of the supporting legs on the sides;
- Side crossbars – help secure the load-bearing legs from above;
- Legs – raise the product above the floor to a certain level.
For more comfortable sitting, the finished product can be upholstered and filled with filling. Moreover, the upholstery, depending on its composition, definitely contributes to the style of the chair. The upholstery is made of textile or leather. The filler is foam rubber, synthetic fluff, and fabric scraps.
The back may have one or more crossbars. In this case, the crossbars are arranged lengthwise or crosswise.
It is recommended to supplement the legs with soft liners at the bottom. The latter prevent the formation of dents on the flooring from the load of the legs and chair, respectively.
Note!
DIY furniture made from pallets (140 photos) - step-by-step master class with diagrams and drawings, design ideas
DIY coffee table - manufacturing guide with a full description of the steps, choice of materials (120 photo ideas)
Do-it-yourself laundry basket (130 photo ideas): step-by-step master class for making it yourself, choice of materials, design options
Folding chairs with backrest
To make this copy, prepare in advance:
- two straps with leg lengths of 74 and 47 cm, respectively;
- 5-8 flat strips 32 cm long;
- 3 rods 43 cm each;
- fasteners.
Let's move on to the collection. Let's start by making the seat. To do this, use short self-tapping screws to secure the slats to the support rods at an equal distance from each other.
Let's move on to assembling the frame. Its main components are the protruding legs and the back of our wooden masterpiece. We select the part where the back will be and attach the slats to it to support the back; there is enough crossbar in the lower part for greater stability. The hind legs also have crossbars at the top and bottom.
So we have two elements that need to be fastened together. To do this, use bolts of any convenient diameter, drill through holes in both frames and fasten them together. We connect the front and rear frames of the chair with bolts and nuts.
Tip: Don't over-tighten the nuts, allow the inner frame to rotate freely, but don't loosen.
You've probably already seen similar photos of a folding chair; now this comfortable and practical piece of furniture will appear in your home.
Type of chair design
Chairs differ from chair to chair, even if thematic products are made from the same type of lumber. The variety of designs contributes to the corresponding assortment. The problem of how to make a chair out of wood with your own hands must be solved, guided by the characteristics of the future project, as well as the factors that allow the chair to be special:
- Strength - type of wood, number of crossbars, quality of fastening, thickness of lumber;
- Functionality – the form of the model and its ability to be transformed (specifically, folding products should be highlighted);
- Convenience – product dimensions, back height, upholstery;
- Style – breed, upholstery, painting, shape.
Low, high, soft, dark - a wooden chair can be made in different types. The main thing is that the corresponding event welcomes an independent approach (without the help of joiners and carpenters).
Cardboard version
For kids you can make a small house out of cardboard. Among the advantages of this design:
- quick installation;
- ease of manufacture;
- an opportunity for a child to show creativity and do their own interior decoration using paints and pencils.
Parents just need to use a couple of large boxes, scissors, glue and tape to give the house the desired shape. Following your child's imagination, you can build princess castles or fortresses for a knight. And it doesn’t matter that the structure is fragile. This is more than compensated by the pleasure of creating and playing it!
Optimal sizes
The normal height of a chair seat is 75-80 cm above floor level. The seat itself has an area of about 30x30 cm.
The height of the backrest is calculated depending on the height of the user. However, it should only support 1/2 or 2/3 of the back length.
If you need to make a children's chair with your own hands, then the height of the product is increased so that the child can freely hold his elbows above the table top. The exception is the youngest children. A transformable high chair with an integrated seat will suit them. The latter should be located above the floor at a height of 45-50 cm. Moreover, crossbars for the back and legs are required.
House - tent
If the area of the children's room does not allow placing a hut on the floor, you can make a removable awning over the child's bed. This option will allow him to independently turn his sleeping place into a play area.
As a frame, you can use narrow bent metal-plastic tubes connected with tape. Textiles stretched over tubes will serve as a roof in an improvised tent. The homemade house is easy to install and fold without the help of adults, which children will certainly appreciate.
Read also: Why spathiphyllum leaves turn black, what to do
Required Tools
One copy of a real wooden chair, i.e. seats made from solid wood are relatively expensive - 6,000-20,000 rubles. The cost is affected by the brand and the complexity of manufacturing the structure.
Note!
Do-it-yourself illuminated mirror - step-by-step master class on how to make it yourself, photos of types of lighting
DIY flower stand - TOP 100 photos of stand options, detailed instructions, diagrams and drawings from the masters
Do-it-yourself furniture restoration: restoration methods, step-by-step master class, necessary tools and materials
It is easier for the target audience to make a wooden chair themselves than to pay an average salary for the entire furniture set. The question is whether the creator has the necessary tools:
- Measuring objects - ruler, square, meter, level;
- Fixation items – vices, clamps;
- Impact devices – hammer, mallet;
- Items for cutting – jigsaw, hand saw for wood;
- Smoothing accessories – electric planer, grinder, emery machine;
- Devices for drilling and fastening – drill, screwdriver;
- Painting accessories – brushes, roller, containers.
Additionally, you will need a workbench and consumables - sandpaper, screws, choppers, wood glue.
Let's sum it up
Despite the apparent massiveness of the structure, making a chair with armrests is not difficult, even in the absence of special equipment. The manufacturing technology of the structure is very simple - just read the instructions carefully, look at photographs of the finished products and understand how the parts are connected to each other. Please note that it is important to make the strongest possible connections so that the recliner is reliable and will delight you and your guests for a long time.
Lately, you can often see homemade interior items made from pallets when visiting someone. These are structures used to transport goods. It turns out that it is not so difficult to make a sofa from pallets (pallets) with your own hands, and in terms of its quality it can be even better than what you can buy in a store.
Relevance of painting
Many people are in a hurry to paint a wooden chair, but this is not necessary. The fact is that the chemical composition only spoils the naturalness of the forest. The latter ceases to emit a pleasant aroma.
Another thing is a worn-out model. It can definitely be painted with quick-drying and hygienic water-based silicone paint marked “For wood”.
Preparing the circuit
First you need to decide on the type of chairs that will need to be made. It is desirable that they be the same. It's more beautiful, more convenient and simpler. Then it is recommended to draw several sketches from which to choose the best one. Then you can proceed to drawing up drawings.
It is necessary to take into account a number of points related to size and shape. The optimal parameters for the seat are a platform of 40x40 cm. The distance from the ground should be about 40-42 cm. The back is straight, 45 cm high, but can be raised up to 70 cm. In this case, you will have to equip an orthopedic headrest.
It is better to connect individual parts using the tongue-and-groove system, but this is quite difficult, so it is better to use corners.
For a solid base, the support can be made in the form of legs with transverse strapping. For use on the ground, it is better to make a platform, frame or runners. In this case, the contact areas should be covered with sleeves, steel or plastic overlays.
Photo of a homemade wooden chair
How to make a blanket house at home. How to make a children's house in an apartment or on the street
Children absolutely love secluded corners where they can fantasize or play an exciting game. For this reason, children often build homemade houses from scrap materials: pillows, bedspreads, chairs. You can make your child’s leisure time exciting with the help of a DIY children’s hut.
But first, it is advisable to decide where the structure will be located: on the street or in the room. The choice will depend on the list of materials used and dimensions.
Wigwam in the house
During the cold season, a wigwam is an excellent option for games in the room. It is one of the attributes of a children's room decorated in Scandinavian style. A textile house in the form of an Indian hut can be made using:
- strong wooden twigs or slats, connected at the top with a rope, and at the bottom opened in the form of a polyhedron;
- a textile cover or fabric triangles attached to a frame made of rods.
The stability of the structure will be ensured by transverse rods attached to the bottom of the wigwam.
Such a hut will become indispensable if you use it to store numerous toys.
House - tent
If the area of the children's room does not allow placing a hut on the floor, you can make a removable awning over the child's bed. This option will allow him to independently turn his sleeping place into a play area. Narrow bent metal-plastic tubes connected with tape can be used as a frame. Textiles stretched over tubes will serve as a roof in an improvised tent. The homemade house is easy to install and fold without the help of adults, which children will certainly appreciate.
Cardboard version
For kids you can make a small house out of cardboard. Among the advantages of this design:
- quick installation;
- ease of manufacture;
- an opportunity for a child to show creativity and do their own interior decoration using paints and pencils.
Parents just need to use a couple of large boxes, scissors, glue and tape to give the house the desired shape. Following your child's imagination, you can build princess castles or fortresses for a knight. And it doesn’t matter that the structure is fragile. This is more than compensated by the pleasure of creating and playing it!
Summer house
For the happy owners of a summer cottage or private territory, the choice will undoubtedly be made in favor of the street. This will allow the child not only to spend more time in the fresh air, but also to hide from the scorching sun. It is better to abandon the idea of building a playhouse for your beloved child in an open area, and give preference to a flat area in the shade.
Traveler's hut
Older children can make their own structure from available materials: ropes, sheets and pegs. To do this, it will be enough to perform the following steps:
- stretch a rope between the trees;
- throw a sheet or blanket on top;
- Stretch the edges of the blanket and secure it to the ground with wooden pegs.
Such a house, made with your own hands, will give your children double pleasure. Blankets or pillows will add comfort, and thematic attributes will help you feel like a hero of a fascinating story: a flashlight, binoculars, a flask and a backpack.
Dream tent
Young ladies will love a summer house in the form of a tent. To build it you will need:
- gymnastic hoop;
- a long piece of fabric or sheet;
- rope for fastening.
The basis of the structure will be a hoop, and the walls will be a long fabric attached to it. The hoop is suspended from a tree branch with a rope at such a height that the edges of the fabric reach the ground. The roof can be made from a separate piece of fabric, sewing it to the hoop around the circumference. In this case, to hang the structure it will be enough to use a strong ribbon sewn to the center of the dome.
"Living" house
Lovers of adventure and wandering will be delighted with the “living” hut. Long flexible branches will help make a child's dream come true. Having acquired a sufficient number of them, a circle should be drawn in the space allocated for construction. Then everything is simple: the branches are dug vertically along the outlined circle with thin parts upward. By bending the resulting structure towards the center in a conical shape, secure it tightly enough from above. By planting climbing plants along the perimeter of the frame, you can make a “living” hut that will delight its young inhabitant every season. A playhouse for a child is not just another toy or whim. A personal space in the form of a hut will allow children to develop their imagination and enjoy exciting games, and older children to dream.
The main steps for sewing a tent consist of the following procedures:
