Scattered toys look so cute. They occupy the most needed places. Only in the understanding of a child. Parents are annoyed by the mess; they want to clean it up, hide it, get rid of it. The only way out is to build a convenient, accessible, neat storage space. Let your beloved child handle the cleaning on his own, and the mothers will do other things.
Today we will make a toy rack with our own hands. We offer a detailed master class with tips, secrets, and little tricks. Bonus - decor options for every taste.
Advantages and disadvantages of toy storage furniture
Shelves and chests of drawers for children's rooms are multifunctional and suitable for a child of any age. They fit a lot of supplies: for school, creativity, toys or bedding. The furniture is ergonomic: convenient placement of things and minimal waste of free space.
An option for storing toys, in addition to regular boxes, is a rack.
The following advantages can be highlighted:
- Safety, environmental friendliness. Modern materials meet all criteria, do not cause allergic reactions, and do not emit harmful toxins.
- Exclusive execution (if made independently), wide selection of models (if selected in stores).
- Unique appearance - ships, animals, trees.
- Ease of use.
For the baby, the most important thing is the atmosphere of the room, where he feels comfortable, first of all, with his favorite things.
It is convenient to place wooden and collectible toys and books on open shelves. You can hide construction sets or cubes in the drawers.
Making a rack with your own hands means being able to provide all the child’s preferences.
Depending on the type of furniture, there are the following disadvantages:
- plastic chests of drawers should not be overloaded;
- furniture made from natural wood is too heavy and uncomfortable for children to use independently;
- drawers without stops can cause injury;
- When made independently, textile finishing collects a lot of dust.
You need to purchase shelves and shelves taking into account the individual characteristics of the child, his age and independence.
It's hard to imagine a children's room without a shelving unit.
Shelf “house” for a child’s room: design options, production, photos
We present an interesting solution for a nursery - a shelf in the shape of a house. This design will appeal to any child aged 3 to 10 years. Its purpose is to store toys and other entertainment accessories.
House shelves in a children's room are additional storage space for books, toys, photo frames, souvenirs and other small items.
They are perfect for any children's room, complementing its interior and making it more fabulous.
Dollhouses with shelves make children's rooms match their hobbies in style, while also fulfilling their practical function.
Now the child will not be afraid of cleaning the room and will love it, because with such furniture, arranging toys and books will become a real pleasure!
The shelves inside this cabinet can be arranged as you wish, so that operation is as convenient as possible.
Children's shelf houses are products that imitate the walls and triangular roof of a building. This is an open structure, inside of which there are several shelves connecting the sidewalls. It is possible to divide the intershelf space into sections.
Shelf houses are absolutely safe for children; it is simply impossible to get hurt on them.
You can also choose any color for the house according to the child’s wishes.
Dollhouses have their advantages:
- Convenient for placing toys, books, children's sets;
- Inexpensive;
- Compact.
Only environmentally friendly and child-safe materials are used in their production.
The components of the shelf house are natural processed wood and odorless acrylic paint.
The design can be either wall or floor. In the latter case, the child is interested in turning such a piece of furniture into a real home for dolls, arranging it and inventing play stories.
The shelf house will fit perfectly into your child's room.
Various toys, books, construction sets, drawings, crafts, and photographs will look great on the shelves.
To make it safe for a child to play in the room, choose a product made from environmentally friendly materials - wood, plywood, chipboard, which have a flat surface and are coated with durable paint. The widest range of colors.
Putting things on shelves will help to instill in a child a love of order from an early age, instilling neatness and independence in him.
The bright colors of wooden houses will not let children get bored and will contribute to their diversified development and good mood.
Purchased dollhouses, as a rule, undergo certification, like all other children's products. Most house shelves are handmade products, so you can find a variety of options - with asymmetrical cells, semi-closed, etc.
Bright and unusual interior accessories in the form of shelf houses immediately catch the eye.
They are beautiful, warm and will undoubtedly add a touch of joy and optimism to the atmosphere of the room.
It is quite easy to make such a design at home. To do this, you will need several boards, screws or nails, a screwdriver, a hacksaw, and quick-drying paint for treating wooden surfaces.
Tools for making a house shelf.
Children's shelf houses must be firmly made and free from burrs and roughness. Therefore, before starting work, thoroughly clean the surfaces. The frame is made first, and only then the roof.
Everything is attached with Euroscrews, making the structure stable.
If sections are proposed, then they are also made before installing the top. The roof does not have to be constructed from the main material. You can use a combination: the walls are made of wood, and the top is made of plywood or thick cardboard.
The railings are made from wooden rulers, and the fence itself is made from a decorative element glued in half.
Many parents are trying to make the standard model more interesting. Therefore, additions to floor models in the form of an attic, windows, side exits with doors, carved railings, and staircases are possible.
The roof can be made in the form of tiles to make it look more interesting.
Decorations include garlands of multi-colored flags or an openwork roof. To a child, such a house seems like a fairy tale, and he enjoys spending time having fun.
The lantern for the attic is made of cardboard, inside there is a light bulb from a flashlight, two AA batteries are hidden in a niche under the roof, the switch is located on the front wall.
Interior additions include doll furniture, curtains, mini lamps, toy kitchen utensils, etc.
Such a house can be used both for games and for storing toys or other items.
For a girl it will become a dollhouse, and a boy can use it as a multi-level garage.
Building a house with your own hands will cost you much less, and it is also possible to make the structure more original than the one purchased. Materials can be purchased in specialized stores, on online platforms or from wholesale companies.
Shelf in the shape of a house for boys and girls.
An interesting idea for a play rack for dolls, cars and books.
In addition to the task of entertaining a child, this piece of furniture also has a purely practical function - all the dolls and toys are in one place, and not scattered around the room. Thus, a sense of order is instilled in a son or daughter from an early age.
By making a shelf house with your own hands, you will give it uniqueness and originality.
This house is guaranteed to please its little owner.
VIDEO: DIY dollhouse.
Shelf houses for a children's room - 50 photo ideas:
We recommend articles on the topic
Unusual bookshelves in the interior
There are books in any home, they are placed in the closet, on the shelves, in general, they take up a lot of space. Many people have entire libraries, this is becoming very popular. I would like the shelves to be not just standard,…
Shelves in bedroom design - their types and features
A bedroom is a place for privacy and relaxation for the owner of the house, and every detail of the design of this room should create an atmosphere of calm and comfort. And even a small shelf that stands out from the overall design...
Making shelves in the garage with your own hands: practical tips, recommendations
The main purpose of a garage is to store cars. However, this does not prevent car owners from using it for other purposes: storing conservation goods, tools, household appliances, unnecessary things,...
berkem.ru
What material can it be made from?
Making furniture for compact storage of things and toys in a nursery with your own hands is not so difficult. Consider the age and gender of the child, the number of toys, and health status (some coatings may cause allergies).
The design and construction of a toy storage rack must be chosen based on personal needs.
First: decide on the material of manufacture. It could be:
- natural wood;
- laminated chipboard;
- plastic;
- metal;
- cardboard;
- MDF.
Important! If you have to work on wood, you will need certain processing skills.
The absence of sharp corners and protruding parts will reduce the risk of injury to a minimum.
Depending on the type of building material used, the following tools may be useful:
- jigsaw;
- drill;
- Sander;
- hammer;
- roulette;
- wood glue;
- hacksaw;
- fasteners;
- drills of different diameters;
- metal corners;
- picture baguettes;
- miter box and others.
It is recommended to give preference to wood: it is easy to work with, it is characterized by durability and environmental friendliness, and can withstand mechanical damage. Before you start work, you need to create a drawing of the future piece of furniture. Indicate on the diagram the dimensions and all mounting options for parts.
Depending on the type of rack, the materials and tools used in production will vary.
Purpose
A closet for children's things is not just a place to store them. The presence of this element in the baby’s room will help accustom the child to order from childhood. By collecting toys and putting them in their places after playing, the baby will learn to handle things correctly.
With the help of such storage, you can sort all your children's things and easily organize them. This way, the baby won’t have to pour everything onto the floor at once, he will only get what he needs. With the help of a special storage for toys, it will be easier to keep order in the room. There is no need to place toys in free corners; they will all be in a certain area.
How to make toy storage shelves
You can make a creative hanging shelf in the shape of a cartoon character, a child’s favorite item, or fruit. Draw the base on paper in advance so that you can then transfer it to the wood. You will need:
- large sheet of plywood;
- fasteners: nails, screws, dowels;
- structure holders;
- building level and ruler;
- drill;
- emery;
- everything for decoration.
Depending on the gender of the children, the design of the children's toy rack will vary.
After applying the design, you need to carefully cut it out, and mark areas for further cutting on the second sheet of material. The blanks are fastened together, the design is cut out with a jigsaw.
Important! Before assembly begins, each element must be sanded.
Use nails and self-tapping screws to mount all the parts, having previously marked the areas where the holders will be located. Upon completion of assembly, the furniture is painted, varnished, and after complete drying it is attached to the wall with dowels.
Furniture for girls should be more romantic, in bright colors, with a variety of decorations.
Manufacturing of shelving
Let's look at how to quickly make a beautiful rack for storing toys with your own hands. The structure must be stable, with strong support. There should be no sharp protruding parts or corners on the surface - it is important to minimize the possibility of a child getting injured.
Having decided on the type, design and construction of the toy storage rack, you need to make a sketch of it.
The creation process looks like this:
- draw a drawing with dimensions;
- prepare all parts separately;
- assemble the frame: upper, lower and side shelves;
- drill grooves on the shelves with dividers;
- generously lubricate the joint areas with adhesive and dry;
- connect the shelves using nails;
- Assemble the rack and sand it down.
The back wall can be cut out of plywood and attached with small nails for furniture assembly. Decorate the finished product to your taste: painting, carving, drawings using stencils.
You can initially make a shelving unit for a children's room with your own hands in such a way that, as the child grows up, it will grow with him.
Important! A wooden piece of furniture must be additionally secured to the wall with metal corners to ensure stability.
Creating a Storage Cabinet
The best option for a nursery cabinet is made of plywood. The material is environmentally friendly and practical, does not dry out, and does not lose its original appearance. Depending on the need, the thickness of the sheet can be selected individually.
The toy storage item should fit organically into the overall interior of the room.
Advice! To make such furniture, it is important to think through the shape and design in advance and prepare the tools.
To get an original cabinet, you need to make blanks in advance: cut out the shelves and two sides. Holes are made in the walls for attaching shelves, according to the width of the plywood itself. If the thickness is less than 2 cm, you can attach the shelves to the structure with small metal corners. The assembly algorithm looks like this:
- two bases are connected: lower and upper (using furniture bolts);
- shelves are inserted.
Such cabinets will serve as a good alternative to a regular box.
As you can see, everything is simple. You can mount two planks on top, connected at right angles, and give the finished product the shape of a house.
Making a chest of drawers for toys
The design of the chest of drawers can be different, depending on preferences. The material used is only environmentally friendly: chipboard, plywood, wood. You need to make a drawing with dimensions, purchase consumables and get to work. The tools you will need are a drill, a building level, fasteners and a jigsaw. Design the drawers: decide on the width and depth, and the height of the sides of the chest of drawers. A good solution: a chest of drawers with a door on top - for large toys.
Depending on the gender of the children, the design of the children's toy rack will vary.
Important! The fittings must be of high quality: durable, smooth and comfortable for a child’s hand.
First of all, the frame is assembled, then the side guides are fixed. Third stage: cutting out the boxes and installing them together. The bottom is secured with furniture nails. The last thing to do is install the facades. You can view detailed step-by-step assembly instructions on the Internet.
To equip a structure with drawers, it is important to accurately determine their dimensions.
House for dolls - rack, cabinet. House-wardrobe series “DREAM MAXI” with drawers
Doll house project “MAXI DREAM” series Dimensions: 1250*850*255mm. (height width depth). Weight 20 kg.
Doll house project “MAXI DREAM” series Dimensions: 1250*850*255mm. (height width depth). Weight 20 kg.
Doll house project “MAXI DREAM” series Dimensions: 1250*850*255mm. (height width depth). Weight 20 kg.
Doll house project “MAXI DREAM” series Dimensions: 1250*850*255mm. (height width depth). Weight 20 kg.
Doll house project “MAXI DREAM” series Dimensions: 1250*850*255mm. (height width depth). Weight 20 kg.
Doll house project “MAXI DREAM” series Dimensions: 1250*850*255mm. (height width depth). Weight 20 kg.
Doll house project “MAXI DREAM” series Dimensions: 1250*850*255mm. (height width depth). Weight 20 kg.
Doll house project “MAXI DREAM” series Dimensions: 1250*850*255mm. (height width depth). Weight 20 kg.
Doll house project “MAXI DREAM” series Dimensions: 1250*850*255mm. (height width depth). Weight 20 kg.
Doll house project “MAXI DREAM” series Dimensions: 1250*850*255mm. (height width depth). Weight 20 kg.
Doll house project “MAXI DREAM” series Dimensions: 1250*850*255mm. (height width depth). Weight 20 kg.
Doll house project “MAXI DREAM” series Dimensions: 1250*850*255mm. (height width depth). Weight 20 kg.
Doll house project “MAXI DREAM” series Dimensions: 1250*850*255mm. (height width depth). Weight 20 kg.
Doll house project “MAXI DREAM” series Dimensions: 1250*850*255mm. (height width depth). Weight 20 kg.
Doll house project “MAXI DREAM” series Dimensions: 1250*850*255mm. (height width depth). Weight 20 kg.
Doll house project “MAXI DREAM” series Dimensions: 1250*850*255mm. (height width depth). Weight 20 kg.
Doll house project “MAXI DREAM” series Dimensions: 1250*850*255mm. (height width depth). Weight 20 kg.
Doll house project “MAXI DREAM” series Dimensions: 1250*850*255mm. (height width depth). Weight 20 kg.
Doll house project “MAXI DREAM” series Dimensions: 1250*850*255mm. (height width depth). Weight 20 kg.
Doll house project “MAXI DREAM” series Dimensions: 1250*850*255mm. (height width depth). Weight 20 kg.
Doll house project “MAXI DREAM” series Dimensions: 1250*850*255mm. (height width depth). Weight 20 kg.
Doll house project “MAXI DREAM” series Dimensions: 1250*850*255mm. (height width depth). Weight 20 kg.
Doll house project “MAXI DREAM” series Dimensions: 1250*850*255mm. (height width depth). Weight 20 kg.
Doll house project “MAXI DREAM” series Dimensions: 1250*850*255mm. (height width depth). Weight 20 kg.
Doll house project “MAXI DREAM” series Dimensions: 1250*850*255mm. (height width depth). Weight 20 kg.
Doll house project “MAXI DREAM” series Dimensions: 1250*850*255mm. (height width depth). Weight 20 kg.
Doll house project “MAXI DREAM” series Dimensions: 1250*850*255mm. (height width depth). Weight 20 kg.
Doll house project “MAXI DREAM” series Dimensions: 1250*850*255mm. (height width depth). Weight 20 kg.
Doll house project “MAXI DREAM” series Dimensions: 1250*850*255mm. (height width depth). Weight 20 kg.
Doll house project “MAXI DREAM” series Dimensions: 1250*850*255mm. (height width depth). Weight 20 kg.
Doll house project “MAXI DREAM” series Dimensions: 1250*850*255mm. (height width depth). Weight 20 kg.
Doll house project “MAXI DREAM” series Dimensions: 1250*850*255mm. (height width depth). Weight 20 kg.
Design ideas
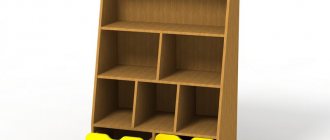
The choice of furniture design depends on the age and gender of the baby. From 1 to 3 years, one section with shelves is enough, from 3 to 6 - you will need drawers and boxes. For older children, from 6 and above, shelving on half the wall would be a good solution. Boys will be delighted with a rack in the shape of a ship or a fortress, a car garage or an airplane. For girls, bright castles, towers, and houses are suitable, in which you can not only store toys, but also convert them into a mansion for Barbie.
Depending on who the children's toy storage rack is intended for, as well as the interior of the room, its decor is also made.
Advice! Students are advised to choose a neutral color scheme for furniture that can be added with new shelves.
Filling
To make using a toy box convenient, you need to think about the correct filling. This will help teach your child to be organized. It is very important that there is enough space for everything you need (school supplies, toys, other items). To do this, you need to choose the right “filling” for the cabinet. There are several filling options:
- open shelves are ideal for storing everything you need. They store books, toys, magazines and much more. This is not a very good option for allergy sufferers; dust always accumulates on open shelves;
- baskets - some models have baskets installed. With their help, you can easily sort toys and other accessories and store them separately from each other. This filling is convenient to use, such a box is easy to take out and assembling toys in it will be quite simple;
- Drawers are the most common filling for cabinets. It is not recommended to have a drawer for a children's room due to the sharp corners. A child may forget to close the box and accidentally injure himself.
Pros and cons of cardboard shelves
Like products made from any material, cardboard shelves have advantages and disadvantages. Let's start with the pros:
- Individual design, limited only by your imagination. No matter what kind of bookcase you make, no one has exactly the same one.
- Saving. Minimum investment.
- Easy to disassemble, assemble and transport (especially when fastened not with glue, but with plastic clips).
- Environmentally friendly, safe for health. The material does not contain toxic substances and does not cause allergies.
And, of course, the main plus is the satisfaction of doing it yourself. Not a single thing bought in a store can give you so many positive emotions.
In appearance, it is almost no different from furniture bought in a store, but it will cost much less.
There are also disadvantages:
- Insufficient fire resistance. Keep away from heating devices, heating pipes and open flames!
- Sensitivity to moisture. You cannot place furniture made from cardboard boxes in the garden, on the open veranda, in the bathroom or in the kitchen.
- Less strength than more traditional materials.
Cardboard furniture can be disassembled and reassembled at any time, which is very convenient when moving or during renovations.
Painting parts
I painted the shelves in pure white using glossy acrylic paint. This paint is safe for a child's room, it has almost no odor, dries very quickly, has excellent covering abilities, the shelves were painted only twice, and the surface looks perfect. But I decided to make the legs of the rack and the beams for raising the height matte. But they all together resemble a rainbow. The colors chosen were clean and bright, pleasing to the child.
One color was chosen for one shelf, this gave the whole rack a real resemblance to a rainbow, and not the feeling of a colorful vinaigrette. I entrusted my children with painting the beams for the shelving using brushes - it caused a storm of delight!
We painted 4 legs purple, then 5 posts blue, 4 posts green, 5 beams again, but longer ones, yellow, 4 posts orange-orange and the remaining 5 beams red.
When the paint had dried well, I decided to drill holes for the fasteners. To do this, along each end I drew two diagonals from opposite corners. Their intersection gave the location of the hole for the fastener.
What is
The shelves are similar to standard racks, of course, not like those in a warehouse, but adapted to the size of the home and made from the same materials as the rest of the furniture. They can serve as:
- partitions to divide a room into several zones;
- spacious compartments for a home library, office documents, cosmetics, shoes;
- an elegant element of decor with beautifully arranged flowers, family dinnerware, collectibles and so on.
The most popular models are those with:
- Mobility. They should be light, yet stable; if appropriate, then on wheels.
- Multifunctionality. The shelves are located at different heights; some space can be occupied by drawers and vertical partitions.
- Capacity. Depending on the purpose, the racks should accommodate your favorite boots, a large indoor flower or stacks of books.
The most important thing is that the product must perfectly fit the overall design of the room. For example, for high-tech, a square modular bookcase is recommended, for oriental style - made of bamboo, for noir - forged
In recent years, bookcases have begun to replace larger pieces of furniture from rooms. In the living room they are preferred instead of a glass or bookcase, in the bathroom they are used instead of a cabinet, and on the balcony - for storing household items, tools or flowers.
Features of garden furniture made from pallets, nuances of operation and care
Rack in the interior
Perhaps the most common place for a shelving unit is in the living room. This helps to divide it into certain zones. In addition, it acts as a decorative element, as various frames with memorable photos, interesting books, small vases with flowers and much more are often placed on the shelves. If desired, you can install a completely open shelving unit so that it allows light to pass through and serves solely as a partition. It looks quite original.
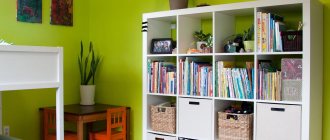
No less often, a rack is chosen for a children's room. In this case, it plays a more functional role. That is, it can be used to store clothes, toys and other necessary things. It is best to purchase plastic containers or wicker baskets for this. This design looks very beautiful and modern.In a hallway or dressing room, a shelving unit is simply an irreplaceable thing. This is very convenient, as you can place all your shoes, outerwear, various accessories and much more in it.
The shelving unit is a truly versatile piece that looks great in any room. Therefore, feel free to purchase such a decorative item or try to make it yourself.
Room layout
Since you need to make shelves and racks in the room to properly organize the storage of things and clothes, it is recommended to plan everything in advance. It is optimal to make drawings and then carry out the work based on them.
The cutting can be made to order, or you can do it yourself. It all depends on the material you choose and the tools you have.
When working and planning, consider a few important points:
- Determine in advance the list of things that will be stored there. This will allow you to decide what is the optimal height for a particular shelf;
- Make the most spacious and highest shelves at the bottom;
- The most compact ones are at the top to store rarely used items;
- Be sure to leave space so that it is convenient for you to walk around the pantry and move indoors;
- Do not leave too large gaps between sections, as otherwise the racks and shelves will sag.
By following these fairly simple rules, you yourself can figure out how to plan your pantry competently and as practically as possible.
Be sure to reinforce long shelves with jumpers. Thus, they will be able to withstand the heavy load you need.
If you plan to store canned food and heavy items there, it is better to immediately go for shelves and racks made of wood. It is better to use fasteners made of profile and metal.
Decide on the optimal shelving layout.
There are 2 common options:
In fact, the choice is whether to fix the structure on the wall or not. Both options are good in their own way, but the fixed products will be more stable.
It's up to you to decide anyway. The corner or straight type of pantry largely depends on the size of the room and what you want to place there.
Peculiarities
Chipboard is considered a reliable material that can last for many years. It has a good strength rating and at the same time belongs to the budget category.
Structures made from chipboard can fit perfectly into almost any interior. This material is relatively light in weight, making it easy to work with. If necessary, such racks can be easily moved to another location.
These storage spaces are perfect for storing a large number of books, children's toys, and construction tools. They can also be placed in greenhouses under containers with young seedlings.
Sometimes, for the manufacture of such pieces of furniture, instead of simple chipboard, laminated chipboard is used.

