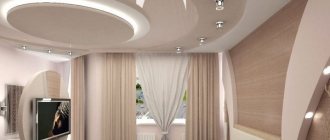
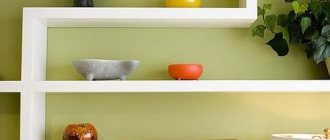
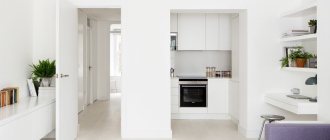
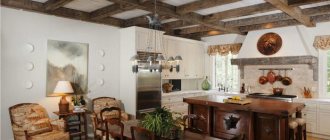
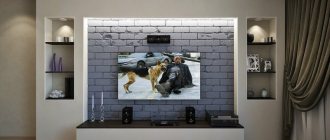
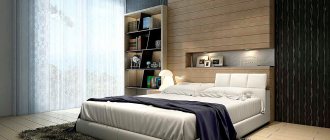
Photo: vannadecor.ru A new TV is always good, but with it the question inevitably arises of where to put it. Cabinets, brackets, furniture sets with special compartments, stands and hanging shelves - among the assortment of stores, one’s eyes run wild. But what to do if you don’t want to clutter the room with unnecessary furniture? There is a solution: a neat and elegant plasterboard niche! And we will help you figure out where to place it and how to make it yourself.
Dry processing method
This method is the easiest. Arched plasterboard is used to make the figures. It is thinner than the standard one (approximately 6 mm - 6.5 mm). The maximum radius to which the sheet can be bent is 1000 mm. (external) and 600 mm. (interior).
Smoothness of arched plasterboard
The bend is easy to do with your own hands. Installation is carried out on a metal frame, which bends into a given shape (this is easy to do thanks to the cutouts on the sides of the profile).
To obtain a large radius curvature, you can make cuts on the drywall: they are made parallel to one side of the sheet (on the inside - for concave structures; on the outside - to create columns).
When applying this method, it is worth considering that the price of arched plasterboard is an order of magnitude higher than that of regular plasterboard.
Decorating walls with stone - beautiful design in the interior
The choice of decorative stone is very large and varied and it will not be difficult for you to choose the right one. Decorating walls with such stone will not become difficult if you use our tips. It is best to apply the solution using a comb and trowel. The most important step is laying the first row, since virtually the entire wall will depend on it and a small mistake can become a big problem for all further laying. Before you start decorating the walls with decorative stone, you need to level the walls well.
This type of decoration is very massive, and it will be very difficult to work with it on uneven walls. To keep the level during installation, it is best to place beacons from strips of drywall or stretch fishing line/nylon thread. You can also use plastic crosses, but in this case your seam will be small.
Before you begin, we recommend sketching out a sketch of the future project, as well as choosing a stone for interior wall decoration. When creating a sketch, keep in mind that the stone can be laid end-to-end or along the seam. When calculating the sketch, the dimensions of the stone will help you, since almost all of their types have the same size. The leader among finishing materials is plasterboard. Due to the fact that it has a flat surface, it can be finished with a variety of materials: wallpaper on drywall, stucco, painting drywall, decorative plaster. But the most effective finishing is considered to be the installation of artificial stone on drywall.
But before you take on such finishing, you need to know a few nuances that will help make the structure durable and beautiful. Lining a plasterboard wall with artificial stone There are certain requirements that apply to the surface in order for the stone to stay on the wall for a long time. So, the surface should be: As a rule, marble and granite are used for finishing the floor. Granite has an average size of 305x305 millimeters. Marble has a lower structure density, so its thickness should be at least 20 millimeters.
Granite is considered a more practical material; it will delight any home owner. Marble is prone to wear faster and is more easily scratched. In order for a floor made of marble to always please everyone, it needs to be polished periodically.
Marble is polished every five years. Using stone in the interior to decorate walls and floors, you can create your own fortress or cozy home, it depends on the desired style and type of material for interior decoration. It can be natural or decorative stone, both of these types have their advantages, and designers have long appreciated the strengths of using stone in the interior. It can decorate any room, from the hallway to the bathroom, taking into account the style of the room. Stone in the interior of the hallway will help solve the problem of dealing with street dirt on shoes and high traffic.
Decorative stone in the interior of the hallway should be durable and retain its original appearance for a long time. Under heavy stone cladding, metal frame posts are installed more often (every 30 cm) to make the structure more rigid and durable. They are sheathed not with one, but with two layers of gypsum board.
Then they proceed according to the standard scheme. Only moisture-resistant plasterboard is used as a base for decorative stone. And even on its surface it is necessary to apply primer for absorbent bases or a universal one before starting facing work. Otherwise, moisture will leave the adhesive layer (especially thin ones) faster than necessary. It will not have time to gain the necessary strength, which can subsequently cause the elements to peel off.
The base ready for installation must be level, clean and dry. It is widely known that drywall is excellent for leveling walls, creating false walls and partitions, and it also allows you to create multi-level surfaces on the ceiling. However, you can combine wall decoration and the creation of composite structures and create a complex surface on the wall, for example, plasterboard niches for a TV or for various small items.
And the decorative finishing of a plasterboard niche in the wall will make the interior unusual and attractive. Assembling a plasterboard niche in a wall does not have any fundamental features; it is performed in the same way as finishing the entire wall - using the same set of materials and tools:
How to do it yourself?
Step-by-step instructions for making a plasterboard niche always begin with preparation and collection of the necessary material part.
Home DIYers will need:
- several guides (made of wood or metal);
- plasterboard sheets;
- construction level;
- screwdriver and drill;
- dowels and screws;
- putty;
- putty knife.
The installation of the frame must comply with the drawings; The guides are fastened to the walls using dowels; they can be tightened together with self-tapping screws. However, structures included in a metal profile can also be connected with a riveter. This option allows you to avoid cracking of the drywall or not fitting it tightly enough to the guides.
The sheets placed on the frame are covered with plasterboard and puttied. The options for subsequent finishing are quite varied. This includes painting, wallpapering, decorative stone, and cladding with ceramic tiles. Shelves installed in addition to niches can be wooden or glass. The decision must be made in accordance with the dominant style in the room. All that remains is to place the desired interior items there and enjoy the result.
Preparing a niche for installing a TV with your own hands is quite possible. For work you will need aluminum profiles (ceiling-wall, guides and flexible). You will definitely need a number of hangers, connecting components, angles and extensions. The gypsum board and profile are secured with self-tapping screws, sometimes dowels are used. In most cases, you can get by with standard sheets of drywall, but there may be situations where arched material is required.
The gypsum board will need to be puttyed and primed, and all seams and joints will be sealed using serpyanka tape.
Before the production of a plasterboard niche begins, it is necessary to clearly determine whether it will protrude outward or recessed inward. The second method will require covering a significant part of the wall with sheets of material, but such a solution makes the space more expressive.
It is equally important to select the configuration of the element being created:
- rectangular (horizontally or vertically);
- square;
- oval;
- curved shape;
- original design.
The principles are well known to everyone - if the line is extended upward, it will help raise the ceiling, and if directed horizontally, it will expand too narrow walls. Atypical geometry is justified only if the room itself has a shape different from the standard one. But with the usual straight walls, various experiments are not always compatible, and if they can be carried out, then only on the instructions of an experienced designer.
To improve the area around the TV, you can make a number of shelves for sound equipment and decorative elements. Often they create racks or cabinets that, together with a niche, form an integral ensemble. Important: always leave 50-70 mm from the back wall of the TV to the niche so that you can safely place cables and provide ventilation. Free space should also be left around the perimeter of the screen.
When installing guide profiles, dowels can be placed a maximum of 0.4 m apart from each other. Then comes the turn of the vertical parts (ceiling and floor). The frame is covered with plasterboard gradually, and first of all they work with the most complex elements. The screws are placed at a distance of 25-30 cm.
In addition to primer, putty and serpyanka, you need to use a metal corner with perforation (they cover the outer edges).
Useful tips
If the room is designed in a classic style, symmetrical shelves and recesses will look best. This will help the whole composition look more static. Asymmetry will be appropriate in minimalism and hi-tech. Here you can hang the TV not in the center of the wall
This option is more often used in rooms divided into zones. It is important to decide before starting work whether the TV will stand on a stand or hang on the wall. The size of the niche will depend on this. Play with color - if light colors predominate in the room, then the niche should be several tones darker, and vice versa.
- If you have a lot of time and a desire to make your niche original and unique, then a mosaic pattern will be the ideal solution. Such work may take more than one week, but the result will definitely exceed all expectations.
- Less complex, but no less beautiful decorative elements will be flowering shrubs around the perimeter.
- When drawing up a drawing and work plan, for convenience, you can divide the wall equally with a pencil, outlining the contours of the future niche in advance.
- There are several types of drywall. For any niche, first of all you need to choose a moisture-resistant option. You should choose the desired thickness based on the shape and dimensions of the niche, as well as the weight of the items for decorating the shelves.
- Some of the wiring can be laid under the baseboard. Modern plastic models just assume such use.
- It is often more convenient to completely assemble the frame first, and then attach it to the wall.
- If the niche goes all the way to the floor, then there probably won’t be enough wall slats for mounting. All parts of the structure should also be secured from below.
- If the finishing includes wallpapering, it would be advisable to treat the entire niche with a primer for better adhesion.
- It is better not to use a wall with a window to build a niche, as this can disrupt the lighting in the room.
- Even at the planning stage, it is necessary to take into account the location of all sockets, and also think about which of them will be used and where the electrical wires will run.
- When calculating the dimensions of a niche, remember that over time you may purchase another plasma of a larger size. But even if the new technology does not fit into the existing “framework,” this will only be another reason to start a small construction project again and show imagination and ingenuity in a new style.
- Don't be afraid to use wood for finishing. This will take more time than just painting or putty, but will add warmth and coziness to the overall picture.
- If you use pieces of glass or mirror to decorate a niche, you must follow all safety precautions. It is best to use a thick fabric bag (or better yet, several) and a hammer for crushing. Make sure that small fragments do not spread across the floor after finishing work. It is better not to allow pets into the room during finishing work.
Box formation
The box for hidden LED lighting is the most important component: a strip is mounted in it, which will reflect light rays from the ceiling surface and distribute them throughout the room.
Box assembly steps:
- draw the boundaries of the future box on the base ceiling;
- attach a supporting profile along the border of the drawn line;
- stepping back 10-15 cm from the wall, secure another load-bearing profile, forming the inner perimeter of the box;
- every 40 cm, attach cuttings of the starting strip to the profile, the length should extend beyond the base drawn line by 10 cm;
- connect the supporting and starting profiles with suspensions;
- sheathe the gypsum board frame;
- Install corner profiles at the joints of plasterboard sheets, seal the seams with putty, sand them, and prime them.
Box frame
Choosing a niche for your interior
There are quite important nuances that influence the design of a niche in your living room. It is worth taking a closer look at them and those who chose the standard solution and decided to be original. In any case, listen to the advice of the masters.
How to choose a niche for your interior:
- Niche location. This parameter will influence both the choice of material and the properties of the material. If you place a niche near a window or door opening, in partitions, they may have different parameters.
- Number of recesses. If there are a lot of niches, they will look a little heavy in a small living room, and everything should look harmonious.
- Integrity of the design idea. If the installation of niches is intended to decorate the room, think about how to make them an accent in the interior. At the same time, the external arrangement should distract from the possible shortcomings of the room. These can be such successful “irritants” as decorative vases, flowers, figurines, photos, plates.
- Functional purpose. If any equipment is inserted into a niche, then the supports must be reinforced; even a TV can be very heavy for such a design. And be sure to think about where to hide the wires from the same TV.
Finishing options
The cladding method for plasterboard niches is entirely at the mercy of the designer’s imagination and the wealth of building materials. Popular options are:
- Painting in one color or several (horizontal surfaces - one, vertical surfaces - another.
- Wallpapering
- Combination of painting and wallpaper
- Enhancing the effect with hidden LED lighting.
- Adding ceiling structures with decorative cornices and polystyrene pilasters.
As can be seen from the above, the design of plasterboard niches is a difficult design that includes the designer’s plan, the technical development of the structure and the correct implementation according to the drawings. At the same time, recesses can bring not only an artistic function to the premises, but even completely replace all the furniture in the apartment with niches.
Using other textures
There are several ways to decorate a niche using stone texture. In this photo, the corner niche is only partially decorated with stonework.
Here we see a wall made entirely of stone.
The interior space can be decorated with a contrasting color, or you can add sophistication with the help of a mirror. Lovers of the loft style will love the design using brickwork.
The recesses decorated using wood look noble. The combination of dark tones, sandy elements and warm lighting looks advantageous.
Drywall products can be attached to any wall and fit into any design. It is a mistaken opinion that they are appropriate only in expensive, luxurious interiors. They can be used even in the most modest apartments. A competent design, color scheme, plus highlighting lighting - and you are guaranteed a beautiful and unique living room design.
See below for a master class on creating a niche from plasterboard.
A look into history
Niches were used as an interior element as early as the second century AD. Ancient architects did this by creating recesses in religious buildings, temples and places where believers in mystical teachings and cults gathered. As a rule, they played the role of recesses in the walls, open to the eyes of people. They contained various attributes of faith: statues, vases, fonts.
Ancient Roman architects used niches both in interior decoration and in exterior walls, like the famous Temple of Diana at Nîmes. Niches were used to create wonder in people and thus make the cult place even more special. The architect seemed to demonstrate that the room is transformed by magic, that this place is special, capable of causing delight and worship among believers.
Using a niche in the wall in a medieval interior
There are many examples of the use of niches in Gothic buildings, for example, Wells Cathedral. And although the era has changed, the impact on people’s feelings has not gone away. The Renaissance also used this element of architecture in the seventeenth and eighteenth centuries. At this time, any place to install an object of art was valued, and numerous niches in the houses of the rich had precisely this function - they stored paintings, sculptures and other great creations of the creators of that time.
Drywall installation
After the frame of metal profiles is completely assembled, it is necessary to begin covering with plasterboard. Installation is carried out in several stages:
- The building material needs to be cut into pieces that will fit the required dimensions.
- The finished parts are applied to the profiles and attached using self-tapping screws.
- Installation should be done starting from the outer part and ending with the inner part.
Since lighting is provided in the niche, holes for lamps must be made in the sheets of plasterboard before installation. In some cases, an LED strip can be used, which is attached directly to the material.
Installation of lamps is carried out as follows:
- lighting fixtures must be inserted into the prepared holes;
- then connect them to the wiring that was installed on the frame of the structure.
It is important to remember that the heads of the screws during installation should not protrude above the surface of the drywall and be too recessed into the material, otherwise the final finish will not be sufficiently smooth
What is necessary
First of all, we take measurements, draw a design, purchase materials and begin creating a niche.
Don’t forget about the finishing materials, which need to be thought out and purchased in advance, even with the plasterboard itself, profiles and fasteners.
You can build a niche with your own hands even in a wall where there was none before
Plasterboard niches
Due to the elasticity of plasterboard, it can be used to create all sorts of decorative niches, for example arch niches, which are then used as shelves for souvenirs, for paintings, etc. The furniture frame is also built into them. Moreover, they can be located in any room of the apartment: in the hall. bedroom, kitchen, hallway and bathroom.
Niche for a fireplace made of plasterboard photo
Thanks to them, the interior of any apartment is transformed. They often have lighting installed, which makes the space of the apartment seem to start playing. Thanks to some design techniques, through the manufacture of decorative niches with lighting. It manages to visually increase the space of the room and make it modern.
Decorative plasterboard niches photo design
Drywall can be used to decorate any room, including kitchens and bathrooms. In the latter case, there is a special waterproof drywall. Large and small recesses in the wall everywhere replace shelves and even some furniture, which makes the interior less loaded and more modern.
TV niche made of plasterboard design photo
Niches in the living room
In the living room, as you know, the most “visible” place is the TV area. Due to the fact that modern TVs have a thin design, it has become possible to mount them on the wall; the end result is very stylish and practical. And in order to add even more style, they began to make niches and boxes from plasterboard for a place on the wall for a TV and other equipment.
How to make a niche for a TV, read the article: “A plasterboard niche for a TV”
Living room interior with a niche in the wall photo
The box looks no less effective. The advantage of making a box is that you do not need to cover the entire wall with plasterboard. The box can cover only part of the wall, for example, around the TV. The box can be made for built-in appliances, which is very often used in the kitchen. Also in the kitchen, niches are made from plasterboard for decorative dishes and souvenirs.
Kitchen interior with a niche in the wall photo
In general, drywall and lighting are two interrelated components of a successful modern renovation.
In addition to a niche for a TV, plasterboard is often used to make places for various souvenirs, which are very beautifully illuminated.
In the bedroom
As in the living room, beautiful decorative niches are often made in the bedroom. As a rule, it is made above the head of the bed, in which a panel with a beautiful image is placed. It is usually complemented by lighting in the form of spotlights. The result is a very effective composition.
Niche in the wall with lighting photo
In the bathroom
In the bathroom, as mentioned above, special moisture-resistant plasterboard is used. The presence of a niche in this room is very convenient, because it is a wonderful replacement for shelves for storing hygiene products. It should be noted that the drywall in the bathroom is finished with tiles.
Niche in the bathroom made of tiles photo
In addition, to make the bathroom interior more stylish, boxes for the washing machine are made. If you have a combined bathroom, it will be very useful to separate the toilet from the bathroom with a symbolic half-wall.
Plasterboard box in the toilet
Using drywall in a toilet is a very successful way to redesign and make it functional. Using drywall, it is very easy to hide sewer pipes and at the same time make a box for storing all sorts of things: toiletries, tools, etc. Or you can use the space of the back wall for purely aesthetic design.
Plasterboard partition with niches
How to position?
The ideal placement of a plasterboard niche in a hall requires familiarization with basic design principles. Most often, such structures occupy the center of the room, although they can also be made on the longest or accent wall. If there is an empty corner or other unused space in the room, this is where you should install the recess. In the bedroom, a spacious niche with shelves becomes a replacement for a wardrobe and it needs to be placed in the same place where it stood before.
There are other recommendations:
- in the bathroom, it is advisable to place a niche either at the far wall, or deepen it into the side plane (so as not to absorb space);
- in the hallway it is worth placing this structure opposite the front door a few steps away from it to make it easier to put and take things;
- in the kitchen, the optimal location of the recess is the place where the TV will be located, since it is for this that the recess is mainly prepared;
- in the bedroom, it would be a good idea to install a structure in which the bed will be completely or partially hidden;
- in corridors where there is an unused corner, there is no need to additionally look for a place to work with plasterboard sheets.
Niche in the interior of the hallway
Even a small hallway can be successfully decorated with narrow structures. Decorate with hooks for clothes, baskets for keys, shelves. Recesses of different sizes with soft lighting, located asymmetrically, will help create a dynamic interior. Decorating a niche in the wall:
Wardrobe for things
In the hallway, a recess is most often used for practical purposes. A simple crossbar or wardrobe, shelves for things and a minimum of decor. This will help avoid overcrowding and clutter in the room.
Design of a dressing room in the corridorSource topsrestructuring.com
Hanger for a large family
Dark panels and simple hooks are more practical than light trim. Emerald green or brown will perfectly hide minor scratches and stains. An interesting design solution would be steel hooks.
Hanger with mirror in the hallwaySource glomart.ru
Illumination in a niche
In the hallway, side lighting looks advantageous; it is more comfortable and soft. For example, you can run an LED strip along the edge of a niche.
Niche from a window openingSource krovati-i-divany.ru
Storage area
When creating space for storing things in drawers and baskets, you need to reserve space between the shelves. This will make it more convenient to remove the baskets and put them back.
Hanger in a nicheSource belnovosti.by
Cozy corner
A niche in the hallway wall can be used for a soft seat. Decorate with pillows and lighting to make reading comfortable.
Hallway in modern classic styleSource pinterest.com
Space for accessories
If the recess was not planned, but arose due to an unsuccessfully located wall, then it is better to occupy the space with open shelves. A narrow closed cabinet will not decorate the interior, so it is advisable to make shelves and add color accents.
A way to decorate a hallway in an apartmentSource cdbos.rickyhil.com
Solution for a large hallSource gipsokarton-blog.ru
Planning stage
There are many techniques that allow you to use even very narrow elements with taste and imagination. Large functional structures are used for cabinets, gaining usable space.
A few recommendations on how to design a niche:
- When arranging, you need to start from the purpose of the living space.
- The size of the niche in the wall depends on the area of the room.
- The color scheme and style echo the overall interior.
- To create a deep alcove, you should not use dark colors.
- To prevent the design from looking tasteless, you should not overload it with decorative elements.
Vases in niches Source roomester.ru
Vertical recesses Source decorationinfo.ru
For rooms for different purposes, appropriate types of finishing are used. They are combined and complemented with LED lighting, mirrors and stylish elements.
Plasterboard niche for TV in the living room
It is almost impossible to imagine a modern living room without a large TV. Even strict opponents of television do not deny themselves the pleasure of showing their favorite films or clips on the screen. But finding a comfortable place even in a spacious living room is not always easy, because you still need to fit a sofa, table, cabinets, work area, shelves and books, musical instruments and a lot of other little things. Therefore, modern ergonomic designs come to the fore. Plasterboard niches can easily replace old, clumsy walls. They will also help you organize space correctly, because it is a powerful tool for visually zoning a room.
Design of niches in the interior: useful tips
The finishing of a niche is chosen depending on the tasks it performs and the desired effect.
The different finishes of the walls and niches draw attention to this interior object. This is necessary if, when creating a niche, you want to solve an additional problem - for example, visually expand or enlarge the room, change the geometry of the space, or simply decorate a wall with a niche
If the niche is for exhibition, then attention should be drawn to the objects displayed in it, and not to the niche itself. In this case, the niche usually matches the color and texture of the wall
Designers do not recommend choosing a significantly darker shade for finishing a niche compared to the color of the walls, otherwise the niche will seem like a “black hole.”
A niche, as already mentioned, allows you to visually change the space. High vertical niches, especially with lighting, can visually raise ceilings.
Long horizontal niches, on the contrary, will cut off a little of the height of the walls, but will make them visually wider - this is important for a tall but narrow room.
If the inner surface of the niche is decorated with a mirror, the room will become visually more spacious, as a recessed effect will be created. This is an option for the design of a small room.
If there are several niches on one wall, then they need to be placed symmetrically, at the same distance from each other. Vertical niches are usually located in a row, and horizontal ones can be placed one under the other or a ladder.
The shape of the niche should follow the shape of furniture, ceiling structures, doors, etc. So, if the furniture has rounded corners, and the door to the room is decorated with an arched trim, a rectangular niche will be completely inappropriate - in this case it is better to make an arched niche or a rectangular one, but with rounded corners.
Author of the article: Sonya Solovey
Sources of photos in the article and gallery: Lori's photo bank and Depositphotos.com photo bank
Kinds
Using niches you can place, for example, a curtain rod for hanging curtains. A hidden version of such a device cannot be noticed from the outside; the observer only detects canvases descending from somewhere above. No distractions!
The portal is most often formed on the basis of galvanized profiles ; the wall is prepared in advance and sheathed with the original layer of gypsum plasterboard. To create niches, it is recommended to use sheets 1.5 cm thick, because individual elements of such recesses can be large and are designed to withstand hanging televisions and other structures weighing up to 10 kg.
It makes sense to illuminate niches for refrigerators from the inside by placing a strip of built-in LEDs under the very edge of the ceiling. As with other lighting options, the wiring location should be made as close as possible to the existing electrical network.
You can also hide in niches:
- corner wall;
- closet;
- curtains and battery.
Design ideas
A plasterboard niche is an interior detail that is appropriate everywhere: they add relief, depth to the room, serve as additional storage space or a link in the general geometric construction lines.
Below are just a few design ideas that are very often used by decorators.
A blank and monotonous wall, devoid of furniture, looks boring. A fresh solution could be a recessed space for installing a plasma or framed mirror.
Often they make a series of small 3D decors from plasterboard, about 5-7 cm deep, the width of the building profile and insert photos, candles, vases there, and add lighting.
Niche instead of furniture
GCR is so convenient and durable when the load is distributed correctly that sometimes designers use it instead of furniture.
Creating a mini-wardrobe in the bedroom. An interesting move by the designer is to construct a niche in the middle of the room, which is then closed by a sliding door going into the wall. This place is set up to store things, like a pantry and more.
GCR is used to create the depth of the window, the radiator is refined, as if visually recessing it into the wall.
Ceiling
Ceiling versions of similar designs often hide cornice mechanisms, create a multi-tiered top and hide LED lighting. The window curtain seems to fall out of nowhere, and invisible light sources add romanticism and a certain mystery to the room.
Shelves
A favorite technique when decorating in a modernist style is to install books and decorative objects in the depressions. They are used in premises of any domestic purpose: kitchen, guest room, bedroom, plumbing units, bathroom.
Color solution
The most common way is to paint it the same color as the wall, although sometimes lighter shades of color are used. Many people start experimenting with colors, falling into the trap: dark colors create the impression of a “hole” on a light wall. Designers recommend sticking to light shades of paint and looking for your own color scheme, avoiding overly dark colors. It is best to paint a small niche several tones lighter than the wall. Then the objects in it will look more refined and elegant.
A niche for television equipment or an aquarium requires the same color as the wall as a whole. Fortunately, the reflection that will be inevitable will allow the niche to play with new colors.
Decorative niches in the same color scheme as the wall
If you want to decorate your kitchen with niche shelves, try making them like picture frames. It will look very impressive, but at the same time warm and cozy. For the kitchen, you should also make a more durable structure, since the housewife may need space for heavy kitchen utensils: frying pans, casserole dishes, pots, and so on.
Functional niches in the kitchen
Drywall and arches
Drywall: choosing the right one
As you know, drywall is a very convenient and high-quality material, the price of which is determined by the thickness and additional qualities of the sheets. The standard width of gypsum boards is 120 cm.
It includes:
- construction cardboard (two layers);
- gypsum core with various fillers.
Types of arches
Arched structures are erected in any room, they look harmonious and in place, and therefore, drywall in the hallway is a common occurrence.
- symmetrical (classical) types;
- irregular shape;
- ellipsoidal;
- “modern”;
- arches - “romantic”.
Typically, structures are installed for smooth transitions from room to room, most often from the hallway to the living room or kitchen. Mostly arches of the classical style are erected.
Wall - transition from the hallway to the living room, framed by wood
putty
Now that the plasterboard covering of the niche is finished, you need to move on to the next stage - primer and putty. First, prime in two layers, allowing each of them to dry thoroughly, and then apply putty to the material. There are quite a lot of angles in our design, and therefore, we recommend that you definitely use auxiliary elements - perforated angles and serpyanka.
These elements are attached to the starting putty, and after careful leveling and drying, they are finished with finishing putty.
The corners of plasterboard structures are susceptible to possible damage, so a perforated corner is used to protect them
Installation of the niche frame
First of all, you will need a project and its sketch. If you're drywalling an entire room, it's best to plan the niches and shelves at this stage. If such a design is needed in an already renovated room (for example, after purchasing the same “plasma” with a large diagonal), you need to follow the step-by-step instructions.
- According to the developed sketch, markings are applied to the walls. Check the wall for bumps and depressions and level the wall if necessary. All straight lines must be perpendicular to each other, vertical ones must be at right angles to the floor. Use a level if you do not want the plasterboard niche frame to turn out lopsided.
- Using the markings, starting profiles are installed along the floor, walls and ceiling. They are fastened with impact dowels of size 6x40, with an interval between neighbors of 40 centimeters.
- The next step is to attach the vertical guides in increments of 60 cm. At the same stage, the corners of the structure are strengthened by connecting several profiles.
- When the verticals are mounted, it is time to install the horizontal planes. The profiles are placed at the distance from the floor at which there should be shelves for decorative plasterboard niches. They are conveniently fastened with 3.9x9.5 self-tapping screws.
When installing a frame for a niche made of gypsum plasterboard, you need to remember that it is necessary to lay a polyurethane tape between the concrete wall slab and the profile. The profile is divided into the necessary sections using a grinder or metal scissors.
Materials used
First, let's talk about what kind of shelves there are.
There are actually several options:
Mainly used are plasterboard shelves, as well as wooden and glass structures.
You can make them yourself, buy them from the manufacturer, or take them to order if you need something very original and individual. For example, you want to install a dozen shelves in a narrow niche.
Peculiarities
Drywall can be considered one of the best building materials. Rare repairs can be carried out without using its sheets. There are a large number of available options for its use - ceilings with one and several levels, slopes, smooth walls, partitions and screens. Among these and many other options for using drywall, the niche is not the least important.
The advantages of gypsum boards are quite obvious:
- lack of toxic properties;
- strictly standardized sizes;
- possibility of use in a variety of conditions;
- ease of decoration.
The plasterboard slab is always 120 cm wide and the length is either 250 or 300 cm. The material used for the walls is 1.25 mm thick.
Plasterboard niches are much better than the usual exquisite furniture, because they allow you to abandon bulky hanging shelves and whatnots, and original-shaped stands. Such designs are not very practical, are not suitable for every interior and often serve only as dust concentrators. With the help of recesses, it is easy to place the most important and pleasant things for people on the walls, give them a new meaning and radically change the atmosphere in the room. In addition, you can remodel the appearance of a room very quickly and at minimal cost.
Creating shelves with stiffeners
After installing the base, you should begin installing the shelves. To do this, according to the width of the shelves, additional profiles are vertically attached to the wall for the strength of the structure. The profile must have stiffening ribs. These are mainly galvanized profiles, which have a thickness of 0.55-0.8 mm. Between the vertical posts, horizontal sections of the profile are inserted, connecting the verticals.
The base of the shelf is 10 cm. In order for the horizontal profiles to be reliable, corners are attached at the bottom. The recess of the shelf will be as shown in the diagram. This will be the thickness of the entire structure. Jumpers should be installed as often as possible to ensure the reliability of the structure. Let's say every 30 cm.
Scheme for creating plasterboard shelves with stiffeners. Basically, around a niche, a wall or corner needs to be sheathed with plasterboard for an impressive appearance.
Advantages and disadvantages
Plasterboard sheets are a durable material that is easy to use. It has strengths and weaknesses. The advantages include:
- does not rot or collapse over time when used correctly;
- it is easy to work with;
- weight, work can be carried out by one person;
- environmentally friendly and safe, can be used in children's rooms;
- When installed correctly, the material regulates the microclimate in the room;
- odorless, does not cause allergies;
- excellent thermal insulation and sound insulation properties;
- flexible sheets are used to make arches and figured walls;
- fire safety, vapor permeability;
- functionality, behind them are hidden various communications (cables, pipes);
- drywall lends itself to a variety of decorative finishing (wallpaper, putty, painting, artificial stone, etc.);
- affordability.
Despite the fact that the material has many positive characteristics, there are also disadvantages:
- fragility;
- cannot withstand heavy loads;
- does not like contact with water;
- not used for installation on timber floors without a frame.
Functionality
Decorative niches provide a lot of possibilities in the living room interior:
Plasterboard structures can visually lengthen walls or increase the height of ceilings; this technique is often used in non-standard rooms.
- Walls with niches and windows allow you to zone the room. Every household member, whether a teenager or an elderly person, needs a personal living space where he can retire. A plasterboard module, even in a tiny room, can create a recreation area: a sleeping place, an aquarium, a section with a TV.
- Niches allow you to hide defects in walls and ceiling space; they themselves create the necessary stylistic accents in the interior, making it more original and exclusive.
- The owners are provided with a place to store accessories, figurines and memorabilia dear to their hearts. Depending on the size of the niches, they perfectly accommodate household appliances and electronics, furniture and other household items (beds and armchairs, stereo systems, fireplaces, TVs).
- Plasterboard structures not only serve as an element of room decor, but also allow you to save money that would have been spent on leveling the walls and purchasing cabinets, shelves, chests of drawers and other storage systems.
Thanks to the built-in LED lighting, you can use the niche as a night light. Stepped transitions made of plasterboard allow you to create an interesting design of the ceiling space and simplify the installation of spotlights. Plasterboard modules do not take up as much living space as cabinet furniture, which is important for miniature rooms.
Examples
Let's look at some successful examples of designing niches in the interior.
In this room, niches completely occupied one of the walls. Since the room is quite spacious, there were no plans to expand the space. Vertical recesses only emphasize the height of the ceilings. The central niche is used as a place for a TV, and the rest are used as shelves for decorative elements. Glass inserts emphasize the modern style in which the living room is designed. The designers used the same color for all walls. By adding spot lighting, they provided accent to the necessary areas.
The next photo shows a very similar use case for a niche. The difference is the color combination of the recesses with the upholstery of the sofa. The impression of a single harmonious image is created. The contrast of colors brings freshness to the interior, making the room cozy.
A great example of using niches instead of a cabinet. This option is suitable for both spacious rooms and standard halls in the Khrushchev building. This use of wooden inserts gives the room a sense of security and stability. The shelves are used to store decorative items, each of which is favorably emphasized by light.
By placing the bed in the recess of the living room, the owner of the room combined a bedroom and a living room. By adding an original curtain, we will get a secluded and calm place to relax.
The owners of this apartment chose to abandon smooth, straight lines. A partition with built-in niches helps to unobtrusively separate the dining area and kitchen area from the living room. They can be used to store books, indoor plants or left empty.
With the right approach, you can simultaneously use several forms of niches, correctly combining them with each other.
