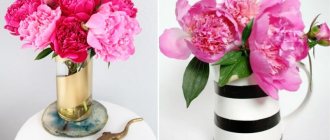
Designers conduct master classes where they teach how to create various accessories. For example, you can make a vase from improvised materials and choose an option that is suitable for decorating any interior. It will decorate a room, kitchen or living room. The main thing is that the color and texture are combined with the rest of the decoration. In some cases, an object can add special dynamics and become a bright accent in the space. The publication shows and describes the most interesting examples of how to create decorative vases with your own hands.
From plaster
Some people make crafts from cement. But, according to masters, gypsum is a more pliable material. For this technique, they suggest taking a template - a plastic container with a volume of 2 liters. Its surface is covered with oilcloth.
Procedure:
- Gypsum is diluted with water. The solution is placed on a circular plane. Place a bottle in the middle of the base for a plaster vase, apply the mixture to its surface (up to the neck) and wrap it with gauze. The gypsum solution is left to dry for 30 minutes.
- The container is carefully removed and the base is formed. To begin with, prepare an additional portion of the mixture, apply it in 2-3 layers and wrap it with a bandage each time.
- To form the top part, take another 1.5 liter bottle and cut it off. In this case, the height is a third of the previous template. The workpiece is combined, the solution is distributed again several times and at the same time alternated with layers of gauze. The joint is coated especially carefully.
The finished pot is left for 24 hours at room temperature until it dries. Then they go over the shape with sandpaper and begin to decorate it. The surface can be covered with acrylic, painted with paints, an image can be pasted on top, or a 3D blend can be made.
This craft is not used as a flower vase, since it can leak and lose its shape. But you can put a composition of dry plants or twigs in it.
Artistic painting
There are special paints for glass; of course, regular paints for painting may be suitable, but not all of them, for example, it is almost impossible to paint anything on glass and other glossy surfaces with watercolors, so I’ll briefly talk about special paints.
As you probably guessed, we are talking about stained glass paints, they are divided into two types - fired and unfired. The former are significantly superior in strength to non-fired ones, but in our case strength does not play a big role, since the vase is rarely touched with hands, and besides, the fired paints are not so bright and are closer to matte than glossy.
- To work with stained glass paints, you need a contour; contours come in different colors and serve to ensure that the colors on the product do not mix with each other.
- It is important that contours can also be fired or unfired and should only be used together with the same paints.
- You can paint the surface with a brush, but professionals advise using a pipette, which makes it easier to carefully and evenly fill the outlined area.
- In the photo, this vase decor looks advantageous in comparison with conventional painting.
An alternative to stained glass paints is acrylic paints.
- Using them you will no longer achieve the stained glass effect, but they allow a beginner to make a beautiful drawing without much difficulty, or simply fill the product evenly with one color, for which the paint is poured inside the vase, after which the vessel is shaken vigorously until the entire surface is evenly painted.
- Acrylic paints are not diluted with water, therefore, after this procedure, the vase can be safely used for its intended purpose.
- Before working with any paint, the surface must be washed and degreased, otherwise the quality of work may be significantly reduced.
White spirit, acetone, or regular alcohol are suitable for degreasing.
Work with solvent should be carried out in a well-ventilated area!
From the deck
To make a wooden container with your own hands, part of the deck is cut to the required size. The bark can be removed or left, it all depends on what effect the master wants to achieve. An electric drill is used to create a recess.
After this, the blind hole is treated with sandpaper. The outside of the wood is treated with stain. Next, place a container of water inside and place a bouquet of flowers in it. The vase-deck will look good in the garden or as a floor decoration in a country cottage.
From the bottle
Vases can be made from plastic bottles with your own hands. For this you will also need scissors, a can of spray paint, primer and electrical tape. The plastic top is cut off and the edges are covered with a layer of electrical tape. Next, apply a primer and spray paint over it. When it dries, the craft will be ready.
Decoupage technique
For work, use napkins that are used for decoupage techniques, a brush, scissors, a glue gun, a hole punch, tape, and rope. Also, to make a hanging vase from scrap materials with your own hands, designers use a plastic bottle. The top is cut off and thrown away, then a napkin is glued on. Then they take a hole punch and make 2 holes at the top (opposite each other), thread a rope through them and make knots on the inside so that it is fixed. The last step is to glue the ribbon or tape around the edges.
Master class No. 7
You will need:
- wooden block 2.5 cm thick and 5 cm wide;
- wood glue;
- nails.
Saw the block into planks 20 cm long (32 planks in total). It's okay if some planks are longer and others shorter.
Fold 8 squares, fastening the bars together with glue. Additionally, you can nail the planks to each other using nails. Stack the squares one on top of the other and fasten them together using glue and nails. Place the squares, slightly shifting them relative to each other.
After the glue has dried, coat the workpiece with paint or stain.
From threads and bottles
How to make a vase with your own hands? To do this, designers use thick multi-colored and thin threads, a wide plastic container, a needle and a piece of fabric. Sequencing:
- Before starting production, cut off and remove the neck. An even number of cuts are made on the side so that you get strips (about 10 pieces).
- One end of the yarn is tied to the bottom of any of the strips. Next, the strips are braided with yarn through one: the first in front, the other in the back. Thus, they gradually rise higher and entwine the entire surface.
- A knot is tied inside.
The final step is to sew a piece of fabric to the edge of the vase.
From a can
Do-it-yourself floor vases are made from the following materials:
- 2 glass jars with a volume of 3-10 l;
- tea saucer;
- tin;
- glue;
- chicken egg carton;
- acrylic paints;
- hot glue;
- sparkles, rhinestones, large beads.
Make a flowerpot from a jar with your own hands as follows:
- First, prepare the base: 2 containers are glued together with hot glue. The saucer is used as a support: it is attached to the neck with the reverse side. The joints are additionally treated with hot adhesive and left for 24 hours.
- Then soak the egg carton in heated water for 2 hours. The resulting mass is applied to glass with glue. Due to this, the designer creates a special texture.
- When everything is dry, start painting. The workpiece is coated with a thick brush and white acrylic paints of a white shade. Before painting, the jar vase must be completely dry.
The drawing will look clearer if you first draw a sketch with a pencil. Small details are drawn with a thin brush. A day later, the image is decorated with beads and glitter gel.
Photo gallery: ideas for decorating vases for artificial and fresh flowers
Wooden decorative parts are simply glued to a grease-free base Lace parts are suitable for vases with artificial flowers
Pasting a vase with beads is a labor-intensive process
For decoration, you can first collect beads on a thread, and then decorate the vase
Coins are glued to a fat-free base
Waterproof paint is used for painting. Decor made from clothespins - a primitive but effective option.
Using thick yarn, you can easily and quickly decorate any vase
You can glue a composition of artificial flowers to a simple vase.
The cones are easily glued to the fat-free base. The sleeves of the sweater are cut and tied on the vase.
Paper decorations are glued with PVA glue
Coffee beans are glued directly to glass with superglue.
Paper strips are simply folded and glued to the base. Using papier-mâché, you can decorate any containers
Cereals or seeds are glued to the container with waterproof glue.
Papier-mâché involves the use of paper and glue. The ball can simply be fixed on the neck of the container.
From the pipe
Craftsmen use different objects to create accessories. For example, vases and other things for interior decoration are made from pipes.
The following tools and raw materials will be useful for this:
- a piece of plastic pipe (50-150 cm);
- hacksaw (for working with metal);
- heated water;
- adhesive composition;
- alabaster;
- a piece of metal foil;
- acrylic white;
- spray can with golden paint.
The required fragment is cut out of the pipes: a hacksaw is used for this. The incision is made carefully so as not to damage the base. The bottom is made of plumbing fasteners. The alabaster solution will make the floor flowerpot larger. It is diluted in water and stirred until it thickens. Afterwards, the alabaster is poured into a container (1/4 of the volume) and left for several hours until it hardens.
DIY polymer clay jewelry: master classes with photosDIY decorative candles: master classes with photos
- DIY hats for newborns. Several types of knitted winter hats for every occasion in a baby’s life
To decorate the workpiece, pieces of foil are glued to it. After some time, acrylic is spread over a dry surface to create a uniform, monochromatic background. After drying, spray the contents of the can.
Tips for extending the life of cut flowers
Agree that cut flowers do not stay fresh as long as we would like. How to slow down the withering of flowers? To do this, it is important to minimize the growth of bacteria in the water, as well as to give the flowers the missing nutrition, replacing what they would have received if they had not been cut.
Learn how to extend the shelf life of cut flowers with these simple tips.
Trimming
Trim the ends of the stems at a 45-degree angle, at least 1.5 cm, to ensure better water absorption. It is best to trim them with sharp scissors, a serrated knife or pruning shears so as not to flatten the stem. It is best to trim the stems under cold running water. Thanks to this method, air will not be able to get into the veins and clog the “vessels” of the plant.
If you find that the flowers are starting to wilt, quickly prune them again.
Trim off any leaves or flower parts that fall below the rim of the vase. The only things that should be inside the vase are the stems and water.
Thanks to these actions, you can prevent the appearance of cloudy water and slimy stems, which cause flowers to spoil.
Preparing the vase
Bacteria and other microorganisms that may be on the surface of your vase can quickly cause your flowers to wilt. Be sure to thoroughly clean the vase beforehand with hot water, a little dish soap, and a little vinegar to kill any bacteria—even if it looks clean! Change the water frequently and re-wash the vase if the water becomes dark or has an unpleasant odor.
Location
When displaying flowers, look for a cool place, away from direct sunlight, to preserve the bouquets as long as possible. Beware of other heat sources, such as appliances or radiators, which can quickly cause flowers to wilt. For the most part, fruits and flowers don't go well together either. Many fruits, including bananas, avocados, apples and kiwis, produce a gas called ethylene. This gas can shorten the lifespan of any flowers stored nearby (as well as increase the rotting of any other fruits that do not contain ethylene), so try to keep these fruits and flowers separate from each other!
Adding a special solution for feeding
To extend the life of flowers, you can prepare a simple solution. It consists of just three main ingredients: citric acid, sugar and bleach. The solution is formulated to help flowers stay fresh longer, and each element has properties that are said to keep flowers longer than their normal lifespan with plain water.
Citric acid lowers the pH of the water, making it more suitable for freshly cut flowers.
Sugar acts as an actual "food" because flowers produce and consume sugar through the process of photosynthesis, and when they are cut they can no longer produce sugar. By adding sugar to the water, the flowers think they are still eating, which makes them perky.
Bleach acts as a water disinfectant and helps get rid of potentially harmful bacteria that may interfere with long-lasting blooms.
You can make your own flower food by following a few simple steps. It is made from ingredients that you most likely have in your home.
From cardboard
How to make a vase from cardboard? To do this, you will need PVA, newspapers, paint fixative and a cardboard tube, which is sold in hardware stores. First, cut off part of the tube with a utility knife. Then they apply it to the cardboard, trace the base with a pencil, and cut out a circle. The resulting bottom is glued to the tube.
Decorations are made from newspapers: they are cut into strips, each strip is folded and rolled into rolls. The ends are secured with super glue.
Then they are glued to a piece of cardboard so that they fit tightly to each other. Empty spaces are filled with sparkles or other details. You can paint a container for dried flowers or ikebana with your own hands. Aerosol paints or gouache are suitable for this. After drying, the craft can be additionally decorated with rhinestones. You can make a cardboard vase with your own hands in just a couple of hours.
From paper
How to make a vase out of paper? It will look unusual and original in the interior. First of all, you should print out a sheet with the outlines of leaves or flowers and carefully cut them out.
You can take a tall glass, measure its parameters and cut them, transfer them to colored paper and cut them. The sheet is wrapped around the glass and secured with double-sided tape. Then fold each leaf or flower in half and glue them with the fold to the workpiece.
You can use a base of different shades and textures. Your DIY paper vase is ready.
Vase “Golden Autumn”
For this craft, you will need a small glass jar of a shape you like. You need double-sided tape, paper, pencil, scissors, and a piece of foam rubber. An important component will be matte and transparent paint for stained glass, a gold outline on the glass and melange threads like “Iris”. By strictly following the recommendations of the master class, the result will exceed all expectations.
- According to the name of the product, draw various leaves on paper.
- Place decorative elements on tape and cut them out.
- We place the cut-out decor over the entire surface of the jar and, using foam rubber, cover it, as well as the bottom, with a continuous layer of stained glass paint. Choose the tone to your liking.
- After the paint has dried thoroughly, remove the glued elements. In front of you will be a painted plain base of a vase with transparent curly leaf windows.
- Carefully outline all the edges with a gold outline for glass; some parts of the design can be completed on the jar itself (leaf stalk).
- We paint the “glass” leaves with transparent stained glass paint in autumn tones. Draw veins on the dried leaves using an outline.
- Finally, decorate the top of the vase (neck of the jar) and the bend at the base with melange threads, carefully laying them in even and tight turns. Make the rows small in width.
Select the melange according to the color scheme of the finished product.
You can make four vases by analogy, but in a spring, summer and winter direction. At any time of the year you will have a new decorative element in your interior.
Made of glass with shiny decor
How to make a vase from a glass bottle or jar? To do this, thoroughly clean the selected container with mild detergents containing alcohol so that no traces of grease or dirt remain.
- How to prepare essays on physical education
How to crochet beautiful napkins: tips with video lessons and patterns
How to make a doll from nylon tights and padding polyester with your own hands
Then abstract stripes (even or asymmetrical) are applied with construction tape (diameter 3-5 cm). Meanwhile, the modeling gel is mixed with glitter and spread over the surface with a sponge using light pats. After staining, remove the tape before the gel has dried, otherwise it will be difficult to separate it later.
Stylish geometry
This vase will decorate any interior and become a stylish accent. To do this, you don’t need to be able to draw or have any abilities. All you need is masking tape, spray paint, a brush, degreaser and cotton swabs.
First, treat the vase with a degreaser and a cotton pad. After the surface has dried, cover the vase with tape in any order.
We spray paint the vase, using tape to make sure the edges are clear and even. All you have to do is wait until everything dries and carefully remove the tape. Agree, such a vase looks much more interesting than a transparent one.
A geometric design looks very nice if you use narrow tape.
The decor that partially covers the vase at the bottom looks no less attractive. In order not to paint over the transparent areas, we use a plastic bag and attach it with tape.
Golden sparkles are an excellent solution for decorating a transparent vase in a geometric style.
It is very important to choose the right shades to decorate the vase so that it complements the interior and goes well with it. The most universal are considered to be various pastel, gold, silver, copper shades, as well as white and black.
Unusual photo ideas for homemade vases
Read here DIY laundry basket: how to make a beautiful and voluminous basket for the bathroom (105 photos)
Simple drawings
To create a beautiful vase decor, it is not at all necessary to have the talent of an artist. Simple, laconic drawings sometimes look much more stylish and modern.

