After serving for some time, the interior doors begin to sag, and the position of the leaf relative to the frame changes. The door leans towards the handle. This becomes noticeable when the door gets stuck in the opening, creaks, does not close, or opens on its own.
Heavy doors made of solid wood, decorated with massive decorative elements, sag faster and more significantly than light ones. But even the latter, over time, are subject to the indicated defect. In some cases, you can fix the problem yourself, without resorting to the help of specialists.
Reasons for sagging interior doors
There are several reasons for sagging interior doors. They must be installed before repairs can begin.
Main reasons:
- The fixation of the hinges has become loose, or the hinges have become deformed under the weight of the door leaf. This is the most common reason. This happens if the fittings are chosen incorrectly, without taking into account the weight of the canvas. Having exhausted the safety margin, the loop becomes deformed. You can determine the problem by opening the door and inspecting the hinges. At the same time, pay attention to the strict verticality of the pin connecting the structure. Sometimes he bends, unable to hold the weight.
- The fastenings of the frame are loose, or the thin door frame bends under the weight of the door leaf. These violations are found on the beam to which the hinges are attached. To determine the malfunction, it is necessary to take an even block or strip of the same length as the height of the opening and apply it to the hinged beam. If cracks are found at the top and bottom, the box is subject to dynamic deformation.
- The door frame is worn out, which can be seen upon inspection. The problem most often requires contacting a technician and subsequent replacement of the unit.
- The canvas was deformed. This occurs as a result of external influences on the door material. The canvas may swell as a result of waterlogging and its weight has increased. Or the door was installed in winter and became deformed, unable to withstand the temperature change.
Horizontal adjustment
In order to adjust the door, it opens completely to allow easy access to the hinges and the ability to twist them. You can see the adjustment screw under the pads. To turn it to the right or left, you will need a No. 4 hex wrench.
If you turn the screw to the right, the door is pulled to the hinges, and if you turn it to the left, it is removed. By using horizontal adjustment, a skew of 2 mm can be corrected. In some door models, access to the hinges can only be achieved in ventilation mode. After the adjustment work is completed, the blade returns to its original position, after which the operation of the mechanism is checked.
This manipulation is carried out if the canvas, when closing or opening, catches the edge of the box or is not covered tightly. To fix the problem, the canvas is shifted horizontally in the required direction. It is necessary to make several successive rotations of the lower and upper hinges and periodically check whether the pins have stopped clinging to the door frame.
On removable
Removable hinges allow you to remove the door leaf without much difficulty .
They often have decorative elements that must be removed before dismantling. Next, loosen the top mounting bolt. Then the door is opened slightly, and a strong object is placed underneath to hold it. Using a shovel handle, a crowbar or a jack, lift the canvas until it is removed from the hinges. To prevent a dent from the object used as a lever, a rubber gasket is placed underneath. If the loop is difficult to separate, you can use a hammer. However, the blows are applied lightly so as not to break the loop.
Due to its heavy weight, removing the door is best done with two people . This way you can avoid injury and damage to the product. Difficulty may arise if there is a platband that interferes with the lifting of the canvas. In this case, you will have to disconnect the top trim strip and free up space.
Sometimes, during long-term use, the lower part of the hinge structure becomes shortened and becomes cramped as a result of pressure from the upper part on it and constant friction of the parts. For this reason, the door sags. You can fix the problem with improvised means by placing metal rings and a washer on the lower parts of the hinges, lubricating them with machine oil, and then putting the door back on. Thus, the canvas will rise by increasing the height of the loops.
If the cause of the problem is wear of the hinges or fasteners, then they are replaced.
Cases in which it is better to seek the help of specialists
To perform the following work you will need professional skills and certain experience. It is better to entrust complex repairs to door structures to specialists, so as not to damage the product or accidentally injure yourself.
Moving the hinges to a new location to strengthen the fixation of the canopies
Step by step instructions.
- We dismantle the door and remove the awnings.
- We choose a new place for the hinges on the door. First, we work with the surface on which knots are observed - this will allow us to select suitable areas for awnings.
- We outline the selected area with a pencil - apply a canopy and outline it.
- We place the door in the frame and mark the areas for the hinges. This method will allow you to make the markings most correctly.
- Using a screwdriver or screwdriver, we hang the awnings on new areas. Before this, you should mark with a pencil the places for the central screws.
Over time, any interior door can sag. Structures with a relatively large weight change their position faster than lightweight products.
On fixed
If the door is fixed on permanent hinges, then the leaf can be removed only by unscrewing all the fasteners .
Decorative elements are removed before dismantling. Then, using a screwdriver, unscrew the fasteners from one side. You can use a screwdriver. Disconnect the canvas from the loop by pulling it to the side. Having removed the door from its hinges, carefully inspect the canopy mechanism and the condition of the fasteners. If the self-tapping screws hold the hinges weakly, then they are replaced with new, longer ones. To seal the holes for the self-tapping screws, wooden sticks of suitable diameter, greased with wood glue, are driven into them. Allow to dry for 24 hours, then install the hinges by screwing in new screws.
If replacing the fasteners does not help, and the heavy door still sags, you may need to install new, stronger hinges, move them to a new location, or install a third canopy. When installing new hinges, choose fittings that can better support the weight of the door . The map of the new product must be larger than that of the old one in order to cover the previous recess. Make samples of appropriate sizes and install hinges using self-tapping screws.
Moving the hinges may be necessary if the holes for the old fasteners are greatly expanded or deformed. When rearranged, both parts are displaced - on the hinge beam and on the door leaf. It is important to accurately mark the new location. The hinges can be moved slightly upward relative to their previous position. They outline the perimeter and make a selection using a chisel or milling machine. The loop should fit into the recess with little effort. Then, using a thin drill, holes are made for future self-tapping screws, the fasteners are screwed in, and the door is hung.
Before hanging the canvas, old holes are sealed, painted over or sealed with a material of a suitable color.
Installation of an additional hinge is required if the door leaf is very massive and two canopies are not enough. It is attached at a distance of 15-20 cm under the top loop. For lightweight interior doors, it is often enough to tighten the fasteners so that the door rises and falls into place.
Necessary tool
To repair a sagging interior door with your own hands, you will need a certain tool that can be found in every hardware or hardware store:
- Construction level, to determine the amount of deviation of the canvas from the vertical due to sagging.
Building level
- A ruler or steel square for accurately measuring the gaps between the leaf, floor and door frame.
- Wooden or plastic wedges for temporarily fixing the door after bringing it into the design position.
Door spacer wedges
- A screwdriver with a set of bits or a simple screwdriver for unscrewing and re-tightening screws.
- Chisels or plane, if necessary, adjust the geometry of the wooden panel due to swelling.
- Spacer washers installed on removable hinges to secure the door in a raised position.
Spacer washers
- A drill with a wood drill, if it is necessary to reinstall the hinges in another place.
- Use a hammer to straighten a deformed hinge pin if necessary.
- Pencil for marking.
- Clamps or a vice, for fixing the blade, if necessary, it must be processed with a plane.
- Abrasive materials – file, sandpaper, for sanding the blade after planing.
File
The tool used to repair the door panel must be in good working order, cleaned of dirt and completely ready for use.
When can you fix a defect yourself?
You can decide whether to contact a specialist by assessing the cause of the door sagging.
If this reason is loosening of fasteners or deformation of hinges, then you can fix the problem on your own. To do this, you need to dismantle the door leaf, remove old fasteners or hinges and install new durable products in their place. If you have some experience, it will not be difficult to move the hinges to another place and install a third canopy. A deformed door leaf that has increased in size as a result of swelling can be reduced using a plane.
It is recommended to contact specialists in the following cases:
- with dynamic curvatures and deformations of the door frame;
- when the hinge beam is loosened;
- when the door leaf is deformed;
- if the unit is installed incorrectly.
The technician will determine the exact cause of the subsidence, indicate the area of the door frame that has become deformed, and will be able to strengthen it. He will evaluate the correct installation of the unit, see what the problem is, and be able to fix it.
Elimination of door leaf deformation
If the problem is identified at an early stage, then it is relatively easy to return the product to its previous shape.
To restore the swollen area on the door surface, just place a heavy load on the problem area and leave it there for a day. Before this, the door should be dismantled and laid on the floor.
For the most severe deformation, you can use a wet towel: place it under the load, wet it every day and gradually increase the load slightly.
How to avoid door sagging?
It is best to take measures to prevent this problem, starting from the installation stage of the interior door.
- It is necessary to pay attention to the correct choice of material. A too thin frame made from low-quality raw materials with a massive, weighty door will certainly lead to rapid sagging. When purchasing, you should carefully inspect all parts for damage, swelling, or cracks. They can cause the door to deform and sag.
- In winter, a door block brought from a store should be left on a glazed balcony for some time to avoid sudden temperature changes. Otherwise, the product may crack and be damaged.
- Saving on fittings, choosing cheap, weak hinges and fasteners is also one of the reasons for sagging. It is better to choose fittings with a margin of safety so that they can certainly hold a heavy structure. Possible subsequent decoration of the door with additional elements that will increase its weight is taken into account.
- Often the fault is initially due to incorrect installation of the door frame and leaf, which led to misalignment and sagging of the door. If you have no experience in installing interior units, it is better to entrust this matter to professionals. Knowing all the details, the specialist will do the job efficiently, which will affect the service life.
- The product should be used in accordance with the instructions, avoiding overload and intentional wear. Children should not be allowed to hang or ride on the door, crack nuts with it, or otherwise use it for other than its intended purpose.
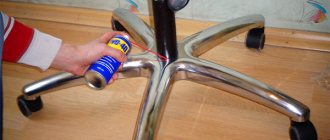
- Periodically you need to check the condition of the door hinges and lubricate them.
Further prevention
To avoid complex repair work associated with tampering with the door leaf structure, as well as reinstalling hinges, it is necessary to periodically carry out a number of preventive procedures:
- The hinges and their fastenings must withstand the weight of the web, taking into account the resulting bending moment, regardless of the intensity of use of the structural element.
Replacing hinges
- You should purchase doors made of rigid materials so that the screws do not pull out with subsequent destruction of wood, chipboard or MDF.
- When installing hinges for the first time, you need to carefully monitor the tightening force of each screw so as not to damage the threads on the leaf or frame of the interior door.
MDF doors
- When installing hinges, you should pre-mark thin holes in the wooden structure to avoid delamination when tightening the screw.
- When the first signs of misalignment appear, it is necessary to determine the cause of the defect and correct it before the problem begins to progress.
Canvas distortion during operation
The main preventive measure is careful operation of interior doors. When pressing the handle, you should not put too much pressure on the blade, and when closing, you should avoid impact loads, as they can lead to delamination of the wood.
Careful operation
The operation of door leaves made of wood or pressed materials should be carried out in rooms with normal temperature and humidity conditions. When using interior doors in spaces with a high content of water vapor in the air, you should give preference to plastic products.
Moisture resistant door
Moving the loop
Sometimes it happens that even reinstalling the hinges does not help and the screws still do not hold them well. Under the weight of the door leaf, they sink down again. In this case, it is necessary to completely remove the hinges and mount them in a new place. Accordingly, their second parts on the door leaf will also have to be shifted synchronously.
- In order to move the loops to the desired location, you must first accurately mark their future location.
- Using a pencil, mark the perimeter of the loops and carefully cut out the indentations with a chisel. There is no need to rush while cutting out the groove for the hinges; start work only after you are completely sure of the correct location, comparing the expected location on the frame with the area on the door.
- It is imperative to take into account the thickness of the hinge on the frame and on the door, otherwise the door will not close well.
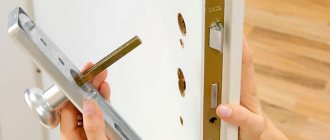
Setting up locks and handles
Adjustment of locks and handles is required in two cases.
- The lock is not seated tightly in the socket.
- The lock escutcheon touches the narthex.
The first problem can be eliminated by tightening the screws or installing a gasket in the space between the lock and the socket.
The second problem can be easily solved by deepening the groove under the latch or lock.


