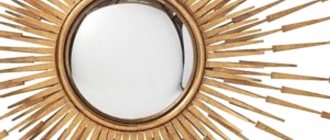
When choosing a mirror as an interior decoration , we recommend paying attention to the now so popular sun mirrors. We studied their history, what style they suit and where you can find interesting examples. Let's figure it out together!
The sun mirror first appeared in the interior in the 17th year in France at the instigation of Louis XIV. Over time, the fashion passed, but with the revival of Art Deco, the accessory again took pride of place in the apartment. Today, decorators often choose a sun mirror to decorate apartments and recreation areas.
What's worth knowing?
A sun mirror, as a rule, cannot replace a regular mirror, so use it as an art object, for example, instead of a painting or to “revive” a plain wall. An alternative situation is when there is bright multi-color wallpaper or a pronounced texture on the wall: in this case, the paintings will be lost against this background. It is important to remember that a mirror visually magnifies reality , so it is important not to overload the space and keep order.
The sun mirror is an almost universal accessory that is acceptable in many design areas. The main thing is to successfully choose the design, material and shade of the frame.
The sun mirror looks especially good in a composition of different mirrors, for example, 2-3 small ones. If you have the time and desire to realize your creative abilities, this is your chance. If you trust professionals more, it’s time to choose a contractor.
If you love the sun mirror itself but don't know where to place it, try hanging it in your nursery. It looks fantastic and is quite easy to combine with typical images on wallpaper and textiles for children - birds, animals, plants.
For those who have not yet had time to have children, you can hang a sun mirror in the living room opposite the chandelier : the light will be reflected and scattered around the room, visually making it brighter.
Manufacturing process: step-by-step instructions
Step 1. Prepare the stencil
Cut out a sheet of paper in a shape that completely matches the mirror. It should be a circle. We find the center and draw straight lines from it to the edge. As a result, we form 24 sections, equal in size. Inside the large circle we draw a smaller one, retreating 2.5 or 3 cm from the edge. We will draw rays along the straight lines.
And for the price, this type will be the most attractive.
We work in the same way with the third and fourth piles.
The stencil is ready. All that remains is to transfer the finished drawing onto cardboard. Cut out another circle of similar size from it.
. Firstly, it will be a unique, unique thing that will decorate the interior of your living room or bedroom.
Step 2. Prepare bamboo sticks
We divide the set of sticks into 4 piles. Each contains 24 pieces. Then they will serve to create rays.
Secondly, it will cost several times less.
It is advisable that the wall be monochromatic or with an inconspicuous, medium-sized pattern.
Leave the first group of ray sticks at their original size and set them aside. We shorten the second group by 7 cm. We cut the third group by 10 cm. And the fourth by 13 cm.
It is necessary to saw off the sharp edges of all sticks and polish them with sandpaper.
Here a person is limited only by his own imagination and the availability of the necessary material.
After all, this is one of the ways to add sophistication to the interior and set the desired atmosphere.
Step 3. Glue the rays
We glue the longest rays from the center of the circle according to the prepared pattern. It is more convenient and faster to use a glue gun. Then we take the second set of shortened sticks and glue them not from the center of the circle, but from the edge of the second, inner circle. We work in the same way with the third and fourth piles.
The easiest way to make it is using bamboo sticks, since this option does not require special skills.
Today, designers have come up with many ideas for designing the frame of a product.
Step 4. Before gluing the missing elements, you need to paint the rays
In this master class, golden paint was used. After painting, wait the required amount of time for complete drying.
We glue the longest rays from the center of the circle according to the prepared pattern.
It can be complemented in the interior by other decorations in the form of candles in metal candlesticks, antique vases, etc.
Step 5. Assembling the finished product
Glue the mirror on top of the finished rays so that its edges completely coincide with the cardboard blank. After this, you can glue the brass ring. Important tip: it is better if the diameter of the ring is slightly larger than the diameter of the mirror. Then the work will be more accurate.
We work in the same way with the third and fourth piles.
Today, the mirror performs both its usual function and a decorative one.
We glue the mount on the back of the finished product.
In this master class, golden paint was used.
Step 6. Decoration
It would be appropriate to place such a piece of art in a room in the Baroque or Art Nouveau style. It is advisable that the wall be monochromatic or with an inconspicuous, medium-sized pattern. Today, the mirror performs both its usual function and a decorative one. Therefore, a great option would be to hang it in a small, bright room to visually expand the space. It can be complemented in the interior by other decorations in the form of candles in metal candlesticks, antique vases, etc.
Glue the mirror on top of the finished rays so that its edges completely coincide with the cardboard blank.
So, using the example of this master class, you were convinced that creating a mirror with your own hands will not be difficult. Today, designers have come up with many ideas for designing the frame of a product. After all, this is one of the ways to add sophistication to the interior and set the desired atmosphere.
Important tip: it is better if the diameter of the ring is slightly larger than the diameter of the mirror.
It would be appropriate to place such a piece of art in a room in the Baroque or Art Nouveau style.
Where to hang the sun mirror?
- On the wall where you want to make an accent.
- Replace the painting if the room has colorful wallpaper or textured walls.
- Next to two or three others, if, of course, they are combined with each other.
The sun mirror is a bright accent that does not require additional decor. Don't forget to arrange objects so that there is no unnecessary reflection.
A little history
It is unknown when exactly the first sun-shaped mirrors appeared , but they can be seen in the paintings of ancient artists starting from the 15th century. For example, the painting by artist Jan Van Eyck “Portrait of the Arnolfini Couple”. In the background you can see a mirror that vaguely resembles a sunburst. At that time, such mirrors were made convex, so they greatly distorted the image.
In the Middle Ages, such mirrors were hung in churches; they symbolized deity. They always “looked” at the parishioners.
the highest popularity under the “Sun King” Louis XIV . There is an opinion that it was he who came up with this design, but this is not so, he only made it very popular. Such a mirror is fun in royal chambers. Every morning the king looked into it. The mirror disk was not large, so it looked as if the rays were emanating from the king’s very face. It’s as if he himself is the sun.
After Louis, sunburst mirrors came into fashion only 200 years later. Then mirrors ceased to be a luxury, so designers began to actively experiment with shapes and sizes, also inspired by the heavenly bodies.
At the beginning of the 20th century, the Art Deco style became popular , one of its main features was its appeal to the sun's rays. Therefore, it could not be done without solar mirrors. And already in the middle of the 20th century, mirrors - suns became mirrors - stars, due to the fact that the whole world began to actively become interested in space.
And even in the 21st century, interest in mirrors in the shape of the sun does not fade away. People actively use sunburst mirrors to decorate their homes. For more than two centuries, the mirror sun has found its connoisseurs.
How to hang?
A large sun mirror looks great alone. But small ones can be combined into a composition. They are placed randomly or in a certain sequence if you want to maintain proportions and rigor. If the room has paired pieces of furniture, for example, bedside tables, identical sun mirrors can be hung above them.
Required Tools
In the process of work we will need;
- glue gun;
- scissors;
- small hacksaw;
- sandpaper;
- compass;
- ruler;
- pencil.
The mirror has more of a decorative function, so you should choose a small diameter.
Before gluing the missing elements, you need to paint the beams.
Which style will it suit?
Most often, this accessory is used to decorate rooms in the styles of modern classics (another name is American classics) or art deco.
The sun mirror is often found in eclectic interiors, where it represents a piece of classics. The shine and unusual shape make it suitable for the glamor style.
The large sun mirror is beautiful in itself. But miniature products are more often used in a duet or trio.
Sun mirror in the living room interior: photos and ideas
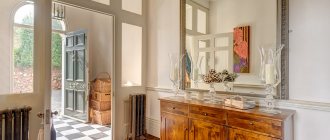
Most often, this type of decor is placed in the living room above a sofa, chest of drawers or console.
Mirror-sun in the bedroom interior: photos and ideas
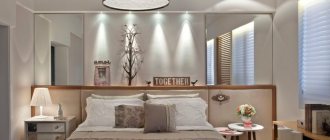
The best place in the bedroom for such a mirror would be the headboard. But this is not the only option. A vanity, a work area, or just a blank wall would all be great for placing solar decor.
Material of manufacture
When making mirrors, different materials are used (wood, plastic, metal, etc.) it all depends on the interior into which the mirror should fit, as well as on the desired cost of the product.
The mirror panel comes in silver and aluminum.
It is best to choose wood or MDF as the material:
- Wood is an expensive and practical material that can be adjusted to any design.
- MDF is an excellent material, in no way inferior to wood, but its price is lower, which does not affect the quality at all.
- Metal - such a mirror will fit perfectly into a cold interior, but a metal mirror will be heavy, bulky and expensive. An excellent replacement for it can be a mirror made of MDF and painted to look like metal.
- Plastic is the cheapest and not very practical material. The choice of plastic products is small, because it looks very cheap and designers rarely start working with this material.
