MDF cannot be called a very cheap material, but given its naturalness, it is quite possible to characterize it that way. This is a fairly universal “tool” that can be used in a variety of ways. If we consider the material as a finishing material for arranging arches, then it has its own advantages, which will be discussed further.
Choosing arches from MDF
We will also consider how you can finish MDF arches with your own hands: what is needed for this and how the procedure is performed.
MDF and arched structure
As we have already found out, interior arches made of MDF will be relatively inexpensive. This is largely possible thanks to the wide range and high competition in the building materials market.
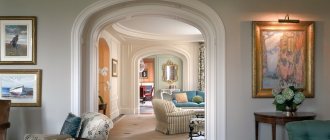
Beautiful arch
An important advantage of MFD is the strength and uniformity of the wood structure. The result is a durable and reliable material. The products are free of defects. And the decorative qualities of the material are also at their best. As a result, we get a material that is very attractive in all respects, which can be effectively used for finishing MDF arches.
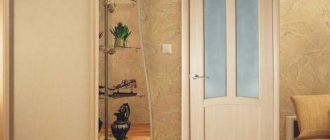
At the same time, this design can be complemented with a variety of interior styles.
Description
Arched interior structures made of MDF are popular. The fact is that this finishing of openings has some advantages over other options. The advantages of use include:
- external attractiveness of the material;
- variety of textures and colors;
- the ability to make an arch of any desired shape;
- acceptable price;
- relatively simple installation (you can assemble it yourself);
- environmental friendliness and safety;
- high wear resistance.
Advice! Consumers have the opportunity to purchase ready-made standard kits for making arches (they are suitable for standard openings) or order their production according to their dimensions.
Decorative finishing
The popularity of arched structures made of MDF is due, among other things, to the variety of their decorative designs. Possible options:
- lamination with polymer film. This is the most inexpensive finishing method; the film can have a wide variety of patterns, including those imitating the surfaces of natural materials;
- The use of special paint and varnish coatings makes it possible to choose almost any color option. Perfectly suited for modern interiors;
- bases covered with natural veneer can be additionally varnished. This finishing option will fit perfectly into a classic interior.
More about arches
An arch is an architectural element invented long ago that plays a decorative and functional role. As far as we know, they first appeared in the architecture of the Ancient East. The Latin word "arca" is translated as "arc". The design became most famous in Ancient Rome, Egypt and Greece. At that time, arches were used to decorate palaces and temples.
But through time, the shapes and characteristic curves of the arches have passed unchanged. New technologies and materials have been added to this. But what remains is the use of such a solution to create a particularly attractive interior.
Unique engineering board Bentline SUPERBASE
Solid board is a popular floor covering that is often chosen, but this coating has its drawbacks: in the Russian climate, the board often begins to dry out, which leads to warping, the appearance of gaps and cracks. Moreover, the thicker the boards, the greater the effort that occurs when they dry out.
But there is a solution - this is a perfect version of an engineered board with a unique design and SUPERBASE fastening system!
Bentline engineered board has a 2-layer construction, with a SUPERBASE fastening, which no other manufacturer has. It is specially designed for the conditions of the domestic climate with sudden changes in humidity and temperature conditions.
Source: homemasters.ru
Arched features
MDF is a popular material for finishing door arches. This is largely due to its excellent characteristics, as well as its natural appearance and content. Thus, a special atmosphere is created in the interior.
At the same time, door arches made of MDF or any other material not only smooth out the corners of the living space, but also play an important functional role. Such a design can visually separate a single space or, conversely, unite rooms that are completely different in their functional purpose.
Conclusion
The process of installing MDF arches is generally quite simple and does not take much time, especially for structures with corner fillings. The only thing is that you must follow a certain sequence of actions, and also perform the work very carefully and carefully.
Otherwise, the parts may be damaged during the cutting process, or the structure will look untidy after assembly. See the video in this article for more information. If you have any difficulties in the process of assembling the arch or some points are not completely clear, ask questions in the comments, and I will be happy to answer you.
Did you like the article? Subscribe to our Yandex.Zen channel
Installation procedure
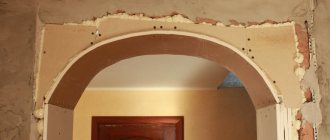
Before doing the work, we determine the height and width of the future arch (usually the height of the arch is determined by the height of the doors in the apartment, and the width is determined by the thickness of the opening wall). We clear the doorway from old door blocks and other structures (if any).
We prepare the doorway for the installation of the future arch
To do this, we mount wooden blocks (or a metal profile) on the sides of the opening using dowel nails to the walls and a transverse (horizontal) block that determines the height of the future arch.
The width of these bars should be equal to the internal width of the arch with a margin of a few millimeters. We mount the cross beam in such a way that it is 5 cm lower than the planned height of the arch. This is done so that the arc of the arch overlaps it, which gives rigidity to the structure. We sew up the unnecessary space on both sides of the opening with fiberboard - fiberboard.
Preparing the vault
Based on practice, the width of the arch usually does not exceed 150 mm, and the width of the fiberboard strips included with the arch is on average 200 mm. Therefore, in accordance with the width of the future arch, we mark and cut the supplied painted fiberboard (if necessary).
We insert the fiberboard strip cut to width into the groove of one of the arch arches.
We measure the cutting line with a pencil, so that there is a margin of 10-15 mm.
We take out the fiberboard from the arc of the arch and cut it along the intended line.
Next, having coated the groove in the arc with glue (can be applied pointwise in several places), we glue the fiberboard, leaving a margin of 5-7mm on each side. For these operations, it is advisable to use transparent glue, so as not to spoil the appearance in places where the glue may protrude.
Glue in the second half of the arch in the same way.
Arch arch installation
To fix the vault of the arch in the opening to its inner side, we screw a small piece of wooden slats or a metal plate onto a self-tapping screw (the thickness of the wooden slats can be a lot), and with its help we fasten the arch.
Preparing the side parts
Using a tape measure, measure the distance from the edge of the arch to the floor on one side of the arch.
In accordance with these measurements, we saw off the two side panels of the arch and the strip to length.
We saw off the fiberboard to the same 5-7 mm less for which we left a margin in the paragraph above. This is done for rigidity and maximum symmetry of the structure, so that the upper part of the installed arch docks with the lower one.
Apply glue to the grooves of the sawn and prepared panels.
We glue the fiberboard, aligning it along the bottom edge (the necessary margin remains in the upper part).
We mount the second panel in the same way and get a finished side post for the interior arch.
Mounting the interior arch post
To do this, we apply “liquid nails” to the inner sides of the rack and glue it to the vertical bar.
One of the installed side racks.
In this case, it is advisable to press it for several minutes until the glue sets. We make the second arch pillar in the same way.
The final moment of installation
All that remains is to cover the junction of the upper and lower parts of the arch with decorative molding.
To do this, apply small drops of glue to the side elements of the molding.
And glue them to the joint of the arch.
Having measured the distance between the side parts of the decorative overlays, we cut off the middle element to the required length. The cut should be as even as possible to form a tight joint with the side elements of the molding and glue it in. We glue the moldings on the other side in the same way.
At this point, the installation of an interior arch with your own hands is completed and you can enjoy the work done.
Watch the tutorial video.
Fixing the material
Let's consider several options for how events could develop further:
- Installation of the frame. For a doorway, this is not the most effective solution, since the space is often small, and a lot of actions will have to be done, taking into account the required number of bars or profiles. By the way, it will be easier to handle the profiles, since you won’t have to cut them for a long time - only metal scissors are used. It is convenient to fasten the panels to the bars using clamps, but it is better to use self-tapping screws for metal.
- Installation with special glue. This option requires a clean, dry and level opening, otherwise nothing will work.
- Installation on polyurethane foam. If the opening has irregularities, they should not be corrected using putty. Polyurethane foam is suitable for these purposes. It will fill the voids and at the same time fix the panel in the desired position. However, you should be extremely careful, since there is every chance of either overdoing it or not squeezing out enough foam. In the first case, we will get deformation of the material, which will put an end to the whole work, and in the second - the fragility of the structure.
MDF finishing - profitable, stylish and pleasant
MDF is a kind of compromise between modern technology and natural material. And I must say, a very profitable compromise. After all, the material behaves perfectly during installation, has excellent qualities, and using it is a pleasure. Therefore, the decision to finish the arch with just such a material is correct and logical. Moreover, you can choose the optimal color and structure.
Since we have figured out in sufficient detail how to install an MDF arch, all that remains is to try to implement the idea with your own hands. To do this, you can also look at the presented photos. And then the result will be very attractive and high quality, and the design will be modern and comfortable.
Source: legkoe-delo.ru
Preparation
We start by preparing the opening. We remove the old door along with the frame. Next, we clean the surface of the opening from dust and dirt. It is not necessary to level the opening, but more on that later.
After this, you can take measurements, based on which we cut the MDF panel using a hacksaw. Corners should be cut after installation of the main products.
