MesterulManole
7024 0 0
MesterulManole August 4, 2018Specialization: many years of experience in finishing works of residential and office premises, summer houses, country cottages, etc. Hobby: cycling in all its forms
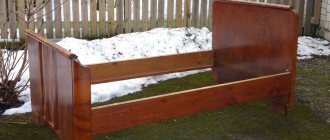
Many people got rid of such furniture at one time, but in vain, because it can be brought back to life
Do you have an old bed at home that you are planning to get rid of? Do not rush to replace old furniture with new ones, because it can be restored. I offer simple and effective instructions for restoring beds with your own hands at home. Check out the recommendations in this article and bring time-worn furniture back to life.
How to update an old bed with your own hands: photo
If a bed that has served for a long time has lost its attractive appearance or simply does not fit into the interior after renovation, this is not a reason to throw it away.
Updating an old bed with your own hands is quite simple, you just need to put in a little effort. The easiest way to update your bed is to paint the backs and bases of the furniture.
This is especially true for armored beds.
By the way, if you have an openwork lattice, it will serve as an additional decoration for the headboard of such furniture.
Another way to update your bed is to cover the base and backs with fabric.
Convenient, functional and beautiful.
It’s especially easy with beds that have a headboard. Here you can fully express your imagination. A small awning will completely transform the room and add coziness.
However, the old backrest can be covered with artistic painting, creating a unique furniture design.
Anyone who is interested in macrame can make an original wicker headboard.
When the bed does not have a back, you can create it yourself from pillows.
If you don't want to put in a lot of effort, use a vinyl decal or wallpaper instead of a headboard.
And when you have enough strength, desire and time, the headboard can be turned into an original flower shelf.
Article on the topic: DIY wooden gazebo furniture
And, of course, new design - bedspreads and decorative pillows will add zest to the fresh look of your furniture.
Don't throw away an old bed that can last for several more years. Make it a real work of art.
The final stage is decoration
After the bed is completed, the product is sheathed using foam rubber, upholstery fabric and a furniture stapler. Thanks to the covering, the frame and frame elements are hidden, resulting in a soft, comfortable and aesthetically designed model.
How does the process of covering a finished model take place?
Step 1
Foam rubber is placed on the base of the bed. The required number of layers is determined by the master independently.
The sides of the bed are covered with foam rubber
Foam rubber is nailed on top with an overlap of approximately 3-4 mm
Step 2
The foam rubber is covered on top with upholstery fabric prepared in advance. The upholstery is chosen according to the interior of the room and the tastes of the owner.
The sides of the bed are upholstered with leatherette
Step 3
The trim is attached to the base using a stapler, which firmly drives the staples into the furniture frame. Staples on the trim are not noticeable and do not affect the aesthetic appearance.
The corners of the upholstery are secured with corners
Step 4
The sides of the model are decorated with upholstery. In places where the decorative fabric and the lift come into contact, a sealant is placed under the upholstery material.
Step 5
The legs are fixed to the finished model if they are provided in the schematic image.
A finished bed with a lifting mechanism, made by yourself
Having studied in detail the instructions on how to make a bed with a lifting mechanism with your own hands, even a novice master will make a complex piece of bedroom set on his own. It’s not difficult to make a bed with a lift with your own hands, based on pre-prepared drawings. Making your own sleeping bed saves significant money and makes it possible to create a unique multifunctional bed.
Wooden bed with a lifting mechanism and a niche for storing things
Tired of your old bed? Don't throw it away, we'll show you how to restore it!
Do you have an old bed that you are looking to get rid of? Don’t rush to do this, because you can restore it yourself!
Don’t rush to buy a new bed, because the old one can serve for a very long time; Soviet furniture produced before the 80s has an enviable margin of safety. Vintage items are also very popular right now and are well priced!
So, first of all, it’s worth deciding on the cost-effectiveness of the restoration and visually identifying the “patient.” If the damage is not significant (chips, peeling varnish, heel, etc.), then you can do without disassembly, but if disassembly of the bed is inevitable, it is worth disassembling it and carrying out a deeper troubleshooting. There is no particular point in restoring furniture made from chipboard; chipboard does not have much durability; 10 years is the limit for it. If, of course, this furniture is dear to you as a memory, then you can replace the chipboard elements to strengthen them, but the price will be noticeable.
The easiest way to restore an iron bed is to simply refresh the paintwork and select a suitable mesh. This bed will fit perfectly into the Provence style. If you have old furniture from the 50s and 60s, you are lucky! Back then the furniture was made from solid wood, it is eternal! With a little effort, you will have a gorgeous vintage bed that will last for another half a century.
So, let's look at the stages of restoration.
Visual inspection
It is necessary to visually assess the damage, examine creaks and other extraneous sounds.
Analysis (if necessary)
If, nevertheless, the damage is significant, there are extraneous sounds (creaking, crackling), it is necessary to disassemble the bed into its component parts and repair them separately. Most often, a bed frame or slats become unusable; it is all dismantled (the process is not complicated) and a new one is installed. The tools you will need:
- Spanners
- Hex keys
- Screwdrivers (depending on fasteners)
- Drill
In a building materials store you can select suitable bars and slats, you can also buy additional fasteners in order to strengthen the structure.
Assembly of finished furniture
After the interior has been repaired and replaced, you can assemble it. This will not be difficult; all steps must be performed in reverse order. The tool you will need is the same as during disassembly.
Article on the topic: DIY furniture for LPS
External restoration
This point can come either after the first or after the second. Here you can go in several ways, you can restore the varnish on the surface, you can sheathe it with material, according to your desire.
Varnish restoration
To do this, you need to clean the surface down to the wood; if there are deep chips, you will have to use color-matched putty. the surface is sanded with 200 sandpaper (hereinafter 80), after which the dust is removed with a solvent and coated with penetrating impregnations (for example, drying oil). If you want to change the color of the wood, you can use stain (but there is a problem, in this case the putty will be noticeable). Allow the surface to dry, then apply the varnish one layer at a time, allowing the previous one to dry. To obtain a glossy surface, you must use a glossy varnish, for a matte surface, a matte varnish. After the last layer has dried, you can polish the surface.
Tools:
- Putty knife
- Brushes
- Sandpaper (200, 80)
- Hair dryer (to soften old coating)
- Sander
If you don’t want to varnish, you can sheathe the surface with a material that you like. To do this, you need to purchase the material itself (leather, leatherette) and filler (foam rubber). You can upholster the headboard, footboard and sides. Here everything depends on your imagination.
Tools:
- Furniture stapler
- Stationery knife
- Small carnations
- Glue
- Hammer
Repair
As mentioned above, beds with nets are not used as often as they used to be. If you do not take into account hospitals, boarding schools and sanatoriums, then they can be seen mainly in dachas or country houses. They are often used as a safety net in case many guests come.
Due to the fact that the structures are usually many years old, sometimes it becomes uncomfortable to sleep on them. This is due to the fact that the mesh stretches during use. How to tighten them up?
First you need to find two cylindrical springs. They can be removed from some old sofa. You will also need two strong boards that will act as a support or base.
The workflow consists of several stages:
- The springs need to be attached to the boards where the longitudinal parts of the frame that holds the shell will be located.
- The resulting structure is placed directly under the shell. The distance between it and the boards directly depends on how much the bed is stretched.
- It is necessary to stretch some dense material between the shell and the boards. This could be, for example, a tarpaulin. Then tighten the entire structure with twine.
Methods for restoring an old wooden stock
Sometimes it's hard to part with an old wooden bed, whether because of its convenience or its value as a memento. You can use several methods to restore, decorate furniture and give it new life.
Updating the backrest (headboard)
You can update the backrest in the following ways:
- Restore a damaged area of varnish: If there are no bubbles or deep cracks, wipe the surface with a rag soaked in gasoline to remove grease stains.
- Wait until the product dries, treat it with conditioner, and then wipe it with a wooden furniture polish.
- From the dried back, wipe off the top thin varnish layer with a steel wool. You can't cut through it all the way through!
- Remove dust with a dry cloth and apply a varnish similar to the previous one in several thin layers.
- Allow the product to dry.
- In the first case, the wooden back is sanded and craquelure varnish is applied. After it has dried, the surface is coated with basic varnish. When the varnish layer cracks, cracks form, giving the furniture an antique look.
The dried surface is sanded, and a new layer of stain is applied to the parts that are planned to be left darker, having a different base than the composition when first used. After the product dries, the wood pores are filled with shellac primer. When the back is dry, wipe it with antique wax along the fibers. After it dries, sand with a soft cloth.
Article on the topic: How to make home furniture with your own hands
The owner of an old bed can update the headboard by covering it with different types of materials. We wrote about the most popular methods of reupholstery in this article, and you will find detailed master classes here.
Mattress restoration
To reupholster a spring mattress you will need the following tools and consumables:
- new fabric for upholstery;
- hammer, construction stapler;
- nails or staples for fastening.
Depending on the structure of the mattress and any damage inside it, the following may be required:
- cord for tying;
- wooden slats;
- foam;
- items without defects.
- The mattress is placed on a flat plane in a horizontal position, and the old textile covering is removed. Using any tool, remove the parts that attach the worn fabric to the base. If the mattress is covered with stitched fabric, it is cut at the seams and carefully removed.
- The mattress structure is inspected for damage, cleaned of dust, small debris shaken out, and the frame is wiped.
- After making sure that the internal parts are in good condition, they begin the sheathing: laying a fresh gasket layer and top covering material, securing with nails or staples. To avoid wrinkles in the fabric, stretch it slightly with your free hand.
How to restore a mattress in the video:
Bed repair: price and stages
All work is carried out according to the general plan:
- product inspection;
- drawing up estimates and work plans;
- delivery of the product to the workshop;
- disassembly;
- damage inspection;
- elimination of defects;
- carrying out modernization if necessary;
- product assembly;
- delivery to the client.
The final cost of the service will depend on the volume of work and its complexity, the type of materials used. We offer a large selection of different fabrics for upholstering headboards, from textiles to leather. We also use different types of wood for restoration, including chipboard, MDF and solid wood.
Bed repair in Moscow at an affordable price
We offer a free visit of a specialist to Moscow and the region to assess the damage and draw up an estimate. Thanks to the professionalism and extensive experience of our employees, each customer will be able to transform their furniture without compromising the family budget.
A huge selection of materials, affordable prices and experience in working with the most complex orders allow us to provide a quality guarantee for all the services we provide. Call!
Restoring an old iron bunk
An old metal bed can be restored by careful polishing.
- Scrape off the rust . To remove large pieces from rusty areas, use both a wire sponge and a special brush. Then the frame is washed and all parts that have peeled off are removed.
- Polish the product . Use sand and sandpaper to remove fine rust. Particular attention should be paid to hard-to-reach places. Sanding is carried out until completely smooth.
- Solvent wipe . The treated bed is prepared for priming and painting, wiping with any solvent, for example, acetone.
- Primed . For light-colored furniture, use a white primer; for dark furniture, use a duller primer. The primer is applied with gentle movements, in two to three thin layers, allowing each to dry thoroughly. After the piece of furniture has dried, wipe it with a rag to remove dust and primer residues.
- They paint . For painting, it is recommended to use high-quality aerosol paint, which protects furniture from rust.
How to restore a metal bed in the video:
Floor finishing
Carpet finishing
The completed frame should be beautifully finished. To do this, the entire surface must be treated with a wood primer, for example, drying oil. The surface must be dry. Then paint the surface in two layers.
If you don’t like painted surfaces, you can lay carpet on the floor of the podium. To do this, distribute the carpet evenly over the surface of the podium. Press it along its entire length with a heavy object. Then make markings that will exactly follow the outline of the entire structure. In places where the bed platform has rounded areas, work extremely carefully and carefully. Use a sharp knife to cut carpet. Each edge can be further processed, for example, with a braided cord or something else. When you have completely adjusted the carpet to size, it should be laid with glue so that it does not move.
This is how a pull-out bed is made. In literally four square meters you can organize a workplace on the podium and a pull-out bed under it. As you can see, making a pull-out bed is not that difficult. It just takes a little patience and effort.
How can you improve the look of a double bed?
You can update the appearance of a double bed in several ways:
- Plaster and paint . You can radically transform a double bed in a simple way: level the surface with plaster and paint it in the desired shade. The restoration method is suitable for any straight model.
- Renew the varnish layer . The bed is disassembled, the parts are sanded, and varnished in several layers. When the product is dry, it is polished.
- Gilding is applied . Gilding is used to update the shabby surface. It will turn an ordinary bed into a luxurious bed and disguise minor flaws. You can cover the entire bed with gold or paint only individual parts.
- Upholster with leather . If surface damage cannot be masked with varnish or paint, the use of eco-leather will help out. It can be used to cover the back and side panels. Before covering, a sheet of foam rubber must be laid to soften it. The legs are painted the same color as the upholstery material.
- Artificially age the surface . The bed is covered with craquelure varnish or stain, then sanded. This processing method allows you to hide furniture defects and transform a shabby look into a vintage one.
The video shows one of the options for restoring an old double bed:
How to make separate ones from a two-tiered one?
To make two separate bunk beds, first build a base in the form of a rectangular box, on which a mattress of a suitable size will then be placed. First, prepare the side panels. To do this, take two processed boards, sawn to the required dimensions, and attach two more smaller boards to them at an angle of 90 degrees. This will be a specific shelf.
The back is created using the following steps:
- Take three boards that correspond to the width of the bed. They are attached to the racks.
- Use connecting dowels to secure the structure. Place them on the boards and mark the locations for the holes with a pencil.
- Drill holes in two parts and connect them with dowels.
- The side backs are attached in the same way. The first tier will be completely assembled.
Photo with headboard design ideas
Learn more about how to make and reupholster a headboard.
Updating and decorating your bed yourself allows you to significantly reduce costs that cannot be avoided if you buy new furniture. Thrifty owners will appreciate the opportunity to restore furnishings with their own hands. This allows you to refresh the appearance of the bed and give originality to the bedroom interior.
Areas of use and benefits
Beds with iron mesh of different sizes are used in the following places:
- military barracks;
- children's camps;
- medical institutions;
- boarding schools;
- sanatoriums;
- student dormitories.
Modern version
Where does this popularity come from? It turns out that these designs are reliable and durable. In addition, neither adults nor children will experience discomfort during sleep.
You will probably be interested to know what types of Russian bed manufacturers there are.
An armored bed has many advantages:
- High strength. The design can withstand heavy weight and loads. This feature is useful where the bed is used continuously, for example, in a hospital.
- Saving. A bed or cot with a metal mesh is much cheaper than other models.
- Long service life. This piece of furniture will last at least 15 years, which is convenient for medical institutions that do not have the opportunity to frequently update furniture.
- Hygiene. Metal structures do not harbor insects. In addition, they are easy to care for. There is no need to buy any special detergents - just wipe all parts with a damp cloth.
- Reliability. The use of metal almost completely eliminates the risk of breakage.
How to restore an old bed with your own hands at home - tips and tricks
Many people got rid of such furniture at one time, but in vain, because it can be brought back to life
Do you have an old bed at home that you are planning to get rid of? Do not rush to replace old furniture with new ones, because it can be restored. I offer simple and effective instructions for restoring beds with your own hands at home. Check out the recommendations in this article and bring time-worn furniture back to life.
Painting the bed white
Painting an old bed white is no different from the steps above. When painting wood on a complex, uneven surface, you can use special bleaching pastes that even out the tone of the base.
Painting an old bed is an alternative method to freshen up your bedroom at a minimal cost. If you don’t want to waste time and effort, in our store you can order a bed of any size and color at a super-attractive price!
Source
Benefits of DIY restoration
An alternative to restoration - artificial aging of furniture
- Saving money . A good modern bed costs a lot of money, so why not restore old furniture, which in the end will be no worse.
- Old furniture is better quality than modern furniture . Until the end of the eighties, Soviet beds were made to last and last, while modern products will last no more than ten years without repair.
- Fashionable retro ambiance element . Retro is in fashion, and therefore, by restoring an old bed, you will get a unique element of the surroundings for a very small amount of money.
- Old furniture can be modernized . With the right approach to restoration, a bed can not only be restored to its original appearance, but also modernized. As a result, furniture that was otherwise thrown away will be relevant when arranging modern interiors.
- Gaining valuable experience . If the bed restoration is successful, you will gain valuable experience that will be useful when restoring other furniture in the house.
Where to begin
Most iron beds are in excellent condition and for their restoration it is enough to select a mesh of the appropriate size
No matter what you decide to restore, you need to start by identifying and assessing the damage that will have to be repaired during the restoration.
If the wear of the bed is insignificant, you can do without disassembling and limit yourself to eliminating cosmetic defects on the back and foot. If there is a lot of damage, the bed will have to be disassembled into individual structural elements, cleaned of accumulated dirt, after which it will be possible to identify all the defects and decide on their elimination.
When is restoration appropriate and when is it not? Any furniture can be restored, even in very poor condition. But you need to understand that the worse the condition of the furniture, the more time, effort and money will have to be spent on restoring it.
Chipboard is a short-lived material, but if desired, it can be updated
An important point is the material from which the bed is made. The easiest way to restore metal products is to simply clean off the rust and oxides, after which you can start painting. Furniture made from chipboard is the most difficult to restore. After more than 10 years of use, particle board loses its former strength, and therefore I do not recommend restoring old broken chipboard beds.
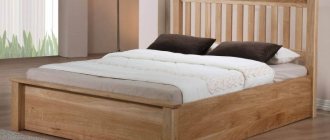
The most popular option is restoring wooden beds. Such furniture, being made in the 50-60s of the last century, is now distinguished by enviable durability and all you have to do is repair chips, cracks and abrasions.
Features of partial restoration
| Illustrations | Damage to wooden beds and solutions |
| Cosmetic defects . Minor abrasions are eliminated using masking tinting compounds. Significant defects, including scratches, chips, dents, etc., require preparation of the wooden surface with complete repainting. | |
| Stock creaking under load . Remove the mattress and try to lie directly on the slats; if there is no creaking, then the problem was in the spring mattress. If the squeak remains, tighten all bolted connections in the non-structural frame structure. | |
| Cracking of the supporting frame . Such a defect is caused either by improper use of furniture with excess mechanical load on the bed, or by a violation of the technology in the manufacture of furniture. One way or another, to eliminate the defect, the frame must be disassembled and the damaged part removed. The damaged part of the frame is replaced with a new part made from a new board. |
Attention. When repairing the frame, we use dry wood, which does not deform or crack during the drying process.
Required tools and materials
During the restoration you will have to do a lot of sanding, and therefore you cannot do without a sander
Furniture restoration requires a variety of tools, including:
- Devices for disassembling cabinet furniture - hex keys for confirmations, spanners for bolted connections, screwdrivers for self-tapping screws and screws.
- Equipment for roughing and grinding the surface - an industrial hair dryer for softening the paint, a sanding machine with a set of sandpaper of different grain sizes.
- Painting tools - brushes, rollers and sprayers for applying paint and varnish materials, as well as spatulas and sandpaper for applying a leveling layer of putty.
Wood putty is an effective remedy for removing deep dents and scratches.
In addition to the tool you will need:
- Paints and varnishes (paints and varnishes) - including varnishes, paints and stains.
- Primers and impregnations - these materials reduce the absorbency of wood, increasing adhesion to coatings.
- Putties - used to level the relief on wood.
- Oil and wax impregnations and mastics - to mask cosmetic defects of the old coating.
Brief characteristics of restoration compositions
| Illustrations | Restoration compositions and their description |
| Lucky . This category includes surface coating compositions that are used either as a stand-alone coating or applied over other paint and varnish compositions. |
Varnishes vary in texture and come in glossy, semi-gloss and matte. Also, varnishes can be colored or colorless.
If wood is treated with stain or other coloring compounds, it is preferable to use colorless varnish.
The use of oil impregnations is allowed only on solid wood surfaces.
Methods for eliminating minor defects
| Illustrations | Ways to quickly eliminate cosmetic defects of old wooden beds |
| Masking abrasions . Minor abrasions of the paintwork are not a reason for a complete restoration. |
Mix 1 tablespoon of vinegar and 2 tablespoons of unrefined sunflower oil in a small bowl until an emulsion is obtained. Next, dip a thick cloth in the composition and oil the abrasions. As the composition is absorbed, apply it again.
On the market and in auto parts stores you can purchase a repair marker that masks scratches on the paintwork. This option can also be used for cosmetic restoration of furniture.
Scratches are degreased and rubbed with soft wax. The applied layer of wax is softened with a hairdryer.
Varnish layer renewal technology
Let's look at the instructions for updating the varnish layer using the example of restoring the headboard of a bed.
After the putty has dried, the headboard is sanded down to wood using 200 and then 80 sandpaper.
We sand the wood with a sander or float. If you hold the surface with your hand, it will not work.
The varnish is applied in several layers with a break for the previous layer to dry. After this, the surface can be polished.
Finishing the product - decoration
| Illustrations | Decorating ideas and their descriptions |
| Decoupage . If a cosmetic defect cannot be removed from the surface of the furniture, why not hide this defect behind a sticker. |
If earlier the thinnest gold foil was used for gilding, today there is no need for such expenses. Inexpensive “golden” paint can be bought in a can at any construction market.
Beginning of work
Initially, it is necessary to determine the extent of the breakdown or wear of the product. If it is still in good technical condition, it may be possible to get by with only cosmetic repairs, but when the bed has visible defects, major repairs will have to be made. Let's look at each type of repair and how to get rid of the defect in more detail.
Cosmetic defects
When the bed has a small number of faults in the form of:
It is possible to get rid of them by using various cosmetic compositions for furniture or by completely repainting the headboard according to the instructions of the selected product.
Creak
A common problem with old furniture, first you need to do a little diagnostics: remove the mattress and lie down without the slats. This procedure will give two results:
- the bed continues to creak. Then you need to use the keys and tighten all the frame bolts;
- there is no squeak. This means that the problem is in the mattress itself. It may be worn out and needs to be replaced.
Cracks in the frame
Fairly challenging difficulty. It is important to calculate the specific location of the crack, then carefully disassemble the entire frame and replace the deformed part.
Top 5 tips on how to update a wooden bed
A wooden bed is one of the most reliable, durable, and safest for sleeping. It does not contain harmful impurities, does not cause allergic reactions, and does not accumulate dust. But over time, even such good furniture needs updating. The tree, depending on the species and microclimate of the bedroom, may begin to dry out, become deformed, or become infected with fungus. Timely restoration will protect it from complete destruction, and the updated bed will delight you with comfortable rest for many years.
In this article we will talk about ways to restore furniture at home. We will show you the difference between a partial reconstruction and a complete one, and we will share the secrets of treating a wooden surface that protects it from adverse external factors.
How to restore veneer
Veneered furniture requires a special approach. The means are basically the same, the methods are different. For example, if after getting hit the veneer is swollen, fill a disposable syringe with PVA glue, pierce the bubble, and inject glue into the cavity. Place a piece of thick fabric on top and place a weight. If the surface is uneven (convex or concave), use a thick fabric bag with heated sand as a load.
Such veneer damage is restored in two stages. First, the swelling is eliminated, then the scratch is painted over and the coating is restored.
If the veneer is glued with alcohol glue, you can return the swollen part to its place by ironing it through a rag with a hot iron. But do not overheat the iron: the veneer may stretch. Heating level is medium.
If ironing with a dry cloth does not help, try repeating the operation with a damp cloth (wet it and wring it out well). There is a chance that the wood will swell and become more elastic. To reliably fix the swelling, you can introduce PVA there and then heat it with an iron.
If the swelling is cracked, you can also try to seal it with heating (through a rag). If it doesn’t work, tear off the peeled piece. You don’t cut it, but rather break it off: on veneer, breaks after restoration are less noticeable than cuts. Therefore, you break off the lagging piece. Remove the old glue from the damaged area and the piece of veneer (with sandpaper or a nail file, depending on the size). Next, the repair of veneer on furniture is standard: spread it with PVA glue, lay it down, aligning the fault lines, lay a thick fabric on top and place a weight until it dries.
Such veneer peeling can most likely be eliminated simply by ironing it with an iron.
Scratches and traces of restoration on veneer are removed in the same way as on wood: they are painted over with a furniture marker of a suitable shade. If the scratch is deep, a little melted furniture restoration wax is applied to it (with a spatula). After drying, the wax is ground, and if necessary, fine-grain sandpaper is used, but after this treatment, the restored piece is covered with a layer of varnish.
Do-it-yourself furniture restoration requires patience and accuracy. You have to act gradually and methodically: smear it, wait for it to dry, level it, smear it again, etc. Sometimes you have to try several methods: damage varies, as do the materials used in production (glue, varnish, etc.). But as a result, the furniture will look much better.
What are the most common defects in wooden beds?
During use, wooden beds are subject to various deformations. But how quickly they arise, and what scale they will be, depends on the type and quality of the wood. Some products serve flawlessly for decades, while others already show serious flaws after 3-5 years of operation. To understand how much work you have to do, we suggest you familiarize yourself with the most common defects of wooden beds.
- Dents, chips, scratches on the surface of the product. Frequent companions of softwood: pine, spruce, alder, linden, aspen. They appear after 2-3 years of service and do not affect the strength of the structure, but because of them the bed loses its former attractiveness and aesthetics.
- Drying of wood: cracks, gaps, deformations. Quite serious defects that require immediate elimination, since they affect the integrity of the entire structure. There are several reasons for this: the use of unseasoned wood by the manufacturer, the lack of a stable microclimate in the room, and the long service life of the wood.
- Creaks and broken bases. They arise due to improper use (excessive loads, active games of children), installation of weak fastenings, and expiration of the permissible service life. They have little effect on the overall condition of the structure, but cause significant discomfort to the owners. An orthopedic base with defects needs to be repaired, since cracked lamellas no longer perform the function of supporting the spine.
- Frame damage. The most serious of the defects listed here. Failure to repair them in a timely manner can lead to bending and breakdown of the entire structure. It is almost impossible to restore a broken frame, and if you undertake repairs, you should be prepared for significant expenses.
- Malfunctions of functional mechanisms. Sometimes they occur on beds equipped with a lifting mechanism or a storage system in the form of drawers. They affect the quality of operation of the stock and require urgent repairs.
We have finished our review of common defects in wooden beds, and we propose to move on to ways to eliminate them. When is partial or complete restoration of a product necessary?
Elimination of defects in wooden bedroom furniture, depending on the root cause, can be partial or complete. Thus, single scratches and dents can be treated locally, while multiple scratches require updating the entire surface. There are several ways to do this.
- Covering minor flaws with polishing or special markers.
Minor damage to furniture can be repaired using tinting agents. For example, for a varnish surface, car markers are used to match the color, and for a matte surface, wax is used. It is rubbed into the damage, softened with a stream of warm air (hairdryer), and then polished. - Removing dents and chips using putty and repainting the surface.
Deep dents and scratches cannot be polished. You can smooth them out by applying wood putty, after which you can paint the entire product. - Renewing color using impregnating oils, stains, and re-varnishing.
Natural impregnating oils restore the tarnished color of wood, protect it from unfavorable external factors (excessive dryness or humidity), but they can only be used on solid wood. If the bed is made from cut wood, it can be treated with stain. This impregnation protects the wood from fungus, masks cosmetic defects, and gives it a spectacular, translucent coating of a dark shade. You can also hide visible scratches by re-varnishing the surface of the bed. However, the wood must first undergo a sanding procedure.
Regarding the drying out of wood and the resulting malfunctions, the following repair methods are used:
If the damage is inside the structure, it must be opened. To get to the defects you will need special keys and screwdrivers (hexagons, sockets, etc.). Disassembling the bed will allow you to assess the extent of the damage, make sure that it is not the mattress that is creaking, and strengthen the deformed parts. If the frame cannot be repaired, it can be rebuilt from fresh wood, enlarged, or converted into a podium, as desired.
Malfunctions of the functional mechanisms of the bed require deeper specialization; they cannot always be repaired at home. So, in some situations, it is enough to lubricate the mechanism for normal functioning, while in others, it requires complete disassembly and replacement of parts. It’s up to you to decide what to do: call a specialist or carry out repairs yourself, but in any case, we recommend that you first study the features of the mechanism and then start repairing it.
Gate
You can also make a stylish garden gate by welding a latch on one side of the door and also welding hinges on the other side to hold the door in place.
To remove any remaining original paint, you can use a sander or drill with wire brushes to sand it down. When finished, you need to select soft sandpaper by hand and use a damp cloth to remove any residue that may have been present. Finally, paint the entire structure with a special exterior paint, including the welded parts, to prevent them from rusting.
Ways to renew the surface of a bed
If the bed has no damage, but requires updating its appearance, we offer 5 effective ways to restore it.
- rubber glue (indispensable when gaps appear; It fills the resulting free space, prevents deformation of the product. After drying, it remains elastic, therefore at the same time solving the problem of local squeaks. Effective for single cracks on beams);
- metal plates (used for multiple, deep cracks in timber. The plate is attached to the wood, strengthening it and preventing further fracture).
- Plastering + painting. A simple technique for radically transforming your bed. First, the surface is leveled using wood plaster, after which it is painted in the desired color. The enamel or paint is applied in a dense layer and does not show through, so you can choose any shade. It is possible to transform in this way any sleeping place with straight shapes: a loft bed, a single bed, or a simple double bed.
- Renewal of the varnish layer. Loss of color and shine is typical for lacquered products with a decent service life, so they need periodic renewal. The process takes place in several stages: disassembling the product and grinding parts; varnish coating. It is applied in several layers and polished after drying.
- Application of gilding. An interesting way to transform a shabby bed surface. Gilding looks chic and reliably masks minor defects on the surface. You can use it to paint the entire product or individual elements, creating a unique design yourself.
- Leather upholstery. This method is suitable for beds whose aesthetic damage cannot be disguised. Eco leather is usually covered with the back and side panels, previously softened with a sheet of foam rubber. The legs are painted to match the skin tone. A product updated in this way is radically different from the original one, and can be perceived as a new bed.
- Artificial aging of the surface. A currently fashionable finishing method, the essence of which is to paint the product and then polish it. Flaws on the surface with this treatment are not visible. The bed looks vintage without being shabby, which adds value to its surroundings.
Failure options and fixes
Features of large beds, nuances of choosing furniture for obese people
To repair a bed at home, you must first find out the cause and type of damage. Most often it is necessary to restore the legs, slats, frame of the product, as well as the spring mattress. The technology for carrying out work is different in each case.
Leg repair
If the entire structure is attached to the legs, then bed repairs must be carried out very carefully. When parts become loose, the fasteners must be tightened. If they break, it is better to completely replace them. To do this, the nuts are unscrewed, damaged components are removed, and others are installed in their place and clamped with fasteners. Ready-made parts can be purchased or made independently. If the master is a beginner, then the first option is preferable.
If the legs become loose, the fasteners need to be tightened
If a leg breaks, a complete replacement of the part is required.
Lamels
Most often, children's beds have to be repaired. The reason is that this type of furniture for a child is not only a piece of recreation. He can play on it, jump, do what he likes. This often causes damage to the lamella. If the damage is minor, then it is enough to fix the element with glue. Otherwise, the part is replaced. Moreover, now you can purchase not only the lamella itself, but also its holders, which are most often damaged.
If the damage is minor, then it is enough to fix the element with glue
In the event of a serious breakdown, the failed part will have to be replaced.
Frame frame
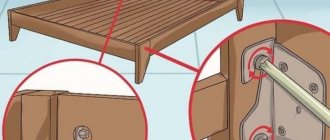
Although this part does not experience maximum stress, failure of the bed frame is common if it lasts more than 3-4 years. The problem may be as follows: the crossbars that connect the backrests pop out. The reason for this is the wear of the coupling bolt. To correct the situation, you need to drill several holes in the end of the cross member. After this, insert guide pins into the outer holes, and a tightening bolt into the middle one.
Another type of failure is the loss of the metal fitting connecting the front backrest and the crossbar of the furniture. To solve the problem, you should simply fix the element in its place. To do this, wind the thread around the foot in the opposite direction to the twist. The diameter of the product should be slightly larger than the size of the loosened hole.
Before fixing the part, the hole is coated with glue, and then the component is installed in place. A screw or self-tapping screw is also screwed into the back of the furniture, securing the footing on the back side. Once it has hardened, the bed can be used.
After 3-4 years of use of the product, the tightening bolt may fail, which will lead to breakage of the bed frame
If the cause of the breakdown is associated with a fallen out fitting, you should fix the element in place by winding a thread around it and lubricating the loose hole with glue
Lifting mechanism
Different types of lifting mechanisms are installed in beds, therefore their repair schemes are not the same. Before starting work, the type of structure is determined and a visual inspection is performed. The algorithm for repairing the bed lifting mechanism is as follows:
- First, the structure must be removed and disassembled. It is advisable to photograph the entire process or write down the sequence of unscrewing the parts so as not to get confused during assembly.
- Conduct a visual inspection of the mechanism to identify broken parts.
- Replace damaged components and assemble the structure.
- Place the product in place.
To prevent the lifting mechanism from breaking for a long time, it must be periodically lubricated. Thanks to this, the friction of the fragments, as well as their wear, will be reduced. In addition, the protective oil film will prevent rusting and corrosion processes.
To ensure that the lifting mechanism lasts as long as possible, it must be lubricated periodically.
The main causes of scratches
Before you start eliminating scratches, you should find out the reasons for their occurrence. This is necessary in order to prevent the formation of defects in the future. The main reasons include:
- Exposure to abrasive substances, including sand and dust. For this reason, minor and barely noticeable defects appear on lacquered furniture.
- Damage caused by pets' claws or various sharp objects.
- External mechanical influence. The largest and most problematic chips appear from impacts from furniture.
Source
Benefits of updating old furniture
This kind of work has many advantages; the minimal costs invested in it will fully justify themselves. The main advantages, when compared with buying new furniture, are:
- significant savings. A new stock made from quality materials will cost a lot of money. Renewing the old one will cost several times less;
- quality. It's no secret that modern materials from which furniture is made are much less durable and not as high quality. Having restored a Soviet bed, it can be used for a very long time;
- interesting, bright design. All this can be achieved if you put together: desire, your imagination, and the necessary materials.
These main positive qualities are a good incentive to restore such an important piece of furniture, plus the interesting time spent will provide useful experience that can be used in the future to implement similar tasks.
How to prepare a bed for restoration
In order to do anything with furniture, it must first be properly prepared for the upcoming restoration. The success of the entire update depends on unhurried and thorough preparation and delicacy.
- All surfaces of the bed, joints and individual parts must be treated with extreme care with a sponge dipped in a simple soap solution. The only nuances: the water should be warm, but not hot. Soap based on herbs or any plant material is best suited. The fewer harsh chemicals it contains, the better. No bleaching options or soap will work against stains.
- How to restore an old bed next? All thread elements and all fittings are carefully cleaned with a previously soaped toothbrush. For the smallest parts, a toothpick will do.
- The most ingrained plaque can be carefully cleaned off with the softest sandpaper (zero sandpaper). But without fanaticism, otherwise the finish will fade.
