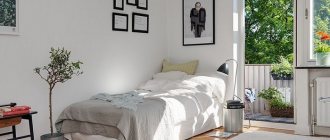
How nice it is to drink a cup of coffee in the morning while admiring the beautiful view from the window. A bar counter on the balcony helps to realize such a dream. In addition, such an interior looks very stylish, original and unusual. You can implement a non-standard solution without even combining a kitchen or living room with a loggia. How to equip a full-fledged bar on the balcony yourself, without resorting to the help of specialists? Advice from designers will help you realize your plans and enjoy the result.
A bar counter on the balcony is an interesting and convenient solution, and it looks great
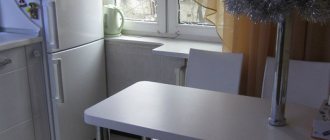
Tabletop instead of window sill
This is the simplest and most economical option, which does not require approval from higher authorities. Its essence lies in the fact that the balcony block with a door and window is dismantled, and a bar counter-window sill is installed in the vacant space. It performs the function of zoning space and serves as a full-fledged dining table. This is especially important in small spaces, where every centimeter matters. In such cases, proper zoning is simply necessary. Access from both sides allows you to seat 4-5 people at the bar at the same time. In addition, such an interior does not look overloaded.
As for the design, there can be various configurations. The most budget option is a window sill-bar counter without additional improvements. You just need to purchase a countertop and place it on an existing block. For small kitchens, a design with fruit bowls, carousel shelves rotating around its axis, and hanging sectors for storing glasses is more suitable. A window sill bar counter with two parallel tabletops looks very stylish. This two-level structure provides additional storage space.
A tabletop instead of a window sill: simple, convenient and practical, and most importantly - affordable both at a price and the possibility of self-production
Principle of operation
First, you need to carefully dismantle the door and window openings without damaging the base. Wooden structures can be sawed through with a hacksaw and then removed using a pry bar. It is better to fix the tabletop using liquid nails or fastening angles. Both methods are quite reliable, but require certain skills. Please note that the bar top is made only after the necessary measurements have been taken. It is better if it is round in shape: this will avoid injuries from sharp corners.
The optimal height of the bar counter on the balcony, a photo of which can be viewed on the website, is 110–120 cm. If the required centimeters are not enough, you can raise the base, or install the tabletop on wide, durable pipes, which in turn are attached to the block.
The opening between the kitchen and the balcony, prepared for installing a countertop
Stone countertop made to individual sizes
Requirements for window sill conversion
A kitchen with a countertop on the windowsill is an option for optimal distribution of free space. Like any other repair work, the process of converting a window sill into a tabletop requires compliance with certain conditions:
- It is important to leave a distance of at least 10 cm between the table surface and the heating radiators. If the recommended parameters are not observed, air circulation in a confined space is disrupted. For greater heating efficiency, it is better to make 1-2 holes along the edges of the table.
- When expanding the countertop, you should not leave large gaps into which moisture, greasy deposits, or dirt can get in.
- All wooden surfaces should be treated in advance with moisture-resistant oil to prevent the attachment of pathogenic fungi.
As a countertop, it is better to use durable materials that can withstand significant loads.
Bar counter along the facade wall
This option can be implemented without dismantling any structures. All you need for this is free space and a glazed balcony. The bar counter on the loggia is located along the wall near the balcony window in a straight line. If the length allows, you can make angular turns at the end sections. The width of the tabletop should be no more than 1/3 of the width of the balcony, otherwise the space will be very cramped.
A bar counter of different configurations, with rounded corners, located in only one part of the loggia, looks compact and stylish. This allows you to save space and equip cabinets for storing things or just put a sofa. Irregularly shaped countertops are suitable for balconies with non-standard layouts, turning their significant disadvantages into advantages.
Principle of operation
For repairs you will need a tabletop, brackets, dowels, a hammer drill and a screwdriver. Please note that the bracket should be only 5 cm less than the width of the tabletop. If its length is short, then there is a possibility of the entire structure collapsing. First, you need to mark the drilling locations (one bracket is used for every 50 cm), then use a hammer drill to make deep holes, insert dowels and secure the brackets using a screwdriver. The table top is secured with self-tapping screws, the length of which should be 3 mm less than the thickness of the table, otherwise lumps may form on the surface. Such a fastening is quite strong, so if the correct ratios are observed, the structure will last forever.
Bar counter along the outer wall of the insulated loggia
Rack Accessories
For ease of use of the bar counter, there should be dishes nearby: cups, plates, glasses. All this is placed in a cabinet with glass doors or on shelves hung on one of the balcony walls. They also house props and decor.
Without lighting, the bar counter will not be such - it will turn into an ordinary window sill. The classic option is to install a suspended ceiling above the tabletop made of material identical to the stand, and lamps are mounted in it. If such a plan cannot be realized, you can glue an LED strip to the ceiling or to the upper crossbars of the frames. In this way the issue of lighting and original light decoration will be resolved.
Bar counter with lighting
An important bar accessory is chairs. For a narrow balcony, round bar stools without backs, preferably on one leg, are suitable. For DIYers, there is a chance to express themselves and make folding seats. They are convenient because when folded they do not take up space and do not interfere with movement around the balcony. But even if you make folding seats, it is better to buy a couple of real bar stools to create the appropriate atmosphere.
The bar counter on the glass balcony makes it possible to drink your morning coffee in a pleasant environment, watching what is happening outside the window, relax in the evening with a cup of tea and, of course, use it for its intended purpose. That is, get together to chat with your best friends.
Please note: We make a small cabinet on the balcony from wood with our own hands
Bar counter as a divider between the room and the balcony
This version of the bar counter involves the complete demolition of the wall and balcony structure. A bar counter is being installed in the kitchen in place of the former window sill. Such redevelopment requires obtaining permission for construction work from government agencies, since it involves moving the radiator to the balcony. Unauthorized dismantling threatens with a large fine and an order to return the interior to its original state, so do not neglect the rules. For small apartments, such renovations are the only possible option to improve living conditions.
Redevelopment allows you to consider racks of any configuration and independently set the boundaries of the work area and rest area. A very interesting solution is a table top for a loggia, which is attached to the wall on one side and supported on the other by a support in the shape of a metal pipe. There is still room for your legs below, so you can move closer to the bar counter or push in chairs. You can also consider a table with small built-in shelves, as if it were a continuation of the wall. Fans of non-standard solutions can consider the option of a bar counter with decorative elements: an aquarium, a luminous panel, etc. Such a design will become a real highlight of any apartment.
This bar counter consists of only two panels
The owners of this apartment decided to leave the radiator in place
Principle of operation
A tabletop on a balcony with a metal support is the easiest to install. On its lower side you need to screw the brackets and pipe, and then turn it over and fix it to the wall and to the floor. It is better to make a stand with a vertical support to order so that it matches the kitchen set.
In order to install a tabletop with a vertical pipe from floor to ceiling, you need to drill a hole in the surface, insert the pipe there and fix it at the desired height. Next, you should attach the structure to the wall using brackets and secure the pipe. If there are additional cabinets or shelves below, they should be assembled immediately.
Layout
When purchasing a bar counter, it is very important to choose the right layout. This aspect depends on the characteristics of your kitchen - mostly on its size. The following options exist.
L-shaped stand
Project corner set with stand
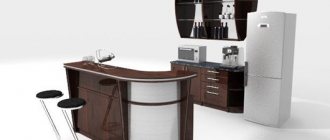
This layout is very often used in small studio apartments to separate the kitchen from the living room. The countertop is a continuation of the corner kitchen unit; it is located perpendicular to its main line. Thus, it is very convenient to use the surface as a dining and/or work area.
In addition, the advantage is the fact that the design of the L-shaped bar counter is usually the same as the rest of the set. Therefore, the kitchen area looks harmonious.
This option is especially good in mini-kitchens, as it allows you to use the available space to maximum benefit. But it is also quite suitable for large rooms. For example, a separate corner bar is an excellent solution.
To arrange it, a wine cabinet is placed next to the L-shaped counter. As a rule, such an area is used only for its intended purpose, and does not replace a dining room or work area.
Another interesting option is a corner sofa with a built-in bar counter. Expensive models also have a mini-cabinet for storing drinks. Such sofas allow a fairly large group to sit very comfortably.
Standard straight
A very popular option is a rectangular design, standing separately from the headset. It can be attached to the wall or ceiling. If there is a closed base, there is usually no need for fixation; the stand is simply placed on the floor.
The shape and size of the structure usually depends on the individual preferences of the owners, as well as the size of the room. For example, it can be narrow - for small apartments this is a good way to delimit space, at the same time getting a place for breakfast and tea parties.
The most popular are the classic models, since their countertop area is sufficient to be used as both a bar and a dining area.
Standard size of the structure: length 120 cm, width 55 cm, height 105 cm. Of course, the dimensions can be larger - it depends on the specific needs of the owners.
Square
For 20 sq. m you can put different bar counters
The island racks discussed above are often square in shape. At the same time, their base is case-based, which allows various household appliances to be built into it. Sometimes a sink is also installed in the countertop.
This square stand is often used as a work surface. In fact, with its help it is possible to create a full-fledged area, very well suited for cooking due to the access available from all sides.
U-shaped
Bar counter in a room of 18 square meters. m
There are two types of design for U-shaped racks. The first is a countertop attached at an angle to the kitchen unit. This approach has already been described above, but here the design consists of three adjacent lines, not two.
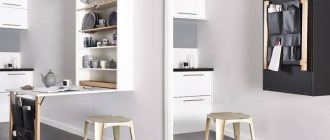
Folding tables on the balcony
Equipping a balcony with a bar counter sometimes seems impossible due to lack of space, but modern designers and furniture manufacturers have foreseen this problem. A folding table installed along the front wall will save precious centimeters and allow you to avoid cluttering up an already cramped room. But if you wish, you will always have the opportunity to admire the view from the window while drinking coffee or tea at the bar. When folded, the tables do not take up much space and serve as a shelf. You can create a full-fledged bar on the loggia using a mini-fridge, sofas, soft chairs or pillows.
Homemade folding table on the balcony
Principle of operation
Choose a tabletop made of lightweight materials (chipboard, wood) so that there is no additional load on the support. Give preference to metal brackets that close and open clearly, without play in the connections.
Options for fixing a balcony table
Next, you need to mark the drilling locations. At a distance of 50 cm (as close as possible), make holes with a hammer drill, insert dowels, attach brackets and secure with a screwdriver. The tabletop can be attached using short-length self-tapping screws so that they do not damage the surface or form bumps.
You will use the folding table only when necessary, and the rest of the time the structure folds along the wall and does not interfere with using the balcony for other purposes.
Advantages and disadvantages of remodeling
A tabletop by the window is convenient and useful in many ways. It is worth considering the advantages of such a solution for interior design:
- Space saving. A window sill-table is a convenient place to place small equipment, equipment or use it as a desktop.
- Aesthetics. In a kitchen with a work area under the window, you can enjoy the cooking process as much as possible while looking outside.
- Energy saving. If you use a window sill-countertop in the kitchen, you do not need auxiliary lighting most of the time.
With all the above advantages, such a solution has certain disadvantages:
- The tabletop under the window should be such that it does not interfere with opening the doors.
- You will need to spend more time choosing curtains. They must be water-repellent and non-marking. You don’t have to use curtains at all if you don’t want to bother with them.
Option with Roman blinds
Selecting materials for countertops
A kitchen with a bar counter by the window is the dream of any housewife, but the choice of materials here should be approached especially carefully and responsibly. The fact is that the countertop is subject to a special load: if it is located in the sun, it is constantly exposed to ultraviolet rays. If the structure is located near a radiator, it must be resistant to high temperatures. If there is poor heating on the balcony, it must be moisture resistant. Since the bar counter is often used as a dining table or a place for a snack, greasy and dirty stains cannot be avoided. Therefore, the surface material of the bar counter must be strong, durable, resistant to mechanical damage and temperature influences.
Let's consider the main options that modern designers recommend.
- Chipboard or wood. The most budget option for a bar counter, which is available to almost every family. Manufacturers offer many similar products, but their service life is very short. Chips, cracks, and bumps on the surface appear quickly, especially with sudden temperature changes.
- Tree. This is a universal material that adds luxury and chic to the interior. It fits perfectly into Scandinavian, classic, country and Provence style interiors. Significant disadvantages include high cost and instability to mechanical damage. Although, with proper care and periodic restoration, such a tabletop will last a long time.
- Plastic. This artificial material has long won the hearts of buyers with its price and original design. The color scheme allows you to match the product to any interior, although such an item looks cheap. But it is practical to use: all you need to do is wipe the surface with detergent once and the stains will disappear. Plastic will suit modern and high-tech style.
- Glass. These countertops look really impressive and stylish, and are also quite easy to clean. The disadvantages include instability to temperature changes and fragility. It is better to pay attention to impact-resistant glass.
- Stone. This natural material is the most durable and resistant to any impact. Due to this, its price increases. As an alternative, you can consider the artificial analog Corian. Its main components are acrylic, color pigment and mineral filler. This tabletop looks stylish and original due to the glow in combination with glass.
The stone bar top is very durable and moisture-resistant, but it is more difficult to process and is not cheap
The bar top made of chipboard is both light and stylish, but is susceptible to moisture
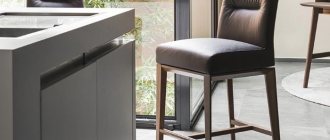
The bar counter should fit perfectly with the overall concept, so when choosing a tabletop, consider practical properties and aesthetic appearance. In order for it to harmonize with the adjacent room, choose the color scheme in which the set is made. Please note that bar stools must be 30 cm below the tabletop. This is the optimal ratio for sitting comfort. Give preference to models with an ergonomic backrest and armrests. Chairs should also be heavy enough to prevent the possibility of falling. If there are elderly people or children in the house, the height can be chosen lower so that it is not inconvenient for household members and guests to climb onto massive chairs.
Kitchens with bar counters are an excellent solution for rational use of space. Such an interior will become a real decoration of any apartment, bringing an atmosphere of comfort and homely warmth.
Types and forms
The stand can be placed not only between the balcony and the kitchen, it can move from the loggia to the living room or bedroom, and can also be an independent multifunctional structure. Kinds:
- No extras. The bottom line is that only the rack is placed, without any cabinets, shelves, or hanging structures. The advantage of this option is minimal costs - you only need to buy a tabletop. In addition, in the future you can always add elements that are missing, in the opinion of the owners. And you don’t have to disassemble or redo anything to do this.
- With shelves on top. Designers offer various options. Much depends on the parameters of the rack. These can be structures for storing something necessary for the kitchen, or a decorative element with various additions: a collection of drinks, an aquarium, a structure for fruit, etc.
- With storage system for glasses and bottles. This design is suitable for bar counters that are used for their intended purpose.
- Two-level structures. This is a system in which a second, slightly smaller one, rises above one tabletop at a distance of approximately 30 cm. A similar solution is to increase the working area of the tabletop if it is used for family dinners.
The design can be straight in shape - the largest number of orders is for this model. It serves as a separator between the recreation area and the kitchen. You can also choose a form:
- L-shaped – suitable for accommodating a large number of people;
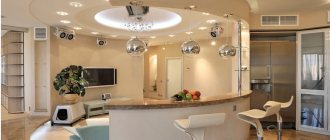
- rounded - this shape is chosen either for a curved balcony or as an extension of the kitchen area, which saves space;
- with rounded corners - a solution for spacious rooms; when there are a large number of people, you don’t have to worry about someone hitting the corner;
- curved - when style is more important than practicality;
- semicircular - takes up minimal space.
The shape should be chosen based on the purpose of the rack and the size of the room. This way you can be sure that the design will not take up too much space or, on the contrary, lose functionality due to its small size.
Please note: A bench with a storage box for the balcony is convenient and functional!
Photos of various bar counters for the balcony
Video: all the difficulties of combining a balcony and a kitchen.
Design tips
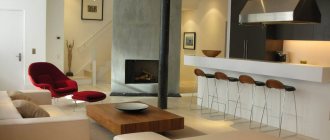
Before planning a kitchen design with a breakfast bar, look at photos on the Internet. First of all, the counter needs to fit into the overall interior design of a small kitchen. It shouldn't be conspicuous. If you want it to become the central element of the interior, then you can designate it, for example, using a framed photo, lighting or a separate ceiling level above the counter.
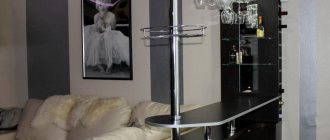
Since the kitchen is quite small, dark colors will make it appear even smaller, so it is best to use light shades for the counter. However, if the design of the room allows, then a bright countertop will be a great move. A very good idea is a glass tabletop that rests on a chrome pipe. The support can be extended to the ceiling, this will visually make it higher.
The space above the counter can be filled with light shelves on which you can place accessories, glasses, wine glasses, fruit baskets, and bottles of drinks. It is also convenient to place holders for glasses at the top. Do not forget that accessories must be consistent with the overall style of the kitchen interior.
How to do it yourself?
If you like the idea of connecting a window sill and a countertop, then it’s better to do it armed with the knowledge of experienced craftsmen. As mentioned above, there are several types of window sills and countertops, so the methods for making them may vary.
To replace an ordinary window sill with such a design, you do not need any special skills. We invite you to familiarize yourself with one of the simple instructions for making this functional interior element, thanks to which the table will become an extension of your window sill.
If you have experience, the entire replacement process will take several hours. If your window already has a simple sill and you want to redo it, then removing it will not be difficult - you just need to apply enough force.
You will need chipboard or MDF more than a centimeter thick, ceramic tiles, silicone, table legs, tape and foam.
- Apply marks. To do this, you need to measure the concrete base of the window and, taking this into account, select the length of the structure. Pay attention to the height: is it lower than you need. Perhaps a tabletop at such a height will be uncomfortable for you.
- Prepare the base. Cut out the structure from chipboard or MDF, then go over the tabletop and its edges with a plane and sandpaper with a grit of 60 or more. For a small table you won’t need legs - it will already be supported by the opening, but for more massive tabletops you need support.
- Treat the countertop. Go over the ends with silicone twice. The reverse side must be covered with packing tape. The plane must be normal; to ensure this, use a building level. Screw the legs if your design requires them.
- Installation. Using a level, install the countertop. After installing the slab, the holes must be foamed. When the polyurethane foam has hardened, seal the seams between the slopes and the window sill.
- Finishing. We suggest covering the canvas with tiles. To make the product look beautiful, the distance should be minimal, and the gaps should be painted over.
Stone and marble countertops are easier to install, as they are sold ready-made. All that remains is to install and carefully seal the seams. However, these are more expensive materials that not everyone can afford.
A good alternative is artificial stone. It has all the advantages of natural, but is much cheaper. In addition, some rocks, such as granite, can be radioactive, but with synthetic analogues there is no need to worry about this.
