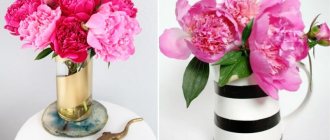
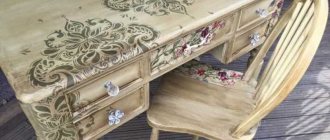
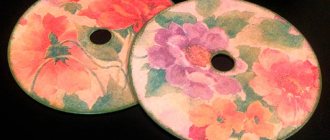
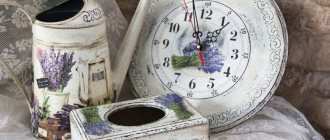
Photo: maminshoping.ru Decoupage is a simple and very interesting technique that will help transform anything: from a plate to a chest of drawers. Anyone can master it, regardless of age or artistic skill. This decorative applique is available to both adults and children. Especially for you, we have collected 8 step-by-step master classes for beginners!
The emergence of decoupage technique
The art of decorating surfaces with ready-made designs originated in Europe at the end of the 15th century. It became popular and was widely used to decorate homes.
The word “decoupage” is of French origin and means “to cut out.” The technique involves gluing a pattern printed on a napkin onto any surface, glass, wood, ceramic or metal.
Many creative individuals are passionate about this art. Pictures of decoupage and samples of napkins can be purchased in specialized stores.
Complete interior transformation
The decoupage technique is designed for decoration
- Cabinets, chairs, tables, refrigerators, walls;
- Cups, bowls, fruit vases, trays;
- T-shirts, blouses, shirts;
- Ballpoint pens, stationery glasses and holders;
- Basins, buckets, troughs, boilers, bathtubs, water tanks.
In this case, the image is transferred to the object being decorated with it from a special decoupage napkin.
What is the secret of the popularity of “application for adults”
What are the features of the technology and why it is so attractive and has remained popular for several centuries:
Firstly, the simplicity of design and the ability to decorate large areas, from small boxes to garden benches. Absolutely any surface can be decorated.
Secondly, the availability of technology. Anyone can learn decoupage from napkins for beginners. There is no need to purchase expensive materials and equipment; all tools can be found at home. This is a great free time activity for adults and children.
Little artists get acquainted and acquire skills in working with various tools, develop artistic taste and spatial imagination.
Thirdly, the ability to create an individual design in any style: Provence, modern, classicism, baroque. Moreover, one or two details are enough and the room is transformed. How easy and simple it is to do this. The answer is simple - decoupage.
Note!
- DIY gifts for February 23rd - a large selection of ideas for creating unusual gifts for Defender of the Fatherland Day
- What to give a 2-year-old boy - a list of the best options for an interesting and useful gift (120 photo ideas)
Papier-mâché - TOP 120 photo reviews of original products. Detailed instructions for beginners on creating beautiful crafts
Choice of motives
There are a great many motives for decoupage, all of them are limited by the personal preferences of the author and the degree of integration of the decorated object into the surrounding interior. You can cut out a beautiful pattern from paper napkins, decorate the selected surface with old photographs, use pictures from magazines, or make a printout with the design you like on a laser printer. Furniture modules of standard models, decorated using the decoupage technique, will immediately attract everyone's attention and add zest and exclusivity to the interior decoration of your home.
Since decoupage is most often used to restore worn out, problem areas on furniture, bright and ultra-modern designs are rarely used as a basis for decoration.
The most common subjects used for decoupage furniture are:
- floral motifs;
- pastoral drawings;
- country style;
- fruits, berries, vines;
- angels, religious subjects;
- birds;
- Japanese, Asian motifs;
- old postcards or photographs.
It is precisely such scenes that fit most organically into the interior of the beloved Provence, ethnic or always relevant classic style.
Basics of using decoupage
How to decorate a surface in three steps.
Step 1. Find a beautiful, suitable design and cut it out.
Step 2. Place in place on a pre-treated surface, cleaned and degreased, assemble a composition from different parts and glue them.
Step 3. Cover the surface with glue in several layers. Finishing the composition with varnish.
Necessary tool
To accurately apply and fix the design you will need:
- Small scissors, suitable for manicure, for cutting out small details;
- Stationery knife;
- A set of brushes for priming, painting, varnishing, smoothing. You will need round, flat brushes to adjust the motifs of the composition, smooth it, cover the protective layer of glue and varnish, thin brushes will be needed to draw fuzzy lines on the surface;
- putty. Necessary for eliminating minor defects, irregularities, dents, cracks on wooden surfaces;
- sandpaper to give the surface a smooth, even appearance and for better adhesion to the varnish;
- priming;
- White spirit, acetone, alcohol-containing liquids for surface degreasing;
- Paints, acrylic, gouache, watercolor to give a background to the decorated surface and complete the details;
- The basis. An item made of any material that is decorated;
- Glue, PVA, special for decoupage, construction glue;
- Acrylic varnish, matte, glossy, with various visual effects, “antique”, with patina, sparkles, gilding;
- A design printed on multi-layer napkins, thin rice or newsprint paper, ready-made templates, or printed on a printer.
We eliminate flaws
If the surface is decorated with small torn fragments, from which it is necessary to obtain a single whole, straighten the edges of the fragments with a brush or fingers. If there is color unevenness somewhere, dilute the paint of the desired shade and paint over the translucent base.
When the surface is no longer very wet, but has not yet dried, you can use thin brushes and acrylic paints to draw in the details, add brightness and clarity.
The next step is to decorate the edges of the product. There are different approaches here. In some places you have to trim the edges evenly, painting the sides, in others you can wrap the napkin on the back side and glue it there. In general, this is also a whole science.
Getting it to the finish line is an equally creative process.
After this, you can leave the product to dry. To speed up the process, you can use a hair dryer, but you need to keep it at a considerable distance, move it all the time and make sure that it dries evenly. If after drying you see that there is a fold on the glued napkin, you can still fix it. Take fine-grained sandpaper and sand it. We act gently so as not to damage the drawing around.
Using decoupage napkins
Napkins for decoupage are in greatest demand among needlewomen. They are regular paper napkins with multiple layers, usually 2, 4 or 8 layers. For appliqués, only the top layer on which the ornament is applied is used.
Napkins can be found in stores. They come in square, round, rectangular shapes, sizes 21x21 cm, 40x40 cm. Pictures differ in the intensity of the colors, the abundance of elements, and location on the paper.
Typically, decoupage napkins have four, two or one center sketch. Round ones have more decorative elements, from which you can choose different motifs and form interesting compositions.
Materials
To start turning boring things into unusual objects, you will need to take care of the tools and materials that will help you create an amazing creation.
A novice needlewoman will need:
- basis for applying the image;
- paper napkins;
- glue;
- clear nail polish;
- paints;
- tassels.
All of this can be purchased at stores that specialize in selling craft supplies, or you can find most of the items on this list at home. For the first work, it is not at all necessary to purchase rather expensive professional materials.
How to choose the right drawing
When choosing pictures, pay attention to:
Note!
- Kinusaiga technique - TOP-140 photos of the best ways to create crafts using the Kinusaiga technique with your own hands + instructions for beginners
Do-it-yourself passe-partout - a master class with step-by-step do-it-yourself schemes. Making tips + photos of the best examples
Amigurumi: features of do-it-yourself knitting technique. Step-by-step master class on making toys for beginners + 180 photos
- Stretching paper. Too thin will be easy to tear and inconvenient to work with;
- The top layer of napkins should be easy to separate, have a translucent structure, due to which an organic appliqué is obtained that imitates artistic painting;
- The degree of wetting, the formation of folds, irregularities;
- One of the advantages is the availability of the material and low price.
Decorating wooden surfaces
Decoupage with napkins on wood requires a certain skill and proper surface treatment. Beautiful decor will be created on a flat surface, so wooden surfaces are pre-treated.
- The surface is cleaned of branches, dirt, dust, the bumps from knots are removed with sandpaper until smooth;
- The sanded base is degreased for better adhesion of the paper to the wood, so that the design does not roll or run off;
- If necessary, seal cracks, irregularities and cover with a primer;
- Apply the picture in the usual way. The cut out element is glued onto the glued base, smoothed out and a second layer of glue is applied. After complete drying, coat with varnish.
In this way you can decorate a wooden box and make an excellent souvenir, a kitchen tray. The products can withstand wet wiping, do not fade over time, and are not deformed.
We collect everything you need for beginners
Before you start doing needlework, you need to make a list of what to buy for decoupage for a beginner, while finding out what tools or materials are already available in the house.
— Base
As a basis for DIY decoupage crafts, you can use wooden and plastic surfaces, as well as various objects suitable for this purpose.
- Tools
To cut out designs you will need comfortable scissors and a sharp utility knife. Keen artists can purchase a special knife for decoupage work. All types of coating with liquid preparations are carried out using brushes, the size of which depends on the parameters of the product.
— Soil
For different types of surfaces, 2 types of soil are used - absorbent and non-absorbent. Almost all types of ground coverings are suitable for the first of them, but special methods are required for the second. Thus, the technique of decoupage on wood for beginners begins with an acquaintance with ground art compositions. They can be selected on specialized websites or in stores, making sure that the characteristics of the drug indicate good adhesion and elasticity. Acrylic paint, which has all the suitable properties to make decoupage according to all the rules, can act as a primer for any wood materials. It is also suitable for priming leather, fabric and other curved surfaces. Metal, ceramic and glass surfaces are well primed using aerosol paints from cans.
- Glue
The choice of suitable glue depends on the type of surfaces on which decoupage from napkins is made for beginners. Regular glue for PVA paper turns yellow over time, and can be replaced with special solutions for decorative arts.
- Consumables
For a decoupage master class for beginners, you will need several types of sandpaper, from the available fractions numbered 1600 - 3200. Numbers that are too large can damage the surface of the products.
— Picture for decoration
Ready-made designs, along with materials for decoupage, can be found at newsstands, in old advertising or fashion magazines, or found in the children's picture book closet. They can be printed from various sites and decoupaged with photos of animals, plants, landscapes or beautiful buildings.
- Napkins
One of the most inexpensive and accessible ways for needlework is to decorate with napkins, which can be multi-colored, with bright flowers, butterflies or other attractive prints. Even plain napkins have an attractive appearance thanks to their relief textures.
— What can replace napkins?
Thin napkins can be replaced with wallpaper, pictures printed on office paper or patterns cut out of thin fabric.
— Features of materials for needlework
Beginners often face the problem of how to do decoupage correctly if thin napkins tear and leave folds when gluing them to the base. It may be difficult to cope with very neat work the first time, but to speed up learning there is a master class on decoupage for beginners, which can be found on the corresponding website.
— Acrylic-based paints
Acrylic dyes are suitable for coating surfaces made of many materials. They have a sufficient degree of penetration, water resistance and elasticity.
— Varnish for fixing
Of the many types of varnish offered for sale, for decoupage techniques you should choose those that leave a thin layer on surfaces, dry quickly and do not contain aggressive solvents.
Getting ready for Easter
On the eve of the Easter holidays, a special theme arises in decorating objects, including Easter eggs. Decoupage of Easter eggs involves applying a beautiful ornament to a pre-boiled egg.
We will not use regular glue, as it penetrates through the porous shell. And for gluing, fresh, raw egg white is perfect. It is tapped a little to break up the fibers and applied with a brush to the base.
Attach the cut out picture, let it dry a little and cover the surface with protein again, but with a picture. The protein reliably fixes the decor, does not fade, does not give off odor and lasts for several days.
Correction of minor bugs
Even experienced craftswomen can make mistakes. But most of them can be corrected before varnishing. Slightly damp paper can be gently smoothed out with your fingers or a wet brush. Unevenness in the dried picture can be removed with soft sandpaper.
Inhomogeneity of the background or blurry image can be corrected with a brush with suitable paint. It will also help create a smooth transition between the picture and the base, and create unusual splashes.
A photo of decoupage will demonstrate the charm of works in this design style and will inspire you to create something similar.
Children's decoupage
Decoupage with napkins on cardboard is suitable for children. A figure is cut out using the template and decorated with an applique of napkins. This creative activity will help develop a child’s imagination, and handmade crafts will be useful to mother and grandmother.
You will need shoe boxes, which make wonderful boxes, large cardboard boxes, from which you can build a house for dolls with beautiful patterns and ornaments.
Features of the design of round surfaces
Surfaces with curves and slippery glass or glazed ceramic surfaces require a special approach to the technique. New Year's bottles decorated with appliqués look very elegant.
A gift option for expensive alcohol in a retro style will pleasantly surprise friends and employees. Decoupage of bottles with napkins, just like decoupage of plates with napkins, requires a different approach to application.
File method
We will decorate a smooth surface with curves using a file. The method has proven itself when working with thin materials, the top layer of napkins does not tear, it is convenient and easy to use, and the ability to decorate uneven surfaces. For this we need:
- Container with water;
- Stationery plastic file;
- Glue;
- Varnish.
Step-by-step instructions for applying an image to a rounded surface
Step 1. Select a design and carefully cut it out. Place face down on file.
Step 2. Pour a little water so that the napkin is completely wet and floats freely. If necessary, use a brush to straighten the edges. The picture should be smooth, without folds or curled edges.
Step 3. Carefully drain the water, holding the picture and applying it to the surface to be decorated. Press well, drain the water completely and smoothly tear off the file. Using a dry flat brush, smooth the image, smoothing it onto the glass surface.
The surface of the bottle and plate should be degreased beforehand. If the design drags behind the file, press the file with the design again and try to slowly remove the plastic sheet.
Step 4. Coat a tightly fitting image without air bubbles with glue from the middle to the edges. There is no need to wait for the napkin to dry; glue it immediately.
Step 5. After the glue has completely dried, the product is varnished. Apply at least 6-8 layers of transparent acrylic varnish with a glossy effect. Experienced craftswomen advise covering smooth surfaces with varnish in 100 layers, then the decorated product will certainly preserve the design for a long time.
Creating flowers and floral arrangements
Stunning bright bouquets and single flowers made from napkins will decorate any event and make an excellent gift. The only drawback of paper decor, the lack of natural aroma, can be easily corrected by dripping essential oil on it. A paper flower created using the simplest technique will remain attractive for a long time.
You need to start creating right now. The choice of pattern and plant itself will depend on the number of napkins available and their color. It’s very simple to create a unique homemade decor; you just need to move step by step towards your intended goal, using the following master classes as a guide.
Rose
There are several ways to make a paper flower queen. The easiest way is to twist it from one napkin without using scissors or glue. We straighten the material and lay it out on the table. Grab one edge with your index and middle fingers and roll it into a tube. Visually measure 2/3 and crumple the napkin, forming a bud. We bend the upper part arbitrarily, simulating opening petals. We make a stem from the bottom of the tube - we twist the napkin into a spiral.
A beautiful rose can be made from a dense three-layer blank. This elegant white product will decorate a glass on any table. Straighten out a large napkin. We bend one corner by 1-2 cm and fold it, pressing it to the very end. We twist the resulting strip. Holding it from below, unbend the upper petals and place them in a glass or glass.
Peony
You can make a lush peony from a multi-layer napkin of any color. You can make the product more realistic by tearing off one strip of folded paper at the bends. To quickly create several elements for a lush craft, the following step-by-step master class is presented:
- We lay out the napkin in one movement, we get a two-layer rectangle;
- We fold the workpiece like an accordion, tie it with a torn piece of paper or thread in the middle;
- Fluff the pliable folds on both sides from the center;
- We roll up a wire leg or prepare several multi-colored blanks for other crafts.
Carnation
Original carnations on the stem will be made from a thin bright napkin. The blanks will be square elements according to the size of the planned flower. Fold them in half and diagonally. Carefully cut off the edge of the triangle. The small hole will be the center of the flower. On the opposite side of the workpiece we make an arched cut and form a fence around the edge.
Using the same scheme, you need to make at least 5 blanks. The more elements there are, the more magnificent the carnation will be. Now we move on to forming the flower head. As a base you can use stiff wire, a long fireplace match, or a pencil. We string each shaped piece and glue it together in the central part. We straighten each petal. The stem can be wrapped with green tape, colored corrugated paper, or foil.
Topiary made from napkins
Topiary made from any decorative material looks stylish and original. But it’s much easier to make a beautiful tree from napkins. It can be a craft in the form of a circle, star, heart. The constituent elements may also differ. Paper roses, dandelions, peonies, and asters are most often used. It’s enough to start preparing materials and original ideas will come to mind.
Ready-made topiary made from napkins is an excellent gift for any celebration or just a memorable accessory. To make an extraordinary craft, you will need the following materials:
- Flowerpot, flower pot;
- Newspapers, napkins;
- Several tree branches;
- Threads, stapler;
- Scotch tape, glue;
- A mixture of cement and sand.
We prepare a beautiful flowerpot and pour sand and cement into it. Add some water and make a solution. We install the densest branch in the center and decorate the base of the improvised trunk with small pebbles or glass. If desired, the composition can be modified and the central piece of wood can be entwined with flexible rods. We fix small elements with transparent tape.
While the solution in the pot dries, we begin to form the center of the topiary. To do this, we crumple up several newspapers, wrap the resulting ball in a solid printed edition, and secure it with threads. Let's move on to making flowers. Fold the napkin in half twice and secure it with a stapler. Straighten the edges of each layer. Using this principle, we make the required number of flowers. All that remains is to glue them to the newspaper ball and decorate with beads.
