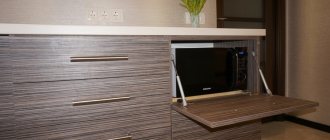
The details of the cabinet are calculated after drawing up a drawing with all the necessary measurements: dimensions of niches, drawers, distance between compartments, etc. Doors and sections must be in harmony with each other. Most mistakes made by novice furniture makers are made in calculations. This article will discuss how to correctly measure and calculate, how the height, width and height of furniture are calculated, and also provide instructions for calculating the door. A methodology for calculating corner and built-in models is presented.
Correct room measurements
Correct measurements are the first step to successful assembly and installation of a sliding wardrobe. Unfortunately, smooth walls and floors are quite rare. Furniture, on the other hand, is a structure with right angles. Therefore, when measuring the space allocated for a wardrobe, you should take into account the curvature of the walls and make the necessary technological gaps. To understand what size the future product will be, using a construction tape, we measure the height and width in several places: top-bottom-middle along the wall, height at three or four points, and width relative to the floor and ceiling at the estimated depth of the cabinet.
Now you should pay attention to protrusions, sockets, radiators, door openings and other objects located nearby. Nothing should interfere with installation, and in the future the cabinet should not block any of the above. Therefore, in order not to forget about their existence, it is best to draw strategically important objects and measure the distance to them.
Angular model
When making corner furniture, they use precise scale and mathematics . If you sketch a cabinet in the desired size on paper, you can see the functionality and practicality of the future design.
For a wardrobe cabinet, for example, a front width of 40 cm is not suitable: it will be problematic to use the inside. As a last resort, transformable doors are used that fold at right angles in the form of an accordion. Thanks to the right angle, access to the interior will increase.
For an opening of 40–50 cm, one swing door is enough, and if the opening is 60–70 cm, you will need 2 doors. For a wider opening, you need a cabinet with open side shelves.
The depth for shelves is 30-40 cm, and for hangers - 50-60 cm . If you take less, then you won’t be able to use such furniture for a wardrobe. The facade needs to be expanded. To ensure sufficient access, change the width of the sidewalls in accordance with the given angle.
Attention
The cabinet does not always turn out to be symmetrical, with the same depth of the sides and an angle of 45 degrees. It's not so scary. The main thing is to correctly calculate the width of the facade. If difficulties arise in the calculations, the width is measured after assembling the housing.
The nuances of calculating a corner cabinet are described in the video:
Calculation of the overall dimensions of the wardrobe
Width
The width of the wardrobe is calculated by determining the smallest size obtained. In our example it is 1670 mm. In order for the cabinet to fit smoothly into a niche, it is necessary to subtract 50 mm from the actual (minimum) width of the room. Thus, we get a technological gap that allows us not to worry during subsequent installation.
Depth
The depth of the wardrobe also depends on previously made measurements. In our figure, the minimum size that can be used is the distance to the switch, that is, 690 mm. Subtracting 30–40 mm from it, we get the depth of the cabinet. It is worth noting that 650–700 mm is the optimal depth of a sliding wardrobe, allowing you to effectively use its internal space. A sliding door system usually takes up 80–100 mm, which means the remaining usable area is only 550–600 mm.
Height
When calculating the height of the cabinet, you will have to remember the school mathematics curriculum, namely the Pythagorean theorem. For what? The sliding wardrobe is a rather bulky design, which is easiest to assemble on the floor. When lifting it, it is necessary to take into account the diagonal of the side wall so as not to rest against the ceiling.
Pythagorean Theorem: “In a right triangle, the square of the hypotenuse is equal to the sum of the squares of the legs.”
The figure shows the side of the cabinet, the diagonal of which (AC) is the longest segment that affects the rise of the sliding wardrobe from a horizontal position. Below the image clearly shows the application of the theorem, during which we found out that with the overall dimensions of the side wall being 650x2400 mm, a sliding wardrobe can be installed without a threat to the ceiling, since the diagonal of the side is significantly less than the height of the room.
How to calculate the volume of a cardboard box
How much will it cost to send your cargo to its destination? To answer this question, you need to know its volume in cubic meters, since transport companies most often indicate the cost of services in these units of measurement in their price lists.
Cardboard boxes are the most profitable and convenient type of packaging for most goods. When choosing corrugated packaging for your products, you need, first of all, to calculate the volume of boxes and order the required number of boxes so as not to transport air and not overpay for transport services.
If, as a result of the calculation, it turns out that you require corrugated packaging of individual sizes, ours will produce the required quantity to order. Let's look at how to correctly calculate the volume of a cardboard box.
Using the interior space of the cabinet
Before you start creating a wardrobe project, you need to decide for what purpose it is intended. Simply put, what things do you plan to store in it. And here again you need to arm yourself with a tape measure and carefully examine the cabinet that you are currently using:
- The optimal distance between shelves is 300 mm. But it’s better to approach this issue individually: measure stacks of folded things, try on boxes of shoes, analyze what doesn’t suit you in the old closet.
- The required cabinet depth for hangers on which hanging items are placed is 550–600 mm. If the actual depth of the future wardrobe varies within these limits, then without a doubt you can use a rod. If the depth is significantly less, then it is best to install retractable hangers and then things will be located “facing” you.
- Decide what you will store in the drawers, what height they should be and how many drawers are needed.
- Advice from the expert: it is advisable to divide wide drawers into several cells, thereby creating an organizer that optimizes the storage of oversized items.
- Study the market for the proposed accessories for sliding wardrobes: retractable nets, tie hangers, built-in ironing board, pantograph, shoe shelves, etc. Properly selected fittings will greatly facilitate filling the internal space.
Incorrect selection of energy efficiency class
There are currently three main energy efficiency classes for ovens:
- A/A+/A++ (the most economical in terms of gas or electricity consumption);
- B (average consumption);
- C (with high power supply consumption).
Of course, it is best to choose an oven of at least class A, since they are the most energy efficient. However, it is important to remember that power consumption is also affected by the power level (the higher it is, the more electricity the device requires to operate) and a number of additional functions.
For example, popular cleaning options - pyrolytic (burning off contaminants from the walls of the chamber at a temperature of about +500 degrees) and steam (water poured onto a baking sheet evaporates under the influence of high temperature) - consume quite a lot of electricity, since they last for 1-2 hours.
Therefore, if the energy efficiency of the oven is of paramount importance to you, it is better to give preference to a model with a catalytic cleaning system (based on special plates that absorb fumes and drops of fat) or coated with easy-to-clean enamel.
Creating a Project
There are many computer programs to help you create a project. But if graphic editors are higher mathematics for you, all you have to do is arm yourself with a simple pencil, an eraser, a ruler and a checkered piece of paper. We will draw the wardrobe by hand.
On a piece of checkered paper, the easiest way is to draw an image to scale - let two cells be equal to 10 cm. That is, the height of our wardrobe is 24 cm (48 cells), and the width is 16 cm (32 cells). We draw a rectangle, based on the overall dimensions and not forgetting about the chosen scale.
Next, you need to decide on the design of the cabinet itself—whether it will be on adjustable legs or the sides will be placed directly on the floor. In our example, we will consider the option of a sliding wardrobe with a plinth, that is, the sides stand on the floor.
The plinth is the bottom strip that connects the two sides of the cabinet. Its recommended height is 100 mm.
We separate these 100 mm (2 cells), we get an internal opening. Before you decide to divide it in half with a vertical line, carefully read the following advice from the wizard.
The sliding doors of the wardrobe will interfere with the drawers if it is divided into equal halves. The middle side of the cabinet must be moved to one side by 50–70 mm, and drawers must be installed in the smaller part. You should also pay attention to the fact that the door rail has a certain height. It is enough to raise the front of the lower drawer by just 10 mm, and it will be able to move out without any hindrance.
So, the wardrobe is divided into unequal parts and the lower drawer is drawn with the necessary gap. Now it’s time to show your imagination and try to use the resulting space in the most functional way. Here is the sketch our designer came up with:
Based on it, you can easily sketch out your own initial wardrobe design on a sheet of paper.
Independent calculation of parts
Calculation for a standard size wardrobe
So, you already have a wardrobe design. All that remains is to calculate the detailing. Before you start calculating the dimensions of the parts, you need to decide what kind of chipboard the cabinet will be made from. There are two standard sizes of chipboard thickness - 18 and 16 mm. Most furniture companies use 16 mm thick chipboard in their production. We will also take a sixteen-millimeter slab as a basis. This value will appear in absolutely all calculations.
Let's get started. Initially, to make it easier, write down on a piece of paper the name and quantity of all the parts present in the wardrobe in a column. For example:
- roof - 1 pc.
- bottom - 1 pc.
- outer side - 2 pcs., and so on
Let's look at the correct algorithm using the example of a calculation for a cabinet with overall dimensions of 1670x2400x650 mm.
To avoid confusion, add the thickness of chipboard to your drawn wardrobe design, that is, make the lines double. This way you won't miss any thickness.
Roof - 1 pc. — 650x1670 mm
Technically, it is correct if the roof of the wardrobe lies on top of the sides, and is not located between them. This means its size does not change. It matches the dimensions of the cabinet - 650x1670 mm.
Bottom - 1 pc. — 650x1638 mm
The bottom of the cabinet is attached between two sides, therefore, it is necessary to subtract two chipboard thicknesses: 1670 – (16 + 16) = 1638 mm.
Outer side - 2 pcs. — 650x2384 mm
The outer sides are covered with a cabinet roof. Calculation formula: 2400 – 16 = 2384 mm.
Inner side - 1 pc. — 550x2268 mm
Expert advice: the sliding door system, depending on the manufacturer, has a depth of 80–100 mm. For full opening, it is necessary to reduce all internal parts by this size. That is, the sides and shelves located inside the wardrobe should be 80–100 mm less than the overall depth.
Calculation of the inner side of the cabinet:
- depth 650 – 100 = 550 mm;
- height 2400 – 16 (roof) – 16 (bottom) – 100 (basement) = 2268 mm.
Base - 1 pc. — 100x1638 mm
The plinth is the bottom strip that connects the two outer sides of the wardrobe and supports the bottom. The length of this strip is equal to the length of the bottom of the cabinet, the height is 100 mm (a different size is possible, but not less than 50 mm).
Shelf - 1 pc. — 550x861 mm, 4 pcs. — 550x761 mm
Let us remind you that the inner side of the cabinet is shifted to the left by 50 mm for the purpose of comfortable operation of the drawers. It follows that the shelves on the right side of the cabinet should be longer than those on the left. To make it easier, we first calculate the size of the shelves as if they were the same, and only then subtract 50 mm: 1670 – 32 (outer sides) – 16 (inner side) / 2 = 811 mm.
- 811 – 50 = 761 mm - the length of the shelves on the left side, where the drawers are;
- 811 + 50 = 861 mm - the length of the shelves on the right side of the wardrobe.
After calculations, be sure to check. The sum of all parts must be equal to the overall width of the cabinet: 761 + 861 + 16 + 16 + 16 = 1670 mm.
Drawer front - 2 pcs. — 150x757 mm and 2 pcs. — 250x757 mm
The height of the drawer is arbitrary. But the width is a technical value that must be calculated based on the internal size of the opening in which the boxes are located. In our case it is 761 mm. For durable and efficient operation of the drawer, you need to subtract 4 mm from the internal size (to put it simply - the length of the shelf) for the technological gap. That is, the width of the facade: 761 – 4 = 757 mm.
Expert advice: when calculating the width of the facade, do not forget about the edge, which will subsequently be glued along the perimeter. It also has its own thickness. Therefore, do not forget to subtract the thickness of the selected edge from the actual size of the drawer front.
Calculation of parts for a custom-sized cabinet
A non-standard wardrobe is considered to be a product whose overall dimensions exceed the dimensions of a laminated chipboard sheet. Main dimensions of chipboard: 1830x2750; 1830x2440; 2070x2800 mm.
When planning to independently make a cabinet 3000 m long, a beginner is faced with the problem that the roof and bottom do not fit into the dimensions of the chipboard. How to get out of this situation? It’s simple - we design a wardrobe in two parts, that is, now there will be two sides inside, not just one. The roof, bottom and base will also consist of two parts. Essentially, these are two separate cabinets pulled together.
Important: the depth of the inner sides is 80–100 mm less than the size of the wardrobe.
In addition to the above, it would be correct to install such a large wardrobe not just on a plinth, but on plastic adjustable legs, which are subsequently covered with a removable bottom bar.
We recommend that you carefully study the diagram to avoid errors in calculating the cabinet detailing. The proposed drawing clearly shows how the parts are arranged, taking into account the design of the non-standard cabinet and the thickness of the chipboard.
Sort your clothes (15 minutes)
This step can certainly take more than 15 minutes, but it must be done.
You need to take each item in turn and decide whether it needs to be hung back in the closet, or whether it’s time to get rid of it. To do this, you should answer 4 questions: do you like this item, have you worn it within the last 12 months, can it be repaired (if the item is damaged), and are you sure of all of the above. If the answer is “no” to any of these questions, you can safely put the item in one of the boxes rather than hanging it back in the closet.
After the decision has been made, you need to hang all the remaining clothes in the closet, organizing them (trousers, skirts, blouses, jackets), etc.
Nuances of cutting parts in a sheet of laminated chipboard
Having written out all the details on a piece of paper, you have two options. The first is to go straight to the company with this list, where specialists will cut it and transfer it to the furniture shop for cutting. The disadvantage of this option is that you will not be able to control how correctly the cutting of parts in the chipboard sheet is done, which means there is a possibility of overpaying.
The second option is more complex, but much more profitable for you - to lay out the parts yourself and pre-calculate the required number of laminated chipboard sheets.
Taking into account the structure of the slab
If you plan to make a wardrobe from chipboard with an applied wood structure, you need to rewrite all the details in a certain pattern. For example, by specifying the first size against the structure.
If the chipboard is smooth and plain, the dimensions of the parts can be written in any order.
Prepare (1 minute)
Before you open the closet doors, you need to find several garbage bags or drawers to sort all your items. The two main things you will need to do are select clothes to throw away and clothes to donate to charity. That's the minimum. You can also sort through clothes to give away to friends (for example, items worn during pregnancy can be given to a pregnant friend) and clothes to sell (for example, a pristine bridesmaid dress that will never be worn again).
You don't need to buy anything. Many people will think that they need more hangers or shelves to organize their closet, but you can actually save on these purchases once the organization process is complete.
In addition to preparing containers for sorting things, you should also bring cleaning supplies, such as damp rags, an all-purpose cleaner, and a broom and dustpan or vacuum cleaner.
