Home » Doors
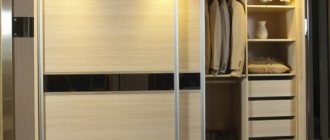
The IKEA company produces affordable furniture in the economy segment, which is suitable for DIY assembly. A characteristic feature of this company is the sale of elements of all structures separately. If you decide to design and assemble a sliding wardrobe yourself, you can purchase wardrobe doors from IKEA to go with it.
- Peculiarities
- Stacked doors
- Ready doors
- Advantages of IKEA sliding doors
- Disadvantages of IKEA doors
Beautiful examples in the interior
You can attach doors of various styles to the standard Pax cabinet frame, which are suitable for rustic furniture, “space” design, modern style and others. You can also use the closet as a divider from one large room into two smaller ones (for example, to enclose a sleeping area in a studio).
The Pax system can be used to create an ideal dressing room in a small room. To do this, frames of small depth are selected, which are attached to the walls along the entire perimeter of the room. In this case, the best option would be doors with a hingeless fastening method. Inside the cabinets there is a section for things on hangers (usually occupies 1.5-2 m), a section for accessories and shoes, and a section for underwear. Thanks to the unified Ikea design, you can match the cabinets with a chest of drawers and a mirror that are identical in style.
Bergbsu doors are an ideal option for creating rooms in the Provence style or pseudo-rustic style. To refer to ethical motifs, it is enough to choose the right fittings, and now the cabinet matches the style of the antique sideboard.
The Pax storage system can become like part of a wall. To do this, the frame and sliding doors are matched to the color of the walls; the height of the wardrobe should match the height of the ceilings as much as possible. The lower part of the frame does not stand out, as if the doors were on the floor. A wardrobe made in this way is a continuation of the wall and does not visually “eat up” the space.
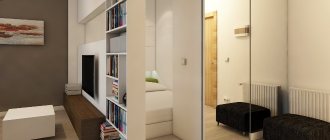
There are two ways to separate a bedroom from a living space with a wardrobe: a wardrobe inside the bedroom and a wardrobe outside. If the closet will store bed linen, pajamas, and household items, then it is better to turn it with its doors towards the bedroom, but if it will serve as a place for outdoor outerwear, bags, shoes and trousers, then it will be more convenient to turn it with its doors into the hallway.
You will learn more about how to choose a PAX cabinet from Ikea in the following video.
How to dismantle from a wardrobe with your own hands?
Any door consists of:
The removal process itself looks like this:
How does the mechanism work?
Doors are installed in several ways:
Required Tools
When assembling or dismantling any furniture items, you must prepare all the tools in advance. This makes the job much easier. To remove the doors, just arm yourself with a screwdriver (its type depends on the method of fastening the door). It is advisable to invite a friend to help you: when removing large doors you will need outside help. You need to prepare a container for self-tapping screws and other small parts.
How to remove rollers?
Since the rollers on the door leaves are equipped with plastic latches, they block attempts to remove the door leaf. Therefore, before dismantling the canvas, it is necessary to remove the rollers. If they are equipped with locks, then in order for the door to come off the rails, the flag on the lower roller is rotated 90 degrees.
Mounted and sliding
Hinged doors are installed in small models. This fastening is only suitable for door leaves with low weight.
And under heavy loads, the hinged structure will not work correctly and will quickly fail. To remove hinged doors you need a wrench, and the process itself looks like this:
This was considered as an option for dismantling hinged doors in inexpensive models. Expensive furniture models with hinged doors are additionally equipped with:
Dismantling steps:
All actions with the remaining doors are done in the same sequence.
How to assemble it yourself?
In order for the wardrobe to serve faithfully for a long time, it is necessary to install it correctly using the included instructions. Consistently, step by step connecting the parts and taking into account all the nuances, you can independently assemble and install the wardrobe. But sometimes during installation you may encounter some problems resulting from incorrect assembly:
- One of them is related to the incorrect sliding of doors along the guides, which occurs when they are installed incorrectly. This problem is solved by rearranging a system equipped with rollers on sliding doors.
- The second reason is related to loose screws used when fastening door frames or when installing rollers. Sometimes it is not possible to tighten it; it may be torn off or simply not fit the thread. You can get it out using tools, tap the internal thread with a tap, and then tighten the screw.
A roller that has come off the guide due to a foreign object or incorrect placement of the limiter. In the first option, an unnecessary item is removed. In the second, the roller with the lower bracket is reinstalled into the guide, followed by fixing the limiter. Failure to move the doors is possible due to frame misalignment
It occurs either due to unevenness of the floor covering, or due to an incorrectly made frame screed, or inaccurate fastening to the wall. If you can’t hang the doors, then you need to pay attention to the limiter. For an internal door, before installation, the limiter part is placed in a horizontal position, and then it must be returned to the vertical position
For the second door, the part is moved toward itself, and after installation, away from itself. If the door knocks when opening, then it is necessary to inspect the guides for debris and gaps if the guides are not tightly connected to each other. And also inspect the wheel in the roller system for deformation and the presence of foreign particles. Door rattling may be due to the loss or deliberate failure to install seals, as well as poor fixation of screws. Sometimes, due to incorrectly adjusted doors, internal drawers hit them when rolling out. To fix the problem, you need to pay attention not only to the doors, but also to the frame, leveling it using a level. And also don’t forget to check the bump stop by placing it in the correct position.
Below we suggest watching a more detailed video about the correct assembly and installation of sliding doors.
IKEA PAX Wardrobe Guide
Need a manual for your IKEA PAX Wardrobe?
Below you can view and download the free PDF manual. It also includes frequently asked questions, product ratings, and user reviews to help you get the best out of your product. If this is not the guide you were looking for, please contact us. Is your device faulty and the manual doesn't have a solution? Go to Repair Café for free repair services.
Management
Rating
Let us know what you think about the IKEA PAX Wardrobe by leaving a product rating. Would you like to share your impressions of this product or ask a question? You can leave a comment at the bottom of the page. Are you satisfied with this IKEA product? Yes No 255 votes
FAQ
Our support team searches for useful product information and answers frequently asked questions. If you notice an inaccuracy in our FAQs, please let us know using our contact form.
What's the best way to disassemble IKEA furniture? Trusted IKEA advises disassembling furniture using the assembly instructions in reverse order.
This was helpful (12477) share
My IKEA furniture is missing a screw/plug/nail. Where can I find a replacement? Verified Every IKEA store has a department where you can get screws, plugs and other consumables for free.
This was helpful (6296) share
I can't remove the dowel from an IKEA product. What to do? Tested It's best to use pliers and try not to squeeze the dowel too hard, otherwise it won't fit as tightly.
The manufacturer makes changes to the technical characteristics of its product over time to improve the quality of the parts.
When installing a wardrobe on their own, the buyer sometimes encounters certain problems.
1. The doors are mixed up. On older cabinet models, the vertical frames of the front door are wider than on the inside. The frames of the door closest to the cabinet frame are marked “A”. It is necessary to rearrange the roller system on the doors.
3. The roller has come off the guide, the door stop is not closed. We install the roller and bottom bracket into the guide and fix the limiter.
4. A foreign object has fallen between the doors.
5. Changes in cabinet geometry: uneven floors, uneven screeding of cabinet frame sections, fastening to the wall, which caused the cabinet to bend. Level the structure and eliminate all unevenness in the cabinet frame.
The closet door knocks when opening.
1. The wheel in the roller system is deformed. If the wheel is chipped, replace the roller bracket.
2. Visually inspect the roller wheel and remove any adhering particles of debris.
3. Sand in the top guide. We remove dust and other objects from the guide groove.
4. The guides are not tightly connected to each other. We remove the gap.
It is impossible to hang an assembled door.
The Pax closet door rattles.
2. The screws are not tightly secured when assembling the doors and installing the roller brackets.
Drawers hit the doors when rolling out
1. Adjust the doors.
2. Move the bumper on the upper guide to the desired position.
3. Install the cabinet frame level, aligning the doors.
The back wall is falling out.
There are not enough screws to assemble the doors.
Read the instructions carefully; not all holes are screwed into all the holes when connecting door frames. After installing the device for smooth closing of doors, the screws in the roller mechanism fastening are replaced and three extra screws remain.
Instructions with screenshots and videos
Scheduler start window
Here we choose where to start, there are options:
- Editing a ready-made wardrobe
- Create your own option from scratch if there is no suitable ready-made option.
This window has an additional function button “See. appearance", when clicked, we switch to the view with facades or the view without facades (doors), and we see the proposed content.
If you start with a ready-made version, you can also change the contents of the closet to your own version.
Working with a ready-made option in the designer
When choosing a ready-made option, we see a window in the wardrobe; under the main photo there are buttons for selecting the type of photo of this wardrobe, including a photo in the interior. At the top there is a button to return to the gallery, where you can continue selecting a suitable cabinet if you are not satisfied with this one.
To change the contents of the wardrobe and facades, click the “Change PAX” button
In the wardrobe change window there is a menu with two tabs:
- “Add product” - here we select frames, internal elements, decor.
- “Room plan” - here we design a room and see the external appearance of the cabinet in 3D mode.
Room plan
This is a full-fledged 3D editor, here we select the size and shape of the room, add niches, windows and doors.
Editing is intuitive; to edit, click on the walls; the active element is highlighted in blue and can be edited.
Internal filling of the PAX cabinet
To create a wardrobe from scratch or edit a finished version, go to the “Add Product” tab and drag the necessary elements into our virtual room and wardrobe.
IKEA wardrobe designer online
At the bottom of the planner window there are buttons for controlling the view and position, a ruler, etc. When you hover the cursor over the button, a hint about its functionality appears.
Choosing the contents of the wardrobe
IKEA PAX wardrobe planner - choosing fronts
The final result of wardrobe design
At the top right we see the price of our kit and an icon with stripes. This is a button to print and save our project; when pressed, a menu will appear. In it you need to select the items you need:
As a result we get:
- virtual photo of our wardrobe in the interior
- shopping list
- room plan
- arrangement of internal elements.
Detailed video instructions for working with the IKEA PAX planner
Preparation of door facades
The same conductor made an additive for the shelves and hinges.
I ordered the doors from the same office where I cut the chipboard. They are an MDF profile in a film, fastened with special “butterflies” and in the center 8mm laminated chipboard. It was possible to insert a mirror, but since the bed is located opposite the door, it is not very good to hang a mirror: not everyone likes to see themselves when they are asleep
I marked the holes for the hinges using a ruler and drilled them with a forstner cutter - nothing complicated. Large diameters should be drilled at low speeds. I did this at the first speed of the screwdriver; as a result: neat chips do not scatter everywhere and it is easier to control the depth. It’s good if the centering spout is not very large, so there is less chance of drilling through.
I saw a jig for hinges on sale, but for me this is already overkill.
Assembly instructions
The collection step by step is as follows:
It is necessary to correctly position the walls, focusing on the number of holes for fasteners. Where the wall needs to be nailed to the wall of the apartment, there will be two rows of holes. Now you need to find the bottom and top. There will also be more than one row of holes at the bottom, and large holes for “hats” for pins will be cut out on the top. Connect the elements to form a box. To do this, attach the bottom to the cabinet walls, having first screwed the legs into it; there should be two legs on each side. When the walls are fixed from below, insert metal pins into the upper part, onto which the upper part is mounted. When the “ceiling” is put on the pins (you can see them through the large holes), you need to make sure that the elements fit snugly against each other. Insert the caps into the holes with a cross inside the cabinet, then tighten the caps. At this stage, the box can already be placed vertically
Pay attention to one very important point - the box of the cabinet is not solid, it is assembled from 2-4 boxes of equal dimensions, which are fastened together. Find small wooden ribs and insert them under the bottom, while driving their wooden pins into the intended grooves
When all the stiffeners are installed, you need to secure the cabinet to the wall using the most convenient fastening systems. To finally assemble the Pax, attaching the doors to it, you need to start installing the runners. They are attached to the bottom and ceiling of the cabinet, and a plug is placed at the ends of the runners. You need to attach another one to the lower runner, to which the door will be attached; on the upper one you need to put plastic fasteners for the door.
The Pax cabinet itself is assembled, now you need to start assembling the door:
- You need to assemble a metal structure with special holes in it. You need to insert and screw metal levels into them, with the help of which the metal and mirror panels will be joined. During assembly, it is best to rely on the photo.
- The door structure is finally assembled using screws.
- The doors are placed on the runners and the ease of movement is checked. If the doors move hard, then you need to adjust the screws - loosen or tighten them more until the door starts to move smoothly.
That's all, IKEA furniture is ready for use.
Instructions for assembling the Pax cabinet, described in technical language, are located on the IKEA website in the catalog. To find all the diagrams that belong to the wardrobe, you need to find a Pax wardrobe or corner wardrobe in the catalog and open the desired page. Schematic instructions will be in the left column under the photo.
If the technical language and verbal descriptions are not entirely clear, you can watch a video that shows the most difficult aspects of the assembly, namely the fastening of Auli doors, which many people find difficult to install.
The Pax corner cabinet from IKEA can be assembled using the same principle; some fundamental differences in the assembly can be seen in the photo. In particular, the corner one lacks the Auli door, which makes it even easier to assemble.
Video instructions for assembling an Ikea wardrobe
The video shows the assembly sequence of the Pax wardrobe. What tool is used for installation? Correct installation of fittings on furniture panels. How the wardrobe frame is assembled, how the modules are assembled. Precise installation of door guides. Connection of frames, insertion of internal door filling. Fastening the roller mechanism, hanging, adjusting, fixing the doors for smooth and safe movement along the guide.
Photo report from the last order
Do it yourself, useful advice
Technical errors made during the design in production or during assembly when connecting parts are not immediately noticeable. An incorrectly assembled furniture design has a number of shortcomings that will appear during operation. In the article we will look at how to make furniture in the house better and more reliable from a technical point of view.
Thank you for a quality order
He carefully did everything according to his order, adjusted the kitchen furniture. I hung shelves on the walls and curtain rods. Hung a TV bracket
Features of wardrobe systems from Ikea
The company's furniture is suitable for storing both large and small items. Such designs have been popular among buyers for many years due to their functionality and favorable cost.
Many people prefer wardrobes from this manufacturer because of their versatility, because you can choose the best option for a room of any size and design. In addition, the design of these systems allows the use of additional elements in the form of baskets, rails, drawers, various shelves, and compartments.
You can fit a lot of things in an Ikea wardrobe
Another advantage of such systems is the ability to install them in almost any corner or free space of the room. All this, combined with impeccable quality, makes any Ikea product very popular among buyers.
Ikea systems include many storage elements
Step-by-step assembly process
First, the sections are assembled. If you select parts for sections in advance, you can save work time. Therefore, it is better to spend a few minutes and put the elements in separate piles. This way the work will proceed faster. The second step will be to remove the doors from the cabinets and remove the shelves and drawers. Put these elements together. Next comes the installation of cabinets. By checking the instructions, the sizes and types of cabinets are determined. Accordingly, all the parts for the boxes are selected. Next, you need to correctly install screws, dowels, and locks. This is done with a Phillips screwdriver
It is important to fasten the structure firmly. All sections of the headset are assembled in the same way. Small pieces are cut from the adhesive tape and glued to visible areas of the finished sections
Do not remove the tapes until the end of the installation process. Installation and placement of cabinets is carried out in strict accordance with the instructions. All sections must be placed in their place, as in the diagram that was drawn in advance. The doors must be hung evenly and carefully. First, the awnings are attached to the base and the door separately. The fastening points are marked in advance on the elements. Even a small shift can lead to damage to the part. You will have to dismantle the canopies and move them to other places. In this case, holes will remain and the appearance will not be aesthetic. If everything is done smoothly, the door will “sit” exactly.
You need to check its strength and avoid contact with the base of the cabinet. Otherwise, the facade quickly crumbles and becomes unusable.
If rails are provided for sliding cabinets, they are inserted into special holes.
Opinion of a professional assembler
Probably, as a professional assembler, I come across what seem to me to be obvious shortcomings, but the ordinary consumer does not notice them at all, or considers them very insignificant. Or, as an option, the customers themselves have underestimated requirements for the quality of the kitchen, because for that kind of money they don’t expect anything else. Some people would agree with this, but I think that Borovichi’s quality is at a very low level.
Here is an example that Borovichi had to encounter during the last assembly of furniture. The side of the kitchen pencil case (the same part) is shown from opposite edges. If made correctly, they should be mirror identical, but we don’t see this
If you pay attention, the distance from the edge of the part to the center of the hole for the tie should be 8mm, but in this case it is 13mm and 3mm. It won't be hard to imagine how the pieces will fit together
Let's consider other cases with elements of furniture purchased in one of the supermarkets. On two of them we will see a half-glued edge. But this is not the worst flaw in the product, since these untreated ends will not be visible later. In the following photographs you can see the result that was obtained when the parts for the dowels were drilled incorrectly. Please note that only the right side of the cabinet is drilled correctly. The edge of the chipboard part is glued incorrectly.
How to store children's toys: 3 tips for maintaining order
Staying organized isn't just about having large storage systems. Children often complain about the lack of interesting activities for themselves, although the apartment is already literally covered with a carpet of dolls, cars and books. The problem lies not in the lack of things, but in their huge quantity: the child gets lost and cannot make a choice.
In order to always maintain order in the children's room, you should from time to time sort through and inspect toys for damage.
What to do in such a situation? The first step is to get rid of some toys. You should start with broken things and those that the child does not play with or remembers only occasionally.
Then you need to sort the toys according to their intended purpose (or categories). This will make it easier for the child to find the necessary thing, rather than rummaging through the whole pile.
Toys can be divided into the following categories:
- Constructor;
- Cars;
- Dolls and accessories (clothing, furniture);
- Dishes;
- Cubes;
- Puzzles;
- Stuffed Toys;
- Books, etc.
There should also be a system for arranging the child’s things on the shelves in the children’s room. Thus, your favorite toys should be stored in an area of direct accessibility (bottom drawers of the closet). Small parts that adults help the baby work with are best placed on the top shelves (construction sets, plasticine, puzzles).
Things that it is advisable to wean a child from should be put in dark boxes. And the toys that the baby should remember more often are in transparent ones. Or put them in the most visible place.
What is included in the IKEA furniture assembly service?
For our masters there are no unsolvable problems. In just a few hours they will assemble any piece of furniture for you:
- cabinets. This is not the most difficult job, but it requires accuracy and manly strength, since you have to deal with large parts. With our specialists, the assembly will be carried out carefully and quickly;
- beds. Beds with lifting mechanisms or options with drawers for linen - each piece of furniture requires a special approach. The more complex the model, the more time is spent on assembling it, and a person without experience cannot cope with some of these tasks;
- dressing rooms. They are compact and versatile, but they come with a huge number of shelves, partitions, small parts and fittings. Due to the size and complexity of the work, it is better not to do self-assembly;
- living rooms. Such furniture is usually large-sized, and it includes a large number of decorative details, glass elements and mirrors. Take on a job only if you are completely confident of success. Also think about the fact that assembling IKEA furniture at home from our company will solve the problem quickly, efficiently and inexpensively;
- kitchens. The undisputed winner in terms of installation complexity. The kitchen requires precise adjustment of all elements, creation of cutouts for communications, installation of built-in appliances, and assembly of hanging structures. Our advice: don’t take risks, entrust the work to professionals, because the cost of assembling IKEA furniture is several times lower than the price of a damaged set.
General assembly rules
These tips apply to all types of furniture without exception; be sure to follow the general recommendations, which will help you avoid many mistakes.
When assembling furniture, it is important to follow general rules
- Carefully read the instructions, check the completeness of the hardware supply, find out the purpose of each part and fastener.
You must understand not only what is fixed, where and in what sequence, but also what functions each part performs and what loads it is designed for. This knowledge will make it possible to select the permissible forces of cabinet elements during assembly. During this period, they are subject to loads not provided for by the manufacturer, and the risks of mechanical breakdowns increase. You always need to control how much you can deflect individual shelves and walls during installation, when the hardware only needs to be attached, and when it needs to be tightened to the limit. Before starting assembly, you should carefully read the manufacturer's instructions - Do not mix up parts from different packages.
Manufacturers package them in such a way as to make the assembly process as easy as possible. For example, in one package there is only a bottom and top part, in another there is a back wall and shelves, in a third door part, in a fourth side part, etc. If you unpacked several packages to check, then put them in separate places. Cabinet parts must be carefully laid out - Prepare your tools.
The specific set depends on the model and manufacturer, but for most cabinets you need hex keys and a set of screwdrivers, including ones for Eurobolts. Responsible furniture manufacturers prepare all holes for hardware during production. Assembly tools
It is imperative to prepare the place for assembly: make room for connecting large parts, provide good lighting.
Peculiarities
Swedish IKEA sliding door systems have their own distinctive features:
- Low cost.
- Easy to assemble. The design is specially adapted for non-professionals.
- Standard equipment. The parts are interchangeable and can be combined.
It is possible to assemble the door yourself from separate double door frames with guides and a set of different panels made of different materials in several color variations. To diversify the design, you can combine 2 sets of panels in one door system: make a different design for each leaf, or arrange the panels in a checkerboard pattern.
Frames with PAX guides for IKEA sliding doors are available in three color options:
- Grey. 150x201 cm costs 6,000 rubles, 150x236 cm and 200x201 cm - 7,000 rubles, and 200x236 cm - 8,000 rubles.
- White and black. 150×236 cm costing 7,000 rubles. and 200×236 cm - 8000 rub.
They are made of aluminum.
Replacement and repair of PAX doors
FURNITURE ASSEMBLY / USEFUL TIPS / Replacement and repair of PAX doors We are often contacted to repair cabinets and sliding doors. We mainly repair IKEA and ProfilDoors cabinets, but if you have a cabinet from another manufacturer, call us, we can help. We carry out a large range of furniture repair work from listed manufacturers.
What we can fix:
- PAX door repair or replacement
- Adjusting and hanging the door
- Restoring smoothness
- Nailing the back wall of a cabinet
- Shelf repair
- Repair of drawers in cabinets
Repair and replacement of sliding doors on IKEA cabinets
Let’s say your PAX cabinet doors are out of order or the exterior needs to be replaced. Door repair is carried out in a simple way. The complete set of cabinets allows you to purchase additional furniture elements separately. For example, you can buy a door frame separately, its cost can be viewed on the IKEA website, for convenience we have posted a link to the site: go to the IKEA website
- Check the dimensions of the frame (you can choose from the right on the website)
- Deliver the door frame to your home
- Call us and arrange the arrival of a specialist
Repairing doors takes no more than one hour. The cost of replacing one door frame is 1800 rubles. Travel outside the Moscow Ring Road is paid separately.
Repair of shelves and drawers
It often happens that for some reason the bottom of the drawer falls out after just six months of use. It’s not a problem, everything can be fixed, mostly it can be fixed with additional corners. The shelves can be repaired in the same way; if you wish, you can purchase additional shelves in the store.
Equipment for craftsmen
Our technicians are equipped with all the necessary tools to carry out repair work. The assembler has with him a small amount of fittings for IKEA furniture and ProfilDoors. This is usually enough to carry out minor repairs or replace damaged fittings. But this will not be enough if you have lost all the bolts and screws from the cabinet and doors.
How to apply for cabinet and door repairs
- Take photos of all damaged parts of furniture
- Send to us by email
- Indicate what exactly is required from the master
- Indicate address, phone number, desired date
- Wait for confirmation by phone
Cost of repairing cabinets and doors
| Hinge repair with transfer and additive to a new location | 500 |
| Replacing the frame on PAX sliding doors (two doors) | 1800 |
| Repair of shelves, drawers, rods, internal mechanisms | 300 |
| Accessories, one set | 300 |
| Minimum cost of repair work | 1800 |
Due to the complexity of understanding the required work, please be prepared to describe the furniture, the manufacturer, what exactly the breakdown is, there is
PRICES FOR IKEA FURNITURE SERVICES
ASSEMBLY OF IKEA FURNITURE (KITCHENS) Cost of assembling IKEA KITCHEN “METHOD” (% of the cost of furniture) more details 10% ADDITIONAL WORK (CUTOUTS IN CABINET FRAMES) Cutout for sink or cooktop 500 Cutouts for pipes, sockets or faucet 200 Changing the design of frames, reducing the size , redesign of the structure 1000 Minimum assembly cost 2500 EQUIPMENT Installation and connection of equipment (price per item) 1000 Facade hanging on PMM not IKEA, without slider BECHELPLIG 1000 IKEA CABINET FURNITURE (DRESSERS, CABINETS...) Assembly cost of IKEA CABINET FURNITURE 7% Minimum assembly cost 1500 Alteration of the PAX frame (reducing the width, height, depth) 1000 Hanging shelves, mirrors, ALGOT, STOLMAN, BESTO, (price for 1 fastener, on any walls) 50 Cutout for sockets, shield, plinth 200 CRAFT OF THE MASTER OUTSIDE THE MKAD CALL OF THE CRAFT OUTSIDE THE MKAD up to 5 km free of charge Visit of a specialist over 5 km (price for 1 km, after the 5th km) 25Types of Pax cabinets
Ikea has thought of everything to ensure that its cabinets look comfortable in an apartment of any size and layout. The parameters can be like this:
- Height - 201 or 236 cm;
- Width - from 50 to 300 cm;
- Frame depth - 35 or 58 cm.
In addition, you can choose between straight, corner and modular wardrobe modifications.
Direct
This version of the Pax cabinet will never lose its relevance, because interior classics are appropriate always and everywhere. There are several accommodation options:
- From wall to wall;
- From the wall to the door or window leaf;
- In the center of the wall.
The design of the cabinet is simple and versatile, making the cabinet ideal for a classic-style interior.
Corner
Corner wardrobes are an ideal solution for non-standard room layouts. This practical storage system will significantly save space in a small room or hallway. A corner cabinet makes the most of the available space without compromising the aesthetics of the room.
Corner Pax in white
Corner cabinet Pax dark tone
Modular
This “Pax” wall is distinguished by the ability to modernize your wardrobe using individual wardrobe elements. By combining different shapes, styles and colors, you can create spectacular designs. Modular closets are very convenient when moving. Those who like experimenting also prefer them: rearranging individual sections from place to place is interesting and easy.
Modular wardrobe Pax
Materials and colors
Ikea uses the highest quality materials to produce Pax wardrobes. In the production of cabinet frames the following are used:
- Laminated chipboard and fiberboard;
- Tempered glass parts.
- Internal components for wardrobes are made from:
- Anti-corrosion steel;
- chipboard;
- Fiberboard;
- High quality ABS plastics.
Pax wardrobe from Ikea
As for the color scheme, the white Pax wardrobe in the interior still remains the most popular. In addition to visually expanding the space, it perfectly complements the interior made in any style. The company also offers other color solutions for wardrobes:
- Brown is a solid and elegant classic;
- Bleached oak - brings a touch of homely warmth and comfort to the room;
- Black - classic, strict style;
- Silver – for glamorous interiors;
- Light blue and dark blue are bright accents in the apartment;
- Beige – soft cozy pastel.
The brand also offers two-color options, which we will show in the photo. The dressing room can be made in a strict black and brown shade or a contrasting combination of black and white. Mirrored or transparent glass doors visually lighten the design and create the illusion of additional space. Manufacturers also produce glossy, matte and translucent cabinets.
PAX wardrobe from IKEA. Full review + 40 photos of the interior
The PAX wardrobe system, like their METHOD kitchens, allows you to assemble furniture like a designer set. But is it so universal and will it solve your storage problems? I will share with you my personal purchasing experience, and also show you what the cabinet looks like in a real interior.
PAX planner: set dimensions and choose design
PAX can be planned independently in the planner program, or with a specialist when visiting a store. The good thing about the second method is that a specialist can give you some advice or warn you against mistakes in planning. The first one will please those who do not have the opportunity to visit the store, because... IKEA is not available in all cities of Russia and CIS countries.
This is what the scheduler interface looks like on the website. On the right is the main menu where you can set different sizes and configurations.
The price will depend on the content and dimensions. The most expensive will be tall cabinets with glass doors or veneer fronts. Panels on sliding doors made of fiberboard are the most budget-friendly.
In general, a cabinet assembled using the PAX system costs from 5 thousand rubles.
Internal filling
The project above is just my closet. And this is what it looks like in reality.
Dimensions of my closet: 236x58x150 cm. The price in this configuration, as can be seen in the screenshot from the program, is almost 27 thousand. In my opinion it is very cheap.
Facades: one sliding door - “Mehamn” under stained ash; the other is mirrored.
Frame sizes
Although IKEA claims that this wardrobe system allows you to assemble a wardrobe for almost any room, the size and capabilities of PAX are still limited.
In the catalog you can choose only 2 types of height and 2 depths:
The width is also not so simple. There are only three standards:
- 50 cm;
- 75 cm;
- 100 cm.
I wanted to install PAX not only in the room, but also in the hallway for outerwear. But precisely because of the width, we had to look for other options for arranging the hallway.
Corner
The PAX system allows you to assemble a corner or U-shaped wardrobe option. To do this, you need to purchase a special module.
Unfortunately, IKEA does not currently have options for frames with a beveled corner. And, in my opinion, it looks more beautiful with a right angle. Although, perhaps, a corner wardrobe in the shape of a trapezoid is more convenient to use.
Doors: hinged and sliding
Sliding ones save space, but from personal experience I will say that it is inconvenient to dress alone with such a wardrobe: while one half is open, access to the other is closed.
But in a small apartment or in a narrow corridor, there aren’t really any other options besides sliding doors.
But there are more design options among swing designs.
Internal filling
The interior arrangement and organization of storage is a separate delight. For this I am ready to endlessly praise IKEA.
Everything is thought out to the smallest detail:
- shelves can be installed at any height convenient for you;
- built-in lighting (to get dressed normally, you don’t need to turn on the lights in the entire room and wake up your household, this is super humane in relation to the husband sleeping in the room, who gets up for work an hour or two later);
- clothes rails (stationary and retractable);
- retractable trouser hangers,
- pull-out shelves for shoes;
- retractable baskets;
- boxes, hanging bags;
- drawers and drawers;
- and much, much more.
This is simply paradise for those who love order and functionality!
Open wardrobes PAX
A large dressing room is every woman's dream. And with IKEA’s open storage system, you can get closer to your dream by organizing a mini version of it in the pantry, for example. Or under the stairs.
And if the size of the bedroom allows, then you can build a partition from plasterboard, organizing storage behind it.
Design options
For sliding doors, the catalog offers the following facade options:
- white: matte or glossy;
- frosted glass;
- beige gloss;
- light gray gloss;
- white with a white strip design;
- bleached oak;
- dark frosted glass;
- dark bamboo;
- white textured;
- mirrored
The sliding door frame can be composed of different facades, because... its parts are sold separately.
The frames are available in only three colors: white, bleached oak and black-brown.
There is a larger range of swing doors. There are blue, green, gray, black, black-brown, light or dark wood, white and even with a floral pattern. There are smooth facades, with panels or with a mirror.
Assembly instructions
If you have at least minimal skills in working with a screwdriver, and the instructions do not seem like a bunch of incomprehensible words and pictures, then you can safely assemble it yourself. But not alone. Call a friend for help: sliding doors with glass are especially heavy and it is very difficult to install them alone. My husband and I assembled the closet together. We got it done in a couple of evenings.
Detailed instructions are included with the furniture. And if you lost it for some reason, you can find it electronically in the product card on the official website.
To imagine the full scale of the upcoming assembly work, watch the video:
Be sure to secure cabinets to the wall for safety.
Opinions on review sites
In addition to quality, it is worth evaluating other properties and characteristics of this furniture. What do other buyers say about this?
My blog has also previously published reviews of PAX

