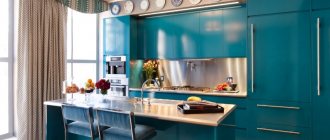
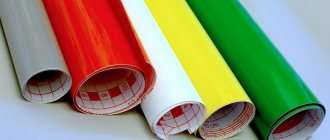
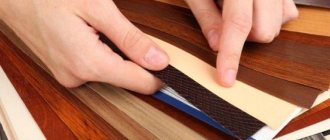
Self-adhesive film is a material familiar to many. But today it is experiencing new life in a budget-friendly interior update. And kitchens too. The reason is that the quality of such materials and the variability of design are growing - you can find self-adhesive on sale not only with the usual wood pattern, but also with marble, stone, tile patterns, just plain matte or glossy surfaces. Our selection includes inspiring examples of updating kitchens using self-adhesive film.
Stages of update work
Filming kitchen facades takes place in several stages.
Facade preparation
Vinyl is a thin and flexible material. Any flaw in the surface being glued will stand out and spoil the appearance of the product. Careful preparation of the base will help avoid this.
First of all, the facades need to be washed from grease and dried, disconnected from the cabinets, and remove the fittings. Clean any irregularities found and fill them with putty. Sand the leveled surface.
If the item has already been covered with film, it is better to remove it before gluing a new one.
You can do this in several ways:
- Soak a small area with hot water and try to remove the coating. You can carefully pry off the material with a spatula or knife so as not to scratch the surface.
- Use a heat gun to heat the coating. A household one set to maximum temperature and power, or even a fan heater, will also work. Peel off the film while it is hot.
- Special aerosols for removing tinting and stickers from cars will help. Spray the product onto part of the surface. After a certain time specified by the manufacturer on the packaging, remove the coating. Instead of aerosols, you can use WD-40. Work with it carefully: the white spirit contained in the composition can damage the paint on the facade.
- White spirit and rectified alcohol are used when the surface coating under the old film does not need to be preserved. Soak the material in them and carefully separate them from the base. The same means, gasoline or other solvents, remove glue residues. Apply them to a piece of fabric and remove the dried adhesive.
Degrease the product with alcohol or gasoline. Prime with furniture varnish or wallpaper glue based on methylcellulose (it is suitable for rough surfaces).
Metal and glass bases are moistened before pasting with water or soap solution.
Measurements and markings
Measure the parameters of all parts to be pasted and transfer them to film. On its reverse side there is usually a centimeter grid for more convenient marking, around which an allowance of 1-2 cm is added.
Cut along the lines with an allowance using sharp scissors, a stationery knife or a breadboard scalpel. It is recommended to cut the film with a pattern from the front side so that you can see how to correctly separate the fragments of the picture and then fold it back into a whole composition.
Pasting the film
When the preparatory work is completed, the most important stage begins - gluing the kitchen unit:
- We begin to glue the part on top.
- We apply the film evenly to the facade. Remove the protective paper layer from a small area no larger than 10 cm.
- We press the vinyl tightly against the facade, smoothing it from the middle of the part to the edges. This can be done with a rubber roller or a plastic wallpaper scraper (if you wrap it with tape, it will become softer). A piece of cloth or a foam sponge will do.
- When the first section is secured, separate the paper from the next one. Press, smooth. Repeat until we reach the bottom of the part.
- We iron the film-covered façade again with a cloth, and trim off the remaining material with a knife or scalpel.
Small air bubbles can be pierced with a thin needle from a syringe and the film pressed well to the surface in this place.
Processing of figured parts and corners
If you plan to update not only the front, but also the side parts of the facades, when cutting the material, add their width to the workpiece, not forgetting about the allowances.
The film is cut diagonally in the corners, and the front part is covered first. The material heated with a hairdryer is pulled onto the edge of the part and carefully ironed. Close the corners. Working with rounded ends is similar.
Important ! Vinyl may shrink as it cools, so do not cut off excess film until the part has completely cooled. Do this after 40-60 minutes.
On the facades there are figured recesses or volumetric projections. They are also covered with vinyl heated with hot air. It is important to straighten the film and smooth it to the surface.
Decorative elements also require an increase in material when marking.
When the width of the PVC film is not enough, it is necessary to join several parts. This is done like this:
- When cutting, add another 1.5–2 cm to each piece.
- We overlap the material, do not press the top layer.
- We cut both pieces simultaneously with a scalpel or knife along a ruler.
- We remove the excess strips, align the edges, and glue the material.
- Warm it up with a hairdryer.
Correcting errors
Allowances will save you from unevenly pasted film. Due to them, a slight distortion will become invisible. This only works on options without a clearly defined pattern, such as plain or marbled.
If during gluing defects become noticeable - severe distortion or large air bubbles - it is better to peel off the material immediately, until it covers the entire surface, and start again.
When the vinyl is glued, but serious mistakes are obvious, remove it as quickly as possible before the glue dries. You can try to re-glue the removed film: high-quality material will withstand 1-2 times, will not stretch or tear.
It happens that the PVC material begins to come off after a while. The reasons are improper preparation of the base, non-compliance with gluing technology, poor quality. To avoid dragging the entire facade again, try attaching the film with transparent universal glue. It is convenient to do this with a syringe.
Photo
Now we invite you to look at a few more photos with updating the facades of the headset at minimal cost.
Covering kitchen units with film at home
To successfully cover a kitchen façade or splashback with MDF at home, you need to carry out the preparatory stage correctly. It consists of the following points:
Note. To replace the film on a kitchen facade with a relief surface, a new blank must be cut with a small margin. It is better to trim off the remainder of a couple of extra centimeters than to cut out a new pattern if there is not enough material.
The gluing process occurs for each part separately.
Important! It is necessary to ensure that when pasting the facades of one pencil case or the door of a bedside table and a drawer above it, the drawings of the upper and lower parts fit together in direction and, at least approximately, coincide in step.
The work is carried out in the following order:
Important! The glue is not fast-drying - its polymerization time is long enough to correct errors in laminating MDF with PVC film.
Video on how to cover a kitchen unit yourself with film below:
Watch the video of how to cover a kitchen façade with self-adhesive film with printing:
Advantages of film pasting
Wide choice of colors
Development of a unique design
Possibility of simulating texture and materials
Possibility of applying an image
Does not require frame dismantling
Doesn't require much time
Relatively low cost of work
Clean and odorless
evaluation of works based on photos
Send photos of surfaces, we estimate the preliminary cost of the work
Cost calculation
We calculate the cost based on the area and complexity of the work
Measurer visit, color and texture coordination
The master will take all measurements from the surfaces
Installation
The master sticks the film on all surfaces quickly and without unpleasant odors
Your application has been sent
Disadvantages of film facades
Film facades also have disadvantages:
- peeling of the film under the influence of high temperatures and humidity;
- possibility of damage due to external chemical, mechanical influences, or the use of abrasive cleaning agents;
- impossibility of restoration of defects.
Manufacturers of kitchens with film facades strongly recommend purchasing a good hood - it extends the life of the cabinet facades located above the hob.
If the appearance of the film facades suffers greatly, you can always order new ones. Fortunately, their price is low. It is not necessary to change the furniture frames - you can only update the facades. If the facades are made from reliable, consistent manufacturers, you can re-order one or two elements from them at any time to replace the damaged ones.
Options for “new things”
Since the set itself is not yet falling apart, it is necessary to update the facades. This will benefit both the appearance and protect the material from moisture. There are two options for updating facades:
- Ready-made self-adhesive film
- Individual photo printing on adhesive paper
The owner of this kitchen settled on the second option, after which he indulged in thinking about the topic of photo printing. The original option with a separate picture for each door was rejected: the overall look would be too colorful. After some more thought, it was decided to choose a print with nature, “breaking” it with an apron would not affect the perception of the picture.
When searching for a suitable print, the picture should be selected with the maximum resolution - only in this case it will not be blurry.
Nuances that may appear when using self-adhesive film
Even an inexperienced craftsman can glue the film on a kitchen set. To prevent further errors and simplify this process, it is necessary to take into account some nuances:
- When working with a fragment, bright lighting is important. If it is not enough, then during work you can miss minor flaws.
- Decor with a pattern is cut from the front side, which will allow you to save the image in the future.
- To work with film that quickly sticks, use talc. When adjusting sheets, it must be poured over the entire surface of the material.
- To prevent gaps from appearing when joining sheets, the next fragment should overlap the previous one by 1.5 cm. Using a knife and a ruler, which is applied to the central part of the allowance, an incision is made. This technique allows you to make the joint smooth.
- When finishing the ends of MDF furniture, a household or industrial hair dryer is used. In this case, the material is first glued to the surface, and then to the ends.
- Air bubbles may appear during gluing. You can remove them with a needle. If the bubbles are large enough, then a medical syringe will help in this situation. It is inserted into the bladder and the air is drawn out.
It is easier to glue the decor evenly on a damp surface. If you moisten the cabinets with a spray bottle, the water will not allow the material to stick immediately.
Installation of moldings and fittings
You can return the old fittings to the vinyl-covered façade (they also change it by repainting it) or install new ones.
Furniture moldings or trim will complete the renovation process. They come in the form of strips of various shapes or with twisted, patterned elements.
Moldings are made from wood, PVC, polyurethane, and metal. There are self-adhesive models.
Decorative elements are cut into parts of the required sizes. Products with an already applied adhesive composition are pressed tightly against the facade, others are secured using universal glue.
Attention ! It is better to pre-mark the places where the decor will be attached with a pencil.
Average cost of service
Most specialists
The cost of services starts from 2000 rubles. The cost is influenced by the experience and qualifications of the craftsman, the cost of materials, and the complexity of the work.
Some masters provide discounts, for example, when ordering several services or a large volume of work.
