Woven rugs using tapestry technique
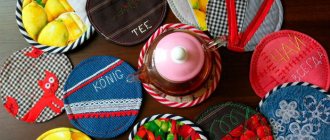
Tapestry is a type of decorative and applied art that involves the production of lint-free wall carpets with a specific composition by interweaving threads. Tapestries have found their use in the home: today, in addition to their decorative function, they bring practical benefits when it comes to handmade rugs woven from dense yarn or thin pieces of knitwear.
A beautiful rug will find its place in a children's room, bedroom or hallway
To produce original creations (this can be not only carpets, but also bedspreads, chair covers), the following techniques are used:
- Crochet;
- braiding followed by stitching;
- gluing thick cord in a circle.
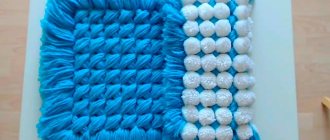
Bright rug with tassels on the edges
Making tapestry rugs with your own hands is one of the most low-budget types of creativity, since the base can be used rags or yarn obtained by unraveling old knitted items.
See also DIY kitchen panels: 9 original ideas
Crafts from old books
Recesses in thick books have long been used as secret storage for money, securities or letters. To do this, simply cut out a recess of the required size. But you can go further and turn the product into a magnificent decorative interior detail.
To begin with, the internal content of the pages needs to be turned into a monolith, so we carefully coat all the pages inside and outside with PVA glue. Place a blank sheet of paper between the top cover and the first page of the book. The coated book must be left under pressure overnight to dry.
We make cuts on a clean sheet of paper and fold the flaps inward. The base of the box is ready! Now let's start decorating. There are many options here - the cover and “inside” can be painted, decorated using decoupage technique, covered with fabric or vinyl wallpaper. You can also make real pieces of furniture from old books with your own hands, for example, original wall shelves, banquettes or even entire sofas.
Photo: pinterest.ru
Photo: liveinternet.ru
Photo: otrada-o.ru
Photo: liveinternet.ru
Photo: liveinternet.ru
Photo: pinterest.pt
Photo: skolkogramm.ru
DIY bull craft: New Year ideas for children
What to make from coconut shells
It turns out there are a lot of things. Here are 5 smart ideas.
Turtle ashtray. Or a vase for small items. It looks extraordinary.
Candlestick. Unusual decor.
House in an aquarium. Beauty!
And what kind of cutie lives here? Syrian hamster. But you can house a dwarf, a mouse or a gerbil. The main thing is to give everyone a separate house.
Or you can make a cup. Use as a dish or stand.
Crafts from old pallets
Many useful things and crafts can be assembled from ordinary pallets. And you don’t even have to work too hard - this material itself is an almost ready-made element for assembling furniture. For example, try making a coffee table that is ideal for both a rustic interior and a stylish loft.
The procedure is quite simple: cut one pallet into two equal parts, treat them with wood-preserving impregnations, and open them with varnish. When the parts are thoroughly dry, assemble the table by placing one part on top of the other. Be sure to secure the structure. For convenience, the table can be equipped with wheels, and the tabletop can be made of ordinary glass with polished edges.
Working with old pallets like a construction set, you can assemble wonderful garden benches, stands for outdoor flowerpots, wonderful children's swings and much more.
Photo: miceup.net
Photo: lanshaft.com
Photo: noithatinfo.com
DIY Christmas tree star: 8 step-by-step ideas (photos)
Beading: flowers and trees made of beads
Bright, unusual flowers and trees made from beads with your own hands are a good option for home decor that does not require large financial investments or special skills. You will need glue and alabaster as a base, but you can use a real wooden branch pre-wrapped with jute thread. The easiest way to create an interior decoration is from ready-made blanks - flowers, leaves and stems made of wire with stringed beads.
Bouquet of beads strung on copper wire
Bonsai tree made of beads and a real branch
See also: Making a treadmill with your own hands
Decor and crafts from old things - photos
In conclusion, we invite you to carefully look at our photo gallery. Here you will find many simple and beautiful ideas for crafts from old things with your own hands. Get inspired!
Photo: zen.yandex.ru
Photo: okwedding.ru
Photo: tr.pinterest.com
Photo: makaan.com
Photo: remontbp.com
Photo: zen.yandex.ru
Photo: projetos.habitissimo.com.br
Photo: pinterest.ru
Photo: xnn.ro
Photo: zen.yandex.ru
Photo: lifestyle.sapo.pt
Photo: o.yandex.ru
Photo: berkem.ru
Photo: pinterest.ru
Photo: nikastroy.ru
Photo: mysemfamily.ru
Photo: sovkusom.ru
Photo: twnews.se
Photo: provse.today
Photo: repairstyling.com
Photo: pinterest.at
Photo: vk.com
Photo: idoska-yaroslavl.ru
Photo: id.decor-modern.com
Photo: happymodern.ru
Crafts from old clothes and shoes
Many of us often find a home in our closets with things that we don’t wear – something has gone out of fashion, and something is simply tired or has lost its aesthetic appeal. Let's see what useful crafts can be made from old clothes?
Shirt bag
In any man’s wardrobe there is probably an old shirt that has long been “written off”, but it would be a pity to throw it away. But you can make a variety of useful things from a shirt - for example, sew a bag.
To sew it, you will need: a shirt, lining fabric that will ensure the strength of the product, you can also use a boring tie for decoration. To begin, draw a template on cardboard of what the future handbag will look like, cut it out, and transfer the sketches to the main and lining fabrics.
Next, we cut out, sew together the front fabric, and sew separately prepared handles and a fragment of a tie to it. When all the elements are attached, you can sheathe the workpiece with lining material. So our spacious handbag is ready!
Photo: cyberpedia.su
Photo: makeit-loveit.com
Photo: salonkallisto.ru
Photo: makeit-loveit.com
Photo: makeit-loveit.com
Photo: makeit-loveit.com
Decorative sweater pillows
Soft, comfortable sofa cushions can be sewn from sweaters. Draw on paper the desired shape of the product - let it be a flower, a star or a fluffy cloud.
Cut out the template and pin it to the sweater, inside out. Using the template, we cut out two halves of the future pillow and sew it together, leaving a small gap through which we fill the product with padding polyester or any other soft fibrous material. Sew the pillow until the end. You can further decorate the craft, for example, by sewing on parts of an animal’s face cut from the wind.
Photo: proffstroygroup.ru
Photo: delaemrukami.org
Photo: salonkallisto.ru
Photo: mychildroom.ru
Photo: podelunchik.ru
Photo: eco.glossy.ru
Cat house made from old T-shirts
To make a cute house for your mustachioed pet, you will need two old T-shirts (one of them can be replaced with a pillowcase), thick cardboard, two pieces of metal wire and tape.
We cut out the bottom of the house from cardboard (plywood), wrap it with one T-shirt (pillowcase), and turn the sleeves inward. To make the cat comfortable, you can put insulation in the form of foam rubber or a flat pad. We give the pieces of wire a curved shape and fasten them together crosswise at the top point, fixing them with tape. Next, the ends of the wire must be connected to the corner areas of the bottom.
Now we take the second T-shirt and simply put it on the structure, pull all the hanging elements under the bottom of the house and secure it with a pin. The neck will serve as the entrance to the cat's home, for which she will certainly be grateful to you.
Photo: cpykami.ru
Photo: cpykami.ru
Photo: catracalivre.com.br
Photo: zen.yandex.ru
Photo: krass42.com
Beautiful flowerpots made from old shoes
Original flowerpots made from old shoes can wonderfully decorate not only a country house, a plot of land, but also a city apartment. This can be done in two ways - use shoes as a stand for a small flower pot, turning it into a flowerpot, or plant plants directly in old shoes or boots. In the second case, not just any shoes will do, but leather or rubber ones, which will last much longer.
Take care of the drainage system - to do this, you need to make holes in the sole and place the flowerpot on a tray where the water will drain. Shoes can be left in their original form or decorated - painted in bright colors, painted, or varnished.
Photo: news.myseldon.com
Photo: totalhub.ru
Photo: orbita.site
Photo: livemaster.ru
Homemade toys: felt owls
Soft, bright and unique felt owls, sewn by yourself, will decorate your living room, bedroom or nursery. To create them you will need felt of varying hardness, strong threads, decorative elements (buttons, seed beads, beads), a needle and scissors. To make the figures perfectly even and realistic, it is better to use ready-made templates for patterns (can be found on the Internet). You can sew owls from felt: toys, foot warmers, hanging cases for storing small items.
Manufacturing process:
The owl consists of two parts. On the top, front part, sew an apron, eyes and nose
A loop must be attached to the bottom
Next, we sew the parts together, placing cotton wool or foam inside
We sew the paws on the bottom and that’s it – the original decor is ready!
See also: How to decorate a closet with your own hands?
Unusual “marble” decorative items (photo)
Starting in 2022, the marble effect on various glass furnishings is very fashionable. To transform an ordinary thing, for example, a vase or candlestick with your own hands, you will need several nail polishes or acrylic paint. Working with nail polish consists of several stages:
- Filling a disposable container with clean water.
- Add nail polish to the water - 1-2 drops of each color.
- Forming marble stains using a toothpick.
- Immersion of the bottom of the item to be decorated into a container with a water-varnish mixture.
- Drying the item.
The process of creating a "marble" effect on a glass object
To secure the marble effect, you can make a protective layer of clear varnish - simply paint the design. Bright original stains on a vase or other product can also be obtained as a result of using liquid acrylic paints. In this case, the paints are gradually poured inside the product, and with the help of careful, slow rotations a fantasy image is created.
Kitchen decor from old cutlery
Using old forks, spoons, knives and other cutlery, you can make an original frame, in which you can then place a mirror or a clock. If you don’t have extra metal utensils, use plastic ones, painting them in different colors first.
To make a frame, in addition to cutlery, you will need thick cardboard, a glue gun, a saucer, a mirror or a dial. We cut out a round base from cardboard and paste it over, as shown in the photo, with various utensils. As a result, we ended up with a frame that requires additional equipment. You can glue a saucer with a mirror surface or a clock dial onto it.
Photo: podelunchik.ru
Photo: podelunchik.ru
Photo: podelunchik.ru
Photo: m.russian.alibaba.com
Woven crafts for the interior: homemade pillows
Textiles, in particular DIY decorative pillows for the home, are always beautiful, fashionable and useful. Before you start sewing them, you should choose the right materials - fabric, filler and decorative elements. They should be durable, easy to clean and not lose shape over time. The base is cotton, filled with holofiber and synthetic fluff, and fully meets these requirements. You can decorate pillows using the following techniques: patchwork, knitting, embroidery, silk painting.
Scandinavian style ornament is a great idea for decorating pillows
And the old suitcase will come in handy
If you have an old suitcase lying around, don’t rush to send it to a landfill, because it can become an excellent base for creating a lot of useful things. For example, in a short period of time you can turn it into a cozy abode for your pet by equipping it with a warm blanket and legs.
If you get serious about decorating - paint the outer sides of the doors, open them with varnish, and cover the inner sides with fabric or wallpaper, then you can turn a suitcase into a luxurious antique-style box for children's toys.
An old suitcase can also be repurposed into a gorgeous coffee table that will suit any traveler's interior. To do this, you need to clean the item well, perhaps paint it or decorate it using decoupage technique, or open it with varnish. If the suitcase doors are soft, you will need plywood inserts on the inside.
Photo: zen.yandex.ru
Photo: odstroy.ru
Photo: marremont.ru
Photo: ices.ge
Photo: zen.yandex.ru
Photo: pol-master.com
Crafts for phones
Mobile phones, tablets, laptops and other electronics have long become an integral part of our lives. But progress has not yet reached such heights that it works smoothly without recharging or connecting to the mains. As a result, our houses are tangled with wires, which not only create interference, but also do not look aesthetically pleasing.
This problem can also be solved with the help of simple DIY devices.
Charging point
Several devices can be charged simultaneously in the house. In order not to look for a free outlet or trip over wires, you can make a compact charging point for all devices from an ordinary shoe box.
It needs to make several holes in the front wall to output the “tails” of the charges, and one in the back for an extension cord with several sockets. Decorate the box as you wish.
Charging point
Hanging case
If the sockets in the house are located high, you can get rid of the appearance of hanging wires using a hanging case made from a container for shampoo or household chemicals of a size suitable for the phone.
Step 1. Cut off the neck of the bottle, leaving a pocket for a phone with a high back wall. We cut a hole in it in the shape of the charger.
Marking and cutting along the line
Step 2. Wash the resulting cover to remove chemical residues and wipe it dry or let it dry.
Step 3. Use fine sandpaper to sand the cut edges and erase the text and drawing from the surface.
Sanding
Step 4. Decorate the case in any desired way: paint, cover with fabric, use decoupage techniques, etc.
Decoration
The result of the work is in the next photo.
Photos before and after
Fast, easy and practical.


