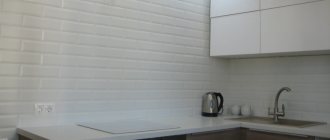
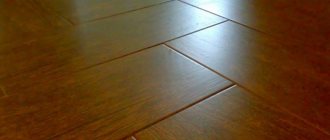
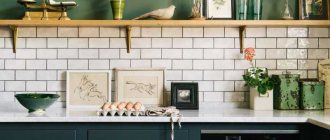
If you are considering tiles for the kitchen floor as one of the possible covering options and have already managed to look at a lot of photos of current collections, it’s time to break away from the catalogs and return to reality - and take a look at how such material looks in a real interior. Moreover, they, as a rule, do not reveal the nuances of selecting and labeling ceramic products, and also do not provide advice on their optimal installation.
And we reveal and advise: perceive the material as a small but very comprehensive guide that answers all (or almost all) questions on the topic and offers the most interesting design options for kitchen floor tiles using real photos, and not mock-ups that are far from reality.
Pros and cons of tiles
First, let's figure out why this flooring is so popular. There are plenty of advantages:
- durability - it can be laid for decades to come and consistently retains its appearance throughout its entire service life;
- practicality - it is easy to care for, it is not afraid even of abrasive detergents;
- solidity - due to the cement adhesive backing, it gives the impression of exceptional reliability and calmly withstands mechanical stress;
- moisture resistance - unlike laminate, it is not at all afraid of water and temperature influences, which makes the tiles extremely convenient for use in the kitchen;
- affordability - even the most budget option will serve you faithfully for many years.
There are also disadvantages, although they are not so obvious:
- professional installation is required - sometimes the cost of installing tiles is higher than the material itself;
- preparation of the base is necessary - if the floor is crooked and wet, this will invariably make itself felt after installation, so you need to fill the screed and eliminate existing defects;
- lack of heat transfer - the surface can be quite unpleasantly cold, but this can be solved by installing a heated floor at the time of installation;
- some species slide dangerously - we recognize the existence of such a problem and will definitely discuss this point below;
- poor sound insulation - that is what it is, but this can also be corrected by additional layers of insulation during installation.
Advantages
Let's list the main advantages:
- Easy washing process. Thanks to the smooth surface, the tiles are very easy to clean, which does not require any effort. In addition, it has antistatic properties that allow it to be washed even with aggressive, caustic agents without causing any damage.
- The service life is at least 15 years.
- Sustainability. The tiles are able to withstand fire, water and temperature changes that are typical for every kitchen without damage.
- Price. It is significantly lower than coatings made of wood or stone.
- Big choice. Modern stores offer a large assortment of goods of different colors, quality, sizes and textures that will satisfy any buyer.
- Locality. You can decorate the entire kitchen with tiles, but in addition, you can use it to decorate a small local area. This is much more problematic to do with other materials.
- Thermal conductivity. When you connect floor heating, the tiles will conduct heat well and provide your home with comfort.
Ceramic tiles have the best price-quality ratio
Advice! If you want your room to be upholstered with these more expensive materials, then you can safely give preference to tiles that imitate natural materials.
How to choose?
In order for you to come to the store to buy tiles with knowledge of the matter, we will arm you with useful information that will definitely help you navigate and make the best choice.
Types of tiles
Floor tiles most often come in 3 types:
- ordinary ceramic - the most common type, which has the necessary set of performance characteristics and ensures stable service for 10-20 years;
- porcelain stoneware (gres) - hardened at a higher temperature and acquires a monolithic structure, the characteristics most similar to stone;
- clinker is a façade ceramic made using extrusion technology and is used primarily outdoors.
There are also so-called quartz-vinyl tiles, but they have nothing to do with ceramics, so we’ll take them outside the scope of our material.
Despite the fact that you can use both regular ceramic tiles and porcelain tiles for the kitchen floor, we still recommend choosing the second option. It may be more expensive, but it outright outperforms classic ceramics in terms of characteristics: it is more durable and wear-resistant, it has a much greater chance of surviving a confrontation with a dropped pan or plate.
Attention: very often sellers in tile stores, either intentionally or out of ignorance, confuse ordinary tiles with porcelain stoneware, without attaching much importance to the difference between them. But you can tell one from the other yourself if you pick up a fragment: porcelain stoneware is most often uniform throughout the entire thickness of the tile - unlike classic floor ceramics, in which the top layer with the enamel applied to it is clearly visible.
Specification
Here we need to clarify some points. Typically, tile stands have stickers indicating one specification or another. If this is not the case, then you can get information from the catalog or simply by looking at the box with tiles:
- anti-slip coefficient - must be at least 0.75, designated as R10;
- wear resistance - at least hardness class III according to PEI or class V according to GOST;
- resistance to chemically active substances - AA marking;
- resistance to stains - according to the ISO 10545-14 standard, level 3 is optimal.
Sizes and formats
Installing tiles is not the most fun task, so it makes sense to simplify it by minimizing the cutting of material. In addition, this will allow you to minimize your costs. Therefore, before you go to the store, think about what size tiles will look best in the format of your kitchen. The most common options are:
- square (in cm: 30x30, 40x40, 50x50, 60x60);
- rectangular (in cm: 15x30, 20x40, 30x60);
- modular (diamond, small squares 10x10 or 15x15).
Everything is simple here: the larger your kitchen is, the larger the tiles you can put on the floor. For example, for modest Khrushchev buildings, where there is no room to turn around, the classic size 30x30 would be optimal. And in rooms with a good supply of usable space, 50x50 tiles will look quite organic.
Advice: even if you have a solid square footage, but the floor suffers from unevenness, it is still better to look towards compact formats. Smaller tiles can hide them all perfectly.
In case you go to the store
Before going to the store, carefully measure the kitchen, approximately decide on the installation pattern, color and design of the coating as a whole.
- Don’t forget to grab a notepad and pen to write down the parameters of the options you like: article number, price, name of the manufacturer and collection, and most importantly, dimensions (caliber can be ignored at the planning stage). When you return home, carefully consider which tile to choose in terms of size and design, calculate the material consumption, if possible, make layout drawings, read reviews and monitor the market. Perhaps in some online store the tiles of the article you need are cheaper.
- And we remind you once again that before paying for your purchase, you need to independently double-check the caliber and tone of the assembled boxes, and also buy material with at least a 10% reserve.
Popular manufacturers and prices
Despite the extremely large-scale market, we will still try to identify the most active players in it. No extra words: we’ll just divide them into 3 levels according to the pricing policy.
Budget segment
Floor tiles with an average price of up to 500 rubles per square meter.
- Interkerama (Ukraine);
- Cersanit (Russia);
- Keramin (Belarus);
- Birch Ceramics (Belarus);
- M-square (Russia).
Average price range
Here the cost is more serious and very often depends on the characteristics of a particular collection. Within 1000 rubles per square meter.
- Italon (Russia);
- ColiseumGres (Russia);
- Kerama Marazzi (Russia);
- FAP CERAMICHE (Italy);
- Grasaro (Russia-Spain).
Expensive tiles
Purely premium segment. The upper price limit is unlimited.
- VALLELUNGA Foussana (Italy);
- Ceramika Paradyz (Poland);
- Opoczno (Poland);
- Cerrad (Poland).
Photo gallery
Tile on the kitchen floor - beautiful options (photo selection)
Porcelain tiles: design options (selection of photos)
Ceramic: design options (photo selection)
Laying methods
There are not many of them, and the choice is most often determined by the characteristics of the room in which the installation is carried out:
- at the joint - the classic placement of fragments in an even row;
- diagonally - looks impressive and, moreover, visually expands the space, which is especially important for small kitchens;
- offset - similar to laminate, imitation brickwork;
- herringbone - requires a lot of trimming, but in general greatly enlivens the room;
- honeycomb - relevant only for special small tiles.
Marking
Having decided on the materials and adhesive mixtures, you can begin marking the room. But first you need to determine how to lay floor tiles in order to accurately calculate the required quantity.
The easiest option is to first draw everything on a piece of paper. It is best to use a computer layout program. Now there are many of them.
After purchase, it is recommended to lay at least part of the tiles “dry” on the floor and visually look at the result. You may need to adjust (move in one direction or another) the location.
Important! The tile is highly durable, but at the same time fragile. Therefore, it is recommended to buy it with a margin of 10-15%.
Design options by color and texture
Floor tiles take an active part in creating the design of a room, so when choosing it, it is very important to take into account the overall color scheme of the room.
Black
It is recommended for installation only if the lower part of the kitchen set and furniture are made in a contrasting color. Otherwise you will end up with an ugly merging of elements.
White
A headache for any housewife. However, milky and light shades are increasingly being seen on kitchen floors. This refreshes the interior and makes even a tiny Khrushchev apartment much more comfortable and airy.
Contrast combined
One of the most balanced options, in which light tiles for the kitchen floor are combined with dark ones and laid out in a checkerboard pattern. These are the options in the photo.
Beige and brown
Very good colors for kitchens with north-facing access. They help make the environment warmer and more homely.
Under laminate
A trend of recent years, which is successfully displacing classic tiles with glazed enamel from the kitchen space.
Most often, oak, pine, and elm are imitated. The structure is conveyed with a good level of detail even on inexpensive porcelain stoneware.
Under the stone
Stone textures will never go out of style, but in the format of kitchen floor tiles they look a little heavy.
However, if you have a spacious room and the interior has a lot of similar textures, then stone-look tiles will undoubtedly make the space even more harmonious.
Under parquet
Compared to all previous options, ceramic parquet a priori seems somehow outdated. However, you need to be able to “cook it correctly.”
See how you can competently use such tiles in the Khrushchev format - they not only properly perform their direct function, but also directly participate in the decoration of the space.
With decor
If you have a large kitchen and want to enhance the expressiveness of the selected tiles, it is advisable to use decorative elements. They most often come in the form of small squares and borders laid around the perimeter.
Squares are attached to each tile - and each subsequent one in this case is shifted by its size. Or at the rate of 1 to 4.
There are also decorative options in the size of one tile. It’s easy to overdo them and end up with a very intrusive pattern that disharmonizes the space. Therefore, remember that the key to success is balance in everything.
With mosaic pattern
A method of decorating floor coverings that is quite rarely used nowadays: some kind of conceptual design is made from tiles.
However, in individual kitchens this solution has quite promising expressive potential: especially if you have a free rectangle with a U-shaped layout.
Flaws
- Ceramic tiles are cool. If you are finishing the floor from this material, it is better to install a floor heating system.
Without a heating system, you will have to lay rugs on the floor and get into the habit of wearing slippers - Poor sound insulation. The disadvantage is noticeable when decorating the walls of a room with tiles.
Advice! To avoid the effect of “thin walls”, lay an additional soundproofing layer.
- Injury hazard. The smooth surface of the tiles is slippery and hard. A fall on such a floor will be much more painful than on a wooden or linoleum floor.
- If a fairly heavy object is dropped onto the tile, it may break or become cracked.
Important! A dropped item will definitely break due to the hardness of the tiles!
- Difficulty in installation. When finishing a room, it is important to accurately and correctly calculate the required amount of material and lay it out correctly and efficiently.
Laying ceramic coating requires professional skills
Note! It is very important before laying to make sure that the surface is perfectly flat, otherwise, if there is emptiness and air, the tile will quickly crack or peel off. Also, installing it is a rather messy business that requires skill and a lot of trouble.
Tools
To lay tiles, regardless of the base, mixtures used to level the floor, methods, adhesive tile compositions and other components, you will need a certain set of tools. Here he is:
- Flute brushes and paint brushes - for cleaning the surface for laying. You can also use a construction vacuum cleaner;
- Paint roller – for priming the floor;
- Tape measure, square, ruler - measuring tools. Will be needed all the time until the end of the flooring;
- Hydraulic level, tapping cord - will serve at the stage of marking the surface for laying;
- Rule-trapezoid, level, nylon thread - necessary to create precise horizontal lines and prevent differences in floor level;
- A drill with a mixing attachment and a deep container - you cannot do without their help when preparing the adhesive mixture;
- Spatula, notched trowel, trowel - tools for applying diluted mortar to the surface of tiles and floors;
- A rubber hammer is a tool for shrinking the laid tiles;
- Tile cutter, tile cutter, grinder with a disk for dry cutting - specific tile tools for cutting tiles in straight lines;
- Tile nippers - will be needed in case of removing small pieces of tiles (in particular corners) of irregular geometric shape;
- Ballerina is a tool for drilling even round holes of various diameters.
- Grouting compounds
