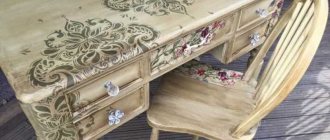
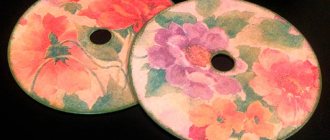
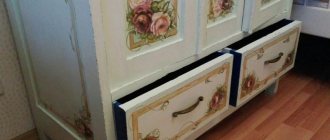
Decoupage is the process of decorating the surface of objects with patterned napkins that are glued to plastic, wood or metal.
The surface is first cleaned, painted, and after the image is transferred by removing a layer from a napkin and placed on PVA, it is varnished and a real masterpiece is obtained!
Decoupage technique
Decoupage itself involves gluing a selected pattern onto a prepared surface. Of course, not everything is so simple, and decoupage is only partially reminiscent of appliqué.
But the technique is not as complicated as it might seem when looking at photos of decorated objects.
Decorative and applied arts originated in the 17th century, and for a long time this method of decoration was considered accessible only to rich people.
Today, anyone, regardless of income, can purchase materials or use available materials.
Interesting ideas
The decoupage technique allows you to decorate objects in any style. For this reason, it is in great demand when decorating rooms.
At the planning stage, it is necessary to carefully consider the appearance of the item and select suitable elements for decoupage.
Delicate floral patterns will look harmonious on a white or very light background.
Artificially aged items will fit well into a classic design.
Bright compositions are perfectly emphasized by a dark background.
Black and white illustrations or old newspapers are perfect for modern interiors.
A creative approach to work will allow you to create bright and unusual interior items.
Materials and tools
The idea of decoration can be very diverse, but the materials used will always be the same. To create original items you will need a very small list of devices:
- the basis;
- Pictures;
- glue;
- dye;
- varnish;
- tassels.
The user can buy all this at a craft store or find it at home.
The basis
To begin with, you can use simple and even objects. The best place to start getting creative is from the cutting board. This item has a fairly large, flat surface that lends itself well to sanding.
In the future, you can move on to more complex items, decorating bread bins, the fronts of cabinets and bedside tables, and boxes.
Images
Almost any theme can be embodied with the help of special decoupage napkins. Experienced craftswomen can make attractive crafts from ordinary kitchen napkins or even pieces of newspaper. Even your favorite photo can be used.
Glue
To start, you can use regular, slightly diluted PVA glue. In the future it is better to use special glue.
Dye
Paints are useful for tinting a design or creating a uniform surface structure. But the tree usually does not require special preparation.
The best option would be to use acrylic paints: they are easy to apply and do not bleed.
Varnish
A good clear varnish will finish off this lovely piece. In principle, you can even use ordinary furniture varnish. To give the effect of antiquity, a special craquelure varnish is used, which creates a patina effect on the surface.
Tassels
This tool will be needed for applying glue, varnish, gluing individual parts, completing lines and patterns. Therefore, thin, neat brushes No. 1, No. 2, and wide brushes are useful for applying a large number of paint and varnish layers.
Preparatory stage
Before you start decorating a wooden surface, it should be properly prepared for work. Typically, the decoupage technique is used to restore old wooden surfaces that need to be prepared for work. To do this, the workpiece is cleaned of dirt and dust using damp microfiber.
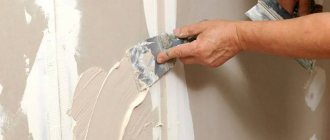
If there are cracks, irregularities and chips on the wooden surface, they need to be repaired with a special wood putty. Apply the primer to the surface of the wood using a spatula. When the putty dries, the wood needs to be treated with fine sandpaper.
After this, you need to prime the surface, dry it and sand it again. Afterwards, remove the working dust and begin gluing the paper image. If the wooden product that will be decorated using the decoupage technique is old, then the primer should be applied twice. This pre-treatment will make the wooden surface perfectly smooth and allow the paper decor to adhere firmly.
When the blank is prepared, you need to decide on the decor by choosing a suitable thematic image. You can use any napkins with a picture, the main thing is that the picture lies evenly during gluing. The easiest way for a beginner to work is with three-layer paper napkins, which have a certain paper quality.
Work technology
A step-by-step master class will help you cope with a new but exciting process.
Preparing the base
First you need to prepare the wood. The board must be cleaned of paint and varnish, sanded to a smooth surface and dried.
Defects in the form of cracks and chips will have to be carefully primed. The usual putty from a hardware store will do, which, after complete drying, is treated with sandpaper.
For better adhesion of surfaces, a regular primer is useful. After applying it, you will have to wait for the material to dry.
No wood painting required.
Preparing the image
Decoupage napkins do not require special preparation. They can be used entirely or individual elements can be cut out of them.
The kitchen napkin will require separating it into separate layers. But even in this case, you will have to buy or find thicker three-layer napkins: plain paper will not work, it will instantly become soggy from the glue.
To decorate objects, only the top layer with pictures is used.
Connecting materials
When all the materials are prepared, the most interesting work begins: connecting the two elements.
- Glue is applied to the board, an image is placed on it, and the folds are carefully smoothed out. Even if the image has spread in your hands, individual pieces can be returned to their place with virtually no damage to the product. The workpiece is left to dry.
- When the glue has completely hardened, the edges of the napkin are lightly coated with a paint of a suitable color that matches the shade of the wood. This is necessary so that the edges of the image are not too noticeable. If the napkin is quite transparent or you want to make obvious boundaries, do not apply paint and move on to the next stage. If coloring is still necessary, then apply the paint with light, neat strokes. The transition between paint and pattern should be as invisible as possible.
- When the paint is completely dry, the almost finished product is coated with a layer of varnish. Not just one! Ideally, about eight layers are applied, but five can be done, especially if the decorated surface will not be exposed to water. Each layer will require careful drying.
A charming little thing with your own hands is ready.
Napkins, paper
For decoupage, napkins and paper with a printed pattern are used. They are glued to the surface and covered with varnish. There are the following types of materials for this type of decor:
- Napkins. Most often they are three-layered - the bottom two are not used. The design is applied to the top layer. It is separated and used during work. You need to know how to work with napkins, as they are very thin, stretch, bubble, and tear. In general, you need a certain skill in work. Napkin decoupage for beginners is not always easy. The average price is 12-18 rubles per pack.
Napkins for decoupage are soft and thin, you need to work with them carefully - Decoupage card on rice paper. The design is applied to a canvas made of rice or mulberry fibers. It is easier to work with because it is more elastic, stretches better, and does not deform when working with compounds containing water. There are different sizes (up to A4 format and larger) and density, the cost of one card is from 70 rubles.
- Cards for decoupage on paper. Plain paper is used, on which drawings are applied. They are good when gluing on flat surfaces, as they practically do not stretch. It differs not only in size and patterns, but also in density. The cost of paper cards for decoupage is from 35 rubles. Paper decoupage cards - can be tried on flat surfaces
- Prints on photo paper. You can order a print of any unique image. It will be transferred to thin photographic paper, but to work with it, you need to know certain techniques.
In general, they also use special pastes to create three-dimensional images, ordinary photographs from which the bottom layer of paper has been removed, and other drawings. But it’s not easy to work with them, and this is not decoupage for beginners, but for those who are already developing their skills.
Small tips
Decoupage on wood is quite simple even for a novice needlewoman. And small life hacks will make this process even more enjoyable:
- Before gluing the pictures, you need to attach them to the surface and evaluate the resulting picture again.
- Careful application of the primer will not only ensure high-quality gluing of the two materials, but will also protect the wood from moisture contained in the paint and glue. In addition, a good primer will allow you to apply the paint without allowing it to bleed.
- The paint is applied in a thin, almost invisible layer. But you shouldn’t skimp on the varnish: each layer should be thin and even, but the number of layers is limited only by the common sense of the master.
- Each stage requires careful listening. Neglecting this rule will lead to unpleasant consequences, and the craft will lose its attractiveness.
- Carefully smoothing out wrinkles will help give your work a neat appearance.
- Caring for your tools will allow you to use them for a long time without spending extra money on new devices. Moreover, all procedures consist only of timely washing and drying of brushes and sponges.
You can decorate a wide variety of objects with your own hands, and you don’t have to stop only at pictures from the Internet; your own ideas will look much more attractive.
Original crafts can become not only an exquisite home decoration, but also a wonderful gift for any occasion.
Useful tips
Wooden surfaces decorated with decoupage fit harmoniously into any interior. Using different design methods, it’s easy to create unique interior items with your own hands.
A few useful tips will help you achieve better results:
- It is recommended to apply the glue with a soft brush to create an even layer,
- Gilding looks impressive to create “antique” products.
For uniform painting, work should be done on horizontal surfaces. For this reason, it is recommended that furniture pieces be dismantled and then reassembled.
Photo examples of decoupage on wood
Why do this?
Furniture is now simply an element of home furnishings. However, just a few decades ago, furniture was treated much better - it was taken care of and valued, since it was difficult to get something interesting and beautiful. And what were the chests of drawers made by the hands of my great-grandfather worth! They were passed on as real family heirlooms and preserved for children and grandchildren. Now, in most cases, such products are sent to a landfill, with rare exceptions they go to live in the country.
It’s quite possible to breathe new life into such a chest of drawers with the help of decoupage with napkins
But what if now you don’t make hasty decisions, don’t spend money, but, after spending a little of your time, restore some old cabinet? Moreover, in modern conditions, it is not difficult to get materials that can be used for this - craft stores can be found on every corner, and at home there are often some suitable means and tools. It is recommended to restore old furniture for the following purposes:
- receive an exclusive product;
- update the interior by decorating the furniture to a certain style;
- realize creative abilities;
- there is no opportunity to buy new products.
Napkin decoupage of furniture - photo
One of the most popular techniques for bringing old furniture back to life is decoupage . This is a fairly simple method, having studied and mastered it, you can turn any element of the decor into something original, unique, and striking in its beauty.
Decoupage furniture with napkins looks really beautiful
How to correct shortcomings
If the product consists of several small parts that are combined into a single composition, then the edges of the fragments need to be straightened with your fingers or a thin brush. If it is noticed that in some places there is some kind of heterogeneity, then this can be corrected with the help of paints and different shades.
If the surface is still a little damp, then the details can also be drawn with a thin brush and paints - some details can be highlighted with additional colors to make them clearer.
After this, the boundaries of the finished item are drawn up. There are several methods here too. In some cases, they prefer to get rid of the edges by cutting them off, sometimes you can paint the sides, and in some cases the edges of the napkin are folded. There are a lot of techniques here depending on what a person is working with.
Finally, the product is left to dry: if you want to speed up the process, you can use a hair dryer (only at a distance so that the parts do not move).
