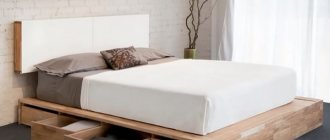
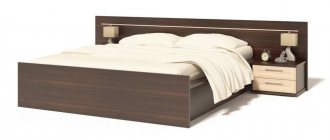
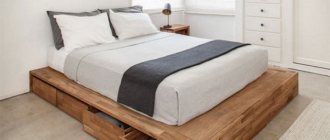
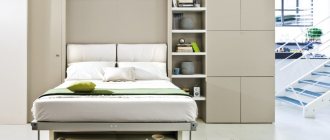
DIY single bed photo
Twin beds are kind of the next step up for a baby after a crib, and are also a great option for a small room like a dorm or guest room. In general, if you need instructions on how to make a single bed with your own hands , we suggest you consider the 10 simple projects that we have collected in this article. Either option is great for a home project. Here you will find drawings of a single bed made of wood , step-by-step photos and links to instructions. Moreover, there is no such thing as a typical DIY bed frame. You can change the style, design, wood type, and finish color, so no matter what you choose from the options available, your project will be unique.
Types of single bed designs
A single bed is a versatile and compact sleeping option. They are usually used in small spaces or children's rooms. Its main advantage is that it does not take up much space. Plus, the bed may have a lifting mechanism or drawers that will allow you to use the space under it for things.
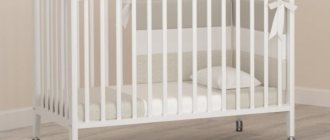
There are also transformable beds. Such structures can be folded, which also frees up space in the room. There are a great many types of single beds. For example, cribs. They are selected primarily based on the age of the child. If he is just getting used to sleeping alone, then it is better to pay attention to low cribs with sides on the sides.
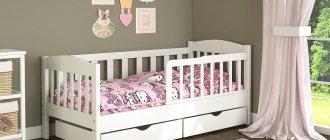
A bed with a side will look interesting in the room.
Such models are made of wood so that the baby does not get injured on metal slats or corners. For older children, you can already consider options without sides. It is better to stick to the same wooden design, since even older children are very active and love to play in their room, and a metal product will be more dangerous.
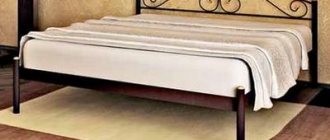
Metal beds are quite dangerous.
There are the following types of single beds for adults:
- Standard version with headboard.
- Sofa-Ottoman is a low bed that can be supplemented with armrests or a backrest.
- Transformer is a multifunctional model that combines a bed with a table or wardrobe).
- Retractable. It is placed on a podium and installed only in rooms with high ceilings.
- Folding. Fixed in the wall.
Today there are many types of beds.
Each type is selected taking into account the size of the room and the style of the room. The standard version or Ottoman can be placed almost anywhere, but the folding version is ideal for narrow but long rooms. If we consider the style of the room, then the type of bed can be any, but its design or decoration needs to be given special attention.
Construction device
Furniture assembly, like construction, begins with the development of drawings.
They can be made competently if you have knowledge of how to make a bed of a simple design. The first thing you need to decide on is the parameters of the bed. The design is based on standard sizes or individual ones, commensurate with the height of the owners. You also need to take into account the interior of the room where you plan to install the piece of furniture. The design of the bed should support the overall concept of the chosen style of the room.
The standard design device includes the following elements:
- frame (transverse strips are connected to longitudinal drawers);
- supports (base for lamellas);
- legs;
- stiffening ribs (lamellas).
The bed can also be supplemented with a headboard, backrest, drawers or stationary drawers for bed linen and other decorative elements. These details are optional, but they add aesthetics and functionality to the product.
Reference! The standard sleeping area for a single design is 90x200 cm, for a double - 170x210 cm.
What tools will you need to make your own?
Once you have decided on the bed you want to make, you need to prepare all the necessary tools. The standard set you will need consists of:
- circular saw;
- measuring tapes;
- screwdriver;
- adhesive solution;
- drill;
- grinding machine;
- adjustable square;
- hammer;
- screwdrivers.
Use quality tools to assemble furniture.
These are the things you can’t do without when assembling a bed yourself. Other tools may be required, for example, if you decide to work with metal products. You will need a welding machine, grinder, sandpaper, etc.
You must have the necessary tools for the job.
Preparing bed parts for assembly
The necessary elements can be ordered at any company that sells and cuts chipboard. You can cut out the parts yourself on a milling machine. There should be no cracks or damage on wood elements made by yourself. The surfaces of the boards must be carefully planed and sanded.
It is necessary to mark the materials for further sawing. The lines are drawn with a pencil. If there are identical parts, a template is made according to which they are cut out. After cutting, it is necessary to sand the surfaces using sandpaper or a grinding machine.
The wood must be carefully processed, corners rounded and varnished. If chipboards are used in the work, then a special furniture edge is attached to the ends, giving a finished look to the elements. The edge is applied to the end and ironed along the entire length with a heated iron, then the material is pressed with a dry cloth. The protruding excess plastic is cut off with a knife, and the edges are sanded with sandpaper.
Which material to choose
If this is your first experience in assembling furniture, then we recommend starting with wooden products. They are easier to work with and do not require special skills.
Chipboard is one of the most popular materials for furniture.
Wood materials come in different varieties. You can make a bed from chipboard or natural wood. The latter will be more expensive, but better quality. It is impossible to say that chipboard is a very fragile material. Most of the furniture we buy in stores is made from it.
The easiest way to assemble a bed is to use chipboard.
Natural wood benefits with its appearance; it does not need to be repainted; the natural color will fit well into almost any style. It is also worth giving preference to natural wood if you are making children's furniture. This product is environmentally friendly and will definitely not cause an allergic reaction.
Wood for furniture must be specially prepared.
Plus, this material is considered to be of higher quality and stronger, and for children who like to jump on beds and toss and turn, this option is ideal.
Benefits of using wood
When making a bed, different materials can be used: metal profile, figured forged iron, polymer composite and other options. But wood is considered the most popular and presentable.
The popularity of wooden beds is explained by the following advantageous characteristics:
• environmental friendliness, safety for human health;
• natural wood ennobles the interior and brings freshness to it;
• wood always remains in trend;
• the material is easy to process, it is not difficult to care for it during the operation of the product;
• wood fits perfectly into an interior decorated in almost any style, ennobles it, and makes it presentable;
• to work with the material you will need a small set of tools, which are quite easy to operate.
The procedure for making a bed yourself
If you decide to make a single bed with your own hands, then do it sequentially. You can’t just buy several boards and connect them together.
You can draw a sketch of the bed in a special program.
To make high-quality furniture, you will need to complete drawings and diagrams, calculate the dimensions of the bed, and think about additional elements in the form of a headboard or armrests, even before assembly.
Drawing up drawings and diagrams
A drawing is one of the key things when preparing to assemble a bed. The final result will depend on how accurately and correctly the diagram is executed. Not one, even a professional craftsman with extensive experience, does not work without a drawing.
In order to draw a diagram, you need to make several segments on a sheet of paper that will be equal to the width, length and height of the product. At the same time, you need to take into account the size of your room so that you understand how much final space is left on all sides. The dimensions of each part are calculated and drawn separately.
An example of a bed can be found on the Internet.
Also, a solution can be a ready-made drawing, which can be found in books or on the Internet. All the details are already indicated there; all you have to do is adjust the dimensions to those that fit the room.
Frame
One of the most important parts in a bed is the frame. It is a box that acts as the base of the bed.
Bed sides can also be made from pallets.
In the simplest assembly, it consists of four sides, which are pulled together by a beam for more reliable fastening. The sides of the frame can be narrow if the bed is on legs or wide if legs are not provided in the project.
Use a quality bed mechanism.
Headboard
It is not necessary to install a headboard on the bed, but it adds coziness and the furniture with it looks more aesthetically pleasing.
Refer to the instructions when assembling the bed.
The headboard is made of the same material as the bed frame, and the top can be covered with soft material, painted or installed with decorative tools. You can also make shelves or drawers on it.
Installation of lamellas
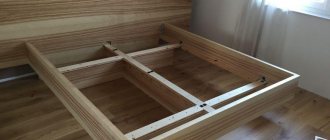
The slats represent the frame on which the mattress will be placed in the future. The structure consists of a base (usually metal) and wooden slats. Their installation into the finished product is very easy; just place the slats in the box.
Assembling the slats is not difficult, but you need to do it carefully.
You can also assemble this part yourself. The slats are necessary to ensure that the load is distributed correctly across the mattress. In this case, it will serve you for a longer time.
Manufacturing and installation of legs
The legs can be made of metal or wood. They are installed on the box after it is assembled. It is necessary to correctly calculate the weight of the bed, taking into account the weight of the person, and based on this, select the legs according to size.
Use quality tools to assemble the bed.
They can be made from wood or metal. In the first and second cases, the part will require grinding and processing.
Required Tools
Depending on the material chosen, certain tools will be required to work with it.
For working with metal
- Electric welding machine.
- Bulgarian.
- File.
- Metal brush.
- Electric drill.
- Roulette.
For working with wood
- Jigsaw. If the product is made of boards, you can get by with a hacksaw.
- Screwdriver.
- Electric drill.
- Roulette.
- Construction corner.
- Pencil.
- Plane.
- Chisel.
- Grinder machine.
As for consumables, we’ll talk about this separately when considering this or that model.
How to make a single bed at home - step by step tutorials
Read the brief instructions on how to assemble a bed at home step by step:
- First, assemble the main parts - the box, the headboard.
- Determine how the bed legs will be positioned. If, according to your design, they are attached to the headboard and to the side, which is located on the side of the legs, then make these walls taking into account the fact that they will become a support for the bed.
- The next step is to install the slats. Do it yourself, or buy a ready-made version of the slatted base in the store.
- After these steps, your bed is ready for use. You can start decorating the product.
Follow strictly the steps described below.
Remember that if the boards need to be painted or sheathed, this must be done before you join them together.
How to make a bed from plywood or pallets
You can even build a bed from plywood that was left over from an old wardrobe. The main thing is that you have enough materials for the entire structure. The manufacturing method will not be any different, at the same time, you significantly save money and give the furniture a second life.
You can assemble a bed from available materials.
You can also find original versions of furniture made from pallets. Tables, benches, chairs, including single beds are made from them. The pallets consist of several boards and can be easily disassembled if necessary.
Ready-made examples made at home
The Internet is replete with pictures of ready-made options for single beds. When making it at home, you can take any example you like and follow it.
At the same time, you have the opportunity to remove what is unnecessary, and vice versa, add something of your own. Assembling a bed yourself gives you the opportunity to recreate your personal idea and approach the renovation with a personal touch.
If you have carpentry skills, making a wooden bed with your own hands is not such a problem.
Veneered plywood
Tips and drawings for making a standard single bed
A single bed is needed not only for older children; such furniture should always be available to accommodate guests or relatives. Unfortunately, today companies do not pay enough attention to this furniture; in stores you can often find double or children's beds; their range is quite wide and allows you to choose the optimal model. If you are lucky enough to find single models, then the assortment, to put it mildly, leaves much to be desired. In addition, the price of such beds is not much different from the price of double beds, and this is expensive for buyers.
We suggest making the bed yourself, the material used is pine boards. We assure you that the cost of the product will be minimal, you won’t have to spend much time, and you can be proud of the results of your work. In addition to lumber, you will need a set of electrical tools, if you have a universal household woodworking machine - great, you can make beds not only for yourself, but also for your friends. The presence of a machine significantly increases labor productivity, parts have improved quality. Even minor carpentry skills will allow you to achieve quality no worse than industrial designs.
The article contains a complete set of drawings, but we will additionally describe some of the most complex operations, we hope that this will help beginners understand all the nuances of manufacturing. One more note - you should not change these dimensions, this will only make the manufacturing process more complicated and time-consuming. If you really want to feel like a furniture designer, then direct your talents to additional decorative elements. You can make them yourself, or you can purchase ready-made profiles in specialized stores. All elements are made of boards 25 millimeters thick; slats of the same thickness are placed under the mattress.
| Single bed |
Selection of lumber
When creating any furniture, lumber must be carefully sorted. The boards should be free of cracks, blue stains, visible disease damage and natural defects in the development of wood. Such areas should be discarded without regret, especially since you can always use them during the manufacture of other, less important products. The surfaces of the boards need to be planed; you can use an electric planer. You must be prepared that after planing you will have to sand the surface with sanding machines. The type of machine does not make much difference. But the best results are produced by tape ones. Why not do without grinding? The fact is that it is very difficult to achieve a perfectly clean surface when working with an electric planer (and for furniture, this is the only way to process parts); stripes almost always remain after each pass of the tool.
| dimensions |
Making bed parts
Start making a bed from the sides, these are the simplest elements, while working with them you will be able to “train” your hand for more complex elements. The dimensions of the sidewalls are in the drawing; we will remind you that it is imperative to chamfer the front side. This operation can also be performed with an electric planer; the quality of the chamfer will be good under one condition - never plan across the grain, move the tool only along the grain. In total, you will need two sidewalls; all additional elements and mounting holes must be made in a mirror image.
| Sidewall |
| Bed side |
In addition to the sides, the bed consists of a back and footboard; these parts are more complex to manufacture. For the headboard, the top board of the backrest must be made profile, the top must be arched. You can draw an arc using an ordinary rope. Measure approximately the required radius, secure one end with a nail at the calculated distance, attach a pencil to the other end and draw an arc. You need to cut out the outline with an electric jigsaw; you can correct the cutting area and give it a beautiful shape using a hand router.
| Headboard |
| Foothills |
| Headboard assembly diagram |
Use wooden dowels to connect the back parts to the legs. They are sometimes called small dowels or large dowels. The diameter of the dowels must be at least ten millimeters, they must be installed with tension and always with wood glue. The legs at the joints have through holes, to hide them, attach decorative strips to them, use dowels and wood glue to fix them. To ensure that the holes are strictly coaxial, drill them in the parts at the same time - clamp the individual elements with clamps, check the location of the holes and drill holes in all the parts at once. If for some reason you begin to doubt the reliability of the fasteners, you can additionally use self-tapping screws; there is no need to do anything with the heads, they will still be hidden under the decorative trim.
| Drilling holes |
Bed assembly
The sides of the bed are attached to the headboard and footboard with self-tapping screws, we left the joints open, but you can recess the heads and putty them or cover these places with various decorative elements. It was stated above that a lot of time was not specifically devoted to decorating in the hope that you yourself would like to feel like a professional designer.
| Bed assembly diagram |
Wooden blocks need to be attached to the sides on the inside, on which the mattress slats will rest. The dimensions of the bars do not matter, the main thing is that they are placed at the same level on two sidewalls. Screw the bars with self-tapping screws. Quite often, during the use of the bed, the slats under the mattress begin to “move” and the mattress sinks in some places. To avoid this unpleasant phenomenon, nail pieces of slats to the bars, the distance between them should be equal to the width of the slats. After assembly, check the stability of the structure again, do not allow even slight wobbles. If any are found, look for the cause and additionally fix unreliable nodes.
| Assembled frame |
For finishing we recommend using clear varnish. If your existing furniture has dark shades, pre-coat the boards with one or more layers of alcohol-based stain.
← Do-it-yourself wooden table for high school students and students - a complete set of drawings Computer desk made of glued sanded plywood - manufacturing tips and drawings →
We recommend watching:
Plywood FSF | 21mm | 1500 mm x 3000 mm | birch | grade 3/4 | Ш1
RUB 7,430
Plywood FSF | 40mm | 1500 mm x 3000 mm | birch | construction | NS
RUB 11,100
Plywood FC | 9mm | 1520 mm x 1520 mm | birch | grade 2/3 | Ш2
RUB 1,500
Plywood FC | 12mm | 1520 mm x 1520 mm | birch | grade 2/3 | Ш2
RUB 1,800
Plywood FSF | 30mm | 1525 mm x 3050 mm | birch | grade 3/4 | Ш1
RUB 3,500
Plywood FSF | 15mm | 1500 mm x 3000 mm | birch | grade 2/3 | Ш2
RUB 7,080
Plywood FSF | 27mm | 1500 mm x 3000 mm | birch | construction | NS
RUB 7,800
Plywood NEEDLES | 21mm | 1220 mm x 2440 mm | coniferous | grade 2/3 | NSH(PRICE ON REQUEST)
RUB 3,100
Plywood FSF | 15mm | 1500 mm x 3000 mm | birch | grade 4/4 | NS
RUB 4,960
Plywood FSF | 12mm | 1220 mm x 2440 mm | birch | grade 3/4 | Ш2
RUB 2,850
Plywood FSF | 18mm | 1220 mm x 2440 mm | birch | construction | NS
RUB 2,800
Veneered Plywood Ordinary Ash
RUB 1,285
Plywood FC | 18mm | 1520 mm x 1520 mm | birch | grade 3/4 | Ш2
RUB 2,400
LAMINATED PLYWOOD FOF (CHINA) | 18mm | 1220 mm x 2440 mm | birch
RUB 3,200
Plywood FC | 9mm | 1520 mm x 1520 mm | birch | construction | NS
850 rub.
Plywood FC | 12mm | 1520 mm x 1520 mm | birch | construction | NS
RUB 1,050
Plywood LAMINATED FOF | 12mm | 1220 mm x 2440 mm | birch
RUB 2,600 RUB 2,700
Plywood FSF | 18mm | 1220 mm x 2440 mm | birch | grade 3/4 | Ш2
4,000 rub.
Plywood NEEDLES | 15mm | 1220 mm x 2440 mm | coniferous | grade SM | NSH(PRICE ON REQUEST)
RUB 1,750
Plywood LAMINATED FOF | 9mm | 1500 mm x 3000 mm | birch
RUB 5,500
We also recommend reading
04.09.2015 → Beds, sofas
Do-it-yourself wooden couch - manufacturing technology and a complete set of drawings
This piece of furniture can hardly be classified as very “fashionable”, but the advantages of the couch still make it indispensable for country houses, verandas or gazebos. The main advantage is ease of manufacture and ease of use.
08.11.2015 → Beds, sofas
Cot for children with a pull-out mattress on wheels
We will tell you how to make your own simple and comfortable crib with a pull-out mattress. You will need some material, skill and patience. The cost of the bed is much lower than the prices existing in stores.
11/10/2015 → Beds, sofas
How to make your own children's bed from boards
The opportunity to please an entire child with a bed made by himself is a great success for all young parents. We will teach you how to make a bed from boards for children from four years old, there are drawings with dimensions.
11/14/2015 → Beds, sofas
Comfortable bed made of sheet plywood
For many of us, it is not always convenient to buy a bed in a store - either the style does not suit, or the price is too high. For those who know how to hold a hammer in their hands, we will tell you how you can make a bed yourself from sheets of plywood.
Comments
- Konstantin 09/17/2016, 12:37
Wonderful, thank you very much for publishing this material!!! Just what I was looking for. I hate upholstered furniture - a collector of dust, for which they also demand exorbitant prices... and besides, this exaggerated style is completely alien to me. And most importantly, I feel more comfortable sitting/lying on something solid.


