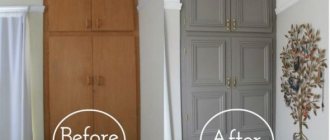
Over time, any furniture ceases to be liked and becomes boring to look at, even if it remains durable and copes with its functional responsibilities perfectly. Sometimes it simply stops matching the interior. This most often happens with cabinets and wardrobes - it seems to be strong and lasts a long time, but the appearance is no longer pleasing. The appearance of cracks and faded paint make it unattractive, it goes out of fashion and looks out of date. The closet seems tasteless and bulky and gets in your way. And yet, how can you update a Soviet wardrobe? There are at least two solutions to this situation:
- Buy a new wardrobe;
- Update an existing one.
Now furniture showrooms offer a huge selection of all kinds of wardrobes, wardrobes, chests of drawers, racks, hanging shelves, multifunctional drawers for clothes and personal items. But, if for some reason, you consider searching for a new cabinet to be inappropriate. Or you decide to plunge into the creative process, then with the help of the following techniques you will learn: how to update a Soviet wardrobe with your own hands beyond recognition. And, as a result, you will receive a completely exclusive sample, thereby giving the room a unique style.
An old table can still serve! 7 ways to restore an old table that will save your budget!
With your own hands you can give a Soviet wardrobe a new life, turn it into a unique one-piece piece, while saving a large amount of money.
What you need to decorate a closet - the most affordable and interesting decoration methods
Restoring a cabinet is a truly long and painstaking process. You can carry out all the work yourself; many people have old furniture that adds coziness to the house. Refurbished furniture can last for many more years, and it looks even better.
Restoring furniture with your own hands is a fascinating process that you may even enjoy. You can even find everything you need in your toolbox. You can transform your closet in a variety of available ways, for example, by applying a variety of patterns, using stickers, and so on.
How to prepare an old cabinet for decoration
Before you begin restoration, you must carefully inspect the furniture in order to determine the tone of the furniture as accurately as possible. Restoring a cabinet is quite a labor-intensive task. Doing work at home has a lot of positive aspects. First of all, this piece of furniture is quite difficult to transport. Doing the process yourself will allow you to make changes at any stage of the work. Carrying out the work yourself will have a positive impact on the budget.
Main stages of work
To restore an old chipboard or solid wood cabinet, it is important to do the work in stages. The master will have to take the following steps:
- Preliminary determination of the final furniture style. Here you need to look around, evaluate the color scheme of the room. Understand her general style. After all, as a result, the furniture should fit into the overall interior.
- Dismantling an old cabinet. It is necessary if the doors do not fit tightly or sag. In addition, you will have to disassemble the furniture in order to change the drawer pull-out mechanisms and check the fastenings of the shelves. If necessary, change them too. In general, disassembly means removing all moving parts.
- Minor repairs. At this stage, all elements of the cabinet need to be washed and cleaned of dirt, soot, and dust. It is important to take the old fittings and go with it to the store to purchase new ones. Be sure to stick to the style you choose for your new cabinet.
Tip: to ensure that the sliding mechanisms are purchased correctly, measure the depth of the drawers in advance.
As soon as the most difficult stages of repair are completed, you can begin decorating.
Painting polished furniture
Painting furniture can really make a big difference in the appearance of a piece of furniture. However, before you begin the dyeing process, you should know some nuances.
Before you begin the staining process, you need to prepare the cabinet. Initially, all things are taken out of it and the fittings are removed. The surface is cleaned of dirt and degreased. The next step is to remove the old layer of varnish using a special scraper. The surface is then primed and sanded, after which the painting process can begin.
Materials and tools
The first thing you need to start with is choosing a coating, that is, paint. The quality and appearance of the work performed depends on the correctness of this choice. In order to repaint polished furniture, the paint must meet the following parameters:
- Water resistance of the coating
- Resistance to mechanical damage.
Depending on the desired result, you can choose glossy, matte or translucent paint. If the cabinet is quite old, then it is best to give preference to thick paint and apply it with a roller. If you want to repaint the cabinet white, then it is recommended to choose translucent paint.
Painting process
Painting a varnished surface is not difficult. The process does not take much time or financial investment. Painting should begin from the internal shelves and recesses. Various shelves and drawers should be painted separately. If a person is painting furniture for the first time in his life, it is recommended to do it with a roller in order to distribute the paint more evenly.
Once all the internal parts have been painted, you can move on to the outside. Apply the paint slowly and carefully to avoid drips. After the first coat of paint has dried, you can apply the next one. When the cabinet is completely dry, you can assemble the structure.
For your information. In order for the paint layer to lay down evenly and thinly, it is recommended to use a spray bottle, but it can only be used outdoors.
What materials can be used?
In addition to the self-adhesive film mentioned above, which remains the most popular and convenient material to work with, other materials can be used. Suitable for these purposes:
- ordinary wallpaper (you can choose either paper or non-woven wallpaper, but vinyl is best);
- photo wallpaper;
- stickers;
- stencils.
If we are talking about front surfaces that are often touched by hands, then it is better to use vinyl or non-woven materials: they are easy to wash, they are denser, and paper ones will quickly become unusable.
Aging furniture
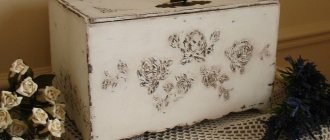
This method of furniture design has been especially popular over the past few years. In this case, to complete the interior idea, you may need to age the cabinet. You can do this yourself, armed with water-based paints, varnish, sandpaper, brushes and acrylic paints. Aging gives furniture a sophisticated look. With a little practice, you can create an intricate pattern on the cabinet.
Antiquity in noble craquelure
Create with your own hands an antique rarity from a cabinet with a beautiful gilded texture, consisting of many small and deep cracks, “testifying” to the venerable age of the item.
Craquelure is a painting method in which the base layer of paint, enamel or putty cracks.
To create a “magic potion” you will need:
- Two-phase craquelure varnish;
- Transparent acrylic varnish with a matte texture;
- “Golden” powder as a grout (powder made from non-ferrous metals crushed to a finely dispersed state - bronze, aluminum, copper);
- Grout sponge.
To ensure that the paint becomes cracked, the surface is first coated with craquelure varnish.
Sequencing.
- Apply the first phase of craquelure varnish. Wait until it dries to a thick sticky consistency.
- Apply and dry the second phase in the same way.
- Use a sponge to rub the “golden” powder into the cracks that have formed.
- Apply a final coat of matte varnish and dry thoroughly.
A cabinet aged using the craquelure technique will look like an expensive antique.
ON A NOTE! Instead of powder, a special composition for patination and bitumen wax, “dry” pastel are suitable. The longer the craquelure layer dries, the deeper the cracks appear on the surface of the furniture.
Photo printing and photo wallpaper
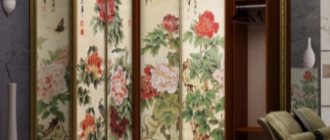
You can completely transform your closet using photographs or wallpaper. In the case of photographs, they must be prepared in advance by printing them in a printing house. Using photo wallpaper is a budget option. For gluing, starch-based glue is used to make it easier to replace the picture in the future.
Criteria for choosing self-adhesive film
Before choosing film for a cabinet, you need to know what it consists of and what criteria to choose. The film has 3 layers:
- upper;
- with adhesive base;
- protective.
All layers play their role. The very first one is made from:
- Vinyl, PVC or polyester are the most durable materials, the use of which allows you to glue the film to the front sides of the cabinet and are not afraid of damage.
- Staniol is a material that is susceptible to damage, so gluing should be done on the surface of hanging cabinets.
- Paper is a fragile material, easily damaged, it is best used for pasting the end sides of racks.
The film can be single-layer or double-layer. Single-layer is more durable, formed into rolls. Two-layer is made of a base and a top layer, but is less durable.
When buying self-adhesive film, you need to take into account the moment on the surface of which furniture it will be used. If it is in the kitchen, where it is constantly exposed to temperature changes, or in a children's room, where there is always a threat of spoilage, a protective layer is needed. The protective layer has:
- moisture resistance;
- protects against ultraviolet radiation;
- thermally stable.
Cheap options do not contain a protective surface.
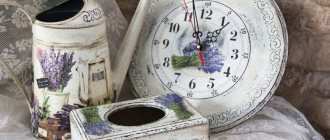
Decoupage
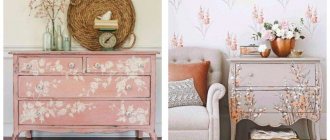
Another interesting option for transforming furniture. For implementation, you should prepare napkins and acrylic paints. You will also need PVA glue, as well as several convenient brushes. The method looks quite beautiful and you can change the style at any appropriate time.
Classical
This method involves gluing a specific picture or coating the surface with varnish. However, before starting the actual process, the cabinet requires preparation. The preparation stages are no different from preparation for coloring.
Reverse decoupage
This method is perfect for transforming transparent furniture. In this case, reverse decoupage is suitable for glass doors. The drawing is applied on the reverse side.
Decopatch
To implement this method, you need to spend a lot of time. However, the result of such manipulations is truly wonderful. Using various elements, entire compositions are assembled.
Video description
The video shows how to apply large posters to wardrobe doors:
Method three - stained glass
It is easy to remove the doors and replace them with stained glass windows made in specialized workshops. Only wealthy people can do this. But even here, if you wish, it is not difficult to save money by choosing translucent stained glass film instead of stained glass finishing. It is also allowed to be used if the doors have a mirror surface.
Bright stained glass film for a closet in the living room Source maksdecor.ru
The film has a translucent base. It lets light through. It is reflected from the mirror and comes back. In this way, a glow effect is formed, similar to the reflection of colored glass. The film is applied in the same way as a vinyl sticker. The following photo allows you to evaluate the result.
Bright stained glass films Source i.ytimg.com

