It would seem that today there is no difficulty in replacing old furniture with new ones. Stores offer a huge selection of ready-made headsets of varying prices, and if you don’t have the model you need, you can always make an individual order in a special studio. But it also happens that you don’t want to get rid of old furniture - it fits in size, design, and is a favorite element of the decor. It's just that her appearance has become worn out. Then you should think about how to repaint your kitchen furniture.
Painting furniture white
Why paint the kitchen furniture
First of all, updating the shade of furniture facades helps to bring something special and unique into the interior. The most beautiful samples displayed in the windows of furniture stores often evoke a feeling of annoyance: everyone can buy exactly the same set, that is, there is no individuality or zest in it.
No matter how hard the owners try to achieve a pre-planned result in the process of repainting existing furniture, in reality it always turns out a little wrong. But that’s the beauty of creativity. Sometimes the result exceeds expectations, and sometimes it differs dramatically from plans, but you still like it.
There are also more significant advantages to a creative approach to kitchen renovation:
- radical transformation of the interior with a minimum of financial investments (you just need to buy paint);
- the entire amount of work can be done alone, without attracting anyone to help, but nothing prevents you from involving all family members in the process, thereby giving everyone a chance to feel like a creator;
- the scope for realizing your most daring ideas is unlimited - from minimalism to French Provence or Rococo, because you can not only paint it one color, but also apply an ornament, glue tiles, and add zest using the decoupage technique.
Changing an old boring color to a new one - what could be easier
? There are no restrictions on the type of material from which kitchen facades are made. For any surface, you can, if desired, find the appropriate paint. The main thing is to choose a suitable beautiful color.
Preparatory stage
Before painting, you must empty the set of all items that are in it. Then it must be washed thoroughly. After this, you can start removing the paint.
However, it is much more convenient to disassemble the furniture. Firstly, this makes it easier to clean the old paint layer. Secondly, this allows you to take individual parts (for example, the facade) outside the apartment and work with them in the fresh air. After all, a lot of dirt is formed during paint removal. And during painting you can be poisoned by fumes. Thirdly, it is more convenient to paint the internal surfaces of the headset. Finally, disassembly allows you to avoid painting the hardware, which is completely unnecessary.
So, the kitchen is dismantled. Now you need to clean it of the old paintwork. To do this, use medium-grit sandpaper. If possible, you can treat the surface with a grinder. This will significantly speed up the process. It is also facilitated by the use of special compositions for removing paintwork.
Painting furniture yourself: advantages
The undoubted advantage is that as a result the master receives a set of the very shade that he has long wanted. With all the diversity in the assortment of furniture stores, sometimes the desired shade is not available and it is impossible to buy it. The color for repainting a cabinet using the RAL palette can be selected with mathematical precision.
The maximum task is completed - the shade is chosen exactly
The second important advantage is the acquisition of invaluable experience. Most often, performers do not stop at one successful experiment, due to its low cost. In the future, nothing prevents you from updating the furniture at the dacha and in other rooms.
When is restoration necessary?
As a result of use and physical wear, the kitchen set develops external and functional defects.
The following signs of wear may be the reason for restoration:
- The facing lags behind the base.
- The varnish coating of the headset becomes dull, wears off or cracks. Spots appear on it.
- Metal fittings wear out and break.
- As a result of use, dents, chips, cracks, scratches, stains from water, chemicals, and hot objects appear on the surface of furniture in the kitchen.
- The legs of the set and chairs break.
- The upholstery on the chairs is worn out and torn.
In case of such damage, it is possible to restore furniture if it is made of high-quality materials.
Choice of colors
Before you repaint your kitchen set with your own hands, you need to choose a specific shade. This is usually done in conjunction with general renovation of the premises. It is important to end up with a harmonious combination that won’t hurt your eyes or nerves.
To complement the neutral shades of walls, floors and ceilings, you can choose juicy and bright colors of furniture facades. Conversely, against the background of brightly colored walls, the furniture should be of a neutral tone.
Designers recommend limiting yourself to a laconic combination of no more than 3-4 colors, harmoniously distributing them across all planes. One shade is predominant (up to 60% of the space is given to it), the second is auxiliary (up to 30% of surfaces), the third or fourth account for only 5-10% each and they serve as decoration.
Depending on the layout and area of the room, the predominant color can be painted on furniture, walls, floor or ceiling (one or the other). The remaining surfaces will share two more dominant shades. The result is a balanced interior design that gives a pleasant feeling of satisfaction at a job well done.
When debates about choosing the right glossy or matte shade lead to a dead end, it makes sense to invite a professional designer. The specialist will take into account all the parameters of the kitchen: ceiling height and floor area, the size of the windows and their direction, the area of the kitchen facades and the existing color of the walls, floor and ceiling. The selected options will give valuable hints on how to make the kitchen cozy and stylish.
Water-based emulsion, silicone or alkyd?
The final result of your work will depend not only on how you handle the roller, but also on the type and quality of paint.
So, let's figure out what “water emulsions”, enamels and “silicones” are.
Water-based
It is water-dispersed - perhaps the best option for the kitchen, which is very popular.
Advantages:
- practically odorless, harmless, easily washed off hands and tools;
- easy to apply with a uniform, indelible layer;
- dries quite quickly (a couple of hours is enough);
- the solvent is ordinary water, and not some smelly and harmful chemicals;
- ideal in terms of price-quality-ease of use;
- a huge range of color solutions: the entire “water emulsion” is sold in white, to which, after you select the desired shade, a dye (pigment) is added and a special machine mixes the final color right in front of you.
The only drawback is that water-based paint must be applied to a completely dry wall. Because of this nuance, repair times may suffer.
There are two types of water emulsions:
- Acrylics - make up 65% of the range of water-dispersion paints, are universal, and are represented on the market by a large number of manufacturers;
- Latex analogues are more wear-resistant and durable than acrylic ones, but have lower vapor permeability, that is, they can “accumulate” moisture. Most often, this type is used for painting non-residential premises, and sometimes for exterior decoration.
Alkyd paints
Despite its less popularity, this type is quite often used for painting indoor walls.
Advantages:
- have a high level of wear resistance, elasticity and strength (in comparison with “water emulsion”);
- are not afraid of changes in temperature, humidity, or direct contact with water;
- As a rule, they have a more saturated, rich color.
The downside is that:
- alkyd base, which has a persistent pungent odor and is fire hazardous;
- diluted with white spirit;
- Such paints are sold in a specific color, so you are limited in the choice of undertones.
All alkyd paints are divided into two types depending on the type of base:
- pentaphthalic (marked on jars as PF);
- glyphthalic (GF marking).
In addition to the letter designation of the type of base, the cans are marked with a digital marking that indicates the category of enamel.
For example, the GF-230 marking means that this enamel is glyptal-based, the number “2” means that it is intended only for coatings inside the house (walls, ceilings), 30 is the manufacturer’s catalog number.
If the first number in the marking is “0”, then it is an alkyd primer.
Silicone
They appeared on our market relatively recently and have already firmly occupied their niche, thanks to the following properties:
- excellent water resistance;
- the best indicators of resistance to ultraviolet radiation, fading, and chalking;
- resistance to alkalis, which allows them to be applied to a wall that was plastered only a couple of days ago;
- practically odorless and absolutely non-aggressive;
- like water-based analogues, pigmentation of any shade is possible.
Of the shortcomings, we can name only one - the high price.
But, no wonder, all the qualities they possess make this product worth the money.
There are cheap “analogues” of silicone paints, which are called “siliconized”.
They are a composite, a mixture of silicone and acrylic bases. Here are a couple of examples.
This has a positive effect on the price of such a product, but has a detrimental effect on its quality.
Therefore, we recommend that you definitely clarify this point in the store, especially if some model stands out in price among others.
Selection of paints and varnishes
Suitable paint for a kitchen set is not water-based, not oil-based or acrylic enamel. These compounds are usually used to paint only wooden surfaces. But for the kitchen it is best to choose a transparent waterproof varnish, even for solid wood. Conventional paints do not adhere well to the surface of chipboard and MDF; they literally roll off it and there is no way to overcome this flaw. Primer won't help either. In the future, the applied layer will crack, and achieving the desired color is even more difficult.
This is what acrylic paint looks like on chipboard
You need to be a real professional painter to use a simple brush to achieve an even application of oil paint without unsightly streaks and drips visible to the naked eye. But this is not the only problem for a novice master. Many difficulties arise during the subsequent operation of the repainted set. Oil paint is washed off with ordinary household detergents along with splashes of grease and dirt, leaving unsightly bald spots. Acrylic compounds behave in exactly the same way.
The palette of shades of automotive enamels cans is practically unlimited
Alkyd paints are best suited for painting smooth kitchen facades. They can be purchased in the same stores that sell everything for cars. The dried layer can be washed in the future - it does not wash off. Automotive enamel is even better suited not in a jar, but in a can because:
- does not suffer from any frequent washing and high humidity in the room;
- applied very easily without special equipment using a roller or a spray bottle;
- withstands temperature changes over a wide range, significantly exceeding real fluctuations in a living room;
- does not flow during distribution along the façade;
- always gives a clean and very rich shade that exactly matches the manufacturer’s promise;
- does not lose strength from accidental impacts and regular wiping from dirt.
With this composition you can paint almost any surface in the desired shade, but before that it needs to be prepared in a special way.
Vernenskaya manufactory
Environmentally friendly
Vernensky paints and varnishes are made from natural materials: the main component is milk casein - the most harmless base that exists, water is the diluent, porcelain powder adds strength, and natural dyes are responsible for the color. The composition of the paints does not emit volatile organic compounds, therefore it is safe for health and the environment. Suitable for a room where you spend a lot of time and does not require ventilation when painting.
High adhesion
The special formula creates a durable coating on any surface: wood and particle boards, including MDF and chipboard, plastic, metal and many other materials can be painted and not worry. Paint for wooden kitchen furniture is also suitable, of course.
In most cases, it does not require any pre-treatment of the painted products other than cleaning and degreasing. A small exception is glossy varnished furniture - you will need to lightly sand it with sandpaper to remove the shine.
Durable and reliable
Resistance to water and wet cleaning is also quite consistent with the specifics of kitchen furniture: after complete drying, the surface can withstand about eight thousand passes with a sponge, exposure to neutral detergents and weak solvents such as white spirit. The stable color of the paint does not turn yellow or fade over time. All parameters of ideal paint for kitchen furniture are taken into account and observed.
Palette
The wide choice of color solutions - more than fifty shades in each line of materials - becomes unlimited, because all paints can be mixed with each other and tinted.
Possibilities
Different lines of materials will bring all design solutions to life. Perfect paint is designed to quickly and with minimal effort update the color of a product. The easy-to-use paint combines a strong primer, durable finish and long-lasting color. Does not require special surface treatment, so you can focus on creativity and results.
If you dream of turning your kitchen into part of an ancient castle or using decorative painting techniques, then choose Shabby paint. It is designed specifically for creating artistic scuffs, multi-layered textures and vintage effects. The finishing coating makes it resistant to washing and other influences.
Effective paints are suitable for painting fittings and other furniture elements. Pearl paint creates a light pearlescent sheen, and metallics imitate silver and gold.
What tools will you need?
Before work, you must prepare a whole set of tools and auxiliary materials:
- Sandpaper for thorough cleaning of surfaces.
- Solvent for removing blemishes and for removing existing layers of old coating (relevant for wooden furniture).
- A primer to enhance the adhesion of paint to the surface - its class is selected for each enamel separately.
- Putty for sealing cracks and chips.
- Masking tape.
- Plastic corners for ends in enamel color.
- New fittings: hinges, handles, holders, etc.
Tools such as a hair dryer, sanding machine, spatulas, scissors, brushes, rags, screwdrivers, and auxiliary containers will also not interfere with painting. It is also worth thinking carefully about protective measures: wear an apron or work coat, protect your eyes with goggles, and your respiratory system with a respirator.
It is advisable to keep the window open or turn on the hood while working with paint.
Facade decoration
The easiest way to beautifully decorate a facade, if its front part is smooth, is to cover the surface with self-adhesive film. It is better to choose color and texture according to the overall style of the interior.
The front part can set off a separate object in the design or play the role of a bright accent. We paint the back and end parts of each door the same color as the front.
Procedure:
- We use wood putty to fill the holes from the old handles: in most cases they do not match the mounting bolts on new models.
- We clean the remaining paint from the façade. This is done after the putty has completely hardened.
- We sand all the irregularities and degrease the surface with a solvent.
- We measure out the approximate amount of self-adhesive film. It is important that the area of the self-adhesive exceeds the size of the surface to be pasted. Some people glue the film straight from the roll, but this is not entirely convenient.
- We remove part of the protective coating along the entire width from the edge of the piece of film, apply it with the sticky side to the edge of the door, and smooth it out well. If bubbles appear, remove the film that has not yet been completely glued and eliminate the defect.
- Gradually remove the protection from the film and smooth it on the surface of the door, moving from the middle to the edges.
On a note . Air bubbles on a completely pasted surface can be dealt with using a needle. It is enough to carefully pierce the film, release the air and level the space. If the film is stuck with wrinkles, it is better to remove it and glue a new piece.
The hardest part is cutting the edge. It’s rare that someone succeeds in cutting out a piece of self-adhesive perfectly evenly and gluing it so that the edges clearly coincide with the surface. That is why it is easier to glue the film onto the product and then trim the edges with a stationery knife or scissors.
To hide irregularities and protect the edges from fraying, the perimeter of the facades can be covered with a decorative plastic corner.
How to paint a kitchen set with your own hands
Before the main work, it is necessary to carry out preparatory measures:
- Take out the shelves and remove the old fittings.
- If possible, disassemble the cabinets into as many parts as possible (if only they can be put back together later).
- Prepare the work area - remove all unnecessary items, protect the floor and other furniture with plastic wrap.
- Before painting, thoroughly wash all surfaces from dirt and degrease.
- Remove the film from MDF facades using a hair dryer by simply heating it. Remove any remaining adhesive from the facades by simply sanding and then wiping with a solvent.
- Thoroughly dust the room and all parts of the headset using a vacuum cleaner, as well as a final wipe with a soft cloth.
- Prime all painted surfaces.
- If there are cracks, deep scratches, or chips, they must be repaired with putty.
- If some areas will not be painted or a different shade has been prepared for them, they should be sealed with masking tape.
You can apply the enamel using a brush, roller or spray can. The direction of painting should be the same to prevent drips and streaks. To paint small details or apply ornaments (for example, red curls on a white background), small brushes are used.
Since the kitchen usually has high humidity and significant temperature changes, it is recommended to apply the paint in at least 2 layers.
The most traditional method is to paint solid wood furniture. To do this, you need to strip off the old paint or varnish, and then apply a new layer. If the wood pattern is beautiful, it is rarely hidden under opaque enamel. You need to choose a special varnish for wood with increased resistance to heat and moisture.
Decoration features
You can create a unique design for an updated kitchen set using various decorating techniques.
Minimalism is always relevant.
Popular options include the following:
- decorating individual elements with self-adhesive film or photo wallpaper;
- use of decoupage technique;
- laying out mosaics, tiles or moldings;
- painting with various patterns (stripes, circles, triangles);
- applying patterns using stencils.
For greater effect, you can decorate the facades with drawings or special decorative elements.
If the facades are made of solid wood, then it is possible to use various methods of aging the wood, the most popular of which are brushing, craquelure, and open fire.
Nuances of decoupage technique
A technology called decoupage allows you to get an unusual set using the simplest means. With its help, you can repaint facades made of any materials, the main thing is the original design and its precise execution.
Facades using decoupage technique
A beautiful picture is not drawn by hand. The printed image is used to transfer to a tabletop, the back of a chair or the front of a cabinet. Beautiful drawings especially for decoupage can be bought in a specialized store - they are called cards. Other images will also work - cut out from magazines, printed on a printer, even beautiful napkins.
Before decorating the furniture with a beautiful image, you need to paint it in the main color. Decoupage work is carried out in several stages:
- The picture is carefully glued into place. For this, regular PVA glue is used.
- After waiting for the glue to dry completely, the entire surface must be evenly coated with transparent varnish.
You can select a drawing in different ways. For example, paste special moldings along the chalk outline of the image to get a frame effect.
You can duplicate the design from the facade of the set on the countertop, decorative cutting boards and other elements of the kitchen interior.
Decoupage of the dining group
Drying process
In professional production, drying is carried out by convective method at a temperature of 35 - 60 degrees and a relative humidity of 50 - 80% for 1.5 - 2 hours. It is impossible to achieve such conditions at home.
Each paint is dried differently.
It will take about 24 hours for complete drying, but there may be deviations in one direction or another, depending on the composition of the dye. If polishing of a glossy surface is required, this procedure should be done three days after painting.
The thicker the paint layer, the longer it will take to dry.
After drying, the tape is removed and, if necessary, the gaps are tinted.
Caring for furniture after painting
Factory painting is always more durable than do-it-yourself painting. This means that you need to use the repainted kitchen unit more carefully. It will not benefit from contamination with grease, since when washed there is a high probability of washing off the paint. Similarly, painted surfaces suffer from bright sunlight and the use of household detergents. Exposure to steam and high temperature causes bubbles to appear.
If handled carelessly, the repainted furniture will soon need to be restored again. It is recommended to wipe the facades with dry wipes as often as possible to remove moisture and grease splashes. If there is some kind of defect in the design - a deep scratch, puncture, crack, chip, then in the future such a loophole will become the starting point for the destruction of the furniture.
It is important to consider the angle of incidence of sunlight from the window. If it falls directly on the facades, then it is worth hanging curtains or blinds to protect the set from fading. For everyday washing, you should not use abrasive powders - only soft liquid products recommended for caring for the selected type of paint. The presence of a powerful modern hood in the kitchen significantly extends the service life of a repainted set.
Painting your kitchen furniture can be the most exciting part of the entire renovation. The beauty is that until the very completion of the work it is difficult to imagine exactly how the set will look. Well, if you don’t like it, you can always redo it.
Let's sum it up
How to repair and paint kitchen furniture so that the result does not disappoint? First, assess the range of damage and the work required, then choose the best paint product. Thanks to high-quality paint for painting furniture, we don’t have to think about labor-intensive, thorough repairs and replacement of equipment. Why replace when you can extend life? All you have to do is change the color, tone or shade, and add a smart selection of accessories to create your dream kitchen with furnishings straight out of an interior design magazine.
As you can see, painting a kitchen is not only about renovation, but also about creativity. Now that you know how and with what to paint the kitchen facade with your own hands, you can safely get to work. The renovated room will not only be pleasant to be in, but also to cook, wash dishes, meet and communicate.
Our photo gallery:
https://www.youtube.com/watch?v=WC3irneJlBsAccessories
Before hanging the restored facades in the kitchen, you need to replace the old fittings with new ones. It guarantees the ergonomics and functionality of the furniture. It is worth inspecting and replacing hinges, guides, closing mechanisms, and handles.
If the mounting holes have widened or part of the fabric is missing in their place, the fittings will have to be moved to another area.
We begin the work by dismantling the fittings. We fill the old holes with putty. It is best if it is on an acrylic base, matching the color of the kitchen facades. After the putty has settled and dried, it is sanded with sandpaper, painted or varnished. You can then drill other holes and install the hardware.
It is better to replace roller guides in kitchen drawers with more reliable ones - ball ones. Handles are matched in style and color to the updated kitchen facades.
Briefly about the main thing
Repainting a cabinet a different color on your own is a simple job that only requires care, time and a set of necessary tools. The process is divided into several stages. The main task is to create a rough surface that helps the paint lie evenly and tightly. The cabinet is first cleaned, defects are repaired and primed.
The main problem may arise when removing the old varnish or film layer. It is solved mechanically, chemically or thermally. The paint is applied in several layers, the number of which allows you to emphasize or hide the texture of the base. For the finishing coat, choose wax or water-based or polyurethane-based varnish.
Replacing the countertop
To update the appearance of kitchen furniture, restoring facades made of MDF or wood is not enough. The tabletop, the most used element of the set, also requires tidying up. Heavy hot pots are placed on it, food is cut on it, meat is beaten. It is not surprising that its surface quickly deteriorates. You can update your countertop in several ways.
Decorate with ceramic tiles
On a surface cleaned with a grinding machine and treated with glue, a mosaic of small tiles is laid out. The elements should be in close contact, leaving no gaps. 6-8 hours after laying out, the joints are grouted, and when everything is completely dry, they are covered with 3-5 layers of furniture varnish.
Installation of protective glass
The original way to update. The tabletop is cleaned, wooden planks are attached to it, dividing the entire surface into sectors of arbitrary shape. Then each of them is filled with decorative material: expanded clay, pebbles, large beads, coffee beans, etc. Tempered impact-resistant glass is placed on top, secured with bolts or glued with special glue.
Installation of a new countertop
The old one is removed and another is installed in its place. Replacement should be entrusted to professionals.
To update the look of your kitchen, you don't have to spend a huge amount on buying a trendy set. Do-it-yourself restoration work will allow you to save your family budget and realize your personal design fantasies.
Several ways to refresh your interior
In fact, there are a huge number of ways to remodel an old kitchen interior with your own hands without much financial investment. This applies to both large-scale changes, such as replacing finishing materials, and smaller ones, such as the use of new dishes, paintings and other decor. You can look in more detail at several particularly popular techniques.
Updating walls and floors, using color accents
Any wallpaper, even the highest quality and most expensive, loses its original attractiveness over time, fades in the sun, fades, gets dirty, and becomes deformed. If the appearance is not very shabby, then you can not change them, but use bright accessories or other details in the interiors, for example, furniture facades.
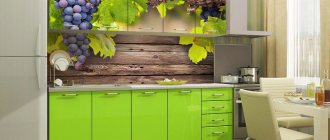
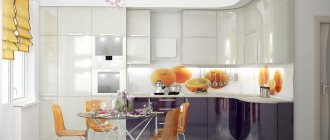
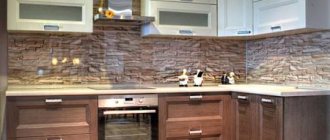
You can replace the apron in the kitchen area by laying it with bright tiles or mosaics. A good solution would be glass with photo printing of any image or decorative panels with a suitable texture. Also, one of the walls, differing in color, texture or material, can become an accent.
Renewing the floor in the kitchen does not mean completely changing the flooring; it is enough to lay a carpet or a bright rug that matches the style. You can also choose linoleum as a new flooring material, and its installation will not be difficult if you follow the instructions.
Textile decoration
A sure way to refresh an existing space is to decorate the interior with new textiles. This includes: curtains, tablecloths, napkins, potholders, furniture covers, etc. All things can be done with your own hands, especially if you have sewing or knitting skills. Before you start making fabric products, you need to decide on their design.
Depending on the size of the room. For a small kitchen, it is better to use curtains made of light, airy fabrics in light shades on the windows. So, the room will visually seem more spacious. Vertical lines on curtains elongate the room, while horizontal lines expand it. A large motley pattern can further reduce the space. From interior style
When choosing, it is important first of all to match them to the style of the kitchen. For classics, massive curtains with a lambrequin, tassels and fringe are suitable, but only if the area is large enough. In minimalism or hi-tech, you can get by with roller blinds or blinds
For country, Provence, and shabby chic, it is better to use light curtains made of natural fabrics in light colors with an unobtrusive floral pattern.
In minimalism or hi-tech, you can get by with roller options or blinds. For country, Provence, and shabby chic, it is better to use light curtains made of natural fabrics in light colors with an unobtrusive floral pattern.
Don’t forget that kitchen curtains should be practical. That is, it is necessary to choose a fabric that is easy to wash, does not lose color brightness, and protects from the sun and prying eyes from the street. And if the window is located in close proximity to the stove, then the curtains should also be fire resistant.
Interior accessories
The easiest way to change the look of your kitchen is to purchase new accessories for it. It is most appropriate to use dishes in this room. It can be both functional and decorative, for example, to decorate a wall.
But even here one cannot fail to take into account the style of the interior. For classics, snow-white or painted porcelain is preferable; in a rustic kitchen, ceramic and earthenware are preferable; and in high-tech, you can’t do without transparent or colored glass, as well as bright plastic plates and cups.
It’s quite easy to transform your kitchen space if you add some fresh flowers in pots to the interior. Owners should select the type of plants based on personal preferences and carefully monitor them, because nothing can spoil the look of the kitchen more than unkempt, dried flowers on the windowsill.
