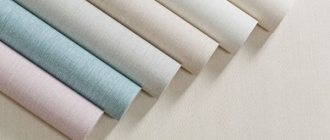
Veneering is done when they want to restore aged furniture or try to give it a new design. The doors may develop cracks, scratches, or dents. The paint may fade, and the varnish may crack due to mechanical influence.
The doors are veneered so as not to waste money on buying a new sheet. In order for the veneer to last long and reliably, you need to properly prepare the surface for gluing and select high-quality glue.
Types of veneer
Traditionally, veneer is used to cover MFD, chipboard and other combined materials. Typically, veneer is understood as a derivative of natural wood, although some types are reconstructed, unnatural and include various synthetic additives.
According to cutting methods, the material is divided into the following types:
- tangential - the tree is sawed at a certain distance from the core, which makes it possible to create a special pattern at the exit;
- radial - the cut is in the center of the trunk, the blade is uniform, durable, and high quality.
According to the processing method, the material can be:
- Peeled veneer. It is produced by rotating logs in a special machine, where thin strips are cut from the tree. Cutting is carried out parallel to the grain. This is usually how veneer is made from birch, oak, pine, and alder. The resulting sheets are used for veneering and cladding.
- Sawn veneer. To create it, a high-precision machine with up to 20 saw blades is used. The result is thin planks that are smooth and have increased wear resistance. Most often, coniferous wood is processed in this way, after which the veneer is used to produce musical instruments, expensive parquet, multi-layer doors, and exclusive furniture.
- Sliced veneer. It is made only from hard wood (mahogany, oak) on machines with running knives. The layers are cut perpendicular to the fibers, resulting in a thin web. Usually it goes on doors and furniture.
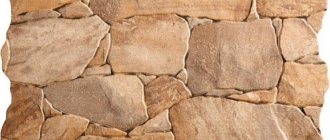
A type of peeled veneer is fine-line laminated veneer. The finished peeled material is sorted, painted, and pressed. Afterwards, the bars are cut, obtaining veneer imitating valuable wood species. It can be glued to plywood, MDF and get original furniture. There is also stone veneer, although it has nothing to do with wood and is made from slate.
Do-it-yourself furniture cladding repair
In order to glue peeling veneer, you will need the following tools and materials:
— iron — paper sheet — award — wood glue — jamb knife — stain — varnish
The working process:
— First of all, you should try the simplest and least expensive method, namely, iron the peeled veneer with a hot iron through a clean sheet of paper. If this does not give the desired effect, then move on.
— We make a small notch along the veneer fibers using a marking, slightly raise the edge of the veneer and coat the base with wood glue on both sides of the notch. Now you need to grind it in properly.
— If the glue has leaked out in the cut areas, it can be carefully removed when it dries using a jamb knife or scraper.
— Now let’s bleach the seam using a solution of oxalic acid and a sharpened wooden stick.
— Then, if desired, you can choose a stain to match the color of the coating and treat the seam with stain several times and finally coat it with colorless varnish.
After these simple steps, your furniture with peeling veneer will look great again.
What to do if the veneer peels off from the end along the edge?
If the veneer has peeled off along the edge of the end of the furniture, then the base of the damaged area must be smeared with glue and the peeled veneer must be rubbed in. For grinding, it is best to use a block of hard wood and be sure to wrap the block with a piece of flannel in several layers. This way you will not damage the varnish during grinding.
Which glue is better to use - types
To properly glue veneer with your own hands, you need to purchase good glue. The requirements for it will greatly depend on the size of the product being pasted, its type, and the complexity of the design. For example, for gluing small elements or applying sheets tightly, you can use PVA or carpentry compound, but they are only suitable for perfectly flat bases.
If the parts are complex and require increased strength and quality of gluing, you need to use products such as “Kleiberit” (polyurethane glue), “Tightbond” (glue for wooden surfaces). Edge gluing - gluing tightly fitted veneer strips along the longitudinal edges to produce formatted sheets - is carried out using the most reliable compounds, for example, epoxy adhesives.
All means that can be used to glue veneer are divided into structural and self-adhesive. Construction compounds form strong adhesion to the surface; their curing begins under the influence of a number of factors (depending on the exact type of glue):
- solvent evaporation;
- exposure to ultraviolet radiation;
- the occurrence of a chemical reaction with the addition of a hardener;
- cooling.
It is enough to simply squeeze the self-adhesive composition onto the part or base; the adhesion is formed when the product spreads during its subsequent curing. Interaction with the base occurs at the molecular level, causing “soldering” of materials.
Recommended brands of adhesive composition
To glue the material, use the following veneer adhesives:
- PVA - used for fixing flat surfaces.
- Tightbond is a professional solution that is highly resistant to moisture.
- Epoxy resin - used to bond plywood and thin wood.
What mistakes are often made when working like this?
The most popular mistakes made by craftsmen when gluing
When fixing veneer, inexperienced craftsmen often make mistakes such as choosing the wrong adhesive composition, violating the technique of using the substance, and neglecting to prepare the surface for fixing.
Surface preparation
How to glue veneer? The process is simple, but requires strict adherence to the instructions, otherwise the lining may come off over time. First, you need to properly prepare the work surface: you cannot glue the material onto an untreated old canvas.
You need to work with a door or other product as follows:
- remove the canvas from the hinges using a pry bar or a screwdriver (whichever is more convenient);
- place the product on the floor, chairs;
- remove all fittings - decor, handles;
- remove the old coating using a sharp spatula, you can also put it under an iron or heat it with a hair dryer;
- sand the canvas with sandpaper or a sanding machine;
- Fill cracks, holes, and defects with special wood putty, then go over them with wood glue.
How to glue chipboard?
For gluing chipboard
PVA glue, casein and other compounds of animal origin, resorcinol or urea-formaldehyde glues, as well as hot melt glue are suitable. But PVA glue is most widely used when performing such work.
Interesting materials:
How to find channels on a satellite dish? How to find channels on a tuner? How to find quarantine on Windows 10? How to find a picture without a background? How to find an image via Google? How to find a picture from a gallery in Google? How to find an image in Google from a computer? How to find a picture in the opera cache? How to find a painting from an image? How to find the memory card on Redmi 8?
Preparation and cutting of material
Next, you need to buy the material (usually veneer is sold by the meter) and cut it. The rolls must first be straightened so that the veneer becomes smooth and takes on a natural shape. For faster straightening, you can moisten the sheets with a wet sponge and place them between layers of drywall and plywood.
The fabric must be measured carefully. Then you can cut, leaving a 5 cm allowance on each side. This will help avoid problems if the measurement was incorrect. Cut the material with a plunge-cut saw or plywood knife. It is best to use an electric professional tool, so all the cuts will be accurate and beautiful. It is forbidden to use scissors: they provoke the appearance of cracks in the material. Veneer in the form of strips, planks must be selected according to the pattern, the sheets must be glued with adhesive tape along the joints and perpendicular lines.
Preparatory work
First of all, it should be noted that the interior items on which the veneer will be glued must be made of chipboard, plywood or furniture boards (most importantly, wood). Their surface should not be greasy, have resin stains, knots, cracks or chips. Existing defects must be filled with wood putty and then thoroughly sanded. Before filling, knots must be removed and, if necessary, a rough surface must be created for better bonding, which can be easily done using a special plane with fine teeth.
Gluing methods
Before starting work, you need to mix the glue if it is two-component. Next, you can carry out gluing using the chosen method.
Cold contact method
This technique is much more difficult. To implement this, you will need contact adhesive for veneer, which sets very quickly due to the minimum exposure time. This technique is not suitable for beginners, because there will be almost no opportunity to correct inaccuracies in the work. After applying the product to the base, you need to firmly press the veneer onto it. What is important is a strong clamping force in the first seconds, which allows you not to use the press in the future. Typically, the technique is used for gluing small products.
Hot gluing
Veneering is easier this way. First, a thin layer of glue is applied to both surfaces, which dries within 10-15 minutes. Then the veneer is applied to the main sheet, melted with a hot iron, or a lapping hammer is used. Since the tool heats the adhesive layer, the latter melts and tightly grips the veneer to the base. In addition, all accumulations of air bubbles are released, and the quality of adhesion improves.
For this technique, it is important to use glue with a thick texture. If it is noticed that it dries too quickly, the base is first sprayed with a little water. Large swellings will have to be carefully pierced, cut, and then ironed over them again.
Cold gluing with pressing
For this method of veneering, Titebond glue is most often used. It is applied to both surfaces, leveled with a spatula, and the veneer is applied to the base. Afterwards, carefully adjust the position of the material and fix it with a clamp (clamp). Do not remove the clamps until the glue has completely dried, then remove them and check the strength of the connection at the ends of the canvas.
Common Mistakes
When gluing veneer to a base, the following errors may occur:
— Too large pores in the wood can lead to glue leakage. In the case of a reversible adhesive, the surface is wetted and an iron is passed over it. However, if the veneer is glued with irreversible glue, this defect cannot be removed.
— If the material peels off, the defect can be eliminated by introducing glue and repeated drying using a press.
— Bubbles on the veneer can be eliminated quite easily. An incision is made and the subsequent introduction of an adhesive composition, then the surface is treated with a hot iron.
Useful tips
If cracks appear on the veneer, this means that the surface is poorly dried. Experts recommend working only with well-dried workpieces. The divergence of the stripes on the veneer means that the joints on the product were not sufficiently dried. You can correct the situation by selecting inserts with a similar pattern.
Useful tips and tricks
To ensure that the user is pleased with the result of self-gluing veneer, you need to follow the advice of professionals:
- veneer textures allow you to create interesting patterns; you can even join different types of wood on one sheet;
- Pre-grinding of the blade begins with sandpaper with a coarser grain and ends with “zero” sandpaper;
- sanding is carried out only along the wood fibers;
- when ironing the material with an iron, apply a layer of cotton fabric on top;
- You cannot stop while ironing; you must continuously move the iron over the surface, otherwise scorch marks will quickly appear on the veneer;
- if black marks do appear, they can be carefully removed with a sharp knife;
- It is most convenient to heat the corners and edges of the veneer with a soldering iron (if the hot gluing method is used).
Immediately after finishing the lining of the canvas, it must be covered with a layer of varnish. The fact is that new veneer strongly absorbs moisture, it is important to protect it from excessive swelling. This will help the product serve faithfully for many years.
Assessing the damage
The first thing to do when veneer peels off is to assess the degree of “wound”. As a rule, the cladding begins to peel off when the humidity in the room is high. Moisture destroys the wood, and the veneer takes the full blow: it swells, cracks, and then peels off. If the damage has not affected the main material, then saving the furniture is easy. It will be enough to simply glue the veneer in place or replace it. But if serious deformation of the material is noticeable behind the peeling, you will have to completely renew the piece of furniture. Fortunately, most often the veneer will peel off before the damage becomes deep.
Installation technology
To use certain types of edges for furniture, you must:
- prepare the materials and tools that will be required to complete the work;
- prepare the end;
- perform the work of fixing the edge.
Preparing tools
To carry out repair work if the edge has come off or completely replace the finishing material, you will need to prepare:
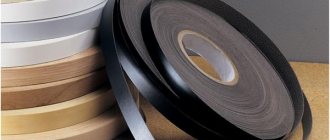
- sufficient amount of edge;
- sandpaper;
- file;
- scissors or stationery knife;
- rubber roller (can be replaced with rubberized gloves);
- any dense material, for example felt;
- an iron or a hair dryer if the edge is equipped with an adhesive base;
- glue if a non-self-adhesive edge is selected.
What glue should I use to glue furniture edges? To get the job done, you can use any universal glue, for example, “Moment” or liquid nails.
Universal glue for fixing edges
Furniture preparation
In order to achieve the maximum level of adhesion of the edge to the end of the furniture and ensure an even fit of the finishing material over the entire surface, it is necessary to prepare the end before performing installation work. The following types of work are performed:
- removing burrs and leveling the surface with a file;
- finishing the end with fine sandpaper.
Finishing the end with sandpaper
Installation diagram of self-adhesive furniture edges
To glue an edge with an adhesive base to the tabletop with an iron, you must:
- cut the finishing tape in accordance with the size of the end plus 2 - 3 cm in case of shrinkage of the material;
- attach the tape to the end and align the edge along the entire length;
- gradually heat the edge with an iron (hair dryer). Roll the heated areas with a roller until they cool completely;
- trim off the remaining tape.
Scheme of installation work
The process of self-fixing the edge tape with an adhesive base is presented in more detail in the video.
Scheme for installing an edge without an adhesive base
To install an edge tape that does not have an adhesive base, you must:
- as in the previous case, prepare a piece of tape with a margin of 2 - 3 cm;
- coat the end of the furniture and the furniture tape with the selected glue and wait time for the composition to partially dry (for each type of glue, the method of its use and the waiting time are indicated in the attached instructions);
Preparing to fix the edge tape
- Place the edge on the end, align along the entire length and press. For complete pressing, it is recommended to use a wooden block wrapped in felt or soft cloth.
When using glue, you can cut off the remaining tape only after the composition has completely dried. The complete drying time is also indicated in the instructions.
