Radius MDF facades. Manufacturing option 1.
In the first option, in order to obtain a product of the required radius, the production of special template frames is required.
The radius on the end templates repeats the radius that is required. In my case it looked like this. Template frames were made from leftover and waste laminated chipboards.
Fiberboard with a thickness of 3.2 mm is used as the material for the facade. To obtain the required thickness of the facade, we need cut blanks that are slightly different from the original dimensions (they should be a little larger for subsequent processing). We decide how many of them are needed for one facade based on the thickness of the facades, in particular if the standard thickness is 16 mm. then you need 5 pcs.
Where the back side of the facade will be located, it is advisable to use fiberboard coated to match the frames of finished cabinets (if you don’t want to bother painting the back side).
After cutting, the workpieces are cleaned of dust. Then glue is applied to the workpiece and evenly leveled over the entire area with a spatula. Then the next piece is placed on top and also coated with glue. The front and back sides of the facade are not coated with glue.
The resulting “pie” is fixed on a template frame.
Since I did everything without help, I first secured one side with self-tapping screws to the frame (that’s what the allowance was for, which is then cut off), then I bent the entire “pie” and also attached the other side. Additionally, everything is tightly wrapped with stationery tape (this procedure helps to get rid of waves formed at the edges.
An even block of wood secured on top along the edges with clamps also helps against waves (not shown in the photographs - this is how the last facades were made). Let it dry for a couple of days.
After complete drying, the workpiece is freed from tape and screws. Next, in order to eliminate the process of self-unfolding, on the back side (if the fiberboard is not laminated, on the laminated one) we fasten it on the front side of the facade with small self-tapping screws, avoiding places where there will be holes for handles, hinges, glass. Naturally, for them it is necessary to countersink the hole in order to recess the caps. Subsequently, these places are puttied. After all the edges are cut with a jigsaw or a circular saw to the required size. The edges are smoothed by grinding. In the absence of a belt sander, I sanded with sandpaper attached to a block. If there are cracks on the edge, unglued voids, they are glued and then puttied. We drill holes for handles and hinges. That's it, the product is ready for painting.
Preparing the opening
At the beginning of work, measure the dimensions of the opening - in case you have to slightly change them. Drywall, putty and other materials are used to change the size or shape; if you plan to do this, then prepare the necessary materials in advance.
Now we need to prepare the surface. Clean the opening from dirt, seal all cracks and degrease the mounting area. Create as smooth and even a surface as possible, preferably by sanding and wiping it.
Before starting finishing work, the surface of the arched opening should be leveled as much as possible.
In cases where the opening is plastered, make sure the surface is smooth. If there are any cracks, chips, or unevenness, remove this layer and apply a new one. Then wait for it to dry completely and clean the surface and sand it.
Production of radius MDF facades. Option 2.
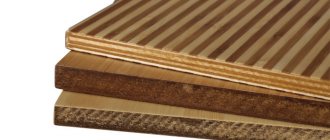
In the second option, the use of template frames is not necessary, since the product can be made directly on site. Here we use special MDF, which has slots at intervals of approximately 5 mm. on the one hand, and a smooth structure on the other. The essence of the technology is as follows: the blanks are applied to the template or fixed in place with the milled sides inward and glued together. The thickness of such MDF is usually 8 mm. and when gluing two sheets together, the result is 16 mm. After drying, the product is cut to size, the ends (horizontal) are puttied if necessary. The following is the same as in the first method.
Article author: yarkey2007.
Features of typical arches
Standard arch models are quite universal, and their choice is so wide that ordering an individual version for standard openings simply does not make sense. Their installation is easy to do with your own hands using a basic set of tools.
Ready-made arches have a modular design consisting of several elements, which allows them to be installed in any standard opening. The standard kit usually includes:
- two arched arcs;
- four platbands;
- two or four locks;
- vault panels;
- two side panels.
Standard set of arched kit
As additional elements that allow you to adjust the depth of the arched opening (thickness of the wall panels and vault), manufacturers offer special arch expanders and intermediate plates of the same color range as the main structure.
Mandatory parameters for the correct selection and subsequent trouble-free installation of the arch with your own hands are the height, width and depth of the opening.
Dimensions of radius MDF facades.
To process a concave surface, you will need a milling machine for curved facades with a curved base that follows the radius of the product and the corresponding template.
When covering bent MDF facades with PVC film on a membrane-vacuum press, you should use special substrates that preserve the resulting bending radius of the product.
The technology for manufacturing bent facades is quite easily mastered by those starting out in the production of furniture facades from MDF. At the same time, some investments in additional equipment are possible. However, as practice shows, in-house production of curved facades costs an enterprise much less than purchasing finished products.
Principle of design calculation
The use of curved facades is often found in kitchen sets, prefabricated furniture structures, or to make radius cabinets. This is done in order to give a beautiful and stylish look to your furniture, and most importantly, to maximize the use of all the space in the room. Another plus is that the sharp corners will not cause damage to both the housewife and the children, who often run around such pieces of furniture.
But to do this work yourself, you should consider some points:
- To calculate such modules, more complex design is required than for conventional furniture.
- To make a curved facade you will need much more money than a standard one.
- Profile curved cornice and false panels are difficult to find, moreover, their price will be much higher than that of their analogues.
But don’t despair, because none of this is scary. If you find it difficult to make the right project and calculate all the necessary parameters, you can turn to a furniture manufacturing company for help. They can provide not only calculations and software design, but also a three-dimensional model that will be made according to your sketch.
You can buy the necessary elements and components from the catalogs of manufacturing companies. You can get it at any specialized store, and get contact information there. The overall cost of the furniture will be higher, but the quality is still guaranteed. Moreover, such furniture will serve you for a very long time.
Hidden text
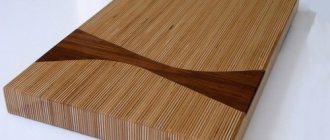
With the invention of methods for the industrial production of veneer, that is, thin sheets of wood obtained by sawdust-free division directly from a log or pre-sawn timber from it, plywood also appeared, that is, a material in the form of flat sheets glued together from several sheets of veneer. Moreover, if during gluing, even before the glue hardens, the veneer sheets in the package can be easily bent at a fairly large angle, then after the glue has cured, the mutual displacement of the individual sheets is eliminated and the material takes the shape specified during gluing, acquiring high bending strength. The production of bent-glued parts is based on this principle, that is, products formed from individual thin sheet elements that are bent together when gluing them together and kept in a press until the glue is completely cured.
The production technology of bent glued furniture is constantly being modernized and improved. One of the most famous is the technology for the production of curved facades, developed by specialists from the All-Russian Design and Technological Institute of Furniture (VPKTIM), specializing in providing technical assistance to enterprises in organizing furniture production. It allows you to make panels from a laminated block of solid wood with a thickness of 4-6mm, as well as from sawn veneer.
Constructions of the first type - based on a laminated board made of solid wood with saw-cut grooves or from several layers of laminated board - the developers recommend using them without cladding, which will emphasize the beauty and originality of the texture of natural wood. Finishing: transparent varnishes. Taking into account the mentality of the Russian consumer, who, unlike the Scandinavians, is not accustomed to using knotty pine and spruce wood in household furniture, the surface of the part can be veiled with a translucent dye, which will slightly muffle the texture of the wood without covering it completely. The surface of aspen cannot be treated in this way, so as not to hide its beautiful silky tints.
The second type is with a middle layer of low-grade wood and facing with any natural or synthetic facing material. Of particular interest are the cladding made from mosaic boards and sawn aspen veneer. Designs of this type are based on the use of low-waste technologies.
As the main unified element in the development of structures of any type, a bent part with R bending from 400 to 600 mm, with a thickness of 16-20 mm, is accepted. The shape and bending radius of the part were selected based on an analysis of current trends in furniture design, presented at international exhibitions in Cologne, Milan and Moscow. On the basis of such a part, as in a children's construction set, by combining its various options, you can obtain a wide variety of surface shapes: round, wavy, with a bend in a vertical or horizontal plane. When developing structures and technologies, much attention is paid to ensuring the necessary rigidity and dimensional stability of the bent parts being glued together, as well as their environmental friendliness. In this case, the physical and mechanical characteristics of the glue used are of great importance. Measurements of the dimensional stability of parts of various structures have shown that for parts of multilayer structures after manufacturing, slight changes in the bending radius may occur in the direction of its increase. The distances between the extreme points of the radius part 10 days after production can increase by an average of 3-4%, which is within the normal range for bent-glued parts. After this period, the form stabilizes and no further changes occur. For parts with special embedded elements, no changes in the bending radius occur. Parts can be produced using wooden or metal heated molds, special or conventional facing presses, cold or hot. For any medium or even small enterprise, an acceptable technology option can be found. The mechanical processing and finishing of parts following gluing is carried out using traditional technologies using conventional equipment.
How to make bent furniture facades from MDF
MDF board, being a fairly durable, easy to process and fairly environmentally friendly material, is widely used in the manufacture of furniture for kitchens and bathrooms. It is convenient to use it when making furniture with your own hands.
Sometimes, as in this particular case, there is a need to make curved facades that you can’t just buy in a store. I want to tell you how I made bent fronts from MDF for a cabinet under a round washbasin in the bathroom.
Where to start
Making a curved facade for a shelf or cabinet with your own hands is quite possible and not particularly difficult for someone who already has experience working with MDF. The board is quite soft and easy to process. The curved facade is made of two MDF boards - external and internal. The total thickness is 16 mm.
To obtain radial parts you need:
- make an end template of the required radius,
- determine how many MDF boards need to be bent,
- cut blanks for bent parts,
- make markings for cuts on the bending area.
How to make bent facades from MDF
To make bent facades, we will use two 9mm thick MDF sheets - one for the inside of the facade, and the other for the outside. The facade will be smooth both from the inside and from the outside.
Simply bending an MDF board under a small radius, and even so that it then remains in this state, will not work. You will have to make cuts on it across the fold.
First we make a template. In my case, the template was the shelves of the future cabinet under the sink. MDF sheets need to be cut with a margin in length and width: you can easily cut off the excess later, but it is unlikely that you will be able to add the missing one. Do not forget that the outer radius of curved facades is larger than the inner one, and therefore the outer blank must be longer.
Find the centers of both blanks and mark with dashed lines in height on both sides of the blanks: along these lines we will then align the blanks with each other before gluing.
Apply markings for cuts until your semicircle transitions into a straight plane. Each line should deviate from one another by 5mm.
Adjust the circular saw so that you do not cut the slab too deep, as insufficient cutting depth will make bending difficult and the slab may even break. The undercut should be approximately 1mm.
Tip: Before you start making cuts on blanks for bent facades, practice on unnecessary MDF scraps of the required length. Apply markings on them, saw through every 5 millimeters, attach one strip to the template with the cuts outward, and the other on top of it with the cuts inward.
Where to start
To make a curved facade with your own hands for a shelf, cabinet or kitchen, an MDF board is a good choice. If someone has already dealt with her, it will be much easier for him. It is soft and pliable, so it can be easily processed. To make a curved facade, two slabs are needed - internal and external. The total thickness of the workpiece should be 16 mm. To get radial parts you need:
- make an end template with the required radius;
- subtract the required number of slabs that will be curved;
- cut blanks for bent parts;
- make markings for cuts where the area will be bent.
How to cut MDF panels?
The length of the panels is more than two meters, so, especially if you do not have your own transport or are inconvenient to transport, they are cut right in the store , but what should you do at home if cutting is necessary?
The following equipment is recommended for cutting :
- A hacksaw for wood – it is not recommended to use a very large tooth, otherwise the edge will turn out loose, in addition, the teeth can catch and pull the decorative film along with them;
- A hacksaw for metal – cuts accurately and carefully, but slowly, so it can be used for isolated cases when something needs to be adjusted;
- Grinder with a cutting wheel - cuts quickly and accurately, but a lot of dust is generated, so it is suitable for working outdoors, or during major repairs;
- Jigsaw - suitable for indoor work, since it is possible to connect a vacuum cleaner to it.
In isolated cases, you can use a metal sharpener or a mounting knife for adjustment, provided that the panel thickness is no more than 3 mm.
The blade is pressed forcefully against the material, after which a sharp cut is made and the fragment is broken off with your hands, while cutting off the film on the opposite side with a knife; metal scissors .
Video
This video shows how a curved facade is made:
Finishing the facade with stone is a hot topic for many who have started building their own home or renovating it. Stone has always been a universal material.
The place of attraction for the whole family in the evenings is the living room. Quiet evenings are spent here watching a movie, reading a book in a cozy chair by the window, and gathering guests.
The quality and correctness of thermal insulation work determines, firstly, the convenience and comfort of living in the house, and secondly, the service life.
How to connect MDF panels?
Installation of MDF may seem complicated only at first glance, in fact, the entire structure is assembled similarly to a children's construction set , and even someone who has never picked up a tool in their life can radically change the situation.
Fastening panels may resemble the same process with PVC, but it also has its own characteristics . The connection between each other is carried out using a tongue and groove, each of the panels has one side pointed, and the opposite side is forked, thus, by inserting the point into the groove, a prefabricated structure is obtained.
For fastening to the wall, it is necessary to arrange lathing , unlike PVC, MDF is sensitive to moisture released from concrete, and the air gap will ensure air circulation.
The sheathing should be made of wooden planks , but panels can now be attached to them using glue. Or mechanical fasteners.
It should be borne in mind that by gluing the panels, you are deprived of the possibility of quick disassembly , and if it is torn off, the decorative film will also be torn off, so only one side of such a panel can be reused.
For mechanical fastening, nails and special fasteners are used - clamps; if necessary, such cladding can be disassembled quite quickly.
Interior arches
Stages of work
Before starting work on the installation of the arch, it is necessary to determine the dimensions of the structure. To determine the width and height, you need to know the thickness and height of the doorway. If a door is installed in the passage, then it must be dismantled, then begin preparing the walls.
- Preparing the opening
To prepare the opening, horizontal and vertical wooden blocks are used. They are installed on the wall and are needed to determine the size of the arch. The width of these elements should be equal to the width of the structure, but have a small margin. The transverse type bar should be installed 50 mm below the arch. Consequently, the arches will be installed overlapping and will create additional rigidity of the structure. Excess parts can be sewn up with fiberboard on both sides.
- Preparation of the vault
How to bend an MDF panel?
It is not always necessary to cover only a straight surface; if you have imagination, you can create decorative elements with a semi-oval or round profile, significantly diversifying its style, but what about MDF panels that have only a rectangular profile?
As it turns out, bending this finishing material is quite possible , but only if the thinnest panels are used, with a thickness of no more than three millimeters and only for painting.
For bending, you will need a template ; you can make it with your own hands; any material that can transfer to the panels a circle radius equal to that of the surface to be coated is suitable for this purpose.
Since MDF has a structure whose density is between plywood and cardboard, it will need to be softened . This can be done using alcohol glue; water-based solutions such as PVA are not useful here, they can cause the product to swell.
A layer of glue is applied to each panel using a notched trowel, after which it is stacked, when the stack is assembled, it is tied at the ends, laid on the template, after which the ends are pulled with force and fixed.
- Information on how wall panels are attached.
- What are MDF panels - useful information here https://postroyka.org/chto-takoe-mdf-paneli/
- How to sheathe MDF panels - see full instructions here.
Drying lasts two days , then the panels are separated, sanded and painted.
You will also find this video about how to install MDF panels useful.
How to trim an arch with a corner: tips and tricks with photos and videos
There are many ways to decorate an arched opening - finishing the arch with a corner, covering it with plastic, painting and others. All these methods allow you to harmoniously fit it into a room where a certain design already exists. Manufacturers offer a wide selection of materials; there will be no difficulties in combining them.
In addition to decorative functions, the corner protects the arch from wear and paint abrasion - we will discuss this further.
Brief description of flexible MDF NeatForm
Neatform is a high-quality flexible sheet material made from MDF (MDF - Middle Density Fiberboard).
Neatform flexible MDF is widely used by furniture manufacturers, architects and interior designers when creating complex curved surfaces.
Neatform has a completely smooth surface, making it an ideal material for painting, veneering or laminating. This, combined with the high uniformity and dimensional stability of quality MDF sheets, makes Neatform the material of choice for many applications, including columns, counter fronts, curved walls and ceilings, steps, furniture fronts and more.
There are two methods of using flexible MDF: 1. In one layer , in which Neatform sheets are attached to a curved frame. 2. In two layers , in which the sheets are bent and glued together, forming self-supporting double-sided structures.
Neatform is often used for lightweight construction in combination with flexible tropical plywood, especially where the product's surface structure, impact resistance and fastener holding capacity are important. We talked more about flexible plywood in the previous article, in more detail.
Gluing
In most cases, it is recommended to use PVA-based adhesive systems or cold-curing polyurethane adhesives , especially with the frameless method of manufacturing curved structures. The use of contact adhesives in this option is not recommended due to the high plasticity of the adhesive seam and the technological need to shift the sheets relative to each other when bending. More information about soft rubber and rubber silicone membranes can be found on this page.
Decoration
Neatform is covered on the smooth side with any kind of decorative materials: plastic, veneer or paper before or after bending. Owners of log country houses will, of course, prefer natural veneer, but in buildings that are not constantly heated, plastic coatings perform better. Deciding on the sequence of bending and decorating operations depends on many factors, such as the bend radius, the thickness of the decorative material and the type of veneer (for example, plain or duplicated).
The advantage of pre-decorating MDF is the possibility of using PVA glue and using flat hydraulic and vacuum presses, including inexpensive vacuum bags. However, it should be taken into account that as a result of preliminary application of the decorative layer, Neatform sharply loses its flexibility. Also pay attention to the need to glue onto the back side of the product a material with physical properties similar to the front material. Otherwise, the structure will change its geometry as a result of fluctuations in temperature and humidity.
Products made from Neatform MDF have a perfectly smooth surface, which makes them easy to paint, including with bright glossy enamels. This decoration option is especially often used in the manufacture of furniture, including kitchen facades.
Basic principles
Metal bending is carried out using various methods. Welding is often used, but temperature exposure can change the shape and properties of the finished product. This reduces performance properties and manufacturing accuracy.
Since when bending metal, the outer layers of the metal stretch, and the inner ones begin to compress, it is necessary to bend part of the rolled metal relative to another by a given angle. The angle can be found using calculations.
The product is deformed to those values that are within the specified limits. They depend on the following parameters:
- Thickness of the metal sheet;
- How much is the bending angle?
- How durable is the material;
- Speed and time of the procedure.
The permissible deformation indicator will depend on them. The next step is to select the type of bending.
Edge processing
Decorative plastic, veneer or paper is usually glued to the visible parts of the curved edges of Neatform products. To do this, cut out a strip of suitable shape from a sheet of material, glue it to the edge using contact glue and remove the resulting overhangs.
In the case of painting curved products, the edges are also pre-sealed with thin white plastic or polyester paper. Alternatively, Neatform grooves on the edges are filled with putty and sanded.
Using a stapler
If necessary, use a stapler with U-shaped staples, oriented across the direction of the milled grooves. Set the minimum impact force in order to avoid through penetration of the sheets. The use of staples without additional gluing can only be considered temporary and is not recommended for a permanent connection.
Connecting with screws and adding hinges
Due to the fact that the Neatform is made from thin sheets of MDF, its ability to hold screws is extremely limited. This disadvantage can be overcome either by combining Neatform with flexible plywood, or by selecting the appropriate type of screw connection from those widely available on the market.
All this applies to the installation of furniture hinges. The combination of Neatform with flexible tropical plywood has sufficient ability to hold hinge screws. Otherwise, it is recommended to use a dowel system for installing screws or self-unclosing screwless (screw-free “insert type”) hinges, for example BLUM 70T559.
Here is an interesting solution for a countertop and curved fronts for a kitchen sink. For the kitchen, you can buy a Necta vending coffee machine - there is a special line of vending machines from the Ho.Re.Ca series (hotel, restaurant, cafe), which will be appropriate in the home kitchen.
Cleaning and Maintenance
- To clean MDF fronts, use only soft, soft cotton, silk or microfiber cloths.
- Most common stains can be removed with a dry or damp cloth.
- You can use dishwashing detergents, window cleaners, cleaning gels, the main thing is that they should not be abrasive substances, which can result in scratches.
- Always clean the front surface with clean water and wipe dry after using chemicals.
- If you stain the surface with dyes, remove these substances with a cloth as soon as possible to avoid discoloration of the furniture.
What to Avoid
- Long-term exposure to water and steam is not advisable for MDF.
- Cooking without using a hood, as liquid and fat will negatively affect the MDF.
- Do not leave stains of liquids or grease as they may discolor the surface.
- Using a brush with stiff bristles, metal sponges, as well as strong abrasives and bleaches.
- Using acetone for cleaning.
- Solvents, abrasives with abrasive properties (powders, creams), undiluted or concentrated cleaning agents.
- Immersion of MDF elements in water is not allowed.
How to use Neatform flexible MDF
Using a supporting frame
1.1. In one layer on a supporting frame.
It is used to create lightweight structures and solve interior problems, such as creating columns, front surfaces of racks, curved walls and ceilings, steps.
1.2. In several layers on a supporting frame.
It is used when it is necessary to increase the load-bearing capacity of curved surfaces.
1.3. Combined method.
A layer of flexible tropical plywood is attached to the supporting frame and covered with a layer of flexible MDF.
Combines the strength and load-bearing capacity of plywood with the quality of a Neatform exterior finish.
Self-supporting (frameless) structures
2.1. Combined into one layer.
The Neatform sheet is laminated on both sides with decorative plastic, which retains the shape of the product.
Used to create lightweight self-supporting structures.
2.2. Two-layer method.
Two Neatform sheets are glued together with their milled sides. The result is a strong, double-sided, self-supporting structure - the most common way to use flexible MDF.
2.3. Sandwich method.
A combination of two layers of Neatform with an intermediate layer of flexible tropical plywood .
The product combines the surface quality of MDF with the high load-bearing capacity of plywood. Holds fasteners well and allows the use of simple hinges.
Possibilities
It should be noted that the finishing materials market quickly responds to the needs of modern renovation. Now there are different models of bendable skirting boards on sale, and while polystyrene strips are very fragile and almost do not bend, then the polyurethane profile with the addition of rubber is very flexible and ductile.
The best solution for finishing a complex curved area with many curves is soft, flexible skirting boards. This is usually vinyl or flexible polyurethane baseboard with a high percentage of rubber. The profile is very elastic and is sold in rolls; it is easy for them to go around both external and internal radius corners.
For example, flexible floor plinths are used in rooms with complex shapes, for arches, columns, rounded podiums, etc., and flexible ceiling plinths are used for finishing curved plasterboard structures or tension systems.
In addition to flexible models, a wide range of curved radius plinths with different diameters and from different materials are available for sale. As a rule, these are wooden and polyurethane segments for a round corner or column.
Flexible, semicircular self-adhesive vinyl plinth, easy to cut and bend to any radius
Technological subtleties of the described approaches.
When using a supporting frame
The general procedure for creating a strong supporting frame and the gluing procedure is shown above in Figures 1..4.
The manufacturer recommends setting the pitch between the frame ribs at 350.450 mm. Vertical reverse ribs (Fig. 2) should not interfere with the precise (without gaps) application of the MDF sheet to the frame. The sheet of flexible MDF and the frame itself are taken with a small margin in size for the resulting product.
The MDF sheet must be applied to the frame with the corrugated side! High-quality glue is applied to the frame (Fig. 4) - the types of glue used were described above. With the help of the necessary devices (we will discuss this below), the MDF sheet is securely fixed to the frame until the glue dries (Fig. 5).
Once the glue has dried, the resulting product is carefully cut to the specified size.
You can obtain more detailed information from consultants.
Possible options for fixing the MDF sheet while the glue dries are shown in the next two figures. The right picture (Fig. 4) shows an option for the combined use of MDF and flexible plywood.
When using self-supporting (frameless) structures
To determine the required dimensions of the future workpiece, bend a sheet of MDF or other material and calculate, with a small margin, the required dimensions of the original MDF sheets (Fig. 1, see above).
Next, cut out blanks of the required sizes from two sheets of MDF, attach them to each other with grooved sides. Apply glue to both surfaces to be glued. For PVA glue it is convenient to do this with a paint roller. There is no need to fill the internal volumes of the grooves - the main thing is the contact surfaces.
Attach both sheets to each other and bend to the required configuration of the future shape (Fig. 3).
While the glue is still wet, you should make sure that the surfaces to be glued are in tight contact; the gap is unacceptable (Fig. 4 and 4a). The drying time of the glue should be clarified according to the documentation provided by the glue manufacturer.
After the glue has dried, the resulting MDF structure will retain its given shape.
Sandwich method (using flexible plywood)
To create such a structure, two sheets of flexible MDF are taken (with corrugated sides inward) and a sheet of flexible plywood is placed between them. All three elements are taken with a small margin in size.
Next, glue is applied to the mating surfaces of all three sheets, for example, using a paint roller. For MDF sheets, filling the grooves with glue is not necessary.
The resulting structure is smoothly bent to the desired shape and secured using one of the previously discussed methods. During bending, care should be taken to ensure that all glued planes are in close contact (see Fig. 4 on the right).
Once the glue has dried, the resulting sandwich structure will retain its shape.
Let us remember that this was the last, fourth article devoted to the use of flexible MDF and plywood.
