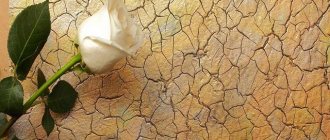
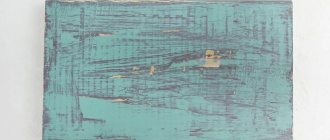
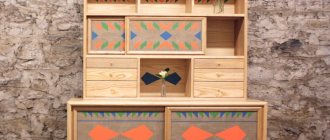
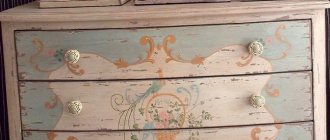
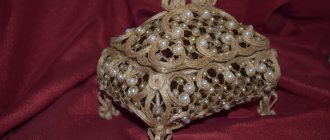
The craquelure technique is one of the favorite techniques among craftswomen who are fond of decoupage. Crackle is small fine or large cracks on the surface of the paint layer, giving the product an antique effect. These cracks can appear on an antique item independently, but after a very long period and under certain conditions.
However, thanks to the chemical industry, craquelure can now be made artificially. For example, artists of modern painting or masters of decorative and applied arts, if desired, quickly give the product the effect of antiquity (crackle) using craquelure varnishes in their works. However, artificial craquelure is almost always easy to distinguish from natural craquelure, which helps restorers, antique dealers and other professionals distinguish genuine works from fakes.
How can you get craquelure?
Master classes of novice interior designers most often use special varnishes to create “aged” items.
That's what they're called - craquelure. To emphasize and highlight cracks formed on the surface of an object, ink, oil paints or pastels are specially rubbed into varnishes. Compositions intended for patination give a remarkable effect. The craquelure technique, despite all the new compositions, still cannot compete with natural cracks in works of art. That is why experts can easily distinguish the original antique item from a fake.
Crackle effect
Have you noticed the network of small cracks on the surface of the paintings? These cracks (loss of integrity of the paint or varnish layer) are called craquelure - from the French word craquelure (crack).
Craquelures on Gioconda's smile. Some even believe that cracks are an integral feature of all old paintings. This is wrong. In most cases, craquelure is the result of a violation of the technology for applying primer, paint layer and varnish. Another reason for their appearance is errors in mixing paints, because previously artists, unlike you and me, did not have the opportunity to buy ready-made paints in the “Artists Supplies” store and made them themselves. Of course, the non-ideal conditions of a work’s “life” also play a role in the emergence of a time grid.
A network of decorative cracks can decorate anything. Today, cracks in paint coatings are not always a headache for restorers. There are formulations on sale that are specifically designed to produce a cracked effect. A network of decorative cracks can decorate anything - from a box to a cake, creating an antique ambience. Crackle can be an addition to decoupage or an independent decor.
Tools and materials for applying craquelure
Craquelure can be applied to almost any surface. Master classes on varnishing glass, wood, ceramics, metal or paper, despite some similarities, still have certain differences. That is why for each of these types of materials the most appropriate technique for executing a given design should be used.
To apply this decorative coating you will need the following tools and special compounds:
• synthetic brush;
• hair dryer for drying the product;
• primer;
• acrylic paints (preferably in contrasting tones);
• one-component craquelure and finishing varnish.
In the absence of expensive compounds, you can use available materials: egg whites, PVA glue, table vinegar, washing gel, gelatin. There are several ways to apply craquelure varnishes to various surfaces. Below are the most popular ones.
Application of craquelure medium (composition)
As a rule, all craquelure compositions, regardless of price and manufacturer, allow you to achieve a cracking effect. They each do it in their own way, and working with each of them takes a little getting used to. However, there are general operating rules.
Typical mistakes:
- The craquelure varnish medium was not mixed before use or was mixed too much and contains many air bubbles.
- An uneven layer of craquelure varnish is applied to the base (if unintentional, this is considered a mistake).
- The composition is applied with a rough, for example, bristle brush, leaving “grooves”.
Rules:
- Before use, you need to mix the composition well (for a uniform consistency) and wait a little (until any possible air bubbles disappear).
- Apply the composition with a flat synthetic brush (for a smooth, “grooved” coating). A thin layer of the product will cause small cracks, a thick layer will cause large cracks. An uneven layer will produce cracks of different sizes.
- If the composition is applied only to certain parts of the work, then craquelure will appear only in these places.
- The movements of the brush are directed in one direction, the composition is applied to the surface at a time.
We invite you to familiarize yourself with Soaked apples for the winter in jars - 6 recipes at home
Single-phase craquelure
The most popular is one-step craquelure.
Master classes on creating this simple coating, also called single-phase, are the most popular. It is used to create a surface with spectacular contrasting cracks. To do this you will need one-component craquelure and acrylic finishing varnishes and a hair dryer. A primer is applied to the thoroughly cleaned surface of the item (selected depending on the material from which the item is made). To speed up the drying process of the composition, use a hairdryer. Acrylic paint is applied to the dried primer. It is this that will be visible in the resulting cracks. After it dries, craquelure varnish is evenly applied on top. It must be remembered that the thicker its layer, the larger the resulting cracks. When the varnish dries a little and does not stick to the fingers (without losing its stickiness), the main (second) acrylic paint is applied to it. After about 10 minutes, cracks will begin to appear on the surface of the object.
The dried paint is carefully coated with finishing varnish. This coating is called “one-step craquelure”. A decorating master class using this technique can be repeated even by a person far from design and art. This finishing method is excellent for decorating porcelain and wooden interior items, jewelry boxes, and photo frames. By honing your skills in this technique, you can create unique products.
How to make craquelure varnish with your own hands
There are many types of craquelure varnish. There are also master classes on how to make it at home. You can replace the varnish with homemade ones based on gelatin, wheat dextrin and other materials. Vinegar and egg white must be added to the composition.
To create varnish with your own hands you need to prepare:
- acrylic based paints;
- brush;
- sponge;
- hair dryer;
- varnish PF-283;
- PVA glue;
- wheat dextrin.
Making a composition for craquelure from gelatin
The varnish consists of:
- 1 tbsp. l. gelatin;
- 1 glass of water.
Gelatin is poured into water to swell, heated and completely dissolved. After cooling, the composition is ready for use. It is applied to the surface and dried. Any other layers can be applied to the dried layer depending on the idea. Most often, a layer of protective varnish is used. This composition is good because, if necessary, it can be easily washed off with plain water and a fresh layer applied to achieve a cracking effect.
Making a mixture for craquelure from wheat dextrin
Varnish can be made from wheat dextrin. This is an adhesive obtained from wheat starch by heat treatment. All you need to do is take 40 grams of it, add boiling water and let it sit. The result should be a mixture that has the consistency of liquid yogurt. A layer of shiny varnish is applied to the surface treated with decoupage and dried. After this, a thick layer of dextrin is applied with a wide brush. It dries in about 30 minutes without a hair dryer.
Read on our website
Decoupage shelves with your own hands Decoupage shelves with your own hands is a great way to breathe a second life into
Making a liquid gel composition
To decoupage furniture, a composition based on washing gel is used. A base color is applied to the surface of the object and dried. After drying, apply a thick layer of gel with a brush. You can do this with a sea sponge. This method is used on fabric surfaces.
Egg white using craquelure technique
To use craquelure on the walls of a room, egg white is used. First, a section of the wall is covered with acrylic-based latex paint. You can do this twice. After drying, the white is applied in large strokes. You need to dry it without a hairdryer. The remaining layers can be laid on the dried layer.
Decoupage. Craquelure (master class)
Another technique for applying such coatings, called decoupage, is no less popular.
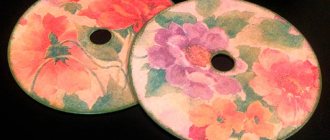
Its essence is that various pictures cut from napkins are glued onto a craquelure mesh of cracks. Some experts perform decoupage in reverse order. In this case, the craquelure is applied to the pictures already glued to the surface of the object. To work, you need the product itself, water-based paint in two tones, PVA glue, cut out and selected designs, acrylic varnish, art brushes, and a hairdryer.
Advantages and disadvantages
Crackle is an artificial aging technology, which is based on the formation of artistic cracks in the color layer of the plaster material. Plaster is used in the interior separately or in combination with other finishing mixtures and techniques (decoupage, painting).
The craquelure plaster composition on walls and ceilings has the following advantages:
- decorativeness;
- the possibility of creating an original interior design;
- versatility of use, because plaster can be used to decorate walls made of brick, concrete, and plasterboard;
- variety of application techniques;
- the material can be used for finishing columns, walls, plinths, ceilings;
- the coating is moisture resistant;
- the ability to enhance the effect of surface aging;
- areas with cracks can be painted over by changing the design;
- environmental friendliness of the composition;
- a wide range of textures and colors;
- a type of plaster can be used to correct minor surface unevenness;
- durability, wear resistance;
- resistance to mechanical damage.
The list of shortcomings:
- difficulty of application;
- high price of materials.
Stages of making craquelure using decoupage technique
• Cleaning and degreasing the surface of the object using alcohol.
• Applying a uniform layer of water-based paint to the surface using an art brush. Dry until completely dry.
• Apply a layer of PVA glue to the surface using brush movements from top to bottom or from left to right.
• After the object has dried, a contrasting (second) paint is applied. The movements of the brush should be the same as when applying glue.
• Without waiting for the paint to dry, a stream of hot air from a hair dryer is directed onto the surface of the object. Under its influence, the coating will begin to crack. The longer the product dries, the rougher and deeper the cracks will be.
• The item is decorated with napkins using glue. The dried product is coated with several layers of acrylic clear varnish.
This craquelure looks good on dishes, flower pots, vases, and trays.
Applying acrylic paint
This is perhaps the most subtle moment in the whole work. The final appearance of the work on creating cracks depends on the timing of this stage, the accuracy and uniformity of paint application.
Typical mistakes:
- The paint is applied too early, that is, when the craquelure varnish has not yet dried enough (it sticks and gets dirty).
- The paint is applied too late. This is a different period for different compositions (you need to look at the description).
- The paint is applied in random directions (if not intended).
- The paint is not applied “in one pass”, but is applied to the still wet layer again or “fiddled” back and forth with a brush.
- A rough or, conversely, too soft (not elastic) brush is used.
We suggest you familiarize yourself with How to properly prepare fresh honey mushrooms
Rules:
- The paint is applied at the moment when the craquelure varnish stops staining your finger when you touch it, but still sticks.
- To obtain large and rough cracks, the paint can be applied a little ahead of time, making confident impasto strokes.
- To speed up the drying of the product, you can use a warm stream from a hair dryer.
- All areas with craquelure varnish must be covered with paint.
- The paint must be applied strictly in one layer (do not move the brush over the same place).
- The movements of the brush are directed in the same direction as when applying the medium (unless otherwise provided by the design).
- The composition is applied with a flat synthetic brush (for an even, “grooved” coating).
- A thin layer of paint will give thinner and more graceful cracks, a thick layer will produce larger and deeper ones. An uneven layer will produce cracks of different sizes and types.
Two-step craquelure
Master classes on this technique are a little more complicated than the previous ones.
To work you will need acrylic varnish, art brushes, gum arabic (a viscous liquid that hardens in air), shellac (a natural resin), bitumen, gold or silver powder. Applying craquelure consists of the following steps: • The cleaned surface of the object is covered with 2 layers of acrylic varnish. After it dries, a generous layer of shellac is applied to it. The thicker it is, the larger and rougher the cracks will be. To obtain a barely noticeable openwork mesh, a thin layer of shellac will be enough. When applying this substance, possible smudges should be avoided, since this error is almost impossible to correct.
• When the surface of the shellac is slightly dry, but still sticky, apply gum arabic (the consistency of liquid sour cream) on top of it in a thick layer. With light movements of the fingertips, this substance is rubbed over the entire surface. After about 3 minutes, the gum arabic will begin to stick to your hands. At this time, the “massage” movements must be stopped.
• When gum arabic dries, cracks will form on the surface. To emphasize them, bitumen is rubbed into them. Then golden or silver powder is applied along the cracks.
• The finished product is coated with finishing varnish.
Two-stage craquelure: step-by-step instructions
Two-step craquelure finishing is a two-step varnishing process, resulting in small cracks that need to be emphasized with a contrasting color. The crackling kit consists of a slow-drying varnish (first step) and a fast-drying varnish (second step).
Before finishing crackle, wooden furniture is carefully primed and painted, otherwise the first layer of varnish will “go” into the pores of the wood and cracks will not form.
In order to master this decorative technique, we suggest that you read the step-by-step instructions and take a master class with two-step craquelure:
You will need:
Craquelure in decoupage is one of the most popular decoration methods, which is used in every second decoupage project.
The surface of the tray, pre-painted in two layers with acrylic paint and decorated with a napkin using the decoupage technique, will be coated with a two-step craquelure varnish.
If this varnish is water-based, rinse the brush with water. Drying time for varnish varies, so follow the manufacturers' recommendations. The varnished surface can be dried with a hairdryer, but not with hot air.
Craquelure on glass objects
Various glass products decorated using this technique look very impressive.
The entire process of working with this material is practically no different from the above methods. At the same time, most needlewomen prefer to use single-phase craquelure on glass. To work, you will need the object itself, acrylic paint in 2 contrasting tones, varnish, a synthetic art brush, and craquelure varnish. The glass surface on which the decor will be applied is degreased with alcohol. Then it is primed with acrylic varnish. After it dries, apply paint of one tone (it will show through in the cracks). After this, craquelure varnish is applied to the surface. When it dries a little, but has not yet lost its stickiness, the product is coated with the main (second) acrylic paint. After cracks appear and the composition dries, varnish is applied to the surface.
What is one-component craquelure?
Craquelure (“fr” craquelure) translated from French is a crack in the paint layer or varnish in a work of painting. One-step craquelure is used to age simple plain surfaces. To do this, the surface of the object to be decorated is covered with the main background. This is the color the cracks will be.
After the paint has completely dried, a one-step craquelure varnish is applied with simple movements in one direction and dried again. Next, paint of the main color is applied, under the influence of which the craquelure varnish begins to crack, and the background paint appears in the cracks. The finished product can be coated with a clear varnish for acrylic paints for durability.
The concept of one-component implies the use of one product (component) in the decorating process. It is worth highlighting that two-component and one-component compositions can give the effect of simple cracking. At the same time, single-component ones can cause cracks in both varnish and paint.
The general scheme of a one-component pie is as follows:
- The first stage consists of high-quality preparation and priming of the workpiece.
- Then we paint it the color we want to see in the cracks and dry it completely,
- Next we apply craquelure varnish. Let it dry a little (here are the following nuances - the longer you dry it, the smaller and longer the cracks will be).
- Apply top coat paint.
- After it you can patina or varnish.
As a result of these manipulations, the craquelure varnish, due to the difference in surface tension, cracks the paint of the main color and the previous layer of paint is visible in the cracks. For clarity, it is recommended to watch the following video:
Necessary materials
To perform crackle plaster you will need the following materials:
- base paint that will show through cracks;
- craquelure varnish, 100 g of varnish is required for 1 m² of wall;
- textured plaster for decoration;
- dye (acrylic or latex);
- decorative wax;
- special grout for cracks;
- transparent fixing varnish;
- primer, etc.
What to pay attention to
When applying the top coat of paint, you must adhere to the following rules:
- You cannot paint twice in the same place, as cracks begin to form immediately, and it is possible to paint over them.
- At one time, the paint should be applied as evenly as possible, covering the layer so that the underlying paint does not show through.
- The consistency of the main color paint is very important - not liquid, but not thick, so that the craquelure varnish allows it to crack.
- It is important to apply this paint evenly, with equal pressure on the brush. If the pressure is stronger, the paint layer will be thin, the cracks will be long and elongated, thin (when applied with a brush) or small and “scaly” (when applied with a sponge).
To recreate beautiful natural cracks, you need to correctly combine a sponge, a brush, layers of paint and drying the craquelure varnish. And, naturally, the selection of the optimal craquelure composition is no less important. Therefore, the nature of the cracks depends entirely on:
- Craquelure composition.
- The thickness of the varnish layer.
- Drying conditions.
- Consistency of top coat paint.
- Thickness of the top layer of paint.
Errors in preparing the base
- The porous base will absorb the craquelure medium, which will not be able to produce full cracks in the subsequent paint layer.
- Only one, thin or uneven, layer of primer or acrylic paint is applied to the base.
- The compositions are applied with a coarse (bristle) brush.
- A well-prepared base (wood, plaster, plastic, ceramics, etc.) is a surface with two layers of acrylic paint or primer.
- If you want to keep the color and texture of the base, you can coat it with a clear finishing varnish with a glossy or matte effect.
- Each layer of product applied to the base must be thoroughly dried.
Which varnish to choose for one-step craquelure
One-step craquelure varnish is a water-based product that looks like a liquid paste. It dries extremely slowly. And acrylic paint applied on top of such a composition dries simply quickly in comparison. That is why its cracking occurs, provoked by movement in the underlying layer.
Varnish for one-step craquelure
On sale on the shelves of craft stores you can find many jars of one-component compositions from various manufacturers. The most common one-step varnishes that are used are:
- Craquelure varnish - DECOLA (Russia).
- Craquelle Medium - Hobby Line (Germany).
- Krakelierlack - Nerchau company (Germany).
- Krakelee Medium - Marabu (Germany).
- Antique Effekt - Sadolin (Denmark).
- Idea Decoupage - Maimeri company (Italy).
- Krakelierlack DecoArt medium - Rayher (Germany).
- Crackle Medium - Decorfin (Holland).
- Craquelure paint Krakelierfarbe - Glorex (Switzerland).
- One-step craquelure varnish - Ars Hobby company (Russia).
- One-step craquelure varnish - Tair company (Russia).
- One-step craquelure varnish - Aqua-color company (Russia).
- Country Style Crackle - Stamperia (Italy).
- One-step varnish Vintage design “I am a decorator” - Rusart company (Russia).
Unfortunately, each composition gives its own peculiar cracks, and it is unlikely that you will be able to choose the composition that you will definitely like the first time. Therefore, you should experiment with different compositions. Feel them and choose the best one for yourself.
Technology for crackling wooden surfaces
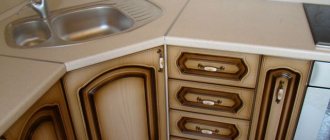
Modern industry produces many compositions for applying craquelure at home with your own hands. Moreover, some of them can be used not only for processing wood, but also for applying “antique” cracks to the surface of products made of plastic or metal. Decorative metal additions to wooden furniture, on which patina or decoupage is complemented with craquelure, will look quite stylish and original.
To apply craquelure cracks, you can buy a one-component crackle varnish or a two-component composition, a set of which is sold in the form of two bottles. For household aging of furniture, a one-component varnish is quite suitable.
Many experienced restorers believe that furniture pieces get a more natural, antique look if cracks are formed using improvised means - vinegar essence, egg white, gelatin and even washing gel. However, for those who want to try their hand at restoration work for the first time, it is better to use a special crackle varnish, sold in household goods stores under the brands “Stamperia” and “Ferrario” (Italy) or “Havo” (Netherlands) called “Creall-Crackle” or "Antique Crackle".
Drying one-step craquelure
It's quite difficult to make a mistake at this stage. To speed up the final result, two options are possible: wait until everything happens on its own, or speed up the process of crack formation using a warm jet of a hair dryer (a hair dryer will also work).
Rules:
- Cracks begin to appear almost immediately, especially if the compounds are applied in a thin layer.
- Large cracks appear first, then they continue to grow and, as a rule, are covered with a network of smaller cracks.
- The heating process speeds up this process.
Features of applying craquelure
Like any type of design, this one also has a few secrets that can make the job easier.
The craquelure technique, which anyone can master, allows you to get the job done quickly and without any defects. To do this, you should remember the following techniques: • The artistic brush should only be synthetic.
• After the craquelure varnish has dried, the cracks are often rubbed over with “silver”, “gold powder”, or dark-colored oil paint. After this, the remnants of these products are removed from the surface with vegetable oil and wiped dry. The processed product is coated with acrylic varnish. This technique allows you to turn even a simple object into a work of art.
• Do not shake the varnish before application to avoid the formation of bubbles. The work area must be free of dust and thoroughly ventilated.
• Cracks on the surface follow the same direction as the movement of the brush. To obtain the so-called craquelure mesh, use a sponge or make very small strokes.
What errors can occur during application?
Apply the varnish using a wide brush in even strokes. You cannot brush the brush twice over the same area. Under normal temperature conditions, the size of cracks depends on the thickness of the varnish layer. The varnish dries in about 30 minutes. You can't overdry it. A poorly applied layer must be washed off and reapplied. This is easy to do if the varnish is water-based. To get small cracks on the surface, it is better to use a sponge. You need to dry the varnish until your finger sticks to it, but does not get dirty. Cracks do not always appear on a completely dry layer.
When using a hairdryer, it is not recommended to direct a strong stream of hot air onto the product. With a thin layer the cracks are smaller, with a thick layer they are larger.
Acrylic paint is selected with a matte surface. A one-component varnish should be placed between its two layers. After work, brushes are washed with turpentine, then with water and laundry soap.
Crackle technique: recommendations for beginners
For those who first decided to use the craquelure technique in their decor, we suggest that you familiarize yourself with the recommendations for beginning craftsmen:
- If you need to get a dark aged surface, it is better to use bitumen varnish.
- When you need to get well-defined cracks, use oil paint. If the paint is difficult to remove from the surface, you can soak a cloth in white spirit or linseed oil and wipe the surface.
- Craquelure cracks on furniture will be clearly visible when using paint in contrasting colors.
- Metallics can only be used as a first coat. If you apply this paint on top, there will be no cracks.
- If the directions of application of varnish and paint coincide, then the cracks will be parallel. If the varnish and the top layer of paint were applied perpendicular to each other, then the pattern of cracks will appear in the form of a grid.
The size and size of the cracks will depend on:
- on the thickness of the top layer of paint, that is, the more paint, the larger the cracks
- from the direction of application of the top coat of paint
To consolidate the material covered, we suggest watching a detailed video of a master class on craquelure:
