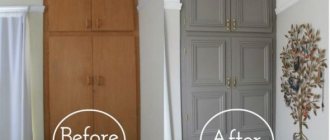
What can you make from a chest of drawers at home?
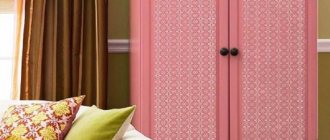
Decorating a chest of drawers yourself is not only changing worn-out furniture by hand, but also remodeling it. This is the creation of a completely original household item for a small amount of money.
By carrying out the restoration of a chest of drawers yourself, you can not only save money, but also show your creative abilities.
Restoring a chest of drawers is a very interesting business. There are many methods for creatively remaking such furniture:
- decoupage with fabric, wallpaper, lace, postcards, etc.;
- painting using stencils;
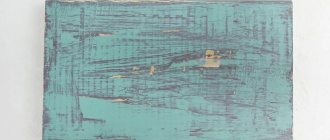
- transformation by aging using different shades of paint;
- gilding - working with gold leaf;
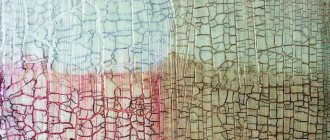
- giving an antique look, creating a cracked effect, etc.
Each of the chosen methods has certain features, but the result is the same - a unique thing, devoid of cliches, a transformed piece of furniture in an interesting style.
Decoupage
Necessary materials : pictures for decoupage, scissors, PVA glue, roller/brush for painting, varnish.
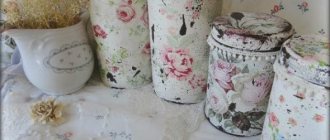
According to Wikipedia, decoupage is the decoration of objects using napkins, pictures, fabric or photographs. The technique is suitable for beginners. All you need is to cut out the illustration you like along the contour (you can use decoupage cards, ordinary three-layer napkins, postcards) and glue it to the selected area with PVA glue. Mix 2 parts glue with 3 parts water and cover the picture with the finished mixture. A final coat of varnish, and an ordinary chest of drawers turns into a work of art.
How to restore an old chest of drawers with your own hands
Over time, any furniture ceases to be attractive: the varnish may peel off, the colors often become dull, etc. But everyone can do restoration work at home: restoration and renewal.
Over time, the chest of drawers may lose its attractive appearance.
How can you restore an old chest of drawers with your own hands? The main thing that needs to be done is to prepare everything that is required for work of this kind - finishing materials and tools - and familiarize yourself in detail with the process methodology. Having decorated the chest of drawers, the craftsman will give the antique piece of furniture another life.
With the help of decor you can update old furniture.
NOTE! The technology for updating an old cabinet is divided into several stages. Each of them is undoubtedly important in order for the expected result to be achieved.
Features of the technology
Old Soviet-made chests of drawers are distinguished by their classic design, impeccable quality and refined lines. Like any other furniture, over time they lose their presentable appearance - the colors fade, the varnish begins to flake, cracks and scuffs appear. The decoupage technique, which is decoration using all kinds of paper and linen pictures, which are often combined with special effects, helps to give a strong and high-quality piece of furniture a second life.
Many people think that decoupage is a French technique, but few people know that in fact its homeland is the eastern part of Siberia. A little later, this technique came to the countries of the Old World. By the way, in Italy, decoupage was considered “the art of the poor,” the trend received such a “nickname” because not everyone had the opportunity to decorate their home with precious stones, gold or silver, but everyone wanted to live in a beautiful house. Over time, in France, decoupage was elevated to the rank of art; then even the rich did not disdain decorations of this kind in their homes.
Today, there are quite a few ways to restore the appearance of chests of drawers - using paper and napkins, linen, aging by applying unexpected combinations of paints, simulating cracking on the surface. In any case, the result will always be spectacular and luxurious.
The main advantage of the technique is a highly artistic result, which can be achieved even in the absence of special education. This is achieved thanks to the main distinctive feature of decoupage - applying a ready-made image to the base. For these purposes, there are a huge number of different options with beautiful designs, namely:
- decoupage cards;
- textile;
- napkins;
- photos;
- stencils;
- wallpaper;
- scrapbooking paper;
- newspaper clippings;
- pictures from magazines.
Every year new styles, effects and devices are added - all this gives reason to assume that decoupage will be in demand for a long time.
Removing paint and plastic film
The preparatory stage in the restoration process is very important.
NOTE! If you miss anything when preparing the surface for decoupage, all further work will be useless.
Before you start decorating, you need to do some careful preparation.
Decorating the chest of drawers is preceded by removing the previous paint or varnish coating. For this purpose, apply acetone to the surface and cover the chest of drawers with oilcloth or film for about an hour: the latter is done to enhance the effect.
After the specified time, the film, remaining varnish and paint are removed using a spatula.
Old paint needs to be removed.
We remove cracks
If in some places on the surface of the chest of drawers chips, cracks, scratches appear, holes or other defects are visible, they can be hidden or disguised with wood putty.
If there are cracks, they must be repaired.
Sanding the base
The putty must be completely dry. It is important. Next, the surface should be thoroughly sanded with sandpaper or a sanding sponge.
The surface must be smoothly sanded.
The surface can also be carefully processed with a special grinding machine.
We prime
The basis for a future self-restored product has been created. Next you need to prime it and paint it.
Then, after the putty has dried, it is necessary to apply acrylic primer. It is usually white: this material has more advantages. But in some cases, black primer may be required.
After preliminary work, the item needs to be primed and painted.
Painting
After the soil has completely dried (this will take about three to four hours), you can begin painting the chest of drawers.
Painting is carried out after the soil has completely dried.
NOTE! Once a primer is selected for wood, there is no one-size-fits-all paint solution.
So, the composition could be as follows:
- water based;
- acrylic;
- multicolor;
- plain.
The choice of paint depends only on your preferences.
What to choose from directly depends on the master himself, his initial idea, and what result he wants to achieve.
The chest of drawers is coated with paint, for which you need to use a roller or brush.
Next, varnish is applied to the surface of the chest of drawers, followed by 1-2 layers of paint. The final step is another coat of varnish.
Manufacturing technology
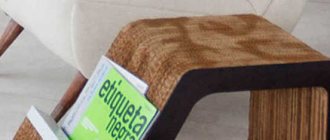
Cardboard is suitable for design and decoration, providing a wide variety of original forms.
For the details of the bottom, top cover and side walls you will need twelve pieces of cardboard measuring thirty-five by nineteen centimeters. The thicker the better.
For the partitions on which the drawers will stand, sheets measuring thirty-four by seventeen centimeters are needed. There are also twelve of them.
A hand-made cardboard chest of drawers can withstand decent loads.
For the front and back walls of the drawers, you will need thirty pieces, the size of which is thirty-one by five and a half centimeters.
Below is a master class on assembling a chest of drawers using these parts.
You can do without any investment at all if you have a supply of cardboard in the house or you know where to get extra.
Schemes and drawings
Scheme for determining cardboard thickness
| Length | Width | Quantity | |
| Bottom, lid, walls (sides) | Thirty five centimeters | Nineteen centimeters | Twelve pieces |
| Partitions | Thirty four centimeters | Seventeen centimeters | Twelve pieces |
| Walls (front and back) | thirty one centimeter | Five and a half centimeters | Thirty pieces |
With careful use and high-quality assembly, cardboard will last 5 to 10 years.
- Bottom, lid, side walls. 1 cell = 1 cm.
- Partitions. 1 cell = 1 cm.
- Front and rear walls. 1 cell = 1 cm.
Master class on making a chest of drawers from boxes
We take the side parts of the chest of drawers (thirty-five by nineteen centimeters). We mark first five, then seven centimeters from the edge. From the top edge, mark six centimeters along the height of the drawer, add the thickness of the partition, and so on until the very bottom. We cut out the small rectangles that we got with a stationery knife and take out two of the three layers of cardboard.
For those who will be making a chest of drawers out of cardboard with their own hands for the first time, choose a lighter model.
We do this specifically in order to fix the partitions in the future. Otherwise, due to heavy things, the partitions will begin to sag and peel off.
We measure 5 and 7 centimeters from the edges of the partition and cut off the excess. Now the side wall and the partition fit perfectly together.
Connect the surfaces with instant glue, a glue gun, then place under a load for an hour for adhesion.
We repeat everything that we did with the first side wall with the second.
We check that the upper partition falls into place without problems and, if everything fits together, you can cut out the remaining rectangles in the side wall and install the partitions.
All that remains is to glue the partitions into the side walls. To do this, fill all the holes with glue. You can also use hot glue for strength. It will securely fix the partition, and after drying everything will hold tight. We repeat this whole process with all four partitions.
Glue the parts on the inside of the sides so that there are gaps in the places where the shelves will be inserted. The dimensions of the groove must correspond to the height of the shelves.
After the glue has dried, we will do the same with the second side wall.
We glue the top cover and the bottom (two parts measuring 35 by 19 centimeters) and, if you decide to use colored paper, cover the entire front part of the chest with it. Next, measure the size of the back wall and glue it (may vary depending on the thickness of the cardboard)
For neatness, the edges are covered with paper tape or paper.
Let's take care of the drawers. The front and back walls (31x5.5 cm) need to be glued to pieces of cardboard measuring 31 by 16.5 centimeters. After this, we measure the size of the side walls and glue them between the front and back. It turned out 16.5 by 5 centimeters, but this figure may vary depending on the thickness of the cardboard used.
Then, if you wish, you can cover the entire structure with colored paper and/or paint it in any color of your choice. You can also screw the handles for convenience.
To summarize, I would like to say that you can assemble many different designs from cardboard, and this is just one of the options. After spending a couple of hours on assembly, you will have a beautiful and comfortable chest of drawers at your disposal, which will cost you mere pennies.
How to decorate a chest of drawers with your own hands
There are many ways to decorate a chest of drawers.
ADDITIONAL INFORMATION! Numerous ideas from specialists and their recommendations will help turn your bedroom interior into perfection.
There are a great many ways to decorate a chest of drawers.
So, what can you do to decorate your chest of drawers?
The original solution is to add:
- floral print;
- fabric on the sides of the drawers.
Floral prints are one way to make your chest of drawers unique.
Other great dresser makeover ideas:
- use painted toys as handles, or alternatively, use their halves;
- cover it with metallic paint;
- paint in other original ways (for example, in ombre style);
- when painting, you can use magnetic paint;
- decorate the boxes with maps of different countries;
- coat the drawers with different shades of varnish;
- decorate with multi-colored stripes;
- add a sunny accent;
- cover with newspapers;
- update with gift wrapping;
- create an optical illusion on the surface;
- cover with fabric;
- cover with foil;
- create a colored texture on the drawers;
- use house numbers as handles;
- decorate with bright geometric patterns;
- mix prints;
- make color contrast;
- line with colored pencils;
- use a stencil to create an original pattern;
- make three-dimensional decor, etc.
You can experiment endlessly.
Wooden or plywood chest of drawers
Let's make a chest of drawers for cosmetics with our own hands.
For this we need:
- jigsaw;
- plywood sheet;
- PVA glue;
- sandpaper;
- small carnations;
- materials for decoration (handles, fabric, lace);
- paints;
- brushes, sponges.
Manufacturing stages:
- Using a jigsaw, we cut out parts from a sheet of plywood according to the dimensions indicated in the table or drawing.
- For convenience, take a beam and attach sandpaper to it. We will handle all the irregularities and burrs on the parts.
- We assemble the chest of drawers.
First step: nail the bottom to the back piece, then attach the sides. Next we attach the top bottom and top panel. The body is assembled.
Let's finish the job:
- We cut out the longitudinal, rear and front dividers.
- Smooth out any unevenness with sandpaper.
- We glue all the parts with PVA glue to the top bottom and we form cells.
- Next, the component parts are cut out and the drawer is folded.
The chest of drawers is assembled. We paint it in the desired color, attach or glue the handles.
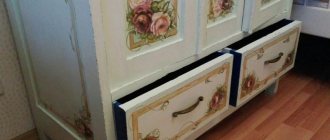
The product will look very beautiful if you use decoupage or hand painting techniques for decoration.
If desired, you can process some parts with a milling machine, then the chest of drawers will be embossed and rounded. That's it, the house for cosmetic accessories is ready.
Master class on chest of drawers restoration
On thematic resources, connoisseurs of old things and those who like to create something with their own hands will find wonderful master classes. The videos show how to restore and restore an old chest of drawers, provide detailed step-by-step instructions, talk about the necessary tools and materials, and reveal the features of decoupage.
You can get many ideas for decorating furniture from master classes.
Master classes will help you do everything correctly, in the required sequence.
Decorating a chest of drawers yourself is a great opportunity to show your artistic taste and create an updated and completely unique interior object. A simple thing can be turned into an example of almost any stylistic direction.
Thanks to the art of decoupage, you can turn a simple boring thing into a unique art object.
Manufacturing
The step-by-step scheme for making any chest of drawers includes a number of stages. The main ones are: cutting and processing of parts, frame assembly, installation of partitions and drawers. Secondary: attaching handles, decorating. Each of the points must be performed in accordance with the rules, then the product will turn out to be of truly high quality.
Material cutting
Cutting chipboard and similar sheet panels can be done on your own or using special machines. Professional cutting services are offered by distributors of tile building materials and furniture manufacturers. When choosing this option, the cost of a homemade chest of drawers will increase slightly, but the ends of the sawn elements will be more accurate.
Features of chests of drawers for TV, types by shape, filling, size
When cutting chipboard yourself, you should remember the need for 1–2 mm of margin on the edge. In such cases, the jigsaw must be electric, the support of the sheets must be stable and level, and the furniture maker’s movements must be smooth and precise. The stage ends with checking the model, adjusting the parts and drilling holes for the confirmations using a drill 0.5 mm smaller.
Edge processing
At this stage, the ends of the parts are carefully inspected for defects and covered with self-adhesive edges. Step-by-step actions:
- Chips and similar irregularities are covered with wax.
- When planning to use the chest of drawers in conditions of high humidity, the ends are coated with sealant.
- After eliminating possible defects, the ends are covered with a protective film, heated with a hairdryer or iron.
Frame assembly
Any model of a chest of drawers is assembled with your own hands according to the general principle:
- In pre-marked areas, drill holes for screws of slightly smaller diameter.
- The parts are joined and connected with confirmations using a screwdriver.
- To check possible deviations, a square is applied to the corners of the assembled structure.
- Directly during assembly, lines are marked on the side parts for attaching the guides, starting from the bottom, with a mandatory 3 mm gap between adjacent drawers.
Installing the table top and bottom
The assembly of any product begins from the bottom, with sequential fastening of the sidewalls and transverse shelves (if any). And only then, after checking the angles of the structure and marking the guides, the tabletop is screwed to the chest of drawers. There are no problems when working with simple, flat surfaces. The upper part is attached using confirmations and plastic furniture corners from the inside. Any additional elements of the chest of drawers (shelves, folding table) are fixed at the end, after checking the stability and correct assembly of the entire structure.
Attaching legs or wheels
Cabinet furniture made from lightweight board materials in most cases does not need legs. Problems with joining the walls are solved using a recess at the bottom of the chest of drawers on the reverse side. But it is advisable to equip heavy, frequently moved or stylish models with supports, thrust bearings or wheels. Such elements are screwed at a distance of at least 50 mm from the corners, at an equal distance from each other. The method of fastening depends on the type of leg and is specified before assembling the chest of drawers. In some cases, corresponding holes are pre-drilled in the bottom.
Rear wall installation
The back part is fixed with confirmats and finally strengthens the structure. Not only the corners, but also the diagonals of all the main elements of the chest of drawers must be checked. Deviations from the specified sketch of more than 1 mm are not allowed. The part is screwed in the absence or after elimination of any defects.
Tips for placing milk oak chests of drawers in the interior
Assembly and installation of boxes
This stage begins with assembling the boxes:
- The side parts are connected first and only then, after checking the diagonals and angles, the bottom is attached to the boxes with self-tapping screws.
- The second part of the guides is mounted to the sides.
- The pull-out elements are sequentially (starting from the bottom) inserted into the chest of drawers, pulled out and pushed in. Correctly assembled and installed boxes move smoothly, without displacement.
The given instructions allow you to make your own chest of drawers both from chipboard and from any board materials, including plywood or solid wood. The difference when working with denser varieties appears insignificantly, namely in the grinding of the ends and the use of more reliable fasteners. It is also necessary to remember that when assembling a chest of drawers on confirmed mats, there is no need to coat the joints; when using tongue-and-groove elements or mounting on dowels, the opposite is true.
Examples of chest of drawers restoration
Antique decor
Required materials : acrylic paint, roller or brush for painting, sandpaper, gold leaf, glue, varnish.
An antique decorated chest of drawers is suitable for a bedroom in country or Provence style. It's funny that even the marks of time have to look stylish, so you have to work a little. On the prepared surface (5th stage of our list) we apply two layers of acrylic paint in contrasting colors. After the paint has completely dried, we sand the corners and protruding areas with sandpaper.
If you want to give your chest of drawers a feeling of former luxury, additionally use thin foil called gold leaf. Apply glue to the selected areas, and then place the gold leaf on top. Give it at least two hours to dry and remove any excess. The final stage of work, as you probably already guessed, is varnishing.
Preliminary preparation
Before starting finishing work, in order to give the furniture a new look, it is necessary to carry out a number of preparatory measures. The first step is to remove all the contents from the drawers - the chest of drawers should be completely empty. To carry out decorative finishing activities efficiently, it is recommended to disassemble the chest of drawers into its component parts. All fittings have been unscrewed. The drawers are open. The swing doors are removable. If necessary, the tabletop can be removed. All this is necessary for a more detailed and in-depth study of each individual element. The output will be a product of the highest quality.
Further stages of work:
- Removing old coating. This is the most important component of restoration work, because decorative finishing is applied exclusively to a clean and impregnated surface. To get rid of any paint coatings, you can use a special solvent and a regular spatula. If it is necessary to remove plastic film, experts recommend arming yourself with a hair dryer. A small area is heated, the coating peels off under the influence of hot air and peels off smoothly. Then gradually clean all the furniture piece by piece.
- Eliminating cracks, leveling the surface. The procedure is carried out using putty, which is applied to the entire area of the chest of drawers. Carefully process each element and section of furniture, then allow the product to dry completely - sometimes this can take at least a day.
- Smoothing the treated surface. It's worth using a sander at this stage, but if you don't have one, sandpaper will do. Particular attention should be paid to corners and transitions. The final goal is a perfectly flat surface.
- Primer. This is a necessary basis for decorative finishing.
For primer, it is recommended to choose a special composition for working with wooden furniture.
Apply paint remover
Remove old paint
Walk through hard-to-reach places
Sand the surface
Sand small parts with sandpaper
Find any deep damage with putty
Sand the fill points
Ready
Updating children's furniture
When it comes to restoring children's furniture, you can experiment with custom colors, fun designs and patterns. An old chest of drawers will look quite original with drawers painted in bright and contrasting colors. Yellow, red, blue, green or purple will fill a child's room with light and fun. The tabletop can be painted in a calmer shade, it will be more practical.
The decoupage technique is also quite often used to decorate children's rooms, because you can always collect colorful pictures with your favorite characters. This will allow you to create an even more original chest of drawers with your own hands. The child’s hobbies will help you decide on the theme of the design, and on numerous thematic resources you can put together a ready-made master class that tells in detail what to do and in what sequence.
Experts recommend that schoolchildren restore the chest of drawers by covering the old wallpaper. As a result, the furniture will look interesting and stylish. It is very important that the restoration of a children's chest of drawers takes place with the direct participation of the child himself. It is he who can be the author of the idea for a new design.
