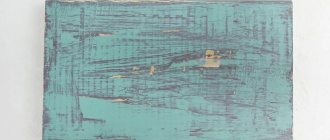
Vintage style is in demand not only among modern fashionistas in clothing and jewelry, but also in designer interiors. The antique furnishings create a special coziness and romance. Craquelure on furniture is a good solution for those craftsmen who themselves want to give a touch of time to a standard chest of drawers or an ordinary mirror, turning it into a wonderful vintage item.
What is craquelure, and what materials are needed for it?
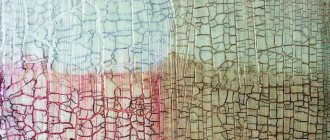
What is craquelure, and how to master this technique? Craquelure or crackle is one of the most popular decoration methods. The painting technique involves creating a pattern of thin cracks on the paint surface and the effect of an aged and cracked surface. Vintage style is extremely popular today, and therefore artificial aging in the interior has also found application. However, few people know that the crackling technique appeared in the 18th century in France.
The technology is based on the peculiarity of craquelure varnish. It is applied between two layers of paint of different shades and cracks as it dries. Thanks to this property of the varnish, a network of small cracks appears on the surface in a chaotic manner.
A surface with imitation aging will be appropriate in interior styles such as country or classic. Using the craquelure technique, you can process not only walls, but also doors or furniture.
Despite the apparent complexity, making craquelure on walls with your own hands is extremely simple. Cracks appear on the surface by themselves; the main thing is to follow the correct sequence of actions. The easiest way to create an aged surface is to use water-based paints.
What tools and materials are needed for craquelure done at home?
To age the walls you will need:
- acrylic primer;
- craquelure varnish;
- acrylic paint;
- putty knife;
- sponge, brush;
- protective varnish.
Before making craquelure at home, purchase paint in two colors. It is better to choose contrasting shades, so the cracks on the surface will appear brighter. If you need to create a network of small cracks, you should use a sponge to apply the varnish, since when using a brush, deep grooves will appear on the surface.
Craquelure varnish can be one- or two-component. In the first case, the varnish dries quickly and is easy to apply. Often, when creating a craquelure effect with your own hands, you use a hairdryer to speed up the drying process.
A two-component varnish requires precision from the artist and takes much longer to dry. However, for a normal smooth surface, using a one-component varnish is sufficient.
The DIY craquelure master class will help you master the aging technique to perfection.
Description of dextrin
If you decide to use the technology described above, then you should know what dextrin is. This is heat-treated starch, based on corn or potato substrate. Dextrin today is quite common in many sectors of the national economy. It is often used in the manufacture of adhesives for bags and labels, adhesive paper tape, as well as in the production of food containers. Among other things, this material is used in the light and food industries.
Alcohol base (shellac and gum arabic)
- First apply 3-4 layers of shellac. Each layer needs to dry for about 15-20 minutes. The brush can be cleaned with alcohol after use.
- After the last layer dries to a tack, that is, it remains sticky, but does not stain your fingers, apply a layer of gum arabic. Apply with a soft flat brush and then rub over the entire surface using circular movements with your fingers. You need to rub until your fingers stop slipping.
- After 30-40 minutes, a thin network of cracks will appear. Oil paint is best for grouting. Rub the paint into the cracks with a dry cloth in a circular motion. Once all the cracks have been exposed, wipe off any excess with a dry cloth. For the second step, i.e., do not touch the gum arabic with a damp cloth or wet hands. Water will wash away the gum arabic and may spoil cracks that have not yet developed.
- When all the cracks have been rubbed, rinse off the gum arabic under running warm water. The product will become lighter and cleaner. Cover the dried work with any varnish.
When mastering a new technique, do tests every time and be sure to follow the instructions and follow the recommendations. Work only with a dry and clean brush - especially when applying craquelure varnishes - otherwise you risk irreversibly ruining the work. Remember also that you cannot skimp on the second step, because the size and appearance of the craquelure is directly proportional to its quantity.
Water base (Maymeri 753-754)
Water-based craquelure is the most convenient for working with decoupage technique. They also create a thin network of cracks on the object, reminiscent of a cobweb. All components are applied very easily, cracks appear quickly enough, the compositions are washed off hands and tools with warm water and soap.
- Use a flat synthetic brush to apply the first step. Leave for at least half an hour. It does not dry out completely and always remains sticky.
- When the first step is completely clear and tacky, apply the second. Work with a dry, flat, clean brush. You can pour a small puddle and smooth it over the entire surface. Rub it in until it starts to dry out and your fingers stop slipping. Leave the work to dry. After an hour, you will notice thin and transparent cracks appear on the surface.
- To highlight cracks, rub in pigment (pastel, shadow) of the desired shade with a dry cloth or brush.
- Rinse the second step under running warm water and after drying from the water, secure the work with acrylic varnish.
Photo master class on decoupage of a key holder with a door using a pair of craquelure Maymeri 753-754
Depending on how you dry the craquelure varnish, the type of resulting cracks directly depends. Using a hairdryer will speed up drying, but the mesh will be very thin and fine. It is better to leave the work to dry naturally.
One-stage craquelure: step-by-step instructions
One-step, one-step craquelure varnish imitates a painted surface where the paint layer has cracked over time. The resulting effect will allow you to turn a modern piece of furniture into a valuable antique item.
A layer of this varnish is applied between two layers of acrylic paint, causing the top layer of paint to crack.
The proposed master class on craquelure will help beginning craftsmen master the basic techniques of this decoration.
You will need:
- acrylic paint of two colors;
- flute brush for painting and applying varnish;
- one-step craquelure varnish;
- acrylic primer.
One-step craquelure for beginners is one of the simplest types of decor. Follow the step-by-step instructions and you will succeed:
Using a soft synthetic flute brush, apply the craquelure varnish in an even layer of medium density. Wait for it to dry. The drying time for the varnish is specified by the manufacturer, follow the recommendations.
Crackle effect
Have you noticed the network of small cracks on the surface of the paintings? These cracks (loss of integrity of the paint or varnish layer) are called craquelure - from the French word craquelure (crack).
Craquelures on Gioconda's smile. Some even believe that cracks are an integral feature of all old paintings. This is wrong. In most cases, craquelure is the result of a violation of the technology for applying primer, paint layer and varnish. Another reason for their appearance is errors in mixing paints, because previously artists, unlike you and me, did not have the opportunity to buy ready-made paints in the “Artists Supplies” store and made them themselves. Of course, the non-ideal conditions of a work’s “life” also play a role in the emergence of a time grid.
A network of decorative cracks can decorate anything. Today, cracks in paint coatings are not always a headache for restorers. There are formulations on sale that are specifically designed to produce a cracked effect. A network of decorative cracks can decorate anything - from a box to a cake, creating an antique ambience. Crackle can be an addition to decoupage or an independent decor.
Compositions for craquelure and principle of operation
Craquemakers and manufacturers of craquelure varnishes and paints distinguish between 2 main types of compositions: one-step and two-step. This classification, upon closer examination, is not entirely correct, because the number of stages (steps) in each option is greater. And the abundance of different manufacturers, variations in the chemical composition of products and their characteristics creates confusion.
Surface with craquelure To better understand the difference, I will explain the principle. I'll start with a simpler option.
- One-step (single-phase) craquelure
This coating looks like cracked paint, through the cracks of which you can see the tone of the first (base) layer or the base itself - wood, metal, glass, etc., if base paint is not used. The action of the one-step composition for obtaining the crackle effect is based on the different drying speeds of the first (varnish) and second (paint) layers of coating.
First, the item is coated with a layer of base paint, if necessary. Allow the painted surface to dry completely. Then craquelure varnish is applied, the layer should be quite thick. The varnish dries for about 40 minutes (you can speed up the process with a hairdryer), but the drying is not complete: the surface should appear dry in appearance, but there should be an unfinished feel “to touch.”
Options for using different base and finish colors in combination with craquelure. Photo from toolgirl.com The prepared surface is covered with a layer of finishing paint, for example, acrylic. For ease of application, it should be quite liquid, since the surface must be covered in one go. If you move the brush over one place several times, the paint will roll off and the bottom layer of varnish will begin to “reach” behind the brush. Therefore, it is important to choose the right brush and degree of paint thickness: it is better to make a small “testing ground” - a separate paint job. The consistency of the composition also affects the size of the cracks: the thinner the paint, the thinner the cracks.
Craquelure on a wooden surface. Photo from the site 1povagonke.ru The direction in which cracks appear depends on the movement of the brush: if you paint vertically, the craquelure will also be elongated in the vertical direction, and vice versa. If you use a roller rather than a brush, the direction of the cracks will be more chaotic - as in the photo above. To achieve this effect when painting small objects, you can use a swab made from a piece of foam rubber. The shape and size of cracks and the speed at which they appear also depend on the air temperature during drying. Here you can also use a hairdryer to speed up the process.
- Two-step (two-phase) craquelure
In this case, cracks do not form in the paint layer, but in the top varnish coating. Its special composition contains substances that promote uneven drying, tightening of the varnish surface and the formation of cracks.
Two-step craquelure. Photo from the site linakarolina.hemsida24.se Decorative craquelures formed by two-step craquelure varnish resemble exactly their prototype - a network of cracks on antique canvases. The size of the craquelure, as in the case of working with single-phase material, depends on the chemical composition and thickness of the varnish layer, the drying speed, that is, on the temperature and humidity of the air. In this case, you can also try to speed up drying with a hairdryer, but it is better to try on a sample first. Having mastered the technique and selected the necessary composition, you can achieve neat small cracks, like on old porcelain.
Imitation of antique porcelain with two-component craquelure varnish. Photo from the site school-remont.tv At the second stage, the cracks that appear are rubbed over with pigment - oil paint (artistic), bitumen varnish, pastel, metallized powder. Even cosmetic shadows are suitable as a grout.
Cracks formed by two-component craquelure varnish. The pigment “reveals” the craquelure mesh. The choice of grout depends on the composition of the varnish: it is important that the powder sticks only to the cracks and is removed from the rest of the surface. For two-step and one-step compositions, the last stage is the same: the surface is coated with ordinary varnish to secure the decorative effect.
Description and technique of applying craquelure varnishes for decoupage
Varnish with a craquelure effect can be one-step or two-step. One-step (or one-component) is applied between contrasting layers of paint. Two-step (two-component) - on a layer of shellac. The composition must be applied to the surface of the objects to be decorated correctly. This is done, if possible, with a synthetic brush. Shellac should not be shaken before application to prevent air bubbles from forming.
There should be no dust in the room. It needs to be well ventilated before work. The resulting cracks on the object can be covered with dark-colored paint and silver or gold-colored powder. Excess is removed with a swab moistened with vegetable oil. At the end of the work, the surface of the product is thoroughly wiped and coated with a final protective acrylic varnish.
Cracks form in the direction of brush movement. To obtain a craquelure mesh, you need to use varnish using small strokes.
Read on our website
Decoupage a stool with your own hands Decoupage a stool can give it a second life and make an outdated item in demand again. Chair design can...
How to make craquelures with your own hands
The name “two-step” (two-component, two-phase) did not arise because of the second stage - grouting the craquelure with pigments. Initially, two separate components were used to create artificial cracks on the varnish surface: the varnish itself and a coating that tightened the varnish layer when drying. For example, you can coat an object with an alcohol solution of shellac, and use gum arabic (a solution of acacia resin) as the second component. This is how forgeries of famous ancient paintings were made: not only the artist’s work was copied, but also the traces of time on the canvas.
Artificial cracks on furniture. The development of the chemical industry made it possible to simplify the process by combining both components in one bottle, but the name “two-step” remained. Although even today most of the offered range of products for such craquelure really consists of two parts, including shellac and gum arabic. And for one-step, there are not only intermediate craquelure varnishes, but also paint that cracks itself, without varnish as an underlying layer. To create this “antique” effect, decorators use not only specialized products: the craftsmen also have improvised means in their arsenal. Thus, the one-step craquelure effect can be achieved using PVA glue, using it as a craquelure “varnish” or mixing it with finishing paint in a 50:50 ratio. Also, use regular construction varnish, and not from the assortment of art stores - it’s cheaper. A cracked surface will also result if the paint is applied to a layer of egg white, gelatin, washing gel or dishwashing gel.
Technology for crackling wooden surfaces
Modern industry produces many compositions for applying craquelure at home with your own hands. Moreover, some of them can be used not only for processing wood, but also for applying “antique” cracks to the surface of products made of plastic or metal. Decorative metal additions to wooden furniture, on which patina or decoupage is complemented with craquelure, will look quite stylish and original.
To apply craquelure cracks, you can buy a one-component crackle varnish or a two-component composition, a set of which is sold in the form of two bottles. For household aging of furniture, a one-component varnish is quite suitable.
Many experienced restorers believe that furniture pieces get a more natural, antique look if cracks are formed using improvised means - vinegar essence, egg white, gelatin and even washing gel. However, for those who want to try their hand at restoration work for the first time, it is better to use a special crackle varnish, sold in household goods stores under the brands “Stamperia” and “Ferrario” (Italy) or “Havo” (Netherlands) called “Creall-Crackle” or "Antique Crackle".
How to make craquelure at home with one-component varnish
First, learn how to make craquelure on a wall with a one-component varnish. Before decorating, the surface is leveled and coated with acrylic primer. There is no need to level the walls to perfection, since craquelure masks small irregularities, chips and cracks. The imitation is usually created on a certain section of the wall, so it is necessary to stick masking tape along its border.
After waiting for the primer to dry completely (about 3 hours), use a flat synthetic brush to apply a dark shade of paint to the surface.
It must be remembered that the cracks will be the same color. After this, the paint should dry completely and the wall area is covered with another layer of paint. Two layers of paint are necessary to ensure that the composition lays down evenly. The color will dry for about 2-3 hours.
If the area with craquelure borders on surfaces painted in other colors, it’s time to paint them too. It is necessary to choose a color for this part of the wall so that it contrasts with the craquelure background.
These DIY craquelure photos show how a one-component craquelure varnish is applied to the surface:
For this you will need a flat brush with synthetic bristles. If you decide to use a sponge, it should be a comfortable size, but not too big. When applying varnish, you need to move from bottom to top. The varnish is applied with a sponge using blotting movements, also from bottom to top. Brush strokes should be not only vertical, but also horizontal. To diversify the pattern, strokes can be applied in different directions, for example diagonally. In this case, the cracks will be vertical, horizontal and diagonal.
The thicker the varnish layer, the brighter the cracks will appear. If the varnish is applied in a thin layer, the cracks, resembling a cobweb, will not be so noticeable. The varnish can dry from 30 minutes to 2 hours - it depends on its type and the level of humidity in the room.
After the varnish has dried, the surface is painted with a contrasting color using a moderately damp bristle brush. The paint layer should be uniform over the entire surface. It is necessary to paint it entirely, otherwise the craquelure will not appear. The coating must be applied quickly. If the wall area is large, it is recommended to apply vertical stripes of equal width to it, working carefully and making sure that there are no layers or drips of paint at the joints.
As soon as the paint begins to dry, cracks will appear. To speed up the drying process, you can use a hair dryer or halogen lamp. Complete cracking of the paint will occur within 24 hours.
To emphasize the texture of an aged section of the wall, you can paint a border along its edge with gold paint. In this case, individual places are not painted over, which also creates the effect of antiquity.
To give the treated surface strength, a colorless acrylic varnish, preferably matte, is applied to it. Surfaces painted with a sponge are covered with decorative varnish. To give additional attractiveness to the finishing layer, natural wax is used.
Now that you have learned how to make craquelure with a one-component varnish, practice on a small surface and then try to master a more complex technique.
Making a liquid gel composition
You can make your own craquelure using a liquid gel-based composition intended for washing. The example considers a variant of washing powder, which is sold in gel form. First, apply a base color to the surface, which then needs to be allowed to dry. Next, you need to put gel on the brush; it is preferable to use the consistency that is as thick as possible. This indicates that for this work it is best to use a concentrated composition. You can use a sea sponge to apply the gel to the surface. It should be carefully dipped into the diluted paint. If this technique is implemented on fabric, the composition should be used on the surface of the material, while paint is applied on top.
Tips for creating craquelure
- To create a spectacular coating, purchase coatings in contrasting shades . Successful combinations: white-black, pink-black, black-silver; Red Black;
- When choosing a cracking varnish, read the instructions . The fact is that some varnishes crack only with a special base, which is usually included in the kit. If there are no instructions, the background can be any brand of gel polish;
- Apply the craquelure varnish as thinly as possible . Only in this case will the coating crack properly;
- do not try to exactly repeat designs from the Internet - craquelure forms a unique pattern each time, the probability of repetition of which is almost zero. However, you can still repeat the idea for the backing, for example, make it with a gradient effect.
The best coatings for craquelure
Dance Legend
The official website of the brand presents 23 shades of craquelure varnish with a cracking effect. The main advantage of the manufacturer’s products is the ability to combine cracking varnish with a background of any color and brand.
To make it easier to navigate among other dye bottles, craquelure products have a lid with a crack pattern and are also marked “crack”.
Popular shades of the brand:
- No. 660 – white . Any rich color is suitable as a background for white cracks - black, yellow, pink, blue;
- No. 670 – red . The manicure is combined with a black or white background shade, but you can also try bolder combinations, for example with blue or green;
- No. 678 – silver . Complement gray with dense small sparkles with a base of any dark color - black, dark green, cherry;
- No. 675 – yellow . Sunny yellow cracks will complement the black or orange background.
All craquelure varnishes are in the Dance Legend palette in the range 660-690.
TNL
To create a cracked manicure with TNL gel polishes, the manufacturer recommends purchasing a specialized base of the same brand. However, the choice of background shades is limited:
- white;
- gold;
- silver.
At the same time, according to reviews, the varnish cracks on a colored substrate of any brand, so you can first buy only craquelure and experiment on the existing gel polish.
There are a little more craquelure shades:
- shades of green – No. 9,10,11;
- rich pink - No. 34;
- bright yellow - No. 33.
And more than 20 different colors.
El Corazon
El Corazon offers 4 shades of craquelure with a thermal effect, that is, a gradient transition of colors. These products are presented in the line of thermovarnishes. Thermovarnish is a nail coating that changes color depending on body temperature, air, and water.
- TK-01 . Pinkish-lilac thermovarnish with a cracked effect. The manufacturer suggests combining the shade with a golden or silver background;
- TK-02 . Light pink thermovarnish with a transition to a slightly more saturated one. After drying, it forms large cracks;
- TK-03. Bluish pink with cracks of varying sizes;
- TK-04 . Intense pink with a hint of purple.
Thermal varnishes - how to choose and use
The company's product range also includes standard craquelure varnishes, without a thermal effect. Conventionally, all products in the Crackle line are divided into:
- metal - numbers from km-03 to km-07;
- glossy - №k01 - k The palette contains bright and calm shades, for every taste.
For the base, you can use gel polish of any brand and color.
O.P.I.
The Opi brand offers craquelure manicures with nail polishes from the Shatter collection. Please note that the collection includes ordinary varnishes that do not require drying in a lamp.
Subject to all application rules according to the scheme:
- base;
- color;
- craquelure;
- fixative
A cracked manicure will last on your nails for up to 10 days. Also, OPI recommends purchasing varnishes from their own brand for the background - in this case, the result will be truly impressive.
As for the palette, the manufacturer offers a large selection of shades - from pastel to neon.
Common Shades:
- Navy Shatter NL E63 – rich blue;
- Blue Shatter NL E56 – pearlescent blue;
- White Shatter 2NITE – white.
Of course, the line is much wider, so pay attention to this brand if you prefer polishes over gel polishes.
Neon manicure ideas
Life hack: how to create craquelure without special varnish
If you don’t have cracking varnish on hand, but you really want craquelure, use foil for this. Since craquelure is a cracking effect, using foil you can create a similar pattern, and even with a metallic sheen.
Prepare for work:
- base and top, preferably of the same brand;
- colored gel polish;
- a piece of foil. For one manicure, a fragment of 10 by 10 is enough. By the way, to diversify the design, you can use foil of different colors or with a holographic effect.
Before creating craquelure, do a manicure - hardware, edged or any other one that you usually do.
Unedged European manicure
- Apply a thin layer of base to a grease-free nail and dry it in a lamp;
- Apply colored gel polish on top, also drying for 30 to 60 seconds, depending on the type and power of the dryer. If the color is not dense, apply a second layer;
- Without removing the sticky layer from the gel polish, chaotically stamp the foil with quick stamping movements. Do not press it too hard so that the fragments end up with cracks;
- Cover your nails with top coat and dry in a lamp.
Do not forget to moisturize the cuticle with oil after the procedure and do not wash your hands for 1-2 hours after the procedure.
In addition to ordinary foil, which every craftsman has in his arsenal, you can find special foil with a craquelure pattern on sale.
In order to transfer the drawing, you will also need additional glue for foil. It is offered by many brands, including Formula Pro.
Instructions:
- On the prepared background in the form of gel polish or varnish, use thin lines to apply a pattern of future cracks with glue;
- Press the inside of the foil to the nail and tear it off with a sharp movement;
- Seal the resulting design with a topcoat and dry it in a lamp.
Nail decorations - an overview of all types
LiveInternetLiveInternet
-Music
–Categories
- MY WORKS (26)
- BEADING (46)
- YUMMYS (259)
- jam (22)
- all sorts of things (73)
- baked goods (27)
- homemade mayonnaise (14)
- preservation (24)
- drinks (8)
- reminders (9)
- salads (26)
- cakes, cupcakes (16)
- decoration of dishes, carving (27)
- EMBROIDERY (445)
- cross stitch (270)
- color range (5)
- ribbon embroidery (28)
- various embroideries (15)
- kanzashi (49)
- ribbon flowers (59)
- CROCHET AND KNITTING (1736)
- knitting flowers (78)
- crochet border (29)
- dolls on fabric (14)
- different knittings (93)
- knitting for children (156)
- knitting for dolls (7)
- knitting on a fork (8)
- knitting (196)
- knitting, patterns (42)
- macrame (16)
- socks, slippers, booties (59)
- dresses, sundresses (68)
- tablecloths, napkins, blankets (149)
- fabric + knitting (9)
- tops, blouses (302)
- crochet patterns (200)
- hats, scarves, shawls (157)
- skirts (42)
- Fortune Telling (36)
- palmistry (19)
- HOROSCOPE (52)
- DECOUPAGE, PAINTING (358)
- bottle decor (56)
- decoupage bottles (28)
- decoupage, miscellaneous (65)
- drawings on stones (35)
- painting (86)
- spot painting (41)
- learning to draw (4)
- templates, stencils (40)
- FOR YOUTH AND BEAUTY (227)
- beautiful hair (19)
- masks, creams (161)
- self-massage, gymnastics (43)
- HEALTH (1071)
- tests, medications (28)
- warts, papillomas, polyps (21)
- bronchitis, acute respiratory infections, sore throat (38)
- gymnastics, massage (70)
- hypertension, heart (102)
- eyes (30)
- women's health (64)
- skin diseases (18)
- traditional medicine (140)
- legs, heels (51)
- oncology (10)
- liver, kidneys, gastrointestinal tract (114)
- miscellaneous (87)
- vessels (56)
- Joints, spine (163)
- ICONS, PRAYERS (40)
- PICTURES, ANIMASHES (13)
- CAT MATRIX (5)
- BEAUTIFUL PICTURES (25)
- antiques (1)
- MAGIC (236)
- if you have been jinxed (39)
- conspiracies (24)
- wish fulfillment (27)
- magic of mirrors (3)
- amulets (18)
- attract money (14)
- candle power (6)
- home cleaning and protection (19)
- esoterics (75)
- MUSIC (55)
- GIFTS (68)
- toys made from flowers, cakes made from towels (7)
- candy bouquets (58)
- bottle dolls (1)
- USEFUL PROGRAMS (72)
- USEFUL TIPS (208)
- remove stains, bleach, wash (64)
- detergents, cleaning products, air fresheners (70)
- miscellaneous (74)
- CRIMEA PENINSULA (8)
- DIARY ASSISTANT (145)
- all formulas (25)
- dividers (5)
- frames (51)
- backgrounds (10)
- HOLIDAYS (142)
- New Year, Christmas, Epiphany (62)
- other holidays (26)
- Easter (49)
- Tatiana's day (4)
- PARABLES, TOASTS (16)
- POEMS (88)
- my poems (10)
- various poems (56)
- comic poems (19)
- SKILLFUL HANDS (594)
- sawing, painting (18)
- make flowers (65)
- leather goods (23)
- quilling (21)
- rugs (14)
- modeling (173)
- origami (14)
- papier-mâché (9)
- plastic bottles (21)
- newspaper weaving (112)
- crafts (110)
- decorate shoes (7)
- MOVIES (57)
- cartoons (8)
- FLOWERS (24)
- SEW YOURSELF (291)
- applications (11)
- dresses for dolls (18)
- patchwork (21)
- sewing (92)
- curtains (11)
- we sew dolls, toys (137)
- THIS IS INTERESTING (68)
- HUMOR (57)
- Baba Yaga (9)
–Search by diary
–Subscription by e-mail
-Statistics
Reasons for the different sizes and nature of cracks in one-component craquelure
The size and nature of cracks in crackle depends on many factors. If you apply it with a sponge, you will get a chaotic mesh, if you apply it with a brush, then the cracks will seem to “go” in the direction of the brush stroke.
The size of cracks in craquelure depends on the thickness of the varnish layer and on the time after which paint will be applied to it ( the damper the craquelure and the thicker the applied layer, the larger, rougher and deeper the crack, respectively, the thinner the layer and the more dried it is, the smaller and more delicate it turns out to be a network of cracks ).
It is advisable to use only acrylic matte paints . For example, glossy and metallic paints are very heavy and the varnish simply under their weight may not show cracks.
After finishing work, brushes and sponges should be rinsed with water.
Vinegar in preparing the mixture
If you decide to use craquelure on furniture, you can make a composition for this technology with your own hands using another method. For this you should use vinegar. After paint has been applied to the base to be treated, you need to take a small sponge, which should first be soaked in vinegar. Afterwards you need to start hitting the surface with it. In this case, the cracks can become very wide. Well, if the bottom layer of paint is visible, for this you will have to use a composition that has a contrasting shade.
Textured or craquelure paste
In addition to classic craquelure varnishes, you can find in stores many products for creating cracks called structural paste (craquelure paste or paste for creating frescoes). It's kind of like artistic putty.
It is more convenient to apply craquelure paste using a palette knife or spatula. The result is beautiful cracks that imitate an antique surface. To create such cracks, it is recommended to use a hot hair dryer immediately after application. It promotes quick drying.
Afterwards, the product can be painted with water-based acrylic paints; the cracks can remain in the same color as the overall tone or can be rubbed over with contrasting pigments. The drying time and the size of the cracks depend on the thickness of the layer - the thicker, the longer and larger the cracks.
Two-stage craquelure: step-by-step instructions
Two-step craquelure finishing is a two-step varnishing process, resulting in small cracks that need to be emphasized with a contrasting color. The crackling kit consists of a slow-drying varnish (first step) and a fast-drying varnish (second step).
Before finishing crackle, wooden furniture is carefully primed and painted, otherwise the first layer of varnish will “go” into the pores of the wood and cracks will not form.
In order to master this decorative technique, we suggest that you read the step-by-step instructions and take a master class with two-step craquelure:
You will need:
- fluted synthetic brush for coloring;
- two flute synthetic brushes for varnishing;
- acrylic paint;
- two-step craquelure varnish;
- colorful pigment umber;
- cotton cosmetic pad or napkin;
- cotton fabric.
Craquelure in decoupage is one of the most popular decoration methods, which is used in every second decoupage project.
The surface of the tray, pre-painted in two layers with acrylic paint and decorated with a napkin using the decoupage technique, will be coated with a two-step craquelure varnish.
If this varnish is water-based, rinse the brush with water. Drying time for varnish varies, so follow the manufacturers' recommendations. The varnished surface can be dried with a hairdryer, but not with hot air.
Craquelure using gelatin
Craquelure using gelatin is a fairly popular method, but it rarely works the first time. For gelatin craquelure, take a tablespoon of gelatin and dilute it in a glass of cold water. Leave to swell, then heat until completely dissolved.
Apply the cooled gelatin mass in random order to the decorative item and let it dry for 10-15 minutes, you can use a hairdryer, but do not overheat. Next, carefully cover with paint, making sure that the gelatin does not reach behind the brush, especially in places where the layer is very thick. Dry and coat with acrylic varnish.
