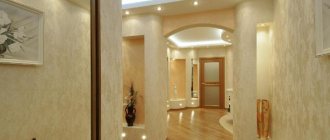
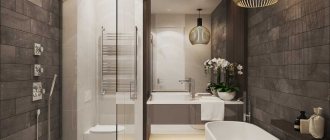
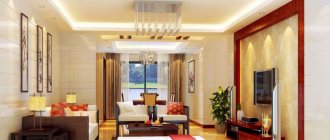
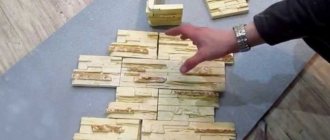
The fashion for decorating doorways with decorative stone has slowly moved from restaurants and cafes to apartments and residential buildings. This beautiful material allows you to create a unique atmosphere. With this cladding you can create a surface that imitates rough masonry, but the decorative plates have a neat appearance and look very natural.
How to finish a doorway with plasterboard
One of the most popular materials of the last decade is drywall. Today it is difficult to imagine a house, apartment or office in which it would not be used. Doorways are no exception, for the finishing of which this truly universal building material is successfully used. It would be useful to note that with the help of drywall you can both level old surfaces and create new ones. This quality of the material allows it to be used for decorating doorways of entrance doors. In addition, using drywall you can finish areas of almost any width. Perhaps the only drawback of this cladding option is the need for additional decoration of the material after its installation. Drywall is a representative of rough materials, the main function of which is to ensure the ability to perform “finishing” construction work on a flat surface. Decorating doors in this way is a good option.
The sections of drywall are secured to the slopes of the doorway using a special gypsum-based adhesive. In other words, the finishing material is glued to the end parts of the walls, which allows you to effectively hide traces of the foam used when installing the door block. Then the plasterboard slopes must be puttied together with the walls and painted with a finishing coating to match the interior of the room. It would be helpful to say that to decorate plasterboard slopes you can use not only paint, but also wallpaper, natural and artificial stone or other decorative materials.
One of the main advantages of using plasterboard for finishing doors is the wide possibilities for choosing the final finishing coating. So, you can use ordinary water-based paint, wallpaper, tiles, decorative plastering. It would be helpful to say that the tiles can be used without creating a hypocardboard base. True, this is only possible if there is no shingle-type covering on the walls.
At the same time, we should not forget that drywall must effectively withstand moisture, which will inevitably accumulate during the process of steam condensation in the air during the winter period. In addition, it will be necessary to reliably protect the door during finishing work with plasterboard. To avoid damage to the decorative coating of the door, it must be covered with masking tape. This will allow you to protect the door block from adhesives, putty and other substances that can damage the surface of the structure.
Algorithm for carrying out the work
At the first stage of facing the opening to the bathroom, toilet or any other room, the wall should be prepared by clearing off the old coating. The paint is removed from the surface and the wallpaper is removed. The base should be degreased and scratched with available tools.
A level is drawn on the wall for laying the starting line. In order to finish the front door, you need to treat the walls with a primer. Gluing is carried out on the composition, which must be developed within half an hour.
At the next stage, the entrance group is decorated with decorative material. You should start with the corner elements. Between individual elements of decorative stone, horizontal gaps are sometimes left - seams. In this case, special limiters are used, but you can get by with pieces of drywall.
After completion of the work, the wall is drawn up for 24 hours. Then you can begin to putty the seams or rub them. You can use a kitchen sponge for this. In order for the entrance opening to last as long as possible, a hydrophobic composition is applied to the finishing surface.
Cladding options inside and outside, photo
Before cladding the doors, it is necessary to carefully prepare the surfaces: remove the old cladding, level and prime the walls. The trim is removed from the doors and the baseboards are dismantled. Markings are made on the wall for the ornament that will be laid out.
After the primer has completely dried, the surfaces are treated with concrete contact, which increases the adhesion of the tiles to the wall. The stone is laid out on a flat surface to make it more convenient to select its color and texture when laying. The laying of the slope begins from the bottom corner, just below the plinth. The fragment is smeared with glue on the reverse side and attached to the wall.
If the tiles are laid vertically to the door slope, each element is placed close to the casing. At the final stage of finishing, a special spray composition is applied to each element. It includes tinting paste and acrylic varnish. This will give the finish a natural look. The final touch is the installation of platbands and baseboards. Just keep in mind: artificial stone does not fit well with platbands made of MDF or other synthetic materials.
Advice
The broken edges of the fragments are processed with a grinding machine so that there are no sharp corners.
Different masonry methods are used for finishing. Most often, imitation brickwork is used when finishing around doors. Its edges do not align with their ends facing each other, but create a torn effect.
Look at the photo, how interesting the imitation of a cave entrance made of massive tiles looks. Pebbles or sandstone are suitable.
Types of stylistic design:
- Matte shades are suitable for modern interiors. If there is little natural light in the room, you need a stone with a glossy surface. The main color scheme in such interiors is boring – black and white.
- For classics, even, smooth and uniform plates are selected. Common colors are orange, beige, cream.
- High-tech implies contrast of colors. The dark masonry looks original against the background of white walls.
- Eco-style involves the use of white material.
- For the rustic direction, the best choice would be an imitation of orange brick, standard or even in shape.
- For loft, use gypsum material in blue or white shades.
Design fantasy
When decorating a doorway, you can bring various design ideas to life. After all, decorative stone imitates different surfaces.
Imitation of natural stone, sandstone and pebbles is suitable for rooms with a lot of flowers, wicker furniture, wooden products and other natural elements.
The original solution is to imitate the entrance to a cave. This option will lead to a visual increase in room space.
The door can act as a passage to a medieval castle. This imitation is the optimal solution when the house is dominated by antique furniture with paintings and other rare items.
The most popular is imitation brickwork, which is distinguished by its variety of colors and textures. Decorative coatings, which are characterized by a transition from one color to another, are in particular demand.
We use decorative stone to finish the opening
Entrance door and opening lined with decorative stone
How does artificial decorative stone differ from natural stone? Affordable, light weight. Due to these advantages, you can use this material for the benefit of your home - to create in a particular room a truly design that can be called original.
In order to carefully fix the decorative stone on the surface of the doorway, you will need to level the surface. Drywall or plaster is used here - this is described in detail above.
How is decorative stone installed? Everything goes like this:
- The finishing material is installed quite simply. Since it is not heavy, it is easy to attach it to the surface of the doorway - wire mesh is definitely not useful here;
- However, it will be necessary to use all the same materials and tools that were needed when attaching natural stone;
- First, a construction mesh is placed on the surface of the opening and secured with cement mortar on the surface. You can immediately install decorative stone here. However, special glue also gives good results when fastening;
- You can install decorative stone in any order. To get variety, several options for finishing materials are often used within one doorway;
- The room becomes more original, as does the door design.
Results:
Recently, doorways are increasingly being lined with stone - and the popularity of this trend is only increasing. This can be explained not only by the styles that are actively used in room designs. Stone is practical, durable, it is a truly worthy finishing material, for which it is highly valued.
Stone arches: preparation of tools, adhesive joints and surfaces
Before you start framing the arches with artificial brick or stone, you need to prepare all the necessary materials. After all, you can’t just start working on top of old untreated walls, gluing artificial stone onto jelly. The adhesive connection required for the work is prepared and the working surface is processed.
Materials to help create an arch:
- The stone itself, which is selected according to a pre-thought-out design;
- Pencil for indicating the location of parts, framing;
- Sandpaper will help to trim rough corners of the stone;
- The surface is covered with a soil solution to prepare it for cladding;
- Adhesive connection for attaching stone to the surface of interior walls;
- In order for the stone tiles to look decent, the gaps between each element are covered with grout for the seams;
- A tub for mortar or glue.
Before decorating an arch with stone, you need to prepare the base
Unevenness on the walls can also be smoothed out with sandpaper, and later also primed. This will prepare the surface. A special glue (liquid nails) or mortar (made of cement and sand) is used. The reliability of the fastening depends on the quality of the adhesive joint or how rough the surface of the decorative stone itself is. If the work is carried out without the help of a specialist, then it is worth preparing the solution gradually. This will help prevent it from drying out quickly. Mix the adhesive compound using a drill with a special attachment. The solution should resemble liquid sour cream in consistency.
Which stone to choose
For the production of decorative stone, synthetic products are used, which include the following components:
- natural crumb fillers;
- mineral additives with coloring pigments;
- polyester resins;
- colored concrete mixtures;
- clay (in rare cases).
To improve strength, fiber reinforcement is used when fiberglass is added to the finishing material during the production process.
To decorate doorways with decorative stone, you can use porcelain stoneware. For its production, vibrocompression technology is used, followed by firing of the material. The texture of porcelain stoneware can be different: matte and glossy, embossed and glazed. In appearance it is similar to ceramic tiles.
When choosing a stone, you should pay attention to the following factors:
- Size, texture and color. They must be the same throughout the entire batch of goods.
- Front side. It should not have growths, voids, chips and stains that arose as a result of non-compliance with the product’s production technology.
- Back side. The presence of grooves or a rough surface indicates a suitable material for lining the opening.
- End part. It must have smooth edges with chips of no more than 4 mm (for seamless laying of decorative stone) and 6 mm (for laying with seams).
- Filler uniformity. Only material without large particles is suitable.
- Additional treatment of the product with a protective agent. If the manufacturer's instructions indicate such a mandatory item, then it is better to refuse the decorative stone.
Advantages and disadvantages of artificial
Artificial stone has the following advantages:
- variety of textures, shapes and colors;
- ease of transportation and handling;
- low cost and light weight (compared to natural analogues);
- It does not require special care.
When installing the finishing material, concrete mortar or adhesive for interior work is used. If a crack appears over time, the same composition is used to seal it.
Due to its relatively low cost, the material can be used to cover large rooms.
Finishing a doorway with artificial stone also has its disadvantages:
- low environmental friendliness;
- shorter service life (when compared with a natural product);
- some varieties are not resistant to temperature changes, exposure to chemical environments and sunlight.
Pros and cons of natural
The main advantages of natural stone include strength and a long service life. The best confirmation is the many houses built in the 18th-19th centuries. Even after centuries, the buildings have not changed their appearance.
Another advantage of the material is its beauty, which lies in harmony with the environment, effectiveness and grace, monumentality and rigor.
Disadvantages of natural products:
- heavy weight;
- radioactivity.
The first disadvantage makes it necessary to accurately calculate the load and determine the method of fastening the material when performing installation work.
As for radioactivity, some types of products have an increased rate: granite, gabbro, diorite. This drawback scares off many buyers. For this reason, finishing the front door with decorative stone has become a popular technology.
Characteristics
Main characteristics of decorative coating:
- moisture resistance;
- resistance to temperature changes;
- strength;
- integrity and structure;
- resistance to aggressive environments;
- fire safety;
- durability;
- maintainability.
When framing a doorway with artificial material, mold or mildew will never appear on its surface. This indicates the moisture resistance of the coating, which does not absorb moisture and can withstand changes in humidity.
In terms of strength indicators, some types of synthetic products are not inferior to their natural counterparts.
Decorating a door with decorative stone has a solid appearance (with standard thickness and smooth edges) and a structure that does not change its qualities throughout the entire depth of the masonry.
Products made from artificial material are repaired and return to their original appearance even if it is completely cracked.
Advantages
Doorways without a door have the following advantages:
- Saving space due to the lack of free space along the opening path of the door leaf. For normal operation of a swing door, a minimum of 1 m2 of space is required, which should be left free, without cluttering it with furniture and other interior items;
- More light, this is especially true for adjacent rooms, one of which does not have a window or is equipped with a small window. An open doorway will allow natural light to enter a dark room;
- Air circulation, relevant for small rooms with insufficient ventilation, for example, due to the lack of a window;
- Combining space through two rooms, decorated in the same style, between which there will be a conventional demarcation in the form of an open opening;
- Visual expansion of space by connecting small rooms to the main one, for example, a balcony or loggia to a room;
- Zoning. A similar effect is used when dividing one large room into two smaller ones, while maintaining the freedom and lightness of the space due to the open door portal;
- Easy to maintain, as there is no need to regularly wipe the sashes, the glass inside them, or lubricate the locks and hinges;
- In addition, a stylishly designed doorway without a door allows you to give the room an original and unique look due to its shape, texture or shade.
How to decorate a door?
To do this, there are several ways that can quickly and efficiently update the product.
Coloring
This is the most economical option for decorating a door structure. In the modern world, it is not at all difficult to find a suitable tone, because there are many different shades produced by many well-known companies. In addition, it is possible to obtain the ideal color by mixing the coloring composition with the color scheme, observing certain proportions.
Acrylic water-based, oil and nitro paints are best suited for painting door structures. Acrylic paints are water-based, and therefore dry easily and do not have a specific odor. They are absolutely safe for health and have a long-lasting bright color. But nitro paint has a pungent odor, so it is suitable for painting external structures.
The coloring composition must be applied using a special roller in several layers. Before applying the next layer, be sure to wait until the previous one has dried. You can also paint a pattern on the surface of the door using templates and brushes. This method is suitable for processing doors both outside and inside the apartment.
Pasting
This method is suitable for people who do not want to wait for the canvas to dry. Adhesive film is well used in many areas and helps to decorate almost any product in a short time. It consists of a colored film, an adhesive surface and protective paper, which must be removed before pasting.
Before pasting the door with self-adhesive, it is necessary to prepare the surface. It must be cleaned so that there are no protrusions left on it. It is better to fill various cracks and chips with putty. And just before pasting, dirt is removed from the structure and degreased.
Wood and MDF paneling
Suitable for making your own doorways. Most often, this method uses thin wooden planks, which are attached to the canvas with glue. Subsequently, the tree must be processed. And in order for it to retain its appearance for a long time and not deteriorate after some time, it must be treated with a moisture-repellent composition.
Facing
For this method, it is possible to use veneer, plastic, laminate and PVC. These materials are applied only when exposed to warm air. At the same time, you need to work very quickly to do everything smoothly and efficiently.
Padding
The least common solution for upgrading door structures. But this way you can achieve a luxurious and attractive look. If you apply upholstery to an old, worn door, you can hide all its defects. In addition, this option helps to insulate the canvas.
Decorating the front door with decorative stone
Well, now about the finishing itself. Most often, it is the front door that is decorated with stone. This applies to both the opening from the street and internal slopes.
If we are talking about façade work, then the finishing should be carried out at the same time as the cladding of the base and preferably with the same material. In ninety cases out of a hundred it will be sandstone, and therefore we will consider working with it.
You always need to start with calibration. Select stones of approximately the same thickness (up to 30 mm) and, simultaneously checking for layering, place them on a hard, clean area. Paving stones or asphalt are quite suitable.
Next, arm yourself with a mini-wash and thoroughly rinse the product, and this needs to be done on both sides. We warn you right away, without having the necessary “shaitan machine” on your household, it is better not to approach the stone. Korcher not only removes dust and dirt, but also removes clay, as well as unnecessary deposits. Repeating all this by hand is a tedious and thankless task.
While the stones are drying, start preparing the facade, and to do this you need to at least open it with a deep penetration primer and smooth out all the unevenness, which we can safely include masonry joints.
Again, we follow the technology, and therefore let the wall dry. During this time, you can visit a construction store and buy glue for the stone. Just don’t listen to the “shabashniks” and purchase their favorite CM 11 for these purposes. Firstly, it is positioned as a mixture for interior work, and secondly, in general, it is not intended for laying wild stone.
Perhaps nothing terrible will happen and the German product will once again prove its quality, but we are building a house, not playing a lottery. The same ceresite has special mixtures for working with stone material, at least the same CM 117.
Yes, such glue costs a little more, but there is no risk that the finish will fall off in the spring.
When all the preparatory work is completed, you can begin to create. Approximately outline the contours of the stone “edge” and begin facing. No matter how wide your apron is, you need to work from the slope, rising no more than 3-4 rows. Once it dries, the stone is a heavy thing.
In principle, the work is not so much difficult as it is creative. Sometimes you have to try dozens of slabs until you find the one that fits the situation perfectly. Of course, you can always play along with the grinder, but you shouldn’t overuse the cutter. Straight lines and regular geometric shapes are alien to nature.
And one more prerequisite is accuracy. Do not stain the face of the sandstone. It will be extremely difficult to wash it later.
When the drawing is ready, fill the seams with a solution from a syringe and open the “canvas” with a waterproofing agent.
But such results can be obtained if you approach the matter with soul.
Beautiful, right? Well, now let's see how the stone will look inside the house.
Cladding on plasterboard
Only this material pliably forms a part of a complex configuration, for example, a curved arch. However, the installation work is not easy - you will need a lot of additional material: profiles, corners, screws. And after installation, drywall requires finishing: putty, paint or wallpaper.
Typically, arched blocks without a door are sheathed with plasterboard. A semicircular opening will soften the corners, as if raising the low ceiling and lowering its high and uncomfortable counterpart. The arch is appropriate between the living room and the hallway or kitchen. Also often found is an arched exit to a loggia or balcony.
Openings without doors unify rooms in an original way, harmonize with the overall style, and expand the area. The quality of finishing and its design is especially noticeable at the border of the hallway and living room or when connecting to the loggia. This design advantageously emphasizes the interior of the premises or zones the space.
Some recommendations
- The width of the seam between the tiles can vary from three to eight millimeters.
- The work will be made easier by plastic crosses that act as supports and fix the stone.
The optimal combination of decorative stone tiles
- A doorway trimmed with decorative stone will look harmonious if the seams between the tiles are filled with special jointing. The jointing solution is prepared according to the instructions on the packaging, and a drill with a special attachment or a mixer is used to obtain a homogeneous mass. After preparation, the resulting mixture should sit for fifteen minutes (unless otherwise written on the package). With the help of tints you can change the color of the jointing solution.
In any case, finishing not only wall surfaces, but also doorways with decorative stone will create a unique, original interior in the apartment. Decorative stone is an affordable finishing material that allows you to implement a variety of solutions and ideas in the interior of your apartment.
Final processing
Once you have succeeded in decorating the walls, you can begin finishing. In an apartment, the cladding is rarely affected by negative factors. But experts recommend applying a special impregnation. To do this, the wall is first cleaned. If you want to get a shiny surface, the decorative stone can be treated with acrylic varnish. For maximum naturalness, the impregnation is diluted with water. If you have changed the doors, but the decoration of the entrance area remains the same, the stone can be repainted.
Stone selection
Given the great demand for the material, today there are several types of decorative stone:
- On concrete. This type consists of several materials and is considered the most common. For its production, cement, sand, reinforcing additives, dyes, and fillers are used.
- Porcelain tiles. Used mainly for interior wall decoration. It contains: clay, feldspar, minerals and coloring pigments. To create strength and stability, several types of clay are used to create it. As a result, this entire mixture is pressed and then fired. The opinion that porcelain stoneware is similar to stone is not true. Rather, it looks like glass rock with different colors. Its qualities are very high: it can withstand mechanical loads and temperature changes. It is not advisable to use it on a kitchen apron - it is very difficult to remove greasy stains from it.
- Conglomerates. It has high strength and reliability, and is very often used for finishing interior walls. It consists of marble and granite, limestone chips, sand and dyes. The appearance is very similar to natural agglomerate. It can also be used for exterior walls and has high strength and durability. Not afraid of frost and high temperatures. The relatively low weight allows you to carry out installation work yourself.
- Acrylic. This type of stone can be called the most practical. It is often used for interior wall decoration. Since it has excellent technical performance. Its structure allows it to withstand various mechanical loads, and it does not deform. Its surface can be cleaned with a clean rag without using additional detergents. Lightweight material that can be easily processed. It does not contain harmful substances, so it can be safely used for cladding bedrooms and children's rooms.
- Quartz. Finishing with quartz material is not particularly in demand, but it is impossible not to mention it. The stone has good characteristics: both resistance and durability. A diamond-coated disc is used to process it.
- Plaster. The most popular type, the demand for it is growing every year. Its light weight and rather attractive appearance make it a leader.
Related article: Installing curtain rods with your own hands (photos and videos)
Advantages of gypsum-based decorative stone:
- Moisture resistance. There is an opinion that this species is damaged by moisture. This is not true, it is treated with a special protective layer that prevents the penetration of moisture;
- Non-flammable, does not deform under load;
- Easy to install, light weight;
- The appearance resembles sandstone;
- You can make it yourself. To do this, you need to have plaster dough, molds, pigments for coloring and a lubricant.
To prepare it, you need to knead the gypsum dough, then add dyes. After that, pour into the molds
After waiting for complete hardening (24 hours), it must be carefully removed from the mold and lubricated with a moisture-resistant substance.
How to sheathe a metal door
After the final choice of material for finishing the metal door leaf, you should think about how to beautifully, quickly and easily make the doorway heat-proof, while the appearance should be completely compatible with the interior of the room. Sheathing the door from the inside with your own hands is not difficult, you just need to be precise in your measurements and avoid making mistakes. Not only the appearance, but also the quality will depend on the accuracy of the work.
Finishing metal sheet with clapboard
For greater convenience, covering the material should remove the door from its hinges. Then:
- It is necessary to prepare the canvas. There should be no dust, cobwebs, pieces of dirt or cement mortar remaining after repairs on the surface of the door.
- Next, you should treat the door with a metal corrosion inhibitor. If there are traces of rust, they need to be cleaned with sandpaper, covered with a primer, and after drying, apply paint. Only when the paint has dried can you proceed to further actions.
- Take measurements and determine the places where the locking mechanism, peephole, and handles are located.
- A sheathing of wooden slats is installed in the metal leaf around the entire perimeter of the door. For this purpose, gluers are used, fixed with self-tapping screws.
- Insulation (mineral wool, penoplex) is inserted into the resulting cells.
- The lining is fixed on top of the wooden slats using “liquid nails” (it is better to use them). Everything should be done one by one and slowly. The material should fit very tightly to each other.
After finishing the work, the resulting surface is opened with varnish. The last step is to install the lock and hardware.
An example of covering a metal door with clapboard
Laminate cladding
Sheathing a metal door with laminate is easy. To do this you will need:
- Liquid Nails.
- Wooden slats.
- Electric jigsaw.
After the door is removed from its hinges and laid horizontally, the door leaf is prepared - all rusty spots are cleaned and treated, dust and debris are removed.
After this, the fabric is assembled from the laminate. Using an electric jigsaw, the blade is adjusted to the size of the door leaf where it needs to be mounted (accordingly, the metal corners of the door remain outside the finish - the panel is laid inside the corners). A frame made of wooden slats is glued onto the door using liquid nails (they must be treated against moisture). A laminated panel is glued onto the frame and everything is left to dry.
The process of installing laminate on a door
Design options for laminated doors
Covering a metal door with leatherette
Covering a metal door with leatherette with your own hands is not difficult. First you need to make the doors clean. After this, glue is applied. First, foam rubber is glued - like insulation; after drying, glue for the material is applied around the perimeter of the door leaf from the end. After sewing the door, everything should be left to dry. The last step will be to clean up the remaining glue and hang the fittings.
The process of finishing a door with leatherette
MDF for covering the metal door leaf
At the very beginning of the work, you should prepare the door leaf. It should be free of traces of rye, dust and debris. The metal is covered with vinyl film on top. This is done for good adhesion of the metal to the MDF.
Example of doors covered with MDF
- MDF panels are commercially available in different sizes. In order to purchase an MDF panel, you should take measurements of your door from the inside.
- Afterwards, you need to apply glue, for example, liquid nails, to the inside of the panel.
- After this, the panel is applied to the metal base, fixed and left for a day to dry.
- Upon completion, the lock and fittings are attached.
Types of masonry
There are two types of masonry - with and without seams. The seam looks better when laying elements of a clearly defined geometric shape.
Seam preservation
When performing finishing work from artificial stone, you can use a masonry technique that preserves the seams. In order for the seams to be even, it is necessary to install plastic wedges between them. This will keep the masonry elements in the required position while the adhesive solution sets.
To maintain the gap between the stones, plastic wedges are used
When finishing slopes with stone, work begins in the lower corner. Cover part of the wall with the adhesive solution using a comb spatula. The decorative element is applied to the wall and pressed.
Stone surface finishing techniqueIf the door slopes do not have a door leaf, then the decorative stone is laid overlapping. If there is a door, the color and texture of the openings should fit harmoniously into the interior and be combined with other decorative finishing materials.
Joining seams
The jointing occurs after the decorative material and the wall surface have completely set. The instructions from the manufacturer of the artificial stone contain recommendations on the use of the type of grouting composition.
Using a syringe gun, the seam is filled to a depth not exceeding 5 mm. This will give the masonry a more pronounced relief.
Seam cutting is done using a syringe gun.
When the grout begins to set, it must be leveled using a shaped spatula or spatula.
A spatula or spatula is used to grout the seam.
The remaining grout from the front surface can be cleaned off with a brush.
Clean seams with a brush
A stone door slope will look more solid if the grout color is gray. Light grout against the background of dark decorative masonry will refresh its overall perception.
Monolithic masonry
When designing a door slope without seams, the work takes less time. The monolithic nature of the masonry is achieved by placing the elements as closely as possible to each other. With this method, the adhesive solution is applied directly to the product.
In monolithic masonry, the elements are laid as close to each other as possible
It is important that there are no traces of glue left on the outside. The adhesive solution is applied to the stone
The adhesive solution is applied to the stone
When laying, it is necessary to control the vertical direction of the masonry
If the products have the correct geometric shape, then it is important to ensure their correct horizontal position
Check the evenness of the masonry using a level
At the final stage, the masonry is coated with a solution that increases the strength and water-repellent characteristics of the material.
Decorative finishing of doorways with stone
Using natural or artificial stone to decorate doorways is a good solution, but it is not always appropriate. The fact is that these materials are not suitable for all interiors. They will look more organic in those living spaces that are made in an old style. Of course, in such apartments and houses, stone simply has no competitors. Finishing entrance doors with decorative stone has a number of obvious advantages, and the appearance of such a solution looks great, as you can see from the photo in our article.
The most important advantage of these materials is their neutral structure. This means that both artificial and natural stone in no way affect the microclimate of the room
Both materials have excellent moisture resistance characteristics, which is very important when lining the slopes of entrance doors that emit condensation during the cold season
Another important advantage of finishing doors with decorative stone is durability. It is known that the glue used to fix the material will disintegrate into its components much faster than the stone itself. In this regard, natural stone is somewhat preferable to artificial stone. But the second one can also last for several decades. Also, the advantages of using stone include a simple laying technology, which does not necessarily require straight seams. Even a person far from the construction and repair industry can perform this method of cladding. In addition, it is worth emphasizing the wide range of this material. This especially applies to artificial stone. The variety of natural stone products is achieved through different cutting methods. Using this technique allows you to create hundreds of different patterns and ornaments, even if you use one type of stone, for example, sandstone.
It should be emphasized that finishing entrance doors with artificial or natural stone is an expensive pleasure. But this “disadvantage” is fully compensated by the unique appearance of the cladding, as can be seen in the photo. In addition, this solution is highly reliable. Many experts and designers emphasize that finishing slopes with artificial stone is an ideal solution due to a number of advantages of this particular material. For example, they note the spectacular appearance, the strength of the cladding and durability, the ease of caring for the stone, as well as the ability to restore the decorative finish in case of damage to its individual elements.
In addition, you can also remember the excellent organic combination of this material with other types of cladding. Often, medium-sized stones are used to decorate doorways with artificial stone in apartments and houses. This allows you to avoid loading the interior with large forms. It would be appropriate to say that many designers use one interesting technique to make the atmosphere natural. The outer edge of artificial stone trim is deliberately made uneven, but smooth edges are almost never used.
In cases where it is necessary to decorate an arched opening with stone, the material is laid out in the upper part along the perimeter, which allows you to emphasize the shape and make the design noticeable against the background of the rest of the wall. An important nuance of laying decorative stone cladding is the finishing of the slopes themselves with the material. This will allow you to stay within the chosen design solution and maintain harmony in the interior.
Brick bathroom
Advantages and disadvantages
Pros of decorating a bathroom with brick:
- beauty and extraordinary decoration;
- moisture absorption;
- good thermal insulation;
- ease of care;
- giving the bathroom a cozy feel.
- destruction under the influence of constant moisture;
- tendency to mold and mildew from water;
- reduction of space.
To avoid the negative effects of water on brick, it is treated with special protective materials. The right design and lighting will visually change the space.
Banal ceramic tiles have long been outdated and humanity is hungry for new solutions. Natural ingredients are used: stone, wood, brick. Catalogs from design firms offer brickwork that adds coziness to the home. No matter how rough it may seem, in many cases such a wall retains a cute appearance and tenderness when selecting suitable accessories (lamps, flowers, shelves). The bathroom is an important part of the home and requires special charm and beauty.
Brick walls in the bathroom - creative room decoration
Aged brick walls in the bathroom
Brick walls in the bathroom look very unusual. Modern bathroom interior design has divided into two directions: some create the semblance of “sterile” spa centers, others prefer slightly rough, but elegant interiors “with soul”. Brick finishing is one example of the second direction. It looks rough, sometimes unfinished, but fits perfectly into the interior.
Spectacular apron
When using brick cladding as an apron that is constantly exposed to moisture, make sure it is well sealed or varnished to avoid problems with mold.
Worn brick in bathroom cladding
Attic bathroom with exposed brick wall and copper bathtub
The beauty of original brick walls in the bathroom
Fireplace and decorative walls
If you mix styles such as industrial and rustic, a brick fireplace in the bathroom will become a very unusual decorative element. You can also install a small potbelly stove if it is not possible to make a fireplace.
Antique iron stove in the bathroom
Rustic bathroom with gray bathtub
Old chimney turned into brick wall in beach style bathroom
Brick walls in shower
This option is quite controversial, because the constant ingress of water and hot steam can quickly destroy the masonry. It is better to cover the wall with a glass shower wall and seal the joints well with sealant. Or simply use decorative tiles to match old brick.
Glass and brick - a combination of modern and industrial style in the bathroom
Marble and brick in an industrial style bathroom
Get creative!
Brick-like tiles can be used to decorate not only the walls, but also the bathtub itself and even the floor. Use your imagination!
Red brickwork stands out on white background
Multi-level lighting
Lamps in the form of candlesticks are ideal for brick decoration. Industrial style lighting is also in no way inferior. Below are dazzling chandeliers, DIY pendant lamps and LED lighting. The choice is truly endless!
Rustic bathroom with wood and brick walls
Bathroom lighting enhances the beauty of exposed brick walls
Industrial bathroom combines several different textures
Brick and wood create an elegant industrial bathroom
Imitation
It is not always possible to use real brick. An excellent alternative in this case is facing brick, which repeats not only the shape of ordinary brick, but also its texture. This material is resistant to changes in humidity levels. If you still have questions, we recommend watching the following video:
It is also worth noting that finishing a brick wall in a bathroom is not only a way to create a unique interior in the room, but also a means of protecting the surface from the negative effects of dampness. We recommend that you familiarize yourself with various interior solutions for brick walls:
Bathroom brickwork
A bathroom with a brick wall is a current solution for the interior, which immediately makes it noble and aristocratic. Many homeowners are afraid that the masonry will look rough, however, this will not happen if you follow these tips:
- Masonry is an active accent spot in the interior, so it is enough to highlight one wall in this way.
- Red brick without plaster makes the room visually darker, so intense lighting will be required inside the bathroom.
- If the brickwork is of dark shades, then you need to use as many light shades as possible for the interior to balance the color balance.
Please note! Brick is a strong, durable material, but it can collapse when exposed to moisture, so it must be protected from moisture, mold and mildew.
If you plan to decorate the walls in the bathroom with gypsum tiles, then you need to choose the right material, taking into account not only the technical characteristics, but also the shades.
If the bathroom is designed in a loft style, then decorative brick should occupy most of the space - at least on one wall. It is better to choose a shade that is as close to natural brick as possible. An excellent option is bricks measuring 6*12 cm.
Bathroom in loft style
It is important to pay attention to the batch number when opening each package, otherwise the color may vary. Inspect the elements carefully for chips. They often check the length of the side edges, since if something happens it will be impossible to trim them
If necessary, you can create rustic romance. To do this, it is better to combine gypsum elements with brick and wood. In this case, the wall imitating brickwork must be painted whitewash.
