After installing the door, the walls adjacent to it - the slopes - have a deplorable appearance. Perhaps the fastest way to put them in order is to decorate them with laminated panels. It can be MDF or laminated chipboard (LDSP). There isn't much difference. The main task is to choose a pattern and shade to match the door or other decoration in the room, and making door slopes from MDF or laminated chipboard is not difficult. Moreover, there is a method that requires a minimum of time.
Laminate slopes are made quickly, and the appearance is at least good. No special skills are required, you just need to be able to use a saw or jigsaw to cut fragments of the required size. The rest of the work is simple and straightforward: glue, polyurethane foam, wooden planks, and self-tapping screws are used. You don’t even need plaster as when finishing drywall slopes.
MDF slopes: finishing doorways with panels, video instructions for DIY installation and photos
Along with the installation of slopes, the installation of platbands is also carried out
Preparing the opening for installation
MDF slopes can be mounted both on the opening itself and on a frame made of wooden beams. The first technique is used relatively rarely: for its successful implementation it is necessary that the edges of the doorway be sufficiently smooth.
Content:
That is why I almost always mount panels of decorative material on a frame made of beams rigidly fixed to a solid foundation.
The work is carried out according to the following scheme:
- Using a hammer drill with a chisel attachment, I knock off pieces of old plaster from the slopes that remain on the surface after replacing the doors.
- I clean the walls of the opening from dust and debris, and then check for the presence of gaps and cracks in the load-bearing surface.
The lower part of the slope, ready for cladding
- If defects are found that reduce the strength of the base, I repair them using a cement-based or epoxy-based composition.
Important! Cement dries more slowly, but is cheaper than more effective epoxy compounds.
- To avoid the appearance of fungus or colonies of pathogenic bacteria, I treat all surfaces that will be hidden under the cladding with an antiseptic primer.
- Next, I install a frame made of wooden beams, also impregnated with an antiseptic, on the inner surfaces of the opening. I level the beams and fix them to the wall with express-installation dowels with plastic sleeves. To prevent the parts from moving, I hammer wooden wedges into the gaps between the frame and the opening.
Metal profile frame option
- Slopes for entrance doors and windows can be additionally insulated. To do this, I either put thermal insulation material in the cells of the frame (foam plastic is enough, but if finances allow, feel free to take mineral wool), or I blow out the space between the beams with self-expanding foam.
Advice! When foaming, I moisturize both the surfaces themselves and the foam. The instructions allow the installation of panels only after polymerization of the composition and cutting off excess, since otherwise there is a risk of deformation of the panels.
Installation of slopes
Now all we have to do is make the slope strips themselves and install them on the prepared frame.
- I cut out three blanks from an MDF sheet: two for the vertical parts and one for the horizontal.
- I apply the blanks to the opening and mark on them the lines along which the trimming will be carried out.
- I trim the parts strictly to the size of the door or window opening.
Important! There are two options here: simple and complex. When it’s simple, we cut the panel at 90 0, and cover the gap between the parts with plastic or laminated cardboard corners. It will be a little more difficult to trim the end of the panel at an angle of about 45 0, which will allow the parts to be joined with a minimum gap. You can use a miter box for trimming, but it is only suitable for narrow slope strips.
- I apply “liquid nails” to the underside of each panel, and then glue the MDF to the frame.
- I carefully align the panels, ensuring that the gaps between them are minimal.
Scheme for installing additional panels on foam
- Additionally, I strengthen the fastening with self-tapping screws, tightening them at the top and bottom. I hide the screw heads in pre-drilled secret holes, covering them with decorative caps to match the panel.
- I fill the gaps between the parts with either tinted wood putty or (if they are not wider than 1 mm) with transparent sealant. In the second case, I make sure that the sealant does not remain on the front surface of the slopes.
- I complete the finishing of the opening by attaching platbands to the ends of the slope strips and to the walls located next to them.
At the final stage we attach the platbands
Installation of a slope using liquid nails and foam
If the width of the slope does not exceed 20-25 cm, the laminated panel can be installed using liquid nails and polyurethane foam. The method requires a minimum of time, and the result is good.
Preparing the slope elements
Laminate door slopes consist of three parts: two side parts and one top part. If the slopes are made at an angle, then one edge of the sidewalls will be beveled.
This is what the “pattern” for a slope made of MDF or laminated chipboard looks like:
Measure the distances from the door jamb to the corner in several places, cut the strip to the required width and height. The cut out sides should be a couple of centimeters higher than the required length - just in case they missed the dimensions. You can cut it off, but you can’t build it up.
You try on the sides, insert the top. If the edge is flush with the main wall, and the gaps near the door frame are minimal, everything is done correctly. If there are mistakes, we correct them.
After cutting off the parts, try them on on the spot.
Then the outer edge of the chipboard or MDF is trimmed - a trim film is glued on: you do not nail the platbands to the very edge, so that some part will be visible. That's why it needs to be decorated. You can do without trimming if you trim the edge with a matching decorative corner. But it is made of plastic, and how good it will look is a question.
It is easy to apply the trim film. It is on an adhesive basis. Only the edge should be smooth and clean - free of dust and dirt. Glue the trim strip evenly onto it, then take a dry cotton fabric that does not fade, and iron the end through it with an iron (at medium power). Then it sticks tightly, but all the irregularities are visible, so saw off evenly.
If you can choose a plastic corner to match, it looks good, and there is less work: it is glued with liquid nails or silicone
If a telescopic platband is used at the final stage of finishing the slope, a groove is made under it using a milling cutter in the laminated end. The width is exactly for the tenon of the platband, the depth is a little more than required so that it “fits” well. For a regular MDF platband you don’t need anything. It simply sticks onto liquid nails.
Installation of slopes
Having completed all the preparations, we begin to install slopes made of MDF (laminated chipboard). The end facing the door is coated with liquid nails. It is better to take a transparent composition - it will not be visible. The jamb to which the MDF is glued is degreased. Having pressed the sidewall, it is placed in the desired position, checking the verticality and maintaining the same indentation. Then peel it off and wait until the glue dries a little. After 5-7 minutes, the fragment is installed in place, checking the position relative to the walls.
The second side panel is installed in the same way, and then the upper part. The top expands additionally: spacer wedges are installed above the place where it joins the sidewalls. This will prevent the trim from bending and additionally “pinches” the sidewalls.
Having installed all parts of the MDF slope, place wedges at the top
Fixation
After the wedges are inserted, check whether everything is aligned correctly and evenly. If everything is fine, take the foam and place “patches” in the gap between the panel and the wall - apply a small amount of foam in islands. They should be full depth, but not wide. There is no need to fill the entire volume: a lot of foam will be required, and it may bend. Therefore, make islands.
After polymerization of the applied foam, the slope fragments are held rigidly. Now you can start filling the empty space. It is also more convenient to seal it with foam, but not to the full depth, but only in front.
The procedure for fixing slopes made of laminated fiberboard
After the foam has hardened, its excess is cut off with a knife. You can start finishing.
Installation of platbands
This part of the work is carried out in a standard way: first, one side panel is measured and cut, then the top one, then the second side panel. After trying on everything folded and checking the accuracy of the joining, the platbands are installed on foam or liquid nails, depending on the situation.
How to plaster slopes is described here.
Advantages of sealing MDF slopes
Installation of MDF slopes is affordable for most buyers, and the color scheme allows you to choose a design that matches the door leaf and style in the hallway, so most of those who have installed new doors prefer finishing the opening with this material. Additional MDF panels have the following advantages:
- the material insulates the opening from noise and cold;
- withstands moderate impacts and is resistant to damage;
- the decorative layer contains a pattern imitating natural wood, which looks very rich and adds coziness to the hallway;
- Easy to install, no hammer drill or drill skills required.
Advantages and disadvantages of the material
Finishing a doorway is a simple procedure that requires only a certain amount of care and compliance with some nuances. Different materials can be used in the work, but MDF panels are considered the most successful. Their popularity is due to numerous advantages:
- Availability. Indeed, now there is a wide variety of these products that are affordable. You can purchase all the necessary components for them.
- Easy to install. Naturally, if you have no experience, then any finishing work may seem complicated. But once you practice a little and understand the essence, the work will seem quite easy.
- Great looks. There is a certain rule, which is that all elements must be combined with each other. Therefore, the slopes on the front door must be made of suitable products. MDF will be an excellent solution in such a situation.
- Additional sound and heat insulation. This is an important point that many initially do not take into account.
- Safety. The panels are completely environmentally friendly.
MDF panels allow you to create an impressive decorative coating and insulate slopes.
We must not forget that there are no completely ideal materials. Therefore, the disadvantages should also be taken into account:
- Average resistance to damage. This product perfectly withstands various impacts due to its high density, but is very unstable to scratches, as well as other similar impacts.
- MDF is a bad option for rooms that have high humidity.
- Sometimes difficulties arise with the selection of additional elements. The fact is that overhead MDF corners, which have a limited decorative range, can be used for finishing. Therefore, you should think through the overall design in advance.
On a note! Many people mistakenly confuse finishing MDF doorways with installing extensions on door frames. These are completely different procedures in technology. It should be taken into account that extensions are excellent for narrow (up to 11-12 cm) and straight openings that are found in interior structures.
Preparation before finishing slopes
In order for the slopes to be sealed efficiently, it is important to properly treat the walls that will remain underneath them, otherwise fungus may develop there or cold will blow in from there. After installation, a lot of fine dust and debris remains in the opening, so it needs to be thoroughly cleaned. To prevent the formation of dampness and mold, it is recommended to treat the wall with antiseptic impregnation. Next, the surface is primed.
If after installation there are small cracks left that the installers missed, then they must be sealed with foam from a can so that cold air does not enter the extensions from the inside. When the material hardens, it will need to be cut at the end so that when decorating the slopes of the front door with MDF panels, it will not rest against the foam, which will not allow the wooden trim to fit tightly in the frame.
Preparation includes cutting panels to the required sizes. Typically, material with a thickness of 8-12 mm is used. It can be placed vertically or horizontally. The first option allows you to cover a larger area faster, so they often choose it. A jigsaw is used for cutting, but it is important to ensure an absolutely even cut line. If you do not have such skills, then it is better to order a cut from a carpentry workshop. The width of the panels should preferably be such as to completely cover the distance from the box to the corner of the wall. The second set is prepared for wrapping at a corner (platband) and its width is considered to be a standard of 7 cm.
Preparatory moments
All the benefits that come from lining the slopes of external doors with MDF panels can be demonstrated during installation. Therefore, before starting work, you can study a video of exactly how slopes are made at the front door. Wood fiber panels come in 2 options:
- Designed for finishing work (they have an L-shape).
- Wall panels.
Measuring the doorway
Most novice craftsmen have a completely natural question about how to sheathe the slopes of an MDF entrance door correctly. First you need to do some detailing. To make door slopes from MDF, you need to take the dimensions of the opening, which should be drawn on paper. Based on the transferred data, each element should be schematically depicted. It is recommended to take into account the following points:
- Presence of a threshold.
- The order of placement of parts.
- Opening width and angles of inclination.
After installing the door, all gaps between the wall and the frame must be sealed with foam. After the foam has hardened, all excess should be cut off.
Stages of sealing slopes with MDF panels
When everything is ready, you can begin installation. The work is carried out in the following stages:
- It all starts from the top bar. First, foam patches are applied to the wall at the top of the opening. Their diameter is 5-8 cm, and their height depends on the distance of the wall from the beginning of the dimensions of the box. Ideally, you need to make a slope for an MDF entrance door so that the panel is flush with the frame or even slightly lower.
- The cut overlay is placed in place at the desired height. There will be a gap between it and the wall. It is tied up with masking tape and then the position is adjusted according to the level. The bar is supported from below with a T-shaped wooden spacer.
- Now you can move the nozzle of the gun inward and apply more foam for better fixation, but you must act carefully so as not to squeeze the material out.
- Using the same principle, the side panels are installed on tubercles with foam, only they will need to be pushed apart with pieces of timber tied with tape to the box in order to eliminate the curved shape of the MDF.
Advantages of building materials
Finishing a door opening is a labor-intensive process that requires precision and following advice. Therefore, it is possible to make this kind of cladding yourself. Slopes can be finished with panel materials, the variety of which can satisfy any needs. Often finishing work is carried out with plastic, wooden panels, plasterboard, but MDF panels are considered the most successful.
Advantages of MDF panels
Since this finishing building material has numerous advantages:
- Availability of material.
- Easy to install.
- Aesthetic appearance.
- The density of the material creates additional sound and heat insulation.
- Environmentally friendly. Fiberboard is made by pressing wood chips under the influence of temperature and pressure. The core binders of the fibrous material use carbide resins, which are harmless to humans. Consequently, MDF is an environmentally friendly building material that can be safely used for cladding both exterior and interior structures.
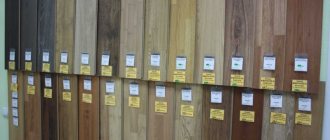
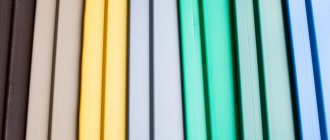
- The color palette allows you to satisfy any request. You can choose the colors of the panels from wenge to bright shades.
Doorway lined with MDF slopes
But like any building material, MDF panels are not without disadvantages:
- Weak resistance to mechanical damage. If the MDF panel is deformed, the damage cannot be restored.
- Does not withstand significant levels of humidity.
Therefore, finishing door slopes with MDF panels should not be done in conditions of high humidity.
Do-it-yourself MDF front door slope (video)
Finishing requirements
Before you start finishing the front door opening with your own hands, you should study the requirements for the work.
They must be followed if you want to get decorative and durable slopes that will not lose their visual appeal for many years.
- Installing suitable door and opening fasteners is an important step in improving the safety, strength and aesthetic appeal of the structure.
- It is advisable to choose the same material from which the door is made. In any case, it should be in harmony with the decor and contribute to the creation of a unified image.
- It is important to determine the appropriate mounting method. Thus, decorative stone is attached by gluing to the wall, and sheathing with MDF panels can only be done after installing the sheathing.
- Pay attention to sound insulation and the ability to conserve heat.
- The finishing of the doorway ends with the installation of platbands.
- Sometimes different materials are used for interior and exterior decoration.
Opening design options
First of all, you need to decide which finishing option is right for you ().
The most common types of decoration are:
- plastering the opening with ordinary cement mortar;
- forming edges using drywall sheets;
- finishing doorways with MDF panels;
- plastic linings;
- wooden extensions;
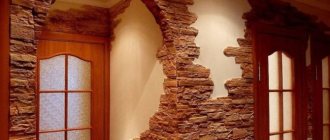
- an opening trimmed with decorative stone.
These elements have their own characteristics that need to be taken into account when choosing an installation option.
The entrance door slopes must meet the following requirements:
- should serve as a beautiful detail that matches not only the entrance area, but also the entire interior;
- must have good thermal insulation properties, preventing cold air from entering the apartment;
- must be strong enough not to be accidentally broken;
- Such a characteristic as resistance to scratches and mechanical stress is also valued, because they often cling to the slopes and touch them with objects brought in and out through the door.
Plaster
The most labor-intensive option is considered to be plastering the opening with cement mortar. But it also has its advantages. Such slopes are monolithic and completely cut off the possibility of cold air penetrating through them.
The plastering process is carried out in several stages and can take 3-4 days, since it is necessary to wait for the previous one to dry before applying the next layer. After finishing the plastering, you can paint the surface or stick any material on it.
Drywall
This option is used quite often when there is no time or desire to do plastering work.
There are two options for working with plasterboard sheets:
- glue installation;
- installation on guides.
For doorways, adhesive installation is more often used. Special glue is diluted thickly and distributed in cakes in the form of beacons on the back side of the plasterboard blanks. The strips are then glued into place, leveling is done by pressing the sheets until the glue dries.
What materials are used?
The finishing of the doorway after installing the iron door is done with the following materials:
- cement-sand mortars;
- plasterboard, which acts as an independent option or the basis for subsequent finishing (for example, you can use wallpaper);
- plastic, wood panels, laminate, veneer;
- decorative stone, natural or artificial.
If you decide not to call a specialist, we select the material and get to work.
However, it is important to learn in advance about the nuances of finishing and correctly assess your strengths.
How to bend MDF
Sometimes it becomes necessary to trim elements of a round or semi-oval configuration with wood fiber sheets. Naturally, the question arises of how to bend the material and whether it is possible. It should be noted that it is possible to bend MDF if thin panels are used (the average value should not exceed 3 mm).
How to bend an MDF panel at home
To bend the panel, perform the following steps:
- Manufacturing blanks from fiberboard.
- Make notches in the sheet across the bend.
- Cut pieces of MDF to the required dimensions.
- At the bend points, apply lines at intervals of 5 mm. The undercut should be 1 mm.
- The resulting shavings must be collected and mixed with glue until a paste-like mixture is formed, which fills the holes.
- Place the MDF sheet on the template and fix it with nails. The nails do not need to be driven deep for ease of removal.
- The last stage is removing the workpiece, sanding and painting.
By following the recommendations, you can effortlessly sheathe slopes with MDF panels or other building materials yourself. Anyone can do all the manipulations with their own hands, despite the fact that finishing slopes with a material such as MDF is a painstaking and time-consuming process.
Plastering a doorway
Plaster is considered a classic option. This method is used in non-residential premises or where additional finishing is expected in the future. You should plaster with care and attention, and then handle the doorway with care, because it will become difficult to care for. But the method also has advantages: strength, durability, resistance to adverse environmental factors, the ability to easily carry out repairs in case of damage, cost-effectiveness (30 kg of plaster mixture costs 200-300 rubles).
How to separate the kitchen from the hallway without a door?
If the kitchen opens into a narrow corridor or hallway, then eliminating the door can be a good solution.
The advantages of this option:
- increasing the functional space of the kitchen - by moving some of the cabinets with kitchen utensils to the hallway;
- the appearance of an additional light source in the corridor, where there are usually no windows;
- greater opportunities for realizing creative design ideas;
- savings on doors. Even the most expensive materials for finishing an opening will cost less than installing a door.
Minuses:
- the kitchen becomes a passage room, which may not suit all residents;
- there is a risk for young children;
- dirt and debris from the kitchen quickly spread throughout the house;
- to demolish part of the wall and expand the kitchen through the corridor, you will need to obtain permission;
- different smells will constantly be heard from the kitchen, and not always pleasant ones;
- you will need a powerful, silent hood.
If some disadvantages turn out to be critical for you, then consider dividing the kitchen and hallway with a sliding partition.
How can you play with the transition of the kitchen into a corridor without a door:
- Place the same wallpaper (washable, of course) in the kitchen and hallway to emphasize the unity of the space. Or vice versa, hang contrasting wallpaper to visually expand the kitchen.
- The same zoning of the kitchen and hallway can be done using the same or different types of floor coverings. For example, there are tiles in the kitchen, laminate or linoleum in the hallway. You can also separate the kitchen with a podium.
- As for the color scheme: it is recommended to use lighter shades in the kitchen, which turn into darker shades at the entrance to the corridor.
- Around the doorway or arch, you can arrange lighting from small light bulbs or LED strip. In the hallway the light should be more subdued, in the kitchen it should be brighter.
- Make the same contrasting accents in the kitchen and in the hallway. These can be any decorative elements in the same style (clocks, lamps, paintings, candlesticks, shelves, etc.).
- An interesting solution for small apartments is the use of transformable furniture. This can be a folding or retractable bar counter in the opening, a folding table and chairs.
- Try to use as little furniture as possible in the hallway. And if you install equipment, then choose a built-in one to save space.
As you can see, there are many ways to refine the opening between the kitchen and the corridor, with the help of which these rooms can be combined or separated - it all depends on your preferences.
Plasterboard finishing
It can also become the basis for subsequent transformation or an independent option. Drywall is not as durable as plaster, but it looks attractive, strict and stylish, and is also easy to install. Another important advantage of plasterboard sheets is the cost, which is in the range of 200-400 rubles.
The finishing of the entrance door openings is carried out as follows:
- Measurements are being taken.
- Plasterboard sheets are cut into fragments. The resulting parts must completely cover the slopes and fit tightly to each other.
- Damage to the surface is repaired with polyurethane foam.
- Foam is also used to secure the finishing material. To do this, it is applied in a zigzag pattern to the wall, after which the drywall is pressed for several minutes. All you have to do is wait 10 minutes and press the material again. This ensures quick and durable adhesion.
- The cracks remaining after completion of the work are sealed, excess drywall and foam are cut off.
- The voids along the edges are closed with corners or putty.
The easiest way
The easiest way to seal a door slope is to use “L”-shaped additional strips. They are usually made from MDF. All that is required in this case is to cut to the required depth and make a 45° cut correctly and clearly. Then you need to coat the end part with liquid nails, apply mounting foam to the inside and press everything against the wall.
The easiest way to design a slope is to use “L”-shaped panels
And, as always, there are “buts”, and serious ones at that. First, these platbands are expensive. Secondly, they are only available in large cities and in specialized retail outlets. Third, there are usually only a few colors in stock, all others are supplied to order. Therefore, other methods of cladding MDF door slopes are often used.
Finishing with MDF panels
MDF is used for interior cladding of entrance doors in residential buildings and office buildings. The material is characterized by durability, hygiene and aesthetics, provides good sound and heat insulation, and withstands moisture well. The panels cost 150-250 rubles. per square meter. The tree will cost more: 300-700 rubles. Serious disadvantages of the material include its easy flammability and the fact that cladding is possible only after installing the frame.
Expensive purchases also include the purchase of veneer, a wood material characterized by high strength and aesthetic appeal. True, direct sunlight is harmful to it. Price per square meter – up to 5,000 rubles.
To decorate a doorway with wood, veneer or MDF panels, you need:
- Using self-tapping screws and dowels, install guides from wooden slats. Before starting work, the frame slats are treated with an antiseptic.
- Adjust the panels to the required size.
- Attach the first part with self-tapping screws or nails to the guides, continue cladding, completely covering the width of the slope.
- Mount corners and side panels to the guides.
- Mask the fasteners with adhesive and install a decorative strip.
- Secure trim around the perimeter of the door.
Decorating a doorway with artificial stone
Artificial decorative stone is a modern finishing material that is inferior to its noble natural counterparts - natural granites, limestones and basalts only in weight and price, which in itself is an argument in its favor. But lightness and accessibility are not the only advantages of this material. Artificial stone is beautiful, diverse, has a rich texture and is produced in a wide range of tones. Due to the fact that this material is made using a technology close to that of tile manufacturing, working with it does not require the skills of a mason - stone tiles are laid as simply as ceramic tiles.
In order for the homemade stone cladding of the opening to look like a stylish and professional finish, when working with artificial stone you must follow certain simple rules:
- the masonry on both sides of the opening must be symmetrical;
- the seams between individual stone dies must be neat, even, of the same thickness and width;
- the stone decoration of the lower part of the rectangular opening is supposed to be wider and more massive than the upper rows of decor;
- The edges of the stone frame should be made uneven - this design technique will create the effect of “ease and naturalness.”
Lining the opening with artificial stone: instructions
To work you will need:
- several packages of decorative stone;
- glue – a special water-soluble dry mixture based on cement and polymer additives or a two-component polyurethane composition of the “Keralastik” type;
- primer;
- construction mixer and bucket for mixing glue;
- marking pencil;
- trowel;
- level;
- spatula - simple and serrated;
- paint roller.
Work order
- Treat the prepared walls of the opening with a primer, and while it dries, remove the stone tiles from the boxes and lay them out on the floor covered with an old sheet.
- Lay out the edge of the opening from the dies, experiment with their location and, having achieved a beautiful combination of shapes and shades of individual tiles, leave them in this position.
- When the soil has dried, mark the outer contour of the finish and the placement lines of the tile rows on the wall.
- According to the instructions, prepare a portion of fairly thick glue. Start attaching the stone dies from the lower left corner of the opening.
- Apply a thin, half-centimeter layer of glue to a small area of the surface to be decorated and smooth it with a notched trowel. Using a flat putty knife, apply the same layer of adhesive to the back of the stone tile and press the tile against the wall in one smooth motion. Use a soft cloth to wipe off excess adhesive from the surface of the tile.
- Having covered the entire opening, mask small chips and scratches with matte paint (if any appeared on the stone during the work) and cover the entire masonry with a special colorless and transparent acrylic composition, which gives the artificial stone special water resistance and resistance to abrasion.
Advice. To make the seams between the tiles less noticeable, mix a little coloring pigment into the adhesive composition, the color of which matches the shade of the stone.
Plastic finish
A popular material, environmentally friendly, budget-friendly and easy to maintain. Manufacturers offer a wide color palette, which makes it easy to match the plastic to the texture of the door leaf. A square meter costs no more than 200 rubles. But the material is not particularly durable and does not fit every door.
The entrance door opening is lined with plastic according to the same principle as MDF: first the surface is prepared, then a sheathing of slats is attached, and then plastic panels are attached to it.
Photo gallery: the most successful doorway decor ideas
Let's look at some examples of successful design options.
Option 1. The simple shape of the opening with a curved upper end looks pompous and majestic, thanks to the classic columns along the edges of the portal. You can make such an arch from plasterboard. The presence of straight lines and the absence of complex decor allows you to maintain restrained proportions of the design. A single color with the walls outside and inside allows you to create a holistic interior.
Design of the opening for the kitchen Source lt.dikidaycare.comOption 2. Stucco decor is suitable for spacious rooms. The arch allows you to combine two rooms - the dining room and the living room. And at the same time, it allows you to delimit rooms in accordance with their functional purpose. In any case, the overall space is perceived as brighter and more spacious. Stucco decoration is suitable not only for strict classical, but also for modern interiors, for example, Scandinavian.
Stucco molding and columns are appropriate to use in living rooms
But it is important to remember that such decor looks massive, and therefore looks organic on wide, high openings. If it is possible to adjust the width of the opening, then it is worth considering that for a small room it is better not to make a wide opening - it will look awkward and will upset the proportion of the room
White plasterboard archSource frombaltic.ru
Option 3. Decorating an opening with natural materials always looks impressive. The stone looks massive and is suitable for country or rustic styles. For a modern interior, you can choose artificial stone, which may look lighter, but at the same time creates the necessary texture. The contrast with smooth neutral walls looks especially impressive. This material has many advantages - it is easy to install, hides unevenness, does not require complex maintenance and has a long service life. You can choose an imitation of any stone existing in nature, even a very rare and expensive one.
Stone decorationSource no.aviarydecor.com
Option 4. An arch made of a wooden frame and stained glass can be mounted into an opening of sufficient width. This design looks light and elegant. It lets in light and visually expands the space. In this example, the shape of the arch follows the shape of the window, but is the main accent.
Doorway decoration Source maz-sirena.ru
Option 5. This arch is suitable for interior design in the Art Nouveau style. Smooth lines, a noble shade of wood and an elegant pattern on frosted glass emphasize the nobility of the design with a sliding door.
Design of an opening into a hall with two doors Source vplate.ru
Laminate cladding
Such finishing usually does not raise questions even among inexperienced builders. This is due to the special flexibility of the laminate, its ability to take different shapes. The material looks good and does not harm the environment, but it does not tolerate high humidity, so you should not use it on the outside of the opening. The price of sheets is 300-3000 rubles.
Finishing a doorway with laminate differs little from lining it with MDF panels. But it is not necessary to mount the frame: another finishing method, suitable for smooth walls without flaws, involves gluing the material with foam directly to the surface.
Decorating the opening with PVC panels
The advantages of plastic PVC panels include low cost, pleasant appearance, variety of colors, ease of installation and excellent water resistance. At the same time, such panels break even from slight pressure, fade in bright light and are easily scratched. Due to the increased fragility of plastic panels, they can only be used to decorate rectangular doorways.
Plastic panels are mounted directly on the walls of the opening (gluing them with “liquid nails”), or attached to a pre-constructed metal sheathing.
Now, knowing the basic methods of finishing doorways, you can choose the most suitable option and start decorating the passages yourself. If all the decoration methods described above do not seem attractive enough to you, contact builders and designers for help and they will make any of your fantasies and wishes come true.
