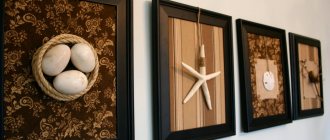
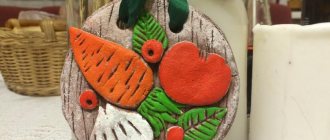
For many, a fabric panel is an unremarkable decor. But often a simple craft in the hands of a talented craftsman can turn into a work of art. It is impossible to give specific templates here, since everything is built on one’s own imagination and idea.
The main factor remains mastering the technique; various master classes will help with this. In the future, everything depends only on the flight of fancy.
History of fabric panels
The history of the appearance of the first decorative paintings dates back to the Middle Ages. Unlike paintings that were created on canvas, all kinds of materials were widely used to make panels: scraps, paper, wood or various types of fabrics. Moreover, by combining several seemingly completely incompatible materials, skilled craftsmen managed to create canvases of extraordinary beauty.
Since ancient times, in order to properly highlight the decoration of a house and emphasize the unique image of the interior, various types of panels have been used. Therefore, decorating surfaces with drawings and voluminous fabrics was considered the best way to decorate a room or facade.
Nothing beats a job done with your own hands. A fabric panel will be an excellent decoration for your interior.
Having passed through the centuries, the art of creating tapestries and paintings from fabric has not lost any of its appeal.
Therefore, nowadays, thanks to the painstaking work of craftswomen, it will not be difficult to do it yourself or mass-produce a real masterpiece. And an excellent result is guaranteed if a person has a wonderful imagination and is sincerely interested in this decorative needlework.
Benefits and accessibility for self-expression
The advantages of this type of handmade creativity are obvious:
- economical, since the materials are available in every home;
- practical, because it uses what is often thrown away;
- accessible even for beginning craftswomen;
- durable;
- original;
- unique;
- Beautiful.
In addition to the above, such creativity is a wonderful option for self-expression and the realization of your fantasies, working together with children, as well as developing their creative imagination, perseverance and ability to work with fabric.
How to make a New Year's panel from fabric correctly
New Year is a special holiday when everyone congratulates each other and gives gifts. Therefore, on this day, a self-made New Year's panel will be a great surprise.
For example, an unforgettable gift would be Santa Claus depicted on the canvas carrying a Christmas tree.
To make such a panel you need:
- Special frame with dimensions 12x17 cm.
- Blue chintz fabric.
- Skin of different colors. For clothes and Santa Claus's hat - red, and for the face - pink. In addition, you will need white, green and golden fabrics.
- Regular cardboard 12x17 cm.
You need to cover the cardboard with chintz fabric. After this, you need to make a three-dimensional silhouette of the future Santa Claus out of cardboard.
A New Year's panel made of fabric is an ideal option for decorating your room for the New Year.
Using red fabric, the clothes and hat are cut out. For mustaches, beards, and “fur”, white material is used. By the way, the “fur” should be cut to create a fringe. Silver fabric is used to make sleighs. And the Christmas tree should consist of separate parts and have several shades.
To give volume to individual parts of the figurine, it is recommended to hold them briefly over a candle fire.
Having taken care of the blanks, you can start gluing all the details of the future panel. To make a high-quality canvas, the master needs to show imagination and try to express all his feelings on the fabric. A properly made New Year's applique will be an excellent gift that will not leave anyone indifferent.
Volume options
To make the image capacious, a number of techniques are used:
- filler: foam rubber, holofiber, various textile waste, cotton wool;
- crumpled sheets soaked in adhesive paste placed under the fabric;
- ribbons, textile balls, braid, flowers, made separately and attached to a single-color base;
- starched parts attached to stretched fabric;
- use of parts in the frame.
How to make a fabric panel on the wall
A decorative panel made of voluminous or regular-sized fabric will become an interesting piece of furniture. Moreover, thanks to the existence of a huge selection of such paintings, everyone will be able to choose the best option.
Some craftswomen prefer to create wall panels themselves. Moreover, the entire process of making such a product is quite simple, and people who have never done handicrafts manage to create beautiful products.
An old frame is suitable for making a decorative panel; you can also use a sheet of thick cardboard or chipboard.
Woven fabric can be made in several ways:
A fabric panel does not require large material costs and is easier to make than you think
- The prepared fabric is stretched over the base, after which it must be wrapped on the reverse side and secured well with glue. All that remains is to attach the resulting base to the frame.
- You need to make a frame from wooden slats. Next, the selected fabric is cut taking into account the allowance and stretched onto a wooden blank. It is important to secure the material well on the reverse side with a stapler or nails.
- To make panels from fabric, you can do without a frame; instead, you will need plywood. Foam rubber or padding polyester should be attached to the front side. The resulting base is covered with prepared fabric and fixed well on the reverse side.
To decorate the resulting canvas, you can use different materials. Some people trim the product with colored beads or buttons. In addition, you can make beautiful and colorful flowers from scraps; the panel will look good and become the highlight of the room.
To make a children's wall panel, craftswomen specially create pictures or drawings taking into account the child's preferences. A similar decorative detail in a nursery will make the room bright and colorful.
A panel with fabric flowers is an unusual room decoration
Before making a more complex panel, you should familiarize yourself with the technology of its creation. Today there are many master classes with step-by-step instructions that allow even a beginner to surprise others with a real masterpiece.
For a canvas with flowers, it is important to prepare in advance all the materials necessary for the work and make a blank. Thanks to the use of a special scheme, the result of painstaking work will be a high-quality product.
Making a panel with flowers from fabric will take you 1.5-2 hours of your time, but the result will exceed all your expectations
To make beautiful flowers for the panel you will need pieces of bright fabrics. You should cut out circles of different sizes; here, pre-prepared templates will help. After this, you need to collect all the resulting circles together (the smallest piece will be the last one on top), and then sew them together. A bead is attached to the center - this will be the final stage of creating a flower.
To make the edges of the product have a wavy shape, you can burn them a little with a candle flame.
A good solution for decorating a future canvas with flowers would be a spring theme. Using a sewing machine, you can separately make bright green blades of grass that will have different sizes.
Upon completion of the manufacture of all parts of the planned canvas, all that remains is to correctly attach them to the base. For very thin parts, it is recommended to use glue, and flowers and blades of grass are sewn on.
The flower does not have to be round. After all, its creation completely depends on the imagination of the author.
Making panels from scraps of fabric with your own hands
For lovers of abstraction, you can independently prepare an unusual wall decoration from scraps. Such a unique picture will help to favorably emphasize the interior of the room and will become the pride of the hostess-craftswoman.
To work, you will need a frame with equal sides and several types of contrasting material. To avoid confusion in the future, it is better to draw a diagram of the future product in advance and number all the stripes.
Why throw away leftover fabric when you can make a fabric panel with your own hands, which will become an original decoration or gift
The shreds are cut into the required quantity and attached to the base, strictly following the specified order. To make the composition interesting and bright, it is important to alternate colors correctly and take care of reliable fastening of parts. For this, it is recommended to use special hot melt adhesive.
A picture made from scraps will look very good on the wall. Therefore, upon completion of the work, it is necessary to secure the resulting product in a frame.
When choosing fabric for a panel, you need to take into account its color, as well as its structure. Silk material will stand out perfectly and expensively on the wall. And the fabric, which has a dense structure, is very convenient for work.
To avoid sagging of thin shreds, it is recommended to insert cardboard into them. In addition to this purpose, such tabs will help prevent the material from showing through.
If you need to make an abstract spiral from scraps, it is better to make the template in the opposite direction. And then lay out all the stripes strictly according to the scheme.
Simple steps to creating your own masterpieces
To begin with, any picture must be framed as an idea, that is, you must clearly understand what you want to get in the end. It can be looked up on the Internet, or an independent sketch will be made if you have the ability to draw, or it will be a printed diagram of the future painting.
The next step is to select the material based on your idea. We select the color scheme and texture of the fabric scraps. It is advisable that the fabric does not stretch too much to avoid deformation and its edges from fraying. If this is a painting using the patchwork or quilting technique, then use matching threads, padding polyester or other material that will be used to add volume. If the painting is using the kinusaiga technique, then we stock up on polystyrene foam. Tools such as scissors, a ruler, a needle, carbon paper, and a stationery knife are required. You may also need wooden frames, a stapler, nails, and glue.
