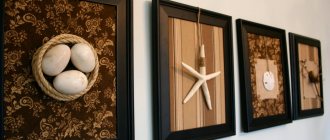
The panel is a decorative element, in the manufacture of which various materials are used: wood, felt, paper, salt dough, beads, etc. It is usually placed on the wall in the living room, bedroom, kitchen or hallway. In the article we will tell you and show in photos and videos how to make a New Year’s panel on the wall with your own hands and decorate everything in the house in a festive way: the ceiling, walls, doors, windows, furniture, fireplace, etc.
Felt
The most popular decorative material is felt. It is easy to sew and is offered to the buyer in a varied color palette and a wide range.
Before you start doing original work for the New Year, you should familiarize yourself with the characteristics of the material and the correct use of it, so as not to make mistakes and waste fabric.
What you should know about felt
- when sewing toys, soft wool blend fabric with a thickness of 1.4-1.6 millimeters is used;
- felt up to 4 millimeters thick is sewn on a machine; you do not need to purchase a special needle for this;
- When sewing very thin fabric, a problem usually arises with the stitching of the outer row. To prevent deformation of the panel elements on the hoop, pre-gluing it to double or non-woven fabric allows you to prevent it from deforming. The materials have one adhesive side; they are connected to the felt by ironing the outer side with a hot iron. To obtain clear, durable patterns, non-woven fabric is used;
- no less attention is paid to the choice of threads, because the neat appearance of the product depends on them. So, if they are too thick, then sloppy holes remain in the places where the needle punctures; otherwise, the edges of the material break.
New Year's panel. Decoupage and felt toy! Master Class.
To make felt panels yourself, you should prepare:
- mosaic;
- beads;
- rhinestones;
- glass;
- buttons.
A New Year's wall craft can be decorated in different ways - with a colored baguette or a wooden frame, supplemented with certain decorative elements, etc. You just need to show a little imagination and reveal your own creative abilities.
#4 Month ❄ DIY Christmas tree decorations ❄ Made of felt ❄ Pattern
We use available means given by nature
Eco-friendly material is very popular and is used in the implementation of various design ideas:
- wood cutting;
- landscapes with branches and dried leaves;
- photo frames.
Abstractions made of bars and inlaid with stones look beautiful and original. Wood products will look elegant in any setting. To preserve wooden structures, they are treated with special means and varnished.
Select flexible branches so that they take a position in the composition and do not break. They are secured with staples and self-tapping screws (the caps are rubbed down). Thin ones are tied together with wire. For the background choose cardboard, fiberboard, burlap. Suitable for interiors in the bedroom, hallway, living room. You can always diversify and add new elements. They go well with dried leaves and flowers.
Salty dough
A New Year's panel made from salt dough is an incredibly popular form of creativity that is loved by children and adults. Working with the material does not cause any difficulties and is accessible to everyone.
From the outside, stucco molding looks like an exclusive and original piece of interior decoration.
Preparing the dough
The material for stucco molding includes three main components: wheat flour, fine salt, and water. There are recipes that also consist of hand cream, wallpaper glue, and starch. Flour contains a lot of gluten, salt gives the products the desired smooth shape.
Classic recipe:
- flour - 1 tbsp;
- fine salt - 1 tbsp.;
- water - 120 ml.
The ingredients are thoroughly mixed with a mixer or by hand - you should get a mass of homogeneous consistency. The test is performed as follows: a piece of dough is torn off, a ball is rolled off it and pressed down with your fingers. The mass does not spread and retains its shape - it is suitable for work.
Advice! When mixing the above ingredients, you need to add a little nourishing cream or vegetable oil and then the dough will not dry quickly and will not stick to your hands when modeling.
The working material is painted with natural juices from beets, carrots, spinach, cherries, watercolors, and synthetic pigments.
How to store leftover dough?
There are many known ways to use such material. Various figurines, toys, photo frames, and festive Christmas tree decorations are made from it.
The figures can be three-dimensional, flat, with or without a base. The work resembles molding from plasticine; crafts made from salt dough are stored for a very long time.
Leftovers are placed in a container with a plastic lid or carefully wrapped in film and stored in the refrigerator.
Advice! To extend the shelf life of the dough, add citric acid to it at the rate of 1 sachet per 2 cups of flour. Without lemon juice, working material can be stored in a cold place for up to three days, and with it - about 30 days.
How are crafts dried and painted?
There are several known methods:
- The panel dries in natural conditions for a month.
- The product is placed near the heating device.
- Or in the oven, preheated to a temperature of 60°C for 10–15 minutes, after which they are browned at 130°C.
To make crafts shine, they are glazed or covered with several layers of acrylic varnish. The first method is suitable for white products, the second - for all other tones.
To add shine, the panel is often coated with an aqueous salt solution and dried in an oven at temperatures up to 50°C.
Advice! To give the craft a pleasant golden hue, it is coated with egg yolk or white.
How to dry a salt dough product
How to place it correctly
To place it correctly, you should consider some points:
- integrity and volume - do not cut off or hide part of the work, then the meaning will be lost and it will look ugly;
- purpose of the premises - for what purposes it is intended;
- harmony in combination with decoration - selection of things and palette.
The kitchen will be decorated with thematic items: fruits, vegetables, still lifes, grain products, cereals, spices, including cutlery and dishes.
The bedroom creates an atmosphere of lightness, peace, and tranquility. Here people relax not only with their bodies, but also with their souls. Heavy objects will be out of place.
Light bright colors, the child’s favorite characters, animals, collages of children’s photographs and other interesting objects are chosen for the child’s room.
In the hall, the design is complemented with wood products, macrame or abstractions.
Paper woven panel
It’s easy to make such a paper composition; from the outside it looks luxurious and interesting. To do this, two New Year-themed images are selected so that one provides a general background, the other is more graphic (black and white) or contrasting.
Materials and tools required for work:
- steel ruler;
- pencil;
- sharp knife, scissors;
- cutting pad;
- PVA glue;
- images of the same size that you want to print with margins.
Making wall crafts is done in stages:
- The pictures are lined into strips about 10 mm wide, one horizontally, the other vertically. To avoid confusion, they should be numbered with a pencil and cut along the lines with scissors. In this case, you need to leave a small indentation from the edges, the result should be a “fringe”.
- Weaving is done by alternately placing one strip on top of another, the ends are bent, cut, and connected with glue. The panel is decorated with a baguette or photo frame.
Birds using quilling technique
You can make almost any bird and place it on a cardboard or wood base. The technique is based on rolling rolls. Step by step process:
- Take quilling paper or a strip of colored paper 0.2 cm wide to the required length.
- Clamp one edge into a special awl or a split toothpick.
- Holding the other end of the strip with your hand, roll it into a tight roll.
- Glue is applied to the end of the strip and secured to the roll.
- The finished part is removed from the toothpick.
The roll is shaped in accordance with the intended design. The bird's feather is made from rolled paper, flattened at one end. The result is an elongated element in the form of a feather. Rolls can be made flat on both sides.
In contour quilling, you can do without complex twisted elements, but the picture will still look great.
Panel made of threads and small nails
Even a schoolchild can make such a panel, because no special knowledge or skills are required for this. You just need to create a sketch or print a ready-made one on a printer.
Having a picture with a New Year's motif on hand, it is worth preparing the base - a cut of a wide tree or a board that has been cleaned, polished to a shine, coated with varnish or acrylic paint. Sometimes it is covered with cloth.
Tools required for work:
- small nails, their number is selected depending on the complexity and size of the panel;
- hammer;
- multi-colored threads;
- fabric when used as the main background;
- thin-nose pliers for holding nails;
- scissors.
Stages of work:
- The layout is placed on the base, the outline of the drawing should not go beyond its limits. Nails are driven along the line to ½ length. To avoid hitting your fingers with a hammer, you need to use thin-nose pliers when working.
- The remaining nails are driven in in increments of 5–10 mm until the outline of the pattern is completely filled.
- The paper with the layout is removed - torn off at the edges.
- The center of the picture is filled with threads. To do this, one end is tied to the cap, then the thread is randomly wound around the remaining studs with movements along the contour, then to the opposite caps. This is done until all the light spots between the threads are smoothed out. The panel for the holiday is ready, it is decorated with colored scales, beads, etc.
Advice! By diluting acrylic varnish with glitter and carefully covering the canvas with threads with the mixture, you can get an elegant design with small lights flickering in different colors.
Performing a contour drawing, a complex pattern
Contour drawings also look unusual - when the thread fills only the background, and the center of the panel is left empty.
To make it yourself you will need similar materials. In the obligatory case, a wooden frame is made, small nails are hammered along the outline of the substrate, and then along the border of the selected pattern.
The thread is attached to the nails located along the edges and stretched to the caps that form the border of the design. The result is a beautiful, unique pattern.
A New Year's wall panel can be made without a layout. To do this, take a dark base and a bright thread. The nails are attached only along the edge of the backing, the thread is pulled to the opposite edge, carefully wrapped around the head, returned and attached to the nearest nail. This must be continued until all the space inside is hidden. The result is an original, spiral-shaped figure. Using the technique described above, complex designs with a three-dimensional effect are created.
Select a pattern
Without much experience, it is better to select a simple and small sketch of a multifaceted or round shape for the panel. Having mastered the technique, you can move on to making more complex paintings, where the threads are arranged according to a certain pattern.
From the outside, such crafts look luxurious; they can become an exquisite decoration of any modern interior. Using multi-colored threads in the work and placing them at different heights, it is possible to obtain a 3D effect, externally similar to a tapestry.
As a New Year's plot you can use:
- Christmas tree;
- Santa Claus;
- asterisk;
- snowflake;
- bells;
- fairy-tale characters or animals, etc.
Beautiful panels made of threads
Tips from experienced craftsmen
- When you use small nails in your work, the hammer must be of the appropriate size.
- The foam backing must be covered with glue or acrylic varnish - this will prevent the balls from crumbling.
- If you are making a large panel on the wall, then you first need to make the main silhouette from threads - this will greatly facilitate further work.
- It is better to use beads, rhinestones, broken Christmas tree decorations, etc. as small decorative elements.
The theme for a children's room can be anything, including a New Year's theme.
Experienced craftswomen create paintings that combine several techniques. The combination of quilling and kanzashi looks amazing. The latter was originally conceived as making flowers from fabric and ribbons. But you can do something similar from paper. The main thing is that it must be dense to form volume. The panel, decorated in soothing colors, looks very advantageous. Suitable for a classic interior.
The variation of tropical leaves in 3D looks bold and beautiful. To make it, take two sheets of paper: green and black. The design is transferred to dark and carefully cut along the edges. The two sheets are folded and fastened with glue, with the exception of the cut out fragments. The slits are folded back so that the green color underneath is visible. To enhance the effect, you can apply glow-in-the-dark paint along the edges of the cuts. In the evening the panel will look very unusual. For weighting and fastening you will need a contour of wooden slats.
Paper has many uses in home interior decoration. With its help you can create a design on any theme.
Cones
Crafts made from pine cones can become a wonderful decoration for interior decoration, an original and memorable gift for loved ones. From natural material you can make luxurious garlands, toys for the Christmas tree, wreaths for the wall, or the front door.
When making panels, New Year's toys, and other decorative items, it should be taken into account that natural material changes shape in warmth. To prevent this, the cones should be prepared in advance in a special way.
They are placed in the adhesive composition for half an hour, after which they are allowed to dry. If you want them to open up and change their original shape, they should be soaked in water for several hours, tied with twine, and then dried well.
To give the panel a more impressive appearance, it is coated with gold and silver paint from a spray can. It lies flat and allows you to hide the smallest visual defects.
Original crafts
A wall panel with pine cones is made in several ways. The most optimal is when natural material is used as decorative elements in the manufacture of toys, Christmas tree decorations or various accessories. Such crafts are easily combined with other products made from branches, leaves, acorns, etc.
If we consider specific crafts, you can make from pine cones:
- figurines of animals and people;
- decorative ornaments;
- houses, baskets;
- Christmas tree garlands, etc.
All you need is paint, glue, and plasticine. Note that natural material can be perfectly combined with artificial material, allowing you to create wall panels in Scandinavian, eco, rustic and any other style.
DIY: NEW YEAR'S DECOR WITH YOUR HANDS! Crafts from pine cones for the New Year!
Photozone
At every party, children's party, meeting of friends, many photographs are taken. To make your photos original, prepare a themed photo zone.
Use voluminous paper flowers or a garland to decorate a well-lit wall. Against this background, the photos will be successful and special.
Here, take a look at some different ideas for inspiration.
Branches
Festive decorations for the New Year and Christmas can also be made from twigs of various sizes, decorating them with dried leaves, chestnuts, dry moss, dried fruits, twine, silk ribbon, and paper.
So, we prepare pruners (scissors), glue, thread with a needle and a wide brush and get down to creative work.
Wicker panel
Let's start by decorating the front door. The lattice is made of branches, cut 40 centimeters each.
The rods are connected with yarn or bast. The structure is randomly wrapped with wire, thereby achieving the visual effect of a “wicker plane”.
Branches of juniper or cypress are placed inside, berries, ribbon bows, sweets in bright wrappers, etc. are glued onto them.
Wreath
The hallway will greet long-awaited guests with a wicker Christmas wreath. It is made from flexible twigs of birch or grapevine, decorated with dry moss and decorative paper, carefully attached to the wall, after which Christmas tree branches are attached to it with wire.
The craft is decorated with bright satin bows, balls, figures of angels, and spray-painted with gold and silver paint.
Light, airy mobiles over the New Year's table
Making them is not difficult. To do this, several thin birch branches are connected with a satin ribbon, gilded cord or beads. Animal figures, fairy-tale birds, multi-colored feathers, and openwork glass garlands are attached to the structure.
Such an airy craft can be given an external resemblance to a bell, a bird's nest, a cloud, or a chandelier.
By sewing
Technique for sewing images from scraps. Contours are drawn on cardboard, the pieces are laid out on top and sewn together by hand or on a sewing machine. For fabric or hard canvas, patterns are used. Not only fabric is used for the work, but also paints and brushes.
Needlewomen sew New Year's toys from it, for children, and make canvases. You can buy it at any store. Patterns, scissors, thread and needle will come in handy. This craft will decorate a room and is perfect as a souvenir.
They use it under the base, tighten the frames, and sew brownies. Herbariums, flour collections, things with the addition of buttons, stones, beads, ropes look very good against its background. Burlap paintings are placed in bright colorful frames for greater impact.
Decorative composition
You can also make an unusual New Year's composition from the twigs. Slices of citrus fruits (orange, lemons, tangerines) are placed at the bottom of a transparent vessel. Larch or willow branches are placed in it, multi-colored grains, shells, dry moss balls, small pieces of bark, cinnamon trimmings, etc. are attached to them with glue. The vase can be replaced with an ordinary clay pot, the bottom of which is covered with floral foam.
New Year's composition - fruit ekibana.
Craft “Boat”
A bunch of thin branches are aligned along the length and tied with a “boat”. Christmas tree cuttings, wax candles on a stand, beautiful balls, chestnuts, walnuts, etc. are placed in the middle.
The delicious aroma of the craft is given by orange, lemon or cedar oil, which is applied on top of the shell.
The best New Year's ideas Decor of bonsai and branches new year
Handmade weaving
For ancient weaving you will need threads and cords. For beginners, cotton, linen or wool are suitable. When choosing, you should focus on the twist, so the pattern will be more clearly visible. A panel knitted with knotted weaving can be made in a square, circle, rectangle, large or small. The palette of shades depends only on desire. Macrame can be immediately woven from colored ones, or from white ones, then painted. Add decor.
Complex and painstaking work that requires patience and attention. You will need: scrap, glue, fishing line, beads in a palette and sizes. There are three ways to create a bead masterpiece:
- glue them to the base;
- embroider on fabric;
- classic - weave according to the pattern.
First, the decoration itself is made using the chosen method. In the latter, it is secured with wire or glue. The finished product is fixed in a frame and hung.
Beads
This is a beautiful, exquisite decorative material. Many beautiful compositions are made from it, including wall panels. As an example, we’ll tell you what New Year’s decorations you can make with beads on your own.
Christmas tree ball
You will need: white, dark green, burgundy beads, wire, multi-colored rain.
The work is performed in the following sequence:
- Prepare four pieces of wire of the same length.
- Connect 2 segments in the center to make 4 rays.
- The remaining pieces of wire are added to the structure.
- The pearls are strung one at a time, leaving the ends of the wire free.
- When all the beads are used up, the ends are joined and twisted.
- The workpiece is formed into a round shape and hung on a spruce tree.
The decoration is ready. Before starting work, we recommend that you watch the video:
DIY. DIY beaded Christmas ball.
Dog paw
Prepare black and beige beads, thick paper, felt, pencil, fishing line, needle, sharp scissors.
Master Class:
- The sketch of a dog's paw is pre-printed and transferred to soft fabric.
- A thin fishing line is threaded into a needle and the end is tied into a knot.
- The needle is threaded so that it comes out on the outer outline of the design and is strung on beige beads.
- The pearl is caught with a stitch, the needle goes back and is threaded one more time.
- In this way, the 1st row of the pattern (the outline of the foot) is performed.
- The 2nd row is stitched with black beads in a similar way.
- The outline of the outer finger is made with beige pearls, and the inside is filled with black ones.
- Excess felt is cut off with scissors.
- The foot is glued to thick paper and carefully cut out along the contour.
- Both sides are covered with felt, the edges of each stitch are decorated with beige pearls.
A dog's paw can be used to decorate a Christmas tree, New Year's costume, etc. Choose the appropriate pattern, color, foot shape, bead color and create unique New Year's masterpieces.
Christmas decorations . Beading. Bell made of 8mm and 3mm stone
Christmas tree ball made of beads and thin wire
For work, prepare: an inflatable rubber ball, multi-colored pearls, wire, beads.
Master Class:
- Inflate the balloon to the desired size.
- On a wire about a meter long, string beads and seed beads one by one.
- Randomly wrap the ball with wire.
- Make a small loop for hanging from a wall or ceiling chandelier.
- Pierce and remove the ball.
The New Year's decoration is ready. To make your own, we recommend watching the video:
DIY: Beaded Angel for Beginners
Beaded snowflakes
New Year is celebrated with snow. Snowflakes are an integral attribute of the holiday. They enchant with their regular shape and unusual beauty, filling the room with a magical atmosphere.
Anyone can make such a holiday decoration. Stick to the plan, we have no doubt, everything will work out for you.
Snowflake From Beads! We are preparing for the new year!
Preparing the necessary materials
In addition to an optimally organized workplace (with a sufficient level of natural and artificial lighting), you will need the following set of tools:
- Corrugated paper, illustrated and office model.
- Specialized types of material, for example, with two coatings (foil), may also be useful.
- Paper napkins (it is advisable to use multi-layer types of material that are not as susceptible to moisture).
- Scissors and a sharp stationery knife.
- Threads and needles for assembling flowers from multi-colored crepe.
- Felt and filler for sewing soft pillows into the core of the bud.
- PVA glue.
- Metal wire.
- Wooden skewers.
You will also need diagrams and templates for cutting out petals of a strictly defined shape. This opportunity is especially relevant for creating lush, voluminous flowers (they are used to decorate a festive interior).
LED Christmas crafts
The design of the luminous figure is a steel body wrapped in an LED garland. The use of LEDs ensures its energy efficiency and safe installation in a residential area.
There are two types of luminous figures:
- volumetric - installed on a special base and away from furniture. They are made in the form of fairy-tale characters, animals, sleighs, trees, etc. There are no restrictions on shape and size, it all depends on the imagination and wishes of the master;
- flat - performed on a flat surface or the facade of a building, most often they become pictures from New Year's fairy tales, the personification of children's fantasies.
Selecting a figure
What kind of LED craft to make for the New Year with your own hands? It's up to you to decide. In your work, we recommend using the advice of experienced designers:
- Hanging luminous figures are the easiest to make and are inexpensive, but they can give your home a spectacular look. These can be balls shimmering in different colors, stars, snowflakes, icicles, falling garlands, etc.;
- To decorate your local area, you can use luminous trees , which are made in several ways: a garland covers a living growing plant or a metal frame. If desired, the garlands can be configured so that they are lit alternately, or the trees near the house can be “painted” in different colors;
- It is recommended to supplement the composition with light inscriptions laid out with duralight garlands.
How to make a wall panel with your own hands
There is absolutely nothing complicated in the technique of creating a wall panel. All you need to do is be patient and diligent. Without spending a lot of time and effort, you can get a truly impressive decor that will add charm and personality to the room.
To create this interesting decoration, you can use everything your imagination allows:
- Threads;
- Old disks;
- Buttons;
- Shawls;
- Groats;
- Beads.
You don’t have to buy anything, you can create a real masterpiece of art even from an ordinary old scarf, the main thing here is not to be afraid to imagine.
DIY fabric paintings - useful tips, instructions, photo examples
DIY souvenirs - a selection of interesting master classes and photo ideas
Recommendations
When starting to create a wall panel, you should take into account some nuances that will determine the harmonious combination of wall decoration and the interior of the home itself:
- A small panel is ideal for a small room. Otherwise, the decor can visually reduce the space even more;
- A large room or several small decorations that form one picture or are similar in theme will add charm to a spacious room;
- When making panels for a bright and colorful room, you should stick to calm and soft shades. Ideally, the number of shades should not exceed three;
- When combining several small panels on the wall, you should remember that they must be of the same theme or represent a specific large picture. Decorations that have nothing in common will look disharmonious.
The wall panel is a very beautiful and elegant thing. Moreover, this decorative element does not require special skills and materials. Such handmade decor can not only serve as an excellent decoration for your home, but will also become a luxurious gift or a colorful holiday attribute!
Decoupage
A panel made using the decoupage technique can decorate any wall: be it a kitchen or a corridor. This technique consists of gluing cut-out pictures and decorative elements onto the selected surface, and then covering it all with several layers of varnish. The general idea of the work can be anything.
Lilac
The following instructions will help you decorate your house with spring flowers made of paper:
- Prepare a paper strip 5 cm wide. Cut it into 7x7 mm squares. These will be the buds.
- For one flower you need a strip 2 cm wide. Cut it into 8x8 mm squares.
- Form flowers and buds from the resulting blanks. Secure them to a wire, imitating a lilac branch. Pre-wrap the wire with green corrugated paper.
- Glue small yellow beads into the center of the flowers.
Multicolored fan
One of the most common elements in Feng Shui philosophy is the fan. Until today, this item is not only a popular accessory in the Middle Kingdom. It is also a strong talisman that protects a person from the effects of negative energy.
Nowadays, many people prefer to use such an accessory as a decorative element, decorating walls with it.
The fan, according to Feng Shui, is a symbol of eroticism and endless life. Quite often you can find floral variations on it. They are most often dedicated to love, bringing harmony to the home and good luck to their owner. Such a talisman protects the room from negative energy and human ill will.
The color and pattern of the fan are of great importance. Although in each specific case it all depends on the person’s taste preferences. It is important that the fan does not cause negative emotions, on the contrary, it delivers aesthetic pleasure. If desired, any image can be applied to the fan canvas.
When choosing a fan, consider the following factors:
- if the room is spacious enough, you can use a large fan, since a small fan will not work properly in such a room;
- for a small room, accordingly, choose a fan of a suitable size;
- the fan must fit into the color scheme of the interior;
- pay attention to the material from which the attribute is made, it should be quite dense and pleasant to the touch, and there should be no gaps in the canvas.
