This curtain holder is suitable for both classic and more informal interiors - from boho to “high technology”. It all depends on the choice of material and finish.
So, in order to sew a classic curtain tieback with your own hands, you will need fabric (preferably the same fabric from which the curtains are made, but you can choose another one that matches the color and texture), matching threads, and two rings.
Operating procedure:
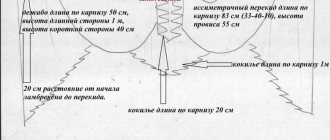
1. Make a pattern for the scoop out of paper. The diagram shows a smaller version of the pattern, so you need to draw a part of the same shape, but in larger sizes, on a newspaper or large sheet of paper.
The overall size of the tieback should be approximately 11 x 70 cm. The width and length of the tieback can be varied depending on the thickness of the curtain fabric and the look you want to achieve, so attach the tieback pattern to your curtains before sewing. Based on the results of the fitting, increase or decrease the size of the pattern.
Helpful advice: you don’t have to make exactly this pattern for the pick-up. A tie in the form of a narrow rectangle (wide ribbon) would look quite good.2.
To sew one tieback, cut two identical pieces of fabric. Don't forget about seam allowances.3. Fold the pieces, fold them with the wrong sides facing each other and sew on a sewing machine.4. Sew rings to the narrow edges of the tieback. Instead of rings, you can sew hanging loops from the same fabric. Useful advice: to make the tieback better hold its shape, place any thick fabric inside when sewing. If you want to make the tieback for curtains more interesting, unusual, decorate it, depending on your existing skills, with embroidery or appliqué .
The simplest option is to decorate the tieback with ready-made fabric flowers or make a pattern of rhinestones and beads on it. Tiebacks for curtains can be sewn in different ways, let’s look at one of them. This way you can sew tiebacks from both thick and thin fabric. To work, we will need the fabric itself, adhesive interlining, adhesive web and bias tape. We cut out two tiebacks from the interlining. We select the size individually, I have a pick-up length of about 60cm, a width of about 8cm. We glue the interlining onto the fabric and on top of the interlining we put an adhesive web over the entire area of the interlining. On top of this “pie”, carefully so as not to move the web, we apply the fabric and iron it.
My organza is white, so I'll stop there.
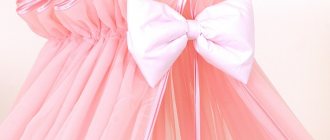
If the fabric had been dark, for example red, I would have glued another layer on top using cobwebs to make the tie-back a more saturated color. Next, we cut out the tie-backs. Since my fabric is transparent, it’s easy to see where to cut. If we sew from thick fabric, then we do the same thing, only with a piece of non-woven fabric sufficient for two tiebacks, and only then we cut them out. We edge the tiebacks with tape from the bottom. And then we process the top of the tiebacks, leaving long “tails” from which we will form loops. We burn the trim sections with a lighter. You can just make loops, or you can make a bow on the front side of the tie for decoration. Ready tie. If something is not clear, ask in the comments, I will answer all your questions. Did you like the master class? I would be very grateful if you share this article with your friends on social networks by clicking on any button below. If you would like to share your experience with the readers of the site or just show your work, write and send a photo to me by email. In the “Site Map” tab you will find a complete list of articles posted on the site. If you are looking for a specific master class, then look at the “Master Classes” tab, there is a complete list of them. Sincerely, Oksana Fadeeva. Use of site materials only if you have an active links https://moishtori.ru Date: 05/17/2015 Comments: Rating: 10 Curtain tiebacks are not only a universal means for fixing the curtain fabric in the desired position, but also a wonderful element of additional decor.
As part of the interior, a tieback can modernize tired curtains, add a new touch to the design of a curtain, or add a bright accent to a window. Tiebacks create a beautiful drapery and help regulate the flow of daylight. By purchasing expensive fabric curtains or ordering the latter from famous tapestry design studios, you need to know that these curtain fastening elements will be included in the kit. However, no one has yet canceled hand-made, so you can do the decorative fastening of curtains yourself. First of all, it’s worth learning how to sew curtain tiebacks. Curtain tiebacks can be made from a large number of available materials: all kinds of fabric bases; cords and ribbons; lace; satin ribbons; straps and threads; hooks and rings; beads. The tieback itself is fixed on curtains in several ways: from clips and adhesive tapes to tightening it on a special hook driven into the wall.
Fabric curtain holder
Pattern of tiebacks for curtains.
If you set out to sew curtain tiebacks, then first you need to use the simplest pattern of the part itself. As a basis, you need to take the standard size of a rectangle 12 cm wide, 30 cm long, drawn on plain paper or tracing paper.
When applying the pattern to the fabric, it is placed on the fold of the fabric in such a way that when the material is straightened, the length of the pick-up is equal to 60 cm. This is the entire length of the finished fastening. On one of the sides, indicating the width of the drawn rectangle, it is necessary to round the corner in any order.
Having applied the pattern at a right angle to the selected fabric base for future tiebacks and outlined it, 1.5 cm is given below on the fabric for allowances. This can be drawn with a pencil or chalk.
Everything must be carefully cut along the outlined boundaries. This is how one piece is prepared for picking. The second piece is also prepared in the same way if the curtains require 2 tiebacks.
Tie blanks can be stitched or glued from the inside with thick fabric for greater durability and strong fixation of the curtain. Non-woven fabric or any other durable textile will serve as such an interior.
Non-woven fabric, in turn, can take on the role of an overlocker, gluing the edges of the fabric with its adhesive side. If the base of the grabs itself is dense, then you shouldn’t do this. It is best to stitch the finished fabric pattern from the inside out.
Scheme for making tiebacks with fringe.
To decorate a fabric tieback, lace or a satin ribbon can be used to stitch around the perimeter of the finished product. The loops with which the tiebacks will be secured are sewn from the same material as the product itself: tulle, organza, lace ribbon and other fabrics that are lighter in texture than the tieback itself. Thin strips of arbitrary length, for example, 10 cm long and 2-3 cm wide, are folded in half and stitched on a sewing machine.
You can sew or glue any decorations onto ready-made fabric tie-backs:
- decorative flowers and butterflies (for the bedroom); straw flowers or small bouquets of dried flowers (for the kitchen); brooches and buckles (for the living room); rhinestone patterns; embroidery; small soft toys (for children's rooms).
Return to contents
Scheme for making a braid from beads.
In addition to the fabric base, curtain tiebacks can be made from ordinary wire. Thin diameter wire, up to 200 cm long, is best. You can string a variety of beads or glass beads on it. First, fasten the largest bead in the middle, bend the wire itself in half and twist the branches together.
The sequence of stringing beads can be arbitrary or in compliance with a certain order or dimension.
Tie a knot behind the last beads in the row, securing them to the wire. In more creative options for decorating wire for curtain tiebacks, other materials can be used instead of beads: small multi-colored balls of thread, felt balls, pompoms, large buttons. They can be combined with each other, for example, alternating balls and buttons.
The finished wire tie should be inserted into the ring fixed in the wall and secured around the curtain. The free ends of the wires, studded with decorations, will fall freely in the folds of the curtains, attracting attention to themselves.
If the housewife knows how to knit or embroider, tiebacks of the required size in the form of knitted or crocheted ribbons can decorate the curtains in an advantageous way.
Moreover, if the curtains are made of lace material or tiebacks are made to secure curtains or tulle.
The advantage of creating curtain clips is that you can bring your own ideas and know-how to life only with the help of free time and skill.
If you decide to change the interior of your room, then it’s time to talk about such a component as curtains.
Curtains are already beautiful in themselves, but you can give them an even more aesthetic or intelligent look. It’s easy to change the design of an entire room; just add curtain tiebacks. With their help, you can regulate the flow of sunlight - narrowing or widening the curtains.
Curtain tiebacks are designed to grip curtains, thereby regulating the flow of sunlight.
Do-it-yourself curtain ties do not have to be made from the same fabric as curtains; you can even use other materials instead of fabric.
Below we will look at what you can use to make curtain tiebacks with your own hands.
Decoration with flowers
There are an incredible number of techniques for making flowers. Surely you also know a couple or three of these techniques. And now is the opportunity to use them in interior decor.
Types and choice of material
The choice of materials is very extensive; you can make the main elements using the following materials:
- Beads. Bugles. Rings. Strings with tassels.
A beaded holder will perfectly complement your little princess's room.
Using similar materials for decorative purposes, you can significantly decorate the appearance of the curtains.
For example, you can make a tie from beads; it will look especially beautiful in a girl’s room. Toys are also quite suitable, especially for curtains in the nursery. It is enough to sew rivets onto the paws of some teddy bear.
As a result, we will get an excellent pick-up, and it will look very appropriate. You don’t even have to sew anything, everything is simple and fast, and most importantly, it’s made from available materials. This is the easiest way to make a curtain tieback with your own hands.
Another easy but effective way is to use a magnet.
Sew it into a ribbon, tie a curtain with this ribbon, and now you can change the interior with the help of metal decorative elements attached to magnets in the ribbon. Or you can attach magnets to forged steel decorative elements and connect them with a cord. All this can be decorated with artificial or natural flowers, it all depends on your imagination.
To make such a device for curtains, you can use completely different materials. For example, it can be made in the form of a necklace using beads.
All you need is imagination and the desire to give your apartment an original look. Let's go further. Below we will look at how to make classic curtain tiebacks yourself.
DIY curtain holders
After sewing curtains, there is often fabric left over. You can use it to make a textile tieback for decorating curtains. Satin, organza, burlap can become the basis for the pick-up.
Description of the procedure for sewing ties
Materials for production:
- textiles for ties – 50 cm. The color either matches the curtains or is contrasting;
- chalk;
- centimeter;
- ruler.
We sew ties with our own hands:
To determine the length, fix the curtain with your hands. Using a tape measure, measure the full circumference, taking into account the distance to the wall mount.
For allowances, add 2 cm to the length and width.
You need 2 cut out blanks for grabs. To cut out your fabric, use chalk and a ruler to draw a rectangle and cut it out.
Fold the piece in half and sew the pieces on both sides.
Turn the tie back out and connect the parts with a hidden seam. Attach textile loops to the edges of the grip. A ring that can be bought at a textile store is also suitable.
How to sew a classic tie yourself
Above we looked at how to make curtain holders yourself from all kinds of decorative elements.
Let's now look at a more classic fabric option. Sewing them is not difficult. Detailed instructions below.
What we need:
Any fabric is suitable for picking up.
The main thing is that it matches the curtains. a piece of fabric; buttons, buttons; interlining; blade; ruler; chalk, you can use soap; a press for buttons, if instead of buttons you decide to use buttons; scissors; iron. Take a fabric, not necessarily the same color as the curtains, and not necessarily from the same same material. When choosing a fabric, follow only one condition - it must fit harmoniously into the overall design of your interior.
It is best if the fabric is dense, so it will hold its shape longer. Do not use fabric that stretches for tiebacks, it will not hold its shape. But if there is no dense fabric, a soft one will do, reinforce it with non-woven fabric. You can use material with all kinds of patterns and designs. But in this case, choose the location of the picture so that the symmetry is not broken.
Cutting and sewing tiebacks
So, first we need to make a pattern. To do this, take a sheet of thick paper or cardboard, the latter is preferable. Draw a rectangle on it with a pencil.
The most commonly used size is 35x10 cm, but it all depends on the size of the curtains and your preferences. Place the resulting triangle on a piece of fabric. We will cut directly onto the fabric.
We take working fabric. Fold it in half and place it on our pattern.
The material should be laid so that its long side coincides with the fold line.
Pattern pattern for curtain ties.
Trace the cut out rectangle with chalk or soap.
Then use a ruler to measure 50 mm on each side for allowances. Cut out the workpiece. We do the same with the second piece.
Take the first piece and fold it in half with the wrong side down. Now you need to iron the fold line.
Then fold the seam allowances inward and iron over them. Fold the workpiece with the top side inward and sew so that one cut remains open. Now turn it inside out and sew up the remaining hole.
Next step. We make a loop from the braid and sew it into the tie. Then you need to mark the place where the hole for the button is planned.
Use a blade to make a small cut. Sweep it. Sew a button on the opposite end of the braid.
It could be easier.
For example, simply using a press to fasten buttons instead of buttons, they will last longer. By the way, the pickup can be decorated with beads. Do the same again with the second element.
Large, double kanzashi flower, made of 5 cm ribbon.
First, I prepared the sharp petals. Each flower needed 10 petals, since I decided to make double flowers themselves. The lower petals on all flowers will be white, and the upper petals will be pink and lilac. I’ll show you how to fold the petals in pink.
- From ribbon wide. 5 cm cut out a square.
- Fold the square diagonally with the wrong side inward.
- I folded the resulting triangle again.
- Then I folded it a third time and trimmed the edge (in the photo it is marked with a blue dotted line). I trimmed it in order to even out the cut of all layers. I pinched it with tweezers.
I fold petal
5. I brought the cut side to the candle so that the ribbon melts slightly. Advice: it is better to melt in the area of the wick (there is less smoke here). If it touched the flame, it was only lightly. She passed the petal several times along the fire so that the entire edge melted.
6. When the cut edge was slightly melted, I pressed it with tweezers for a few seconds so that the tape would stick together.
7. The result is a petal, as in photo No. 7.
8. Then I turned out the petal, as in photo No. 8.
I fold a petal
I prepared these petals: white - 30 pcs, pink - 20 pcs, lilac - 10 pcs.
Prepared the petals
Now you can collect the flowers.
9. Glued together white and pink petals. To do this, I applied hot glue to the white petal along the fold. And immediately, on top, I put a pink petal (so, I collected 20 pieces of white-pink and 10 pieces of white-lilac petals).
10. When the double petals were collected, I began to collect flowers. I applied hot glue to the edge of the white petal and pressed the next petal against it, edgewise. I tried to apply the glue slightly short of reaching the middle and the end of the petal. By the way, you can vary how open the flower is. If the strip of contact between the petals is small, the flower is more open and vice versa.
11. Collected 5 double petals. I pulled apart the last petals that were not glued together, applied glue and pressed them.
12. Using this principle, I collected all the double petals. In the end I got 6 pieces. large, double flowers, 3 pieces, for each scoop.
Picking a flower
Also, I made small flowers.
