What kind of wooden floorings are there?
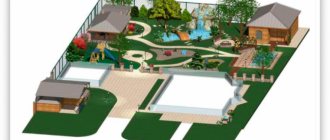
The fashion for arranging wooden garden podiums in a summer cottage or garden came to us from America. The flooring there was originally made of teak wood. As you know, teak has always been used to create decks on ships. That’s why such floorings were called deck.
The podium is an open area isolated from the building. The main purpose of such a site is recreation.
On it you can install an inflatable pool, garden furniture, and arrange flower beds. The deck is made in one, two or three tiers.
In addition to decks, other types of flooring are also installed:
- A patio is a summer recreation area that is protected by a canopy. Often, site owners equip a barbecue or outdoor oven in or near the patio.
- Paths and platforms made of wood that lead from the house itself to the gate, and/or radiate through the garden.
- Terrace is a wooden deck around or in front of a house, adjacent to the walls of the building. It can be either open or equipped with a canopy from precipitation and sun. Most often, the terrace is decorated with garden furniture, curtains, lamps and other decorative elements.
- Podiums around artificial pools, waterfalls, fountains or even a small pond.
Depending on the purpose of the podium and its height, it is supplemented with steps and fencing (railings). Light and water are supplied to it. The shape of the flooring can be different: from square to figured, with cascading transitions.
By the way, glass canopies over the patio area look very stylish, the Glass Group company knows a lot about this, here is their resource https://glassgroup.ru/services/kozyrki-i-navesy/.
Nuances of work
Before you start creating a podium, you should decide not only on its location, but also on the material from which the frame base will be created. Basically, the podium is made for functional purposes.
Therefore, a tree is unlikely to be appropriate here. It may only be needed to strengthen the frame and to support the top of the frame. The base must be made of galvanized metal profile, reinforced.
Every day a certain load will be placed on the frame base. When creating a podium, you should think about waterproofing (if it is in the kitchen, bathroom, or damp place). Drywall absorbs moisture, and if there is a lot of it, the sheets will swell and become deformed.
Option for installing lighting in a plasterboard podium
Backlight. Before creating a backlit podium, you should draw a diagram of the placement of wires, lighting fixtures, switches and sockets. Creating a podium for decoration can be done without reinforcement and supports, but then it should not be made heavier. The base will bend and burst.
Planning and start of construction
Next you need to start preparing the area. This stage directly depends on the topography and height of the future wooden flooring. If it is planned to be large, then it is recommended to use concrete or screw piles driven into the ground as support points. They need to be placed at the corners of the structure, as well as in the middle.
It is necessary to lay logs on the piles. They will be the support for the future flooring.
Most often, the “deck” is laid directly on the ground, without the use of any piles. Before this, the area must be drained so that the support beams do not begin to rot due to contact with wet soil. All necessary preparatory work is as follows:
- Marking the work area using pegs and stretched cords.
- Excavation of the top layer of earth (turf).
- Compacting and leveling the working area.
- Backfilling with a drainage layer on top.
- Covering the resulting area with geotextiles.
It is worth remembering that if the site has a flat sandy surface, then the main preparatory work can be skipped. You just need to raise the logs a little using concrete blocks.
Cost table
In order for you to have a rough idea of future expenses and be able to prudently adjust your budget, we offer you a small table that shows the average current prices for the materials used for finishing the ceiling with plasterboard.
| Name | Vacation unit | Price |
| self-tapping screws | packaging (200 pcs.) | from 120 rubles |
| gypsum board sheets | sheet(3 m2) | from 250 rubles |
| UD profile | PC. | from 40 rubles |
| CD profile | PC. | from 45 rubles |
| ceiling hangers | PC. | from 4 rubles |
| dowels | packaging (200 pcs.) | from 125 rubles |
Selection of materials
Most often, edged boards or timber are used for the podium. For outdoor structures, hard and durable tree species such as oak, ash, alder, pine or larch are ideal.
But wood is quite expensive. If you don’t want to spend extra money, you can make a “deck” using construction pallets. If the house was recently renovated, then they definitely should have remained on the site.
The most expensive option would be to use decking boards. It is made from larch and impregnated with special antiseptic agents. They protect the wood from rotting and insects from entering the wood. The floor surface has a ribbed base, which prevents slipping during rain.
There are special grooves on the back side that allow the boards to “breathe”.
Instead of boards, you can use garden parquet, which has previously been heat-treated. This parquet is made in the form of small tiles that are very easy to attach to each other. The parquet is laid out on a flat surface, for example, on compacted earth or a sheet of central carbon fiber.
But it is worth knowing one important point: this design does not tolerate frosty weather and snow. That is why the parquet will have to be dismantled before the onset of cold weather and taken home.
If you still like the boards, then you need to select them according to the following parameters:
- width – from 75 to 150 mm;
- thickness – not less than 40 mm;
- the length is selected in accordance with the previously developed plan.
Particular attention should be paid to the width. If it is too small, the boards may crack when fastening.
A board with a large width may begin to change its appearance due to high humidity and exposure to temperatures.
Specialized stores sell boards with a length of 2 to 6 meters. They need to be selected in such a way that there are as few joints and waste as possible. If the width of the podium is 2.5 meters, then it is more logical to purchase five-meter boards. If 1.5 meters, then three or six meters.
There is no need to deliberately try to lay out boards of the same width. Different sizes add chic and originality to the podium.
As for the cross-section, it must have dimensions of at least 100 by 100 mm.
Before starting work, it is imperative to treat all lumber with protective agents. The logs are additionally lubricated with a non-absorbent impregnation, which protects the wood from harmful influences.
Pay close attention to the ends, as these are the most vulnerable places near the joists.
There is no need to paint the boards in advance; it would be more logical to do this after making the flooring. Then it will be possible to paint all the ends and guide beams, and not just the flooring itself.
Helpful advice!
Purchase all materials in excess. During work, something may break or you may make a mistake in the calculations. Spare materials should always be available.
Frame
If the markings are done correctly, then constructing the frame should not cause you any particular difficulties:
- start from the perimeter, securing the prepared UD wall profile at a given step (up to 60 centimeters);
- proceed to fixing the hangers - use dowels for this, and again the prepared hangers should be placed at the intersection of the longitudinal and transverse lines of the grid applied to the concrete base of the ceiling (see the previous paragraph);
- prepare mortgages from bars for the chandelier, if one will be used indoors, and also run wires to the places where you plan to install spots and other types of lighting fixtures;
- insert the longitudinal CD profile into the grooves of the wall profile and secure it with self-tapping screws. You should have them on hand, right?
If you didn’t know how to make a plasterboard ceiling with your own hands correctly, but followed the suggested step-by-step instructions, then half the way has already been safely completed. The creation of the frame is crowned by the installation of what is called sheathing
, on which the plasterboard sheets will be attached.
Making the flooring itself
To begin with, logs are laid out on a place prepared in advance, strictly according to the diagram. The average flooring has the shape of a rectangle. Once the logs are ready, you can begin laying the boards themselves.
They should be located across the joists, and the distance between the transverse supports should be about 100 cm.
All necessary details and exact calculations must be written in your plan.
What to use as fasteners
As for fastening, choose what you like best. Self-tapping screws and nails have their positive sides that you definitely need to know about.
Nails
The main advantage of nails is their affordable price. Also, you don't need a screwdriver to work. If the owner of the site has the necessary skill, then the work will go very quickly. But you need to be extremely careful with nails.
Hammer blows leave dents in the wood that do not disappear over time.
As for the disadvantages, the design turns out to be non-demountable. If you want to disassemble some parts, it will be very difficult to do. Boards that are too dry may begin to crack when nailing. To prevent this from happening, you need to drill guides on the boards in advance so that the nail fits in easier.
Self-tapping screws
Ordinary black self-tapping screws are not suitable for street flooring. They must have a protective golden coating. Such self-tapping screws cost much more than nails, but they are the best at fastening boards together. This design can be easily disassembled if repairs or expansion of the area is needed. Self-tapping screws are screwed in using a screwdriver or drill.
How to mount correctly
Fastening should always start from the end board. If it is adjacent to the house, then you need to leave a small gap for ventilation. If you have a deck instead of flooring, then the edge of the board should extend slightly onto the joists.
The boards are attached to each other in two places. Be sure to indent from the edges, somewhere around 2 cm.
If this is not done, the boards will begin to bend over time. Experts recommend laying the wood so that the annual rings point down.
Over time, the tree will begin to shrink or expand due to weather conditions. Leave a small gap between the boards, about 4 mm. This way the wood will “breathe” and the remaining rainwater will quickly drain from the flooring.
Tool preparation
How to make a plasterboard ceiling with your own hands correctly, so that later you don’t have to regret the crooked fit of the sheets and poorly organized lighting? That's right, the key to successful installation is proper markings and the necessary tools at hand.
First, we list everything you need to properly mark out the room:
- roulette;
- level;
- pencil;
- painting cord.
Now let’s touch on the mandatory set of directly necessary construction tools:
- hacksaw;
- perforator;
- screwdriver;
- scissors.
As you can see, you don’t need anything out of the ordinary to make a plasterboard ceiling with your own hands. A standard set of tools that can be purchased at any construction supermarket.
The only thing that can be added to this list, modest in every sense, is safety glasses.
. Still, some steps in our step-by-step instructions include operations that could potentially harm your eyes.
Compliance with safety regulations
- This is the basis of the basics when performing any type of repair work, so take this recommendation seriously.
Useful tips
- If you are afraid of making the gaps uneven, then special plastic inserts or ordinary thick nails can help you. They are inserted between adjacent boards, thereby separating them at the same distance from each other. After fastening, the nails can be freely pulled out and placed in another place.
- Some purchased boards may not have the ideal shape. You shouldn’t throw them away right away, as they will be useful in construction. With the help of a clamp and wedges, you can straighten even the most crooked boards and use them as flooring.
- If you hate to cut the last board on the deck, then distribute them so that the width is exactly enough to cover the entire perimeter. To do this, lay all the wood on the joists, but do not fasten it. Be sure to make indents for gaps. This way you can control the width even before the main fastening of the boards.
- When you get a platform that is too large, the boards will have to be butted together at their ends. The joints must be located on the joists. If the width of the latter is too small, then double joists will have to be made in this design.
- If you bought tongue and groove boards, then there are no gaps between them. This negatively affects the speed of drying. To prevent rainwater from accumulating in one place, the boards need to be placed at a slight slope.
- The cut ends at the joints must be impregnated with protective agents so that the boards do not begin to rot due to bad weather or too high humidity.
- If you want to get a perfectly even end, cut the boards only after installation is complete. To do this, you will need to mark the cut line with chalk and carefully run a jigsaw along it. Unnecessary wood was cut away, and the flooring turned out to be perfectly smooth.
Marking
A very simple, but quite important step, the correct execution of which determines the final result:
- we find the lower corner point on the concrete base of the ceiling;
- we make the necessary indentation, guided by practical considerations: how the lamps will be mounted, how many levels there will be in the final structure. Remember that there must be a certain margin of a few centimeters, otherwise making a plasterboard ceiling with your own hands will turn out to be very rough and unattractive;
- We put a mark using a level; if you have a hydraulic level at hand, then the problem of evenly transferring this line to the entire plane can be considered solved. If not, then you will have to use the painting cord we mentioned;
- We connect all the marks using this cord, achieving a perfectly straight line.
The final marking touch is the application of a so-called mesh
, which will serve as a guide for the installation of prepared hangers.
Keep the step between the lines, it is approximately 50 cm
.
This is what you should end up with.
If you see approximately the same thing on your ceiling, then congratulations: you have successfully completed the first stage of our step-by-step instructions.
How to decorate a podium
When the main work on arranging the flooring is completed, you can begin decorating. Initially, the podium is given the desired color using tinted oils, paints, impregnations or varnishes. It is advisable to use paints and varnishes that do not create a slippery glossy film on the surface of the wood.
If you want to bleach wood, there are suitable ready-made products already created in production.
They can easily be replaced with a solution of slaked lime (only a weak concentration), which will additionally protect the wood from mold.
Did the flat flooring not seem very impressive to you? Then cut round holes between the joists and place flowerpots in them or plant decorative low-growing shrubs.
But you just need to think about such decor in advance, at the stage of creating a drawing of the podium.
Wooden podiums look very impressive, into which shrubs and trees growing on the site are inscribed. When laying the supporting structure, logs are installed around the plants. They just leave free space for their growth and development, and when covering with boards, they make a “window” in the podium.
Under no circumstances should the frame be mounted to the trunk. A tree swaying in the wind can easily damage the decking.
If there are large stones and other natural objects on the site, then you can arrange a flooring, repeating their shape around the perimeter.
Geotextiles that protrude beyond the perimeter of the podium are cut and sprinkled with pebbles. Ornamental plants are planted along the edge, boxes or flowerpots with annual flowers are installed. The high podium is sewn up along the bottom with a board, which is nailed to the ends of the joists.
Wood is not the most durable material for constructing a playground or garden paths on a site. But proper processing of the material will allow the tree to be used for a very long time. And delight with its natural aesthetic appearance and warm, comfortable surface.
Finishing
All joints should be reinforced with sickle tape or Knauf reinforcing paper tape. Before this, the joints are cleaned and primed. After reinforcing the seams, puttying and sealing of seams and fasteners begins. All corners should be reinforced.
Places near the wall are sealed with plinth.
The finishing touches will be decoration. This could be painting, wallpapering, decorative plaster. If the podium is being built in the bathroom, moisture-resistant drywall is a prerequisite. Here the finishing can be ceramic tiles.
We do it ourselves
If you try, the homemade podium will not be much different from the factory one. But the price will be much less. Plus an additional reason for pride.
To complete the work you will need a set consisting of:
- plywood (take a thickness of about 6-8 mm);
- PVA;
- epoxy;
- cardboard;
- degreaser;
- nylon tights;
- polyurethane foam;
- paints;
- putties;
- leather or fabric (will be tight);
- scissors;
- pencil;
- hacksaw or jigsaw;
- sandpaper;
- spatula;
- stationery knife.
I will say right away that in this case we are considering the option of making a homemade speaker podium, which will later be installed with your own hands in the front or rear doors of the car. Often a speaker with a diameter of 13 cm is used here. But no one bothers to make a design for the rear shelf.
But size is not key. The entire preparation procedure looks like this:
- think over the shape of the podium;
- take measurements of the speaker and its special protective mesh;
- the diameter of the ring here will be exactly equal to the diameter of the corresponding landing socket or place on the future podium;
- the external diameter of the existing ring we need, in turn, corresponds to the diameter of the tread (protective) mesh;
- a sketch is drawn on cardboard;
- the template is cut out;
- applied to plywood;
- outlined and cut out;
- a perfectly even hole is cut for the podium.
Do everything as accurately as possible so that no problems arise later.
If you are done with this, proceed to the next step.
Create a drawing
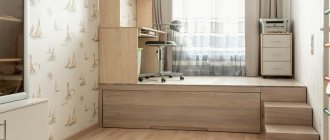
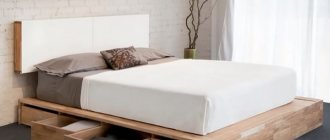
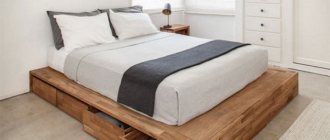
Drawings of the podium bed are drawn up based on exact measurements of the room and the planned dimensions of the mattress. Small rooms are simply covered with a podium into parts with different heights; in other cases, the length of the bed (as well as the dimensions of the drawer with the sleeping bed) is adjusted to the mattress.
Detailed sketches of beds are made on paper or electronically, using online editors or furniture design programs. If you have no experience, you should use ready-made drawings, scrupulously observing the specified indents and gaps
It is also very important to purchase materials of a given thickness
The intervals between adjacent boxes and the specified gaps must remain unchanged. In particular, the width of the drawer placed under the bed in any case should be 2.5 cm less than the box itself, and the minimum permissible distance from the bottom to the floor is 1 cm.
