Today, a two-level plasterboard ceiling fits into interiors of different stylistic orientations in apartments and private houses. But such designs are distinguished by a host of features that a conventional flat ceiling surface lacks. Before installing a two-level ceiling, you should carefully read all the nuances of such a solution.
Design development
The distinctive characteristics of plasterboard are strength, hardness, and resistance to mechanical damage. In all cases, the process of installing a suspended structure begins with the development of a sketch. The most popular options include wavy lines and round elements - they are especially effective for multifunctional rooms. Laconic shapes are easy to fit into a room of any size.
In some cases, there is a need to visually increase the height of the room or zoning it; for this, a two-level plasterboard ceiling is the ideal solution. With its help, you can, for example, allocate places for resting, eating, working, sleeping, and so on. The design of such finishes, which always look extremely impressive, includes combinations of various shaped elements on the plasterboard ceiling, materials, and lighting. Overly complex systems require artistic taste and technical knowledge when developing them, since when designing a structure, the load on the frame is calculated and fasteners are selected.
Tips and tricks from experts
“If the kitchen is made in a classic style, then the decoration and design of the plasterboard ceiling in the kitchen should also be restrained”
- If the ceiling is low, then layering and complexity should not be used.
- A correctly selected basic shape for this type of ceiling allows you to achieve a visual change in the shape and size of the kitchen: using a rectangle allows you to “stretch out” a square room, and an oval allows you to focus on its center.
Isolating thematic areas in the kitchen is achieved through properly positioned lighting.
- Adding style and effectiveness to the kitchen is achieved by introducing LED lighting, a special effect of which can be achieved at night.
- If the kitchen is made in a classic style, then the decoration and design of the plasterboard ceiling in the kitchen should also be restrained; in this case, it is recommended to give preference to matte colors.
- Particular attention must be paid to the correct installation of lighting fixtures, as well as to the correct determination of the brightness required for them.
Drafting
At the planning stage of a plasterboard ceiling, one of the most important aspects is determining the level to which it is permissible to lower the structure. For example, using a floor slab as an upper level allows you to save money and the height of the room. This solution is optimal when creating the design of apartments in Khrushchev-era buildings with low floor heights. Another important step is developing a lighting layout.
Plasterboard ceiling projects
The final drawing indicates the installation locations of supporting profiles, suspensions, and lamps.
When calculating the height of the structure, the existing distance from the floor to the ceiling must be initially taken into account. As a rule, there should be a minimum of 50 mm from the ceiling to the top level, and 100 mm to the bottom. The maximum height of a two-level structure is 250 mm. The ceiling diagram also indicates the location of the curtain rods.
One of the two-level ceiling schemes
The more complex it is, the higher the cost of the structure - every niche and bend increases the cost of construction work. How much they will cost is calculated based on the following factors:
- price of building materials: hangers, profiles, plasterboard sheets;
- the cost of finishing work and materials - putty, paint, mesh for reinforcement;
- prices for installation work;
- cost of electrical work.
Design options with installation of additional lighting
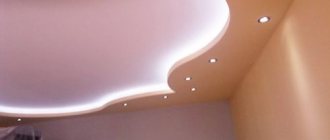
The special charm and exclusivity of a room design with lighting, which can play the role of both the main source of lighting and a decorative element. Almost the most common option at the moment is the use of an LED lamp, which is characterized by reliability, efficiency, safety and particular effectiveness when creating a space design. This lighting is excellent for plasterboard surfaces in two levels, which are easy to experiment with by creating a variety of patterns and shades.
Another option is ceilings with LED strip lighting, which you can do yourself. In addition, it represents an excellent basis for the embodiment of all kinds of creative ideas. Such lighting equipment is produced in single or full color. The first type is cheaper and more suitable for long-configuration lighting devices, when price plays a decisive role.
Additional lighting equipment is installed before installing the structure or directly into it. It is possible to use lightweight lighting fixtures equipped with their own clamp. Large lamps for plasterboard ceilings, as a rule, are not used due to the significant load they create.
The ceiling design should be stylistically consistent with the overall design concept of the living room.
Hidden backlight
Combination of several types of lighting
Spotlights
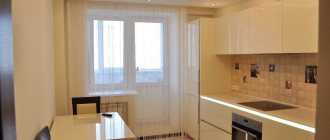
Expanding the kitchen: design ideas
Designers propose to play up a small space with the help of a “floating ceiling”. Its meaning is that the profiles are not installed tightly to the walls, and the voids are filled with LED strip. This lighting option guarantees airiness and a visual increase in space.
By varying the power and direction of the built-in lighting, you can create a different atmosphere in the kitchen space.
In addition to classic spot lighting, the market offers cornice compositions made from LED lamps of any complexity and parameters. But here it should be taken into account that the additional layer “takes away” the height of the room, so this option is more suitable for rooms with high ceilings.
A large print applied using a stencil or a finished vinyl sticker will visually increase the space.
A square kitchen will be “stretched out” by an oval or rectangular element in the middle of the ceiling structure.
A ceiling with profiles made of untreated wood will be the highlight of a loft interior.
For a kitchen in a classic and provincial style, finishing corners and joints with borders imitation gypsum stucco is suitable.
Pros of gypsum boards:
- Environmentally friendly, compared to other ceiling materials. The base is gypsum. Although impregnations and glues to improve performance properties are of chemical origin.
- Perfectly smooth surface with matte or glossy texture.
- High aesthetic properties. A variety of designs for cladding, lighting, and decor.
- Reliable camouflage of communications (wiring, alarms, ventilation pipes).
- Clarity in preparing the surface for decorative finishing and cladding.
- Do-it-yourself installation is accessible, subject to accurate calculations of the size of the slabs and skills in attaching the sheets to the base.
- Easy restoration of damaged coating - just repaint. Mechanical damage to the profiles themselves require partial or complete replacement.
Minuses:
Possibility of combining drywall with other materials
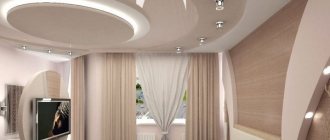
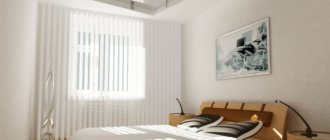
Recently, two-level plasterboard systems have become popular, where the lower level is suspended, made of sheet plasterboard material, and the upper level is tensioned. Between them a space is formed in which lighting fixtures are usually located. Often, to create a unique interior, an LED strip installed around the perimeter of the levels is used. This source acts as a decorative source, and its color is selected in accordance with the overall color scheme of the interior. Usually the LED strip is complemented with a chandelier in the middle of the room.
The combination of drywall and decorative elements such as glass with photo printing looks good. A well-chosen image and lighting will emphasize the style of the interior and help adjust the proportions of the space. The design of the room using stained glass and mirror elements looks extremely original. A two-level ceiling with one of the tiers decorated with volumetric painting is perceived as fresh and interesting.
Combination of drywall and stained glass
Combination of drywall and tensile structure
Combination of gypsum plaster and decorative panels
For lovers of chiaroscuro
Rays of artificial light can be directed both downwards and to the side - at the ceiling or at the wall, creating the previously mentioned play of light and leaving highlights and patterns on surfaces. You can create a real lighting design on your ceiling in your bedroom or living room by using certain shapes of lamps.
To enhance or create a play of chiaroscuro in a large hall, a molding – a strip with molding and an LED strip placed above or below – can be glued into the niche between the first and second levels of the ceiling.
The ceiling molding located above the chandelier will help achieve similar effects. Corner lighting will emphasize the relief of the ceiling, and in combination with LED lighting will fill your living room or bedroom with mystery and romance.
How to install it yourself
If you have sufficient construction skills, a do-it-yourself two-level plasterboard ceiling is a completely feasible idea. In other cases, it is advisable to contact a specialized company with significant experience and a good reputation in the market.
Finishing work includes several stages:
- pre-treatment of the floor: leveling, eliminating defects and cracks;
- marking of each tier, location of profiles and frames;
- laying electrical wiring for lighting fixtures;
- fastening the upper level frame;
- covering the top level with plasterboard or performing finishing when it is a ceiling;
- installation and covering of the frame of the lower tier;
- sealing and filling of seams;
- installation of lighting fixtures;
- finishing of surfaces.
https://youtu.be/4Uv0TepWQaQ
Advantages of plasterboard ceilings
Complex and varied plasterboard designs can decorate any room. Moreover, it is an affordable and versatile material that will always come in handy during repairs.
- Under the plasterboard construction you can hide all imperfections, roughness and surface defects. You won’t have to waste time and money on leveling out level differences. You don’t even have to remove the old whitewash;
- The finished box creates additional sound insulation from neighbors above;
- Minimal preparation and ease of installation of sheets reduce repair time to a minimum. If necessary, the ceiling can even be disassembled;
- Drywall is inexpensive. The cost of the ceiling depends on the complexity of the design. Even leftovers and trimmings will not be lost: they can be used for other repair work and decoration;
- It is easy to hide all communications in the box: wires, pipes, etc. You don't have to ditch the ceiling and then seal the holes;
- Drywall is lightweight. Therefore, there is no need to further strengthen the structure. And it’s convenient to work with him even on your own;
- Any lighting can be easily integrated into such a ceiling. Choose hidden, open or spotlights, decorative lighting, multi-level lighting. It is not only beautiful, but also convenient, profitable and effective;
- Plastic drywall can be given different shapes. This allows you to experiment with design and space, and create complex original solutions. Ceilings on several levels are made of plasterboard;
- The material is completely environmentally friendly and safe for humans. It's just plaster and cardboard;
- The finished structure can be sheathed, painted, plastered and decorated at your discretion.
Drywall construction frame
The first stage of installation is the installation of load-bearing and guides of the upper tier, for which two types of profiles are used. Guide structures are required to form top-level figures. The design of curved outlines is created by cutting the profile with metal scissors or a grinder. Racks equal in height to the lower ceiling drop are mounted vertically to connect a pair of parallel guides.
The next stage of installation of two-level ceilings is the installation of racks with a pitch of 600 mm. Transverse jumpers are attached to them at the same interval. The profiles are mounted to the ceiling using direct hangers, fixed at intervals of 400 mm. You need to stock up on a sufficient amount of fasteners, from which you need screws, dowels, self-tapping screws and other elements.
Profiles for drywall
Scheme of ceiling structure for plasterboard
Frame for plasterboard construction
Preparation
Before you start installing a two-level ceiling, you will need to check the base foundation for unevenness, differences, gaps and cracks. The previous finish is removed using a spatula, and the peeling plaster is removed to the base. If the flaws and defects are too deep, it is necessary to widen the cracks and then fill them again with putty or a mixture of sand and cement. Before puttying, the ceiling surface is thoroughly primed. This will ensure better adhesion of the mixture to the rough floor.
Before proceeding with installation, you need to wait until the surface is completely dry.
GCR sheets must be brought into the room, placed horizontally, leaving them in this position for 2-3 days so that they take the correct shape and adapt to the climatic conditions under which they will be used.
Features of installing drywall sheets
The thickness of the drywall material should be 9.5 mm - this is the optimal size. The cutting of gypsum plasterboard sheets is done on the floor, and to make it easier to give the plasterboard a given shape, the bends are moistened. Then the patterns are fastened to the frame profiles. It is also advisable to make holes for lamps during the cutting process.
The final stage is priming the entire structure, sealing the joints with sickle and putty. The clarity of fractures is ensured by using a metal or plastic plaster corner for straight sections and arched ones if their design is curved. Then the surfaces are puttied, primed and finishing is begun.
Correct placement of plasterboard sheets on the ceiling surface
The correct method for attaching drywall sheets
Fastening gypsum boards and joints of plasterboard sheets when covering the ceiling
Kinds
After assessing all the possible advantages and minor but important disadvantages, you need to decide on a specific type of drywall that will meet exactly your needs.
So, in the renovation of residential premises there are several types of drywall. They have different properties
These are the ones you should pay attention to
GKL - gypsum sheets, which are lined on both sides with light and soft cardboard fixed on the surface of the gypsum. The standard size of such a sheet varies and ranges in length from 2000 to 3000 millimeters. The width usually remains the same - 1200 millimeters. Thickness – 12 or 9 millimeters. For residential premises, it is recommended to resort to sheets with a thickness of no more than 9 millimeters in order to weaken the mass of the ceiling structures.
Widely used in the implementation of design and construction plans for the repair and installation of walls and partitions. The cardboard used in production is gray shades.
GKLO – fire-resistant plasterboard sheets. This type of material, surprisingly, is not used in residential premises, but is widely used in industrial buildings, for finishing air ducts and communication shafts.
GKLV – moisture-resistant plasterboard sheets. They are used in rooms with high humidity, namely in the bathroom, kitchen, toilet in the presence of exhaust ventilation and protection of the front surface with a waterproofing compound, waterproof paint, primer or ceramic tile finishing. Green cardboard is used in production.
GKLVO - mixed-type plasterboard sheets, highly resistant to fire and moisture, combine all the characteristics of the previously mentioned types.
GVL – gypsum fiber sheets. During production they are not fixed with cardboard, like the previous ones. Gypsum is strengthened using special high-quality cellulose waste paper. This type of sheet has high strength and heat resistance to fire and flame. It corresponds to the standard size of an ordinary sheet with a thickness greater than 6 or 10 millimeters. GVLV – gypsum fiber moisture resistant sheets.
Arched plasterboard sheets have the smallest thickness of the previously presented types - less than six millimeters. Used to reproduce various types of designs of different radii of curves and curved lines.
Facade plasterboard sheets are covered with a layer of fiberglass and have a standard thickness of 12 millimeters. The cardboard used in production is yellow.
Plasterboard sheets with insulation are a modification material in which polystyrene foam blocks are fixed to standard sheets with an adhesive base. The insulated layers reach 60 millimeters, which makes it possible to increase the insulation parameter of the wall several times.
Vinyl coated plasterboard sheets are another modern modification that enhances its versatility. The gypsum board package has been expanded and today you can purchase a profile with a decorated vinyl coating, which will allow you to install walls with a ready-made color scheme.
With the help of such a gypsum board you can make both a single-level and multi-level ceiling.
Rules for organizing lighting
Two-level backlit plasterboard designs can be made with different types of lighting fixtures, choose different flow colors, but in any case, a number of requirements must be met:
- wiring is carried out exclusively using insulating sealed sleeves;
- wires should not come into contact with sharp areas of the metal frame;
- wire connections are made using junction boxes, taking into account the design load;
- at the lower level, the plasterboard covering is done in such a way as to create an equal protrusion beyond the edges of the structure along the entire perimeter - lighting is installed on it;
- to hide the lamps, it is necessary to install an additional side with a height of at least 60 mm - if it is lower, it will make it difficult to change lamps.
Diagram of the correct location of a spotlight and hidden lighting
In the case of using LED strips, the power and brightness of which is regulated by the number of LEDs per square meter (60-240), they are mounted along the edge of the frame.
Wiring
Drywall is an excellent material for masking electrical wiring. That is why many people make excellent use of this property and install hidden electrical wiring, thereby avoiding the need to make grooves in the walls.
For hidden electrical wiring, corrugated hoses and non-flammable boxes are used. Installation is done as follows:
- After installing the profile under the drywall, the stage of laying the telephone, telephone cable, and electrical wiring begins. All wires must be insulated with corrugation to prevent a fire hazard in the future;
- To install electrical wiring, you need to stock up on the following materials and tools; corrugated hose;
- distribution boxes;
- cable;
- clips for attaching the hose;
- dowel nails;
- hammer drill with drills.
All electrical leads must be hidden in a corrugation
Electrical wiring installation
Wires run down through specially prepared holes
Installation of film sheet
You can begin installing the canvas after the paint or glue has dried. Experts recommend using film ceilings with a harpoon type of fastening, which can be easily dismantled if the installation is unsuccessful. There are no textile fabrics with this type of fastening.
The film sheet is installed in a room heated to +40°C, and during installation the temperature rises to +60°C. It will not be possible to properly stretch the film in an unheated room. When pulling, a heat gun is used, the operation of which requires certain skills.
The film is attached to baguettes installed on the vertical sides of the gypsum board box using a harpoon, pulled in the opposite direction and fixed under the baguettes. Care must be taken to ensure that no wrinkles appear on the surface of the film. You can iron the canvas using a hair dryer, without bringing it closer to the ceiling than 20 cm.
