Pros and cons of backlighting
Kitchen cabinet lighting has its advantages and disadvantages:
| pros | Minuses |
|
|
Be sure to look at the options for interior filling of kitchen cabinets.
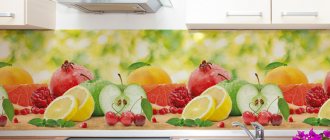
The photo shows the backlight of the glass apron
Kitchen lighting using LED strips
A popular solution for kitchen lighting, which is often chosen by both super-fashionable interior designers and home craftsmen who successfully manage without their services, is illumination of the work surface and other areas of the kitchen with LED strip. This effective and practical method of lighting is universal, but it is simply optimal for rooms with high levels of humidity and frequent temperature fluctuations of different amplitudes - for kitchens. In addition, such lighting is durable, consumes a minimum of electricity, and withstands power surges in the network. You can buy LED strip everywhere and at an affordable price.
The brightness level of LED strips can vary greatly. The glow power can be easily adjusted using a remote control or touch panel. In addition, manufacturers, in addition to strips with white LEDs, offer LED strips in other colors: red and yellow, blue and green. This opens up new possibilities for kitchen interior design.
LED luminaire LED NAVIGATOR 5W IP20 4000K
LED strips can be mounted anywhere: on the wall, on the ceiling, on the bottom of wall kitchen cabinets. Staples, double-sided tape, and reliable glue are used as fasteners. To install LED kitchen lighting, you can use special removable panels made of material of varying degrees of transparency. Their design provides an internal shelf on which the tape is conveniently and easily attached. Among the options offered by manufacturers of similar products, it is recommended to give preference to models with a high degree of protection - IP44 or more. The panels must be coated with a protective varnish or other composition of similar effect. For the kitchen, models are often used whose crystal size is 50x50 or 50x75; they can be arranged in two rows. You should not buy LED strips that are sealed in a tube to make your own backlight. Their service life is short, they quickly overheat, lose brightness and eventually burn out. To connect LED backlight strips to the power supply, you need to purchase special adapters that provide the required voltage values.
What lighting options are there?
LED lamps for kitchen cabinets come in 3 types.
Check out our article about organizing lighting in the kitchen.
Spotlights
Round, square, rectangular - they can either be built into the bottom of the box or mounted on top of it. Spotlights look good both under cabinets and under open shelves. To ensure there is enough light, choose the appropriate brightness and place the sources at a suitable distance from each other.
LED panels
To achieve soft, diffused, homogeneous light, there is no better option. Unlike strips or spots, panels typically occupy the entire bottom surface of cabinets, ensuring an even flow of lumens. The panels do not heat up, are safe for the eyes, and last about 50,000 working hours (~15 years). Easy to install and maintain. The only drawback is the relatively high cost.
Important! Any diode lamps - strips or panels - are characterized by energy-saving properties. They consume much less energy compared to conventional incandescent lamps and even energy-saving lamps.
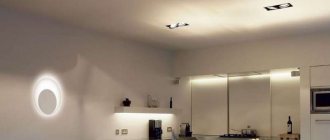
In the photo, illumination with spotlights
LED Strip Light
An affordable option with a low price. Just like panels, tapes do not emit heat and last for many years. They can be installed anywhere:
- the angle between the apron and the bottom,
- in the center of the bottom,
- near the front side.
At the same time, you can install lighting in the kitchen under the cabinets yourself, without the help of specialists. The only disadvantage of the tapes is the serial connection. That is, if one LED burns out, all of them will stop working, which means the strip will have to be changed completely.
Important! Any lamps used to illuminate the work area must be marked IP65 or higher. This marking confirms that the equipment can be used in wet areas.
Selecting a power supply, switches and cooling
LED backlight cannot work directly from a wall outlet. Due to the high power, it will immediately burn out, and the cabinets will lose their presentability. The power from which it will operate is 2 or 24 V. Therefore, the next thing you need to do before installing the backlight is to select a power supply. The power of the power supply must correspond to the power consumption that will be consumed by all connected LED strips.
Power supply options
Let's do a simple calculation. If you connect three strips of 5 meters each with a power of 7.2 V, then you need to multiply these two indicators by each other. As a result, we get 36 V. Please note that you need to purchase a unit with a power 20% more than its rating. Therefore, in this case, for LED backlighting, you will need a power supply with a power of 45 V or more. Calculators will do such calculations for you.
The blocks also differ in design. What are they?
- Sealed . These are small models in a case made of durable and elastic plastic. Such blocks are most often used by manufacturers.
- Sealed with aluminum housing . These are very durable and heat-resistant models. You can safely choose them for the kitchen and place them on the cabinet, but due to their positive characteristics, the cost of such power supplies is too high.
- Open . They have a perforated body and large dimensions. Such models are not protected from moisture, so they require additional protection for their housing. May not be suitable for placement on a cabinet.
- Network . They have a low power of up to 60 V. The advantage of such units is that they do not need to be installed. But if you need to connect several of your tapes, you will have to purchase additional blocks and only then decorate the cabinet.
Units installed in kitchens must be sealed. If you purchased another model, take care to place it in a place where, when using the kitchen, there will be no moisture or provide protection.
Power supplies for LED backlighting: 1 – sealed plastic block, 2 – sealed aluminum block, 3 – block with perforated housing, 3 – network block
For LED strips, blocks are also selected for cooling. They are divided into several types:
- active;
- passive.
Let's look at what characteristics they have. In their block where active cooling they have a cooler similar to the one in computers. Such blocks have high power from 100 V, so they can be used to connect long-length tapes. However, over time, the cooler begins to make a loud noise, which will make the situation uncomfortable.
Passively cooled units are more popular for kitchens. They are silent during operation, however, unlike the previous ones, they are larger in size, which can make them inconvenient. The selected block is not enough.
1 – block with active cooling, 2 – block with passive cooling
Choosing the right switch
Now let's look at which switch can be installed for the backlight. The following options are suitable for the kitchen:
- Invoices . They are displayed on kitchen aprons or walls under ribbons;
- Mortise . Can be placed in furniture above a cabinet.
- Sensory . They operate on belts with a light touch.
- Sensors _ Here the backlight is triggered by movement.
- Dimmers . Allows you to adjust the brightness of the light settings.
All are suitable for LED lighting. The switch that is selected can always be replaced.
Where is the best location?
Kitchen cabinet lighting, depending on its location, performs different functions.
Above the work area
In this case, the lamps are mounted in the center of the cabinets (built-in) or closer to their front side (overhead). Then the light will fall down, creating the right effect and helping to concentrate vision on preparing the products: cutting, cleaning, etc.
Advice! In order not to disturb the appearance, order a special “threshold” along with the cabinets, which will hide the lamp housings.
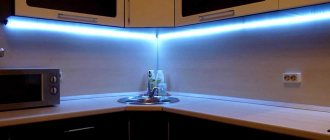
In the photo there is lighting in the corner under the cabinets
On the apron
Because The main purpose of such lighting is still decorative, so the apron should be suitable. Suitable:
- they threw off with drawings;
- plain tiles;
- textured surfaces.
Of course, part of the flow will fall on the countertop, so you can highlight the apron even if there is a slight lack of light in the kitchen.
Ribbons are usually attached to the top, but can be added to the bottom and sides.
In the baseboard
Kitchen work area lighting
It has been established that optimal lighting for a kitchen countertop should be at least 40-50 W/m2. This is true for fluorescent and halogen lamps. For LED-based lamps it requires approximately 10 times less. Since LED backlight consumes about 10 times less power with the same luminous flux.
Fig.1.
How to properly place spotlights in the kitchen. Illumination greatly depends on their location. For countertops, lamps should be placed under wall cabinets.
The lighting of the kitchen work area must have a certain radiation direction. For comfortable work, you should concentrate all the light on the tabletop and prevent it from spreading towards your eyes.
Fig.2.
To prevent lamps from being blinding, lamps with a diffuser are often used. Thus, the light is distributed evenly and does not hit the eyes.
Where should lighting be installed? It is necessary where cooking, cutting food and washing dishes is carried out. Above the stove, the light source is usually built into the hood and does not require any addition. Lighting the countertop in the kitchen in the cutting area and above the sink is very important, since in these areas our attention is most concentrated, and, therefore, the load on vision is maximum.
Fig.3.
In this example, the lighting is distributed evenly. The stove is illuminated by built-in lamps in the hood. The cutting and washing area is well lit. This option will significantly reduce the strain on your eyesight.
Which switch will be more convenient?
Let's start with which option is better to refuse. The most impractical switches for lighting in the kitchen above the work area are those with motion sensors. As planned, they should be as comfortable as possible and turn on the light every time someone enters the room.
In fact, you don’t need to turn on the lighting every time, and the equipment works intermittently and can turn off while you are preparing something and practically not moving (for example, standing still while chopping).
Additional lighting
Lighting can be not only functional, but also solve exclusively the issue of aesthetics. In a large kitchen, you can additionally organize lighting for open shelves, and such lighting can be of any color, which will add bright colors to a simple interior from a design point of view.
You can create an unusual interior by choosing lamps for different functional areas, not only with different designs, but also in different styles. This solution is more suitable for a kitchen-living room - with the help of lighting you can zone a large room.
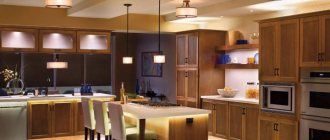
Kitchen cabinets with glass doors illuminated from the inside will create a fabulous mood.
To add coziness to a small kitchen, you can place a table lamp on the windowsill. It is important to choose a stable model so as not to worry about it being knocked over by the wind if you open a window for ventilation.
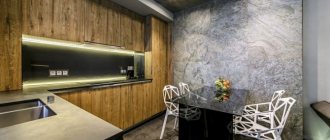
You can place an LED strip along the top or bottom of kitchen cabinets.
A good solution would be to illuminate the stove, but here you need to be careful with open fire and strong heating of surfaces in the immediate vicinity of the stove. If you plan to install a hood, then placing an LED strip on it will be the optimal solution.
How to do it yourself?
Attaching the LED backlight is not difficult, the main thing is to have all the necessary tools and follow the instructions.
Tools and materials
The main thing that installation cannot do without is the LED strip itself. When choosing, pay attention to the following parameters:
- Color. LED strips glow in the RGB model. Diodes are white, red, blue, green. The remaining shades are obtained by including several basic shades at once. There are RGB strips - they are colored, or WRGB - with colored and white diodes. However, the most suitable for the kitchen are ordinary white ones, which in turn are divided into warm and cold.
- Flow. Brightness is measured in lumens - the more there are, the brighter it will be when the tape is turned on. This parameter depends on the type of LEDs and their number, as well as the density of the arrangement. There are 2 main types: SMD3528 (without RGB) and SMD5060 (5050). The first ones are smaller and are placed more often, the second ones are larger and placed less frequently. For backlighting, a standard double-density SMD5060 or SMD3528 tape is suitable.
- Protection. Let us remind you once again that for a long service life in the kitchen, models marked IP65, 67, 68 are required.
In addition to the tape with diodes, you will need a power supply (adapter), a switch, a wire for connecting with a reserve (section ~2.5 mm), a plug into a socket (or a cable pulled out of the wall), electrical tape, double-sided tape or other fastening. Tools you will need are scissors, a screwdriver, pliers, and a soldering iron.
Important! LEDs operate at a voltage of 12 watts, not 220, so you will need to install a transformer.
Step-by-step instruction
6 steps for successful LED strip installation:
- Cut to the required length. This should be done exclusively in the place indicated on the tape itself. Typically, orange marks are located through 3-4 LEDs, often scissors are drawn on them.
- Connect the cable and power supply. The safest way is to expose the contacts on the tape and solder the wire, but you can also use connectors.
- Isolate. A mandatory step for the kitchen to protect the connection from excess moisture. Use electrical tape or special tubes.
- Attach it in place according to the level. The method depends on the specific model; some aluminum profiles have an adhesive side. If not, use double-sided tape.
- Connect electricity. Insert the plug into the socket or connect the tape to the wire coming out of the wall, and turn it on.
- Complete installation. At this stage, you should attach the switch, secure and hide the adapter, and put a transparent or matte diffuser on the profile.
Important! Do not forget about safety precautions: carry out installation with the power off, observe polarity, insulate all exposed wires immediately.
Video
To understand the LED strip connection diagram in more detail, watch the video using a socket for an exhaust hood:
LED lighting selection criteria
When selecting devices, you should pay attention to a number of important parameters so as not to change them to new ones in the future.
Power
Wattage (W) is used to indicate the luminous efficiency of fixtures and reflects the rate at which electricity is consumed. If for other types of lamps the power determines the intensity of the glow, then for LEDs it is a secondary figure. Even low wattage ratings produce light so bright that it would require 10 incandescent light bulbs to provide it. Instead of a 100-watt conventional light bulb, you should choose a 9-10-watt LED.
Glow power
The luminous intensity in lumens (lm) is directly related to the power. The luminous flux of diodes represents the power of the beam energy, or a set of quanta emitted into space. The higher the diode power, the greater the luminous flux will be. So, at 5-7 W the lamp produces 250 lm, at 10-13 W - 400 lm, at 25-30 W - 1200, etc.
Also, when choosing a lamp, you need to take into account the temperature of the glow in Kelvin. Higher values give a cold glow, low values give a warm glow:
- 2500-4000 K – warm white;
- 4000-6500 K – neutral white;
- 6500-9500 K – cool white.
The human eye adapts best to a warm white glow; such lamps should be chosen for LED lamps.
Protection
The instructions for any diode kitchen lamp always indicate the degree of protection against dust and moisture. It is designated by two letters (IP) and the same number of numbers. The first (0-5) indicate protection from solid pollutants, the second (0-8) - from water. The first marking “5” means reliable protection from even the finest dust, the second “8” makes the lamp completely waterproof.
Type of LEDs
All lamps have sockets; diode bulbs are screwed into them. Therefore, when purchasing LED lamps, you need to pay attention to the suitability of their base for a specific socket. All of them are classified into types B, E, P, G, S.
In addition, lighting diodes are divided into the following types:
- SMD LED. By design, these are phosphor-coated crystals on a heat-removing substrate made of copper or aluminum. They have great power and are available in white. They emit light at an angle of 100-130 degrees.
- COB LEDs. They are chips on a board, consisting of dozens of SMD crystals under one housing coated with a phosphor. Their luminous flux is even more powerful than that of the previous variety. Due to the large scattering angle (180 degrees) of light, such diodes are not suitable for creating highly targeted radiation.
- Filament LED. Most often used for decorative lighting. They have a spectrum of light that is very pleasing to the eye, reminiscent of incandescent lamps. The angle of the light flux is 360 degrees due to the cylindrical shape of the substrate.
Advantages of using diode lamps
Modern types of lighting are superior in their parameters to outdated incandescent lamps, energy-saving lamps and other lighting devices.
Rotary lamps
A convenient way to illuminate a work area is rotating lamps . They come in both built-in and wall-mounted types. One of their advantages is the ability to direct the light beam in the desired direction.
Devices with a rotating mechanism can be built-in or mounted. Built-in devices are usually point-type, and are implanted into the bottom panel of wall cabinets.
The lampshade of mounted analogues is often mounted on a bracket. These devices can be quite compact. But given the limited space, this is not the best choice. Designers also believe that such lighting creates a cluttered effect, especially in small kitchens, and makes cabinets visually heavier.
Lamps on brackets are not the best lighting
Wireless kitchen lights
This is one of the most convenient lighting options for the kitchen. Such devices operate on batteries or adapters . They don't need a power source. They are often part of a smart home system, so they are often equipped with motion sensors, which saves power consumption. Their main advantage is independence from the location of the outlet. You also don’t have to look for where to hide the wires.
Battery-powered lamps are convenient because they do not depend on the location of the outlet
But these lamps also have a drawback - you will have to constantly change the batteries or recharge the batteries .
Prices for wireless LED lamps
Wireless LED light
First step
LED technology is developing very quickly. Therefore, before starting to design lighting for a kitchen work area, it is recommended that you familiarize yourself with the latest innovations in the field of lighting devices.
Table setting and holiday recipes for February 23: the best original and traditional dishesTable setting for February 14th - the best ideas and ways to decorate to create a romantic atmosphere
DIY Easter flower arrangements: master class (photo), original ideas
New lamps will prompt new ideas and help implement complex schemes.
After such an acquaintance, you can begin to draw up a project. You should not limit yourself to one type of lamps; this approach is rarely effective.
