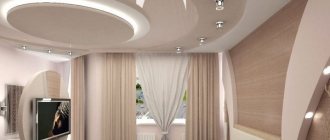
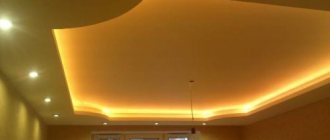
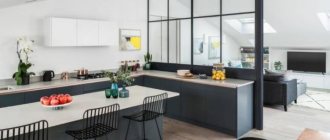
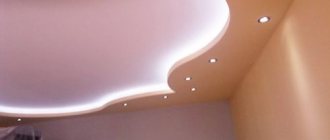
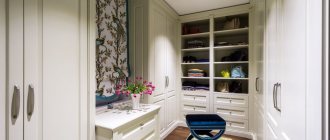
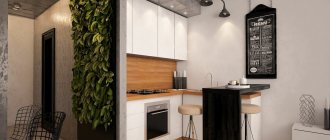
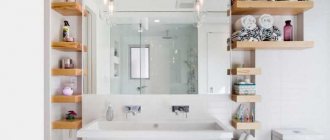
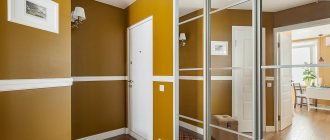
Drywall has firmly entered our lives; it is convenient to use for zoning and decorative elements in the house. Both functions can be performed by plasterboard partitions, if you look at the photos of the projects. Finishing walls, ceilings, interior partitions - let's figure out why plasterboard is so popular and how to decorate interior elements from it correctly and beautifully.
How to choose a partition design for different rooms
You can make a plasterboard room partition for the interior yourself or turn to a professional for help. In any case, you first need to decide on the design: will it be a niche, a figured arch or a cabinet.
An interesting idea is to design a partition that is not completely blank, but with glass, leaving a window in its upper part. This option is suitable if you need to divide one room with a single window, for example a bedroom from a living area, and ensure that natural light penetrates into both parts. When planning a partition, you need to take into account the dimensions and the main role of the room.
Plasterboard partitions: their place in interior design
Drywall is a thin slab, the core of which is gypsum with fillers, and the top layers are heavy-duty cardboard. Quite often in our time, redevelopments are made in apartments, and the organization of false walls plays an important role here, namely:
Choosing a niche for your interior
There are quite important nuances that influence the design of a niche in your living room. It is worth taking a closer look at them and those who chose the standard solution and decided to be original. In any case, listen to the advice of the masters.
How to choose a niche for your interior:
- Niche location. This parameter will influence both the choice of material and the properties of the material. If you place a niche near a window or door opening, in partitions, they may have different parameters.
- Number of recesses. If there are a lot of niches, they will look a little heavy in a small living room, and everything should look harmonious.
- Integrity of the design idea. If the installation of niches is intended to decorate the room, think about how to make them an accent in the interior. At the same time, the external arrangement should distract from the possible shortcomings of the room. These can be such successful “irritants” as decorative vases, flowers, figurines, photos, plates.
- Functional purpose. If any equipment is inserted into a niche, then the supports must be reinforced; even a TV can be very heavy for such a design. And be sure to think about where to hide the wires from the same TV.
Useful tips
If the room is designed in a classic style, symmetrical shelves and recesses will look best. This will help the whole composition look more static. Asymmetry will be appropriate in minimalism and hi-tech. Here you can hang the TV not in the center of the wall
This option is more often used in rooms divided into zones. It is important to decide before starting work whether the TV will stand on a stand or hang on the wall. The size of the niche will depend on this. Play with color - if light colors predominate in the room, then the niche should be several tones darker, and vice versa.
- If you have a lot of time and a desire to make your niche original and unique, then a mosaic pattern will be the ideal solution. Such work may take more than one week, but the result will definitely exceed all expectations.
- Less complex, but no less beautiful decorative elements will be flowering shrubs around the perimeter.
- When drawing up a drawing and work plan, for convenience, you can divide the wall equally with a pencil, outlining the contours of the future niche in advance.
- There are several types of drywall. For any niche, first of all you need to choose a moisture-resistant option. You should choose the desired thickness based on the shape and dimensions of the niche, as well as the weight of the items for decorating the shelves.
- Some of the wiring can be laid under the baseboard. Modern plastic models just assume such use.
- It is often more convenient to completely assemble the frame first, and then attach it to the wall.
- If the niche goes all the way to the floor, then there probably won’t be enough wall slats for mounting. All parts of the structure should also be secured from below.
- If the finishing includes wallpapering, it would be advisable to treat the entire niche with a primer for better adhesion.
- It is better not to use a wall with a window to build a niche, as this can disrupt the lighting in the room.
- Even at the planning stage, it is necessary to take into account the location of all sockets, and also think about which of them will be used and where the electrical wires will run.
- When calculating the dimensions of a niche, remember that over time you may purchase another plasma of a larger size. But even if the new technology does not fit into the existing “framework,” this will only be another reason to start a small construction project again and show imagination and ingenuity in a new style.
- Don't be afraid to use wood for finishing. This will take more time than just painting or putty, but will add warmth and coziness to the overall picture.
- If you use pieces of glass or mirror to decorate a niche, you must follow all safety precautions. It is best to use a thick fabric bag (or better yet, several) and a hammer for crushing. Make sure that small fragments do not spread across the floor after finishing work. It is better not to allow pets into the room during finishing work.
Plasterboard partitions: advantageous advantages and some disadvantages
Such designs rightfully occupy a leading position due to many positive characteristics, namely:
Along with numerous advantages, it is worth mentioning some of the disadvantages of these designs, which, however, are quite few. Drywall does not have high strength compared to stone, concrete or wood.
Consequently, it is subject to various mechanical influences. Although drywall has a certain degree of hygroscopicity, with direct and prolonged contact with water, for example, in the event of flooding, it will very quickly deform and become unusable, which will entail alteration of the structure. That, in fact, is all that should be taken into account before starting work.
Read also: Stylish plasterboard arch in the interior of an apartment - 40 photos
Do-it-yourself plasterboard partition: step-by-step instructions with photos
When the project is ready, the necessary drawings and measurements have been made, and the selected materials have been purchased, you can begin installation.
First of all, keep in mind that a self-made plasterboard partition can be erected after familiarizing yourself with the sequence and rules of the installation processes. Working with main and auxiliary materials has its own subtleties and some nuances, which we will discuss in detailed instructions.
Step 1. Marking
You need to start marking from the floor. Using a long ruler, a pencil and a corner, a straight line is formed to fix the guide (if a plasterboard partition with a door is provided, it is worth immediately marking a place for it, since there will be no profile on the floor at this interval). Using a plumb line, this line is projected onto the ceiling surface. So, two guides are ready. Next, the horizontal lines are determined. Thus, the main outline of the future structure was formed.
Step 2. Frame installation
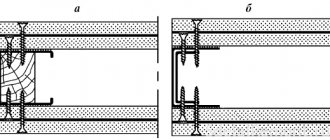
To begin assembling the frame, you need to make holes for the dowels along the guide lines. Sealing tapes are applied to the profiles and they are fixed according to the markings. The side (wall) profiles are designed in the same way. The main box is ready. Then follows the installation of all other racks, the pitch and number of which must be calculated based on the load on the plasterboard partitions (the presence of any hanging cabinets, shelves, etc.); Usually the pitch is 60 cm. Attaching to the guides is done using a cutter. Throughout all this work, it is necessary to constantly check the position of the structures using a building level.
After installing the racks, it is necessary to connect them with horizontal jumpers in increments of 70 - 80 cm in order to ensure the rigidity of the structure, and then lay the electrical wiring. The profiles of the plasterboard partitions have holes for wires, and all cable routing work is carried out before the sheathing.
If the partition has niches or shelves, in their intended place it is necessary to arrange transverse profile jumpers between the racks.
Step 3. Doorway
A plasterboard partition with a door will require the formation of additional elements of the doorway. To do this, profiles are cut along the length of the box, into the inside of which bars are inserted to strengthen the opening and rigidly secure the block. Such prepared structures need to be inserted inside the guides on the floor and ceiling and secured with self-tapping screws. It is important to maintain the same width at the top and bottom. The cross beam is formed from a rack profile. Its internal part is also supplied with bars, and the finished structure is fixed at a measured height. The inserted wooden elements are fixed inside with nails.
Step 4. Sheathing
Before you begin sheathing, you should prepare the drywall by cutting it to the desired length. If decorative partitions are made from plasterboard, it is necessary to cut out the necessary sectors to design elements such as niches and shaped openings.
Using self-tapping screws, the sheets are attached to the guides. Experts experienced in this matter advise starting to fasten from the doorway to the walls, and if there is no doorway, you need to start from the middle: this will make it easier to hide the trimmings at the final stage.
Step 5. Final processing
The last stage involves sealing the joints of the plasterboard partition (photos in the article demonstrate various processes). Initially, the entire structure must be treated with a primer. Then you will need a construction sickle mesh, from which thin strips are cut. Mesh tapes are glued to all joints, then starting putty is applied and leveled with a spatula until an ideal surface is obtained.
Since, when attaching sheets of drywall, the self-tapping screws are screwed in deeply, their heads leave small dents on the surface, which also need to be filled. The finished surface is once again treated with a primer, then a finishing layer of putty is applied over the entire area of the constructed structure. And now, the do-it-yourself plasterboard partition is ready.
The invention of drywall certainly made it much easier to implement various design techniques in interior design. All the processes of constructing structures from it that we have considered once again prove the convenience and ease of installation. It is safe to say that plasterboard partitions are the most successful solution in arranging any redevelopment.
Installation of guides
The next step is installing the guides. Having cut the guide profile to size using metal scissors or a grinder, stick the damper tape on the profile surfaces that will lie on the floor or walls.
This will avoid the transfer of vibrations from the concrete foundations to the profile, which will significantly reduce the noise level in the room.
The marked and pasted profiles are attached to the floor with dowels - using 6/40 nails, into holes drilled with a hammer drill, every 40 - 60 cm, but at least three pieces per profile.
Finishing options
The cladding method for plasterboard niches is entirely at the mercy of the designer’s imagination and the wealth of building materials. Popular options are:
- Painting in one color or several (horizontal surfaces - one, vertical surfaces - another.
- Wallpapering
- Combination of painting and wallpaper
- Enhancing the effect with hidden LED lighting.
- Adding ceiling structures with decorative cornices and polystyrene pilasters.
As can be seen from the above, the design of plasterboard niches is a difficult design that includes the designer’s plan, the technical development of the structure and the correct implementation according to the drawings. At the same time, recesses can bring not only an artistic function to the premises, but even completely replace all the furniture in the apartment with niches.
Implementation of individual elements
We will not consider in detail the process of constructing walls and partitions from plasterboard, but we will try as much as possible to pay attention to the process of forming individual decorative elements. So, the tools and materials that will be needed are the same as for the construction of walls, in addition, such specific ones are used as:
- needle roller, for perforating the top layer of cardboard;
- short hair roller or sponge.
Below we will look at where and how to use these tools and materials when constructing decorative partitions.
Color solution
The most common way is to paint it the same color as the wall, although sometimes lighter shades of color are used. Many people start experimenting with colors, falling into the trap: dark colors create the impression of a “hole” on a light wall. Designers recommend sticking to light shades of paint and looking for your own color scheme, avoiding overly dark colors. It is best to paint a small niche several tones lighter than the wall. Then the objects in it will look more refined and elegant.
A niche for television equipment or an aquarium requires the same color as the wall as a whole. Fortunately, the reflection that will be inevitable will allow the niche to play with new colors.
Decorative niches in the same color scheme as the wall
If you want to decorate your kitchen with niche shelves, try making them like picture frames. It will look very impressive, but at the same time warm and cozy. For the kitchen, you should also make a more durable structure, since the housewife may need space for heavy kitchen utensils: frying pans, casserole dishes, pots, and so on.
Functional niches in the kitchen
Surface putty
For final preparation of the wall plane for the finishing coating, it is used to finish it with putty. This is done like this:
- primer with the recommended composition, gluing corners and joints with sickle tape;
- applying a primary layer of putty, sanding after drying;
- finishing the surface with a finishing composition of putty, drying, grinding;
- thorough cleaning of the surface of the walls and the entire room from dust;
- finishing primer of walls for final coating.
Knowing how to make a plasterboard wall, any developer can cope with this task on his own. You just need to use the information received here correctly.
vote
Article rating
Formation of rounded ends
To ensure that the ends of the partition or opening are not straight, but rather represent a semicircular protrusion, you can proceed as follows. At the end, which is covered with a strip of drywall, another strip is applied, smaller than the previous one, for example by 2 cm. It is attached so that there are gaps on both sides of a centimeter. A strip 2 cm smaller than the previous one is placed on top and fastened with self-tapping screws, and so on several times. The resulting step structure will be the basis for rounding.
Next, the gypsum solution is applied in a thick layer to the entire structure and, using a pattern that repeats the shape required by the protrusion, it is compared. Once the solution has set and hardened, you can finish it with starting and finishing putty to form a perfectly smooth surface.
Types of profiles
The profile forms the basis on which gypsum board sheets are mounted.
Support and guide profiles
Table 2. Types of profiles.
| Type | Characteristic |
| Guide | U-shaped in cross-section, the side walls are smooth. Used as a metal support for racks. Mounted along the perimeter of the future partition. |
| Rack-mounted | Installed in the guide profile. It is to this that the sheets of drywall are attached. It is characterized by increased rigidity due to heavy load. The U-shaped structure of the profile is supplemented with stiffening ribs. |
| Ceiling | There are load-bearing and guiding types. The cross-section of metal products is smaller than that of the 2 previous types. Since it does not place a large load on the base of the partition, it is thinner. |
| Arched | The holes in the product make it possible to install them at different angles. |
Materials for constructing the frame
To construct the frame, profiles made of ferrous or galvanized metal with a thickness of 0.5 to 2 mm are used. Galvanized metal is less susceptible to corrosion, so it can be used in damp areas. If the work is carried out in rooms with normal humidity, a corridor or a bedroom, then there is no point in overpaying for galvanizing.
Guide profiles ranging in size from 50/40 to 50/100 are laid horizontally. And rack-mount ones, with sizes ranging from 50/50 to 100/50, are installed vertically.
It is possible to construct a frame from dry wooden beams of comparable dimensions. If the goal is to achieve maximum sound insulation, then the wooden frame will resonate less, transmitting sound, and the room will be quieter.
Why fastening technology recommends vertical fastening of sheets
Modern technologies in finishing work indicate the use of the method of horizontal and vertical fastening of plasterboard boards with the same frequency.
This is due to the geometry of the room and the versatility of the material itself. However, for each of these methods there are a number of nuances that should be taken into account so that there are no problems with the final finishing with wallpaper or paint. When attaching drywall vertically:
- It is much easier to calculate the location of the profiles in the sheathing, since they must be located exactly at the junction of adjacent slabs and 1-2 pieces are made between them.
- Factory-finished drywall edges ensure a tight fit and require no additional sanding or adjustment.
- As a result of puttying the joints of drywall sheets, defects are smoothed out much more easily, so cracks are less likely to form.
- Puttying of the entire surface is required only if it is subsequently wallpapered. This is done so that after their removal the top paper layer of drywall remains intact.
Thus, even for a person without much experience in finishing work, installing plasterboard sheets will be a simple task.
