Sometimes, to bring the walls into proper shape, damp plaster turns out to be useless. The condition of the surface may be so poor that other materials will be needed for repairs. Or ideal evenness of vertical structures is required for subsequent finishing.
This can only be achieved by covering the walls with plasterboard (gypsum plasterboard) over an installed metal frame.
The high demand for this building material is caused by many pronounced advantages that clearly emerge as a result of its use.
In this regard, it is worth noting that the capabilities of drywall are not limited to straightening walls. It is often used for redevelopment of premises and internal zoning.
During the installation process, walls and partitions made from gypsum plasterboard differ from other structures by an undeniable advantage. They can be easily installed independently without the involvement of professional teams.
Their installation, like leveling walls with plasterboard, does not require the purchase of expensive equipment. The technology is quite simple and if certain nuances associated with the processing of plasterboard sheets are observed, the work can be completed quickly and efficiently.
Advantages of decorating from gypsum plasterboard
This material has many positive characteristics that make it a favorite among all finishing materials for creating beautiful interiors:
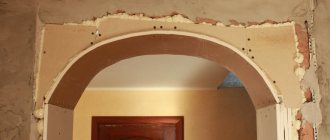
Arched opening of a complex shape made of plasterboard
- fireproof material;
- is an excellent heat insulator;
- additionally, the walls are provided with additional sound insulation;
- the ability to mount any structure, both polygonal and round;
- the ability to disguise communications and wiring under drywall.
All decorative elements made from plasterboard can be functional. If you build a frame from a metal profile correctly, they will withstand a considerable load.
Installation of racks and sheathing
Having finished with the power circuit, install vertical racks. They are installed every 50 - 60 cm. The profile is fastened together with a cutter. The tool punches a hole in the metal and moves apart parts of the profile, fastening it together.
Some craftsmen attach the profile to each other with self-tapping screws, which is not acceptable. With this type of fastening, the heads of the screws protrude above the surface, preventing a tight fit of the drywall sheet and the surface turns out to be uneven.
How to decorate gypsum plasterboard decor
- Painting the surface of drywall is the most economical finishing option, which requires preliminary puttying and sanding.
- The use of decorative film, which can be glued to the decor of plasterboard walls. The film is thin and self-adhesive, so the surface must be well prepared and primed in several layers.
- You can stick decorative stone onto the gypsum plasterboard - this finishing option cannot be called very economical, but the decorative effect is chic.
Options for finishing plasterboard decor - Venetian plaster, which imitates natural stone. This mixture can be bought in dry or ready-made form in the store.
- Ceramic tile. An excellent option for decorating a plasterboard surface. It is enough to prepare an adhesive composition and stick the tiles onto the reinforced gypsum plasterboard structure.
Advice! When finishing plasterboard decor with tiles or mosaics, there is no need to thoroughly prepare the surfaces. But experts advise sticking a plaster mesh on the wall for reinforcement. Polyurethane stucco molding adds nobility and sophistication to any design. The elements are glued either with liquid nails or with a special composition that can be purchased ready-made.
Polyurethane stucco molding
As you can see, there are a lot of options. You can come up with your own finishing option, for example, by using materials of different textures and properties.
Marking the future wall (step by step instructions)
The best solution for marking is a laser plane builder or laser level. Having established the level, we get ready-made marking lines that you can work on immediately, or you can transfer them to the walls with a tapping thread or a simple pencil.
In the absence of a laser, a regular building level, plumb line and tape measure are used. The location of the future partition is marked on the floor, not forgetting to mark the space for the door opening, if one is planned. And from the floor, measuring with a plumb line, markings are made on the walls and ceiling.
What is meant by decor
The interior of the apartment can be decorated with any plasterboard elements.
Arches
Unusual curvilinear elements that can be used to delimit space, making it attractive and varied. You can use a combined structure that serves as an opening, and part of it runs along the wall in beautiful relief.
Drywall arch
You can use a false arch in the bedroom. If you install it above the bed and equip it with shelves, you can do away with bedside tables, freeing up useful space.
Niches
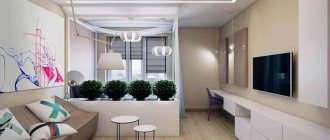
This decorative element is multifunctional and can be used to store things. If you use an open niche for a TV and arrange several small elements nearby for flower pots, you can enliven the interior of a small room.
Plasterboard niche
The headboard of the bed, framed by a niche with lighting, looks original and unusual.
Shelves and cabinets
Drywall cabinets look original, especially if you install lighting on them and decorate them with various materials, such as metal, decorative stone or glass.
Plasterboard shelves
Various shelves made of plasterboard and decorated with mosaics or mirrors look impressive, while visually increasing the space.
Wall openings
Designers are working to make the interior of apartments varied and attractive.
One know-how worth noting is decorative wall openings. These are intricate figured designs that are decorated with shelves for plants.
You can arrange plasterboard shelves on which you can place toys or books.
Wall openings made of plasterboard
Such an opening can be used if it is necessary to zone the space in a room where there is only one window.
Curtain rods
This design of a niche for gypsum plasterboard curtains is often used in apartments with high ceilings. When installing this structure, a cable for lighting is laid.
Drywall curtain rod
An LED strip is laid and when the backlight is turned on, the curtain “flows” from the ceiling.
Wall plasterboard structures
Using plasterboard for walls, you can get an incredible number of structures: arches, niches, fireplace structures, shelves, interior partitions, decorative elements (you can find out more about all of them on the pages of our website). Plasterboard structures have gained popularity not only because of their low cost, but also due to the environmental friendliness of the material itself, because gypsum is of natural origin, and cardboard is, in fact, pressed paper.
In addition to the usual options for using plasterboard for walls (leveling walls for painting, wallpaper or tiles), more and more often home owners are ordering something non-standard. Such bold projects include several plasterboard niches located asymmetrically, wall lighting in the form of LED cords, shelves protruding or built into the wall, and even columns.
You can also get creative with plasterboard partitions. For example, build them in the form of some kind of avant-garde form or decorate them with patterned slots and windows. In a word, having mastered the technology of constructing plasterboard structures, you can create a truly exclusive atmosphere in your home. Moreover, without risk to health, budget and time.
Did you find this article helpful? Please share it on social networks: Don't forget to bookmark the Nedvio website. We talk about construction, renovation, and country real estate in an interesting, useful and understandable way.
Decorating with plasterboard
To decorate a room, you can use not only interior partitions, niches, and plasterboard arches, but also create decorative elements with your own hands.
Decorative elements made of plasterboard
Portal for a fireplace made of plasterboard
Of course, a false fireplace made of gypsum plasterboard is just a prop. But despite this, the interior of the apartment will become romantic. You cannot light a fire in it, but you can build an electric fireplace into it. Corner designs will help diversify the interior, making it cozy and attractive. It will be very pleasant to sit in such a room on a winter evening. Portal construction algorithm:
- draw a sketch;
- transfer it to the wall where the structure is supposed to be installed;
- build a frame from a profile;
- install plasterboard sheathing;
- the inside of the portal must be lined with heat-resistant material or reflective foil;
- install an electric fireplace;
- the outer side of the portal can be decorated with artificial stone or tiles;
Portal for a fireplace made of plasterboard;
portal for a fireplace made of plasterboard... fireplace plasterboard - Place a forged grille on the opening.
Important! If you plan to install an electric fireplace, then it is worth taking measurements of the electrical appliance.
Framework
If you want to highlight a certain element in the apartment, you can build a frame from plasterboard.
Drywall frame
Columns
These are universal elements that are often used to disguise communications, while they create a unique interior in the room. It is easy to set up such a structure using plasterboard. Cut out a fragment of the required size, on which slits are made every 10 cm.
plasterboard column
Then carefully bend it and secure it to the profile. A plasterboard column will turn out to be multifaceted; it is enough to putty and paint it.
Advantages and advantages of drywall
Drywall is a kind of layer cake made of plaster on the inside and cardboard on the outside. This seemingly flimsy combination gives very good strength and ease of processing.
This is in some way a false wall that can always be replaced.
All elements that are made from plasterboard can be easily changed in size, shape and other parameters.
The only thing that is needed is to provide for the possibility and scale of changes.
Simply put, we need to leave room for action.
In order for freedom of choice to be as complete a concept as possible, you should:
- cover the ceilings with plasterboard, the thickness of which is 9.5 mm;
- cover the walls with material 12.5 mm thick;
- It is advisable to build the arch from 6.5 mm thick plasterboard;
- arches can be made from polystyrene or polypropylene profiles, especially since the latter is available in a curved form;
- elements that may be replaced in the future must be fastened in such a way as not to damage the main part of the structure.
How to install gypsum plasterboard decor
For a person who has at least once covered walls with plasterboard, recreating the ceiling decor with plasterboard will not be difficult. The construction principle is the same:
- the frame is mounted on the ceiling made of metal profiles;
- plasterboard covering is carried out;
- The cladding of the structure is installed.
The only difference is that the measurements must be more accurate, and the markings are made strictly according to the sketch.
Design for a plasterboard ceiling
When performing decoration, the design must be rigid if there is a load on it, for example:
- when arranging a portal to match the decor of the fireplace, do not forget that one of the guests may lean on it;
- On a shelf in a niche you can store things that have a considerable specific weight.
Professionals recommend not only using a solid profile whenever possible, but also connecting structural elements with jumpers.
Curvilinear structures
Many people are now trying to move away from straight lines and make rounded corners or beautiful wavy decor. Often the children's room is decorated with flowers or hearts, plasterboard columns are erected, and arches are made to divide the space. The frame for a curved decor, for example a wave on the ceiling, is mounted using a certain technology:
- the profile from which the wave is to be made is cut on the sides with metal scissors;
- then fix the structure to the wall using dowels and nails;
- for structural rigidity, jumpers are installed;
- cut sheets of drywall;
- sew the material elements onto the frame, securing them with drywall screws;
- for greater rigidity, you can sew up drywall in two layers.
Frame for curved decor
Anyone can do this if they approach the work correctly and plan everything.
Gypsum fiber sheet - what is it?
Gypsum fiber sheet (GVL) is a building board made of gypsum mixed with cellulose and reinforced with reinforcing mesh. The material is very strong, high density. GVL is initially non-flammable, since its components are mixed with gypsum, and with the addition of special components it can also be moisture resistant.
High strength makes it possible to use GVL for leveling not only walls and ceilings, but also floors. And the high density allows you to mount furniture on the walls, easily withstanding a force of up to 80 kg per anchor.
- But these same advantages also determine its disadvantages. If drywall is easily fastened with ordinary self-tapping screws, then the gypsum board must be secured by pre-drilling holes or using self-tapping screws.
- Greater strength gives almost a third more weight and makes installation more difficult. Well, the cost of GVL is almost twice as high, which is also a very significant indicator.
How to bend a plasterboard sheet
A small bending radius can be done quite simply using the “dry” method. You need to start screwing the element from the highest point of the structure. Then gradually bend the drywall, trying not to break it and screwing in the screws every 15 cm.
Dry method for bending drywall
If during work there is a possibility that at some point the element may break, then this place is moistened with water. To do this, you can use a spray bottle or a regular brush moistened with water. Then continue to secure the fragment.
Wet method
If it is clear that it will not be possible to bend drywall without breaking, then you should perform the following steps:
- cut the element to the required size;
- place it on a flat surface;
- roll with a needle roller on both sides;
- wet the element with a roller;
Wet method of bending drywall for decoration - as soon as the material is wet, it is carefully fixed to a pre-prepared template and left to dry for about 24 hours.
After drying, you can screw the finished element onto the frame of the structure. If you look at it, making decorative elements from plasterboard is a creative and exciting process that can interest any owner. The video shows in detail how to bend drywall.
Ceiling plasterboard structures
When purchasing plasterboard for the ceiling, professional builders already know what type of ceiling structure they will have to install. Despite the fact that structures can have countless varieties, there are several options on which all the others are based:
- Single-tier;
- 2 and 3 tier;
- Complex.
A single-tier structure is installed when they want to achieve a flat surface or when they plan to install spotlights on the ceiling.
This design may well become the basis for more complex options for plasterboard ceilings. To make it, you will need a frame made of aluminum profile, attached under the ceiling itself. At the next stages of work, lighting fixtures are installed, the aluminum frame is sheathed with plasterboard and finishing is carried out.
When installing the next tiers of plasterboard construction, the algorithm of actions is preserved, only the basis for the next levels will no longer be concrete, but the previous base frame. In addition, the area of each new ceiling level should be smaller than the previous one.
Multi-level and complex ceilings are no longer feasible for an inexperienced builder, so it is better to trust professionals in their construction. There are so many varieties of complex ceilings that it is impossible to list them all. Let's note some of them:
- Curly : designs of an unusual figure (star, flower), made using the 2nd and/or 3rd tier of the gypsum board ceiling;
- Patterned : the most difficult to execute is a fine-mesh pattern across the entire ceiling;
- Abstract : often this is a beautiful spiral illuminated in some unusual way or several figures in different places on the ceiling surface;
- Floating : They have unusual attachments to the concrete ceiling that create the feeling of floating under the ceiling.
Photo selection of decorative plasterboard structures in an apartment
Lighting and ceiling lighting
Lighting plays an important role in the entire design. In addition to the main one, it also performs a decorative function. Depends on the correct choice of each lamp, LED. It can emphasize the ceiling, or make it unsightly and tasteless. Lighting for plasterboard ceilings can be: open, closed, combined.
The following types of lamps are chosen as the main lighting:
- hanging chandeliers;
- overhead lamps;
- fluorescent lamps, as well as daylight;
- LED strips;
- built-in spotlights;
- combined lighting.
To further decorate the room, lighting is used, which is not independent lighting. This can be done using different sources. The most popular of them are diode (strips, duralight) lighting, neon tubes, and fluorescent lamps.
Chandeliers
The chandelier is usually located in the center of the composition and is the brightest source of light. Patterned lampshades can create an interesting play of shadows. Regular lamps with a spiral are screwed into the free sockets.
Hidden backlight
Lamps hidden in multi-level plasterboard structures create the effect of illumination from within. Basically, LEDs are also used for this.
The tape is laid in a niche along the perimeter of the structure. Lay it on the top tier and at the same level. The optimal niche height for uniform light distribution is 15 cm.
LEDs
They come in both white and colored - in the full spectrum of rainbow shades. The advantages of LEDs are low electricity consumption, long service life (from 30 to 100 thousand hours), safety (low voltage, do not heat above 60 °C), environmental friendliness (unlike fluorescent lamps).
Spotlights
The most modern, safe and inexpensive option. Inside the case made of metal, ceramics and durable glass are miniature but very bright LEDs. There are flat (fixed) spotlights and movable ones that can be rotated to direct the flow of light to a particular object. The latter are mounted on special small brackets.
