DIY computer chair
Option two - easier
Here we will need the remains of an old office chair. Then you won't have to bother with welding. And the upholstery pattern is easy to make - old upholstery will serve as a stencil. It’s great if the lift works - then you can also adjust the height of the seat.
And if, for example, the crosspiece of an old product is broken, then you can replace it with five circles of different diameters made of chipboard or MDF. They are connected so that the largest circle is at the bottom. We drill a hole from above exactly according to the diameter of the base pipe, securing it with liquid nails.
Next, we’ll talk about how to disassemble, retighten and upholster a computer chair with your own hands, and yes, don’t forget to get a special protective mat.
The following video will tell you how to make a new computer chair-stool from the remains of an old office chair:
How to disassemble and retighten a product
This process will not be particularly difficult - after all, computer chairs are usually delivered disassembled, folded into a box. So, when purchasing, you have to connect the back and base with the seat together. And to disassemble the chair, you just need to repeat it in reverse order.
As a matter of fact, detailed disassembly for reupholstery is not required:
First, remove the back (it is held in place by one screw with a large plastic head and can be easily removed by moving upwards).
Now let’s prepare upholstery material (furniture fabric, leather, leatherette) and a furniture stapler, as well as staples for it at least 8 millimeters long. Having stretched the piece of fabric properly, estimating its size by eye (you don’t have to make a pattern), we secure it with staples from the inside out. First - vertically, then - horizontally. This will ensure the correct tension. Then the corners are drawn diagonally. After reupholstering, we trim off the excess fabric and put the chair back together.
The instructions described apply to standard models. If you need to reupholster a luxurious “manager’s chair,” then it’s better not to try it yourself, but to immediately send it to a workshop.
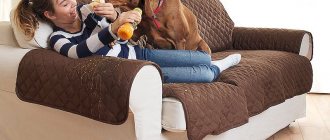
To prevent your chair from getting dusty or dirty, you should frame it in a special cover. Of course, it’s easier to buy a cover for a computer chair, but you can also make it yourself using universal patterns.
The following video will tell you how to disassemble a computer chair with your own hands:
Now let's watch a video on how to repair and reupholster a computer chair with your own hands:
Style selection
The cover for a chair with a back makes a mark. Features:
- Saving - protects from damage, hides flaws. Pos. 1 and 2 in Fig;
- Accentuating - fits furniture into the interior, at the same time complementing and/or completing the concept of its design, poses 3-6;
- Props, pos. 7 and 8 - takes on a leading role in the appearance of the interior, most often together with the tablecloth. This allows you to hide design flaws or obscure decisions that are inappropriate in the circumstances;
- Decorative, pos. 9-11 - mainly at celebrations. In this case, universal covers (see below) make it possible to organize an extensive feast with “different-sized” chairs.
Varieties of chair covers
It is quite possible to sew chair covers that combine several of these functions, but then you should also be guided by the functional purpose of the cover:
- Everyday and accent - made from durable, hygienic, easy to wash, clean and iron fabrics, see below.
- Prop - since they are not used every day, the requirements for durability and washability of the fabric are reduced, but in return, pomp and luxury are required, otherwise it is impossible to visually draw the main accent of the interior onto the table with chairs.
- Decorative - the main thing here is the possibility of catchy decoration at low cost, the cheapness of the fabric, its minimum capacity for fat and liquids and maximum washability if the covers are reusable, for example. rental It’s clear what the covers and the furniture under them can turn into after a wedding or anniversary if they get wet well.
About capes
Covers for kitchen chairs
Covers for kitchen chairs are often made in the form of simple protective covers, see fig. on right. Make them conceptually accentuated with bows, decorative buttons (see at the end), floor-sweeping skirt, etc. accessories in this case are irrational. However, the kitchen also needs style with accents; especially if they are hosting guests. In this case, knitting will help out: knitted furniture covers are an absolute sign of good taste, skill and wealth of the owners. Meanwhile, chair covers can be crocheted very simply from fragments without a pattern or the ability to knit at all, see next. video:
DIY computer chair cover
We are going to have to sew two separate covers for a computer chair with our own hands: for the back and for the seat (most chairs are designed this way). To do this, take transparent tracing paper, apply it to each of the parts and trace with a pencil or marker. Then we cut out and get patterns from which you can cut out elements from the fabric.
Don't forget about seam allowances. For the seat, in particular, they need to be larger (5 centimeters) in order to hem the edge and insert an elastic band or cord there to tighten the edges (optional).
The back part can be made in two versions:
- A double cover, consisting of identical parts, is sewn on three sides (except for the bottom), and then turned inside out and put on the back of the chair from above. In this case, the allowances are 2 centimeters. You can make a pocket on the back side.
A single cover with an allowance of about 5 centimeters is folded to form a tunnel into which an elastic band is inserted (like in a seat). Such a cover should tightly fit the corresponding part of the chair.
Selection of materials
Textiles for chair cushions should be selected taking into account maximum resistance to humidity, low or high temperatures, and direct sunlight. These factors are important, because seats can be used not only for home furniture, but also for garden furniture.
Textile
It is worth noting that not all materials are suitable for making a chair cushion with your own hands. The fabric for the future seat should be pleasant to the touch, wear-resistant and, most importantly, pleasing to the eye. Among the most popular options for sewing a cover for a stool with your own hands, there are several types:
- Linen. It can be used for a long time without changing its appearance. This material is relevant for kitchens made in Provence or country styles. Disadvantages: rough texture and difficult to iron.
- Cotton. This material is durable, hypoallergenic and inexpensive. Washable. The disadvantages include rapid wetness. Paints applied to fabric fade quickly in direct sunlight.
- Lycra. This material is elastic and stretches well in all directions. It is also highly resistant to external factors and washes well.
- Gabardine. This type of fabric can be called one of the most successful for sewing chair cushions with your own hands. It has an attractive appearance, is easy to clean, and dense.
Linen Cotton Lycra Gabardine
There are various ways to decorate pillows that you can do yourself:
- Braid. Gives a finished look and looks impressive. To secure the braid, the edging is placed in the middle of the main seam line and basted.
- Cord. This decor fits perfectly into the classical, baroque, and empire style. Additionally, the product can be decorated with tassels. Best combined with velor, velvet, silk.
- Frill. To make the products look softer, you can buy a ready-made frill or make it yourself. In this case, select a contrasting color or to match the base material.
- Fringe. A short frame will make the seat beautiful and neat, while a long frame will not suit every interior.
Any decor is selected taking into account the characteristics of the furniture’s use.
Braid Cord Ruffles Fringe
Filler
Before sewing chair cushions, you need to choose a filling for them. With all the diversity, each of them has its own advantages and disadvantages. A distinction is made between natural and synthetic materials.
The most popular natural fillers:
- Feather and down are light raw materials, which require a large amount to make a soft seat.
- Sawdust – cedar and pine shavings are usually used. These fillers have a healing effect, for example, the aroma of pine needles helps with headaches. But sawdust wrinkles over time and needs to be changed periodically.
- Buckwheat - seats filled with this filler are very popular, as the seat turns out to be very convenient and comfortable.
- Sheep wool is soft, practical, pleasant to the touch.
- Horsehair has all the benefits of wool, but the seat is tough.
There is one advantage of natural materials - there are no toxic chemical additives. Disadvantages include short service life, possible allergic reactions, and are not suitable for outdoor furniture.
Feather, down Sawdust Buckwheat Sheep wool Horsehair
Synthetic materials include:
- Expanded polystyrene is a filler that consists of small granules. Foamed, hard and light balls add volume to the pillow. This material has an orthopedic effect. Over time it becomes wrinkled and requires replacement.
- Polyurethane foam is a rigid filler that does not cause allergic reactions. The material can retain its shape for a long time.
- Polypropylene - elastic plastic balls recover almost immediately after sitting on the cushion. When ignited, the composition releases toxic substances.
- Foam rubber pillows are soft, lightweight, and have a long service life. The most commonly used brands are EL 2540, EL 2842, the thickness of the material is chosen within the range of 5-10 cm.
- Holofiber is light in weight and can be used in combination with other synthetic fillers. Does not cause allergic reactions, is resistant to moisture, does not absorb foreign odors.
- Sintepon - placed on top of the foam rubber, does not allow the facing material to stick or stretch, and evenly distributes the load. It is recommended to choose padding polyester with a density of 100 g/cm2.
All synthetic fillers quickly restore their original shape and do not cause allergies. Can be used for garden furniture.
Expanded polystyrene Polyurethane foam Polypropylene Foam rubber Hollofiber Synthetic winterizer
DIY computer chair cover
Share on social media networks:
Has your computer chair become worn out and lost its visual appeal? Don't rush to buy new! You can solve this problem with the help of a cover that you can make yourself. Sewing it will not be difficult. In our article we will describe in detail several ways to sew a chair cover with your own hands. With the help of a cover you will not only hide the shortcomings of the chair, but will add something new to your interior. Another plus in favor of the covers is that if you get them dirty, you can take them off and wash them. You can also sew several different options and change them as you wish.
Design
To add some color to an armchair worn over the years, you can make a new cover for it, sew decorative pillows or throws in various shades and patterns. If upholstery is necessary, it can be partially made, thereby changing some parts of the upholstery.
A cape designed using the patchwork technique will look original and creative. You can make a unique applique in advance and attach it to the upholstery.
Chair cover options
DIY cover for a computer chair
There is no single pattern for the cover, since now each manufacturer makes some additions and changes to each model of office chair for an executive. You will make the pattern yourself, based on the configuration of your chair.
Important! If you are sewing a cover for the first time and doubt your abilities. Take some old scrap fabric to sew a test cover for your computer chair with your own hands and gain the skills.
Tools and materials
First you need to prepare the fabric and tools you will need:
- fabric - choose thicker so that it does not wear out too quickly, color and texture - to your taste;
- centimeter and scissors;
- pencil, marker, chalk;
- pins, needles, threads;
- zipper, elastic band;
- tracing paper, graph paper, plastic film (not new, but clean);
- sewing machine.
Fabric consumption calculation
To correctly calculate the fabric consumption to sew a stretch cover for an old computer chair with your own hands, you need:
- Measure all parts one by one (width and length), in centimeters.
- Write down the readings on a piece of paper, adding 2 cm for allowances to each reading.
- Calculate the sum for width and length separately.
- Based on the width of the fabric, calculate the required amount, adding another 20 cm for overlap.
Tools
To sew covers, you need regular tools. To create a pattern you will need tracing paper, newspaper, non-woven fabric or wrapping paper. You will also need tape, scissors, a pencil or marker, chalk, a ruler or a centimeter. To place the finished pattern on the fabric, it is recommended to attach it with tailor’s pins or special clothespins. Scissors are best for fabric. To avoid processing seams, you can use zigzag ones.
To make a cape or cover, you will need fabric, threads of different colors, preferably reinforced ones. To make the product soft, you can use padding polyester, holofiber or other filler. Sometimes an old blanket is placed in the middle.
A sewing machine is used for work. Nowadays different models are produced both for craftswomen and for beginners. Some have a seam processing function. If it is not there, the products can be overcast by hand or tucked and stitched. Otherwise, the threads will fray, which will affect the durability of the covers.
A few tips to help you sew a cover
Before you start working directly on the instructions, take note of a few practical tips that will make the process easier for you and allow you to more carefully make a cover for a computer chair with your own hands.
Tip 1
If this is your first time making a pattern yourself, make sure it is correct. Necessary:
- Transfer the pattern to an old sheet or duvet cover.
- Cut and baste.
- Place the resulting cover on the chair.
Important! Use pins to adjust your pattern, bringing it to perfection.
Tip 2
The fabric for the cover must be washed at the recommended rate, dried, ironed, and it will shrink. There will be no need to add centimeters in the future.
Tip 3
In order not to get confused in the patterns, it is better to immediately sign the individual parts. For example: “inner backrest”.
Tip 4
Material that frays a lot needs to be processed with an overlock or zigzag stitch.
What types of seat covers are there?
The design of all chair covers is based on the ability to easily put on and remove the product from furniture through the use of ties, zippers and elastic bands. At the same time, it is important to ensure a smooth surface of the fabric and a tight fit so that the case does not change its position during use. The covers should fit the design of the chair as closely as possible, and auxiliary fastenings help to adjust them to the furniture parameters.
The models can use any fabric. Most often it does not stretch, but it lasts a long time. Static products are more difficult to sew; the pattern must be carefully calculated. The covers can be decorated with all kinds of ruffles, bows, rivets, etc.
Stretch covers are also becoming increasingly popular, in the manufacture of which a special, well-stretchable fabric is used - Euro chair covers. The products are designed for bulky pieces of furniture with bulky armrests and high backs, so if you need a cover for a computer chair, this model will not work.
For owners of standard furniture, it is better to choose a universal chair cover, equipped with many fasteners and connections. When used correctly, a cape can completely cover a piece of furniture.
Method 1 - Step-by-step sewing plan
To begin with, we will describe a method that even a novice tailor can handle. You won't spend a lot of time and effort on it. And the result will please not only you, but also your household.
Disassemble the chair into its component parts:
- The back.
- Seat.
- Armrests.
Make a pattern for each part:
- Measure the piece and draw on the wrong side of the fabric or tracing paper.
Important! By making a drawing on tracing paper, you will get a more accurate copy of the cover.
- Cut out and transfer to fabric.
Important! You need to pay attention to the direction of the threads on the fabric to avoid distortions. Don't forget to allow seam allowances.
- Make allowances around the entire circumference of 9 cm.
- Cut out pieces from fabric.
Important! When doing this, take into account the corners and curves of the parts.
Sewing a cover
To make sure your DIY computer chair cover fits perfectly on the base of the chair:
- We process the edges of the parts with an overlock or zigzag stitch.
- From the inside, we bend 1.5 cm inward, pinning with tailor's pins or basting with thread.
- Sew with an even stitch, departing 3-4 mm from the edge of the hem. You still need to leave a gap of 2-3 cm to retract the elastic.
- We pull the required amount of elastic into each part and secure the joints.
- We put ready-made covers on each element of the chair.
- Assembling the chair.
Pattern
The easiest way is to make a drawing for a sofa without armrests or rectangular in shape. Here all the lines are smooth and clear, and therefore the dimensions are determined very easily.
Each individual part of the sofa is measured and the data is transferred to the patterns. Old wallpaper or newspapers glued together are suitable for them.
Ready-made schemes:
- cut out;
- applied to fabric;
- attached with pins;
- outlined with chalk (with a margin of at least 2 cm).
On the lower elements of the cover, do not forget to allow a couple of centimeters for hem.
The parts are then swept away by hand, and the product is tried on the existing sofa. If everything is in order, then it can be stitched on a typewriter. Do not use too small a pitch - this will not strengthen the seam, but, on the contrary, will damage the fabric. A stitch width of 1.5-2 millimeters will be sufficient.
Method 2
This method can be handled by a seamstress who has experience not only in sewing, but also in cutting. We will tell you in detail about the nuances in the cut of the cover, tight-fitting with zippers, which will be a single whole (seat, back, and side parts - everything is sewn into a single cover).
Important! Your cover will follow the shape of the chair, and the stitching on it will also follow the stitching on the chair. We sew two zippers into the side seams and one on the bottom. With their help you will easily remove the cover.
Make a pattern
In this case, we need an accurate pattern. To make it faster, we need polyethylene, about 1-1.5 m. Next we need:
- take a piece of film and apply it to the part of the chair limited by the seams;
- level the film so that it lies as evenly as possible;
- secure with pins near the seams;
- Use a marker to outline the contours along the seams (on the film).
Important! With a symmetrical part, you can immediately check whether you have drawn it correctly. Just fold it in half - ideally the edges should match. If the differences are small, then circle along the middle outline. And if they are very different, it means the pattern was copied incorrectly and needs to be redone.
The chair has a round shape. Of course, a problem will arise - the film will not fit tightly, and accordingly, it will not lie flat. That's why:
- It is necessary to straighten it out on level ground, securing it with pins.
- Gather the free part into folds, securing with pins so that the film lies flat.
- The sweets can be stitched with darts or folds as you wish.
Important! Save the pattern - you can sew more than one cover for your favorite chair.
Determining the amount of fabric
In order not to buy excess fabric, which can be by no means cheap, and the cover for your computer chair with your own hands turns out beautiful, you need to correctly take all the measurements of the fabric. To do this you should%
- Place the patterns on the floor or carpet according to the width of the intended fabric.
Important! When laying out, take into account the direction of the grain thread, seam allowances, and the specularity of some parts.
- Measure the resulting length and add 20 cm for material shrinkage.
Important! Buy the material in specialized stores. Be sure to ask at what temperature this fabric can be washed. Do not use flocked fabrics - they will peel when washed.
Fabric cutting:
- Lay the fabric out on a flat surface.
- Place the pattern pieces and pin them in place.
- Make seam allowances of 1.5 cm.
- Trace with a simple pencil.
- Cut it out.
Your parts are ready. Let's move on to the next stage.
We sew a cover for a chair:
- We sweep the middle inner part with the side elements.
- We try on the decor of the chair, thoroughly examining whether the cover fits tightly on the computer chair. If the fabric bristles in any places, you need to remove the defect using darts.
- We remove our parts, make adjustments, and smoothly bend the fabric to the edge symmetrically on both sides.
- We sew the seams with a machine in the following sequence:
- machine sew the seam with a straight stitch;
- cut 0.5 cm from the seam allowance from the edge of one side;
- Fold the cut allowance uncut, stitch along the seam, retreating 2-3 mm.
Important! On the front side, the delay will look good if all the lines are symmetrical.
- We assemble the outer elements of the back and sides in the same sequence, only along the seams of the connections of the central part and sides you need to sew in zippers.
Important! You need to sew in the zippers 3-5 cm from the edge, because when connecting the inside and outside of the cover there will be a very thick and ugly seam.
- We sweep out the internal and external parts of the cover, try on all the elements - they should follow the contour of the chair.
- We sew 2 times along the same line.
- We sew in the same way as the side seam.
- We put it on the chair and draw a line along the fold of the lower part. Remove, fold in half and cut off the unnecessary part, leaving 1.5 cm for seam allowances.
- We baste a fragment of the seat and the inside of the backrest.
- Let's try it on below - you need to evenly distribute the folds of the middle of the back, pin it with pins, then remove it and draw darts with a pencil.
- We sew in the darts, cut them off by 1 cm from the stitching, and also stitch on the front side.
- We sew a zipper into the bottom part.
- We overcast the bottom of the resulting cover, step 1 cm and stitch.
Types of seats
One of the advantages of such products is their wide range. Pillows are produced in different shapes, sizes, and materials. There are harder or softer, flat, convex or anatomical. The latter are convenient because they adapt to the contours of the human body, and after the load stops, they restore their shape. This feature is called the memory effect.
In addition to models for the buttocks, it is recommended to use special chair cushions for the back. These are mesh structures on a wire frame or convex rollers. Such products ensure the correct position of the spine and support it.
But it is the orthopedic seat on the chair that is most popular. It can be round or oval, rectangular, bagel-shaped, wedge-shaped or the letter “p”. There may be a hole or depression in the middle, which is necessary to reduce the load on the tailbone.
Ring
The ring shape with a hole inside is especially beneficial for the spine. Such pillows relieve stress from the tailbone and perineum and provide free air circulation. It is recommended to use them for pregnant women, as well as for hemorrhoids. They have the following properties:
- provide the correct curve of the lower back;
- withstand high weight;
- prevent blood stagnation;
- do not compress the sciatic nerve.
Ring-shaped pillows are universal; they are suitable for chairs and armchairs of any shape, even small ones. The products retain their quality for several years even with frequent use. Standard diameter is 40 cm.
Circle
They don't have a hole inside. Such pillows can be soft or hard; there are also multi-layer ones, like a mattress. Thanks to this, the load on the muscles of the back and pelvis is reduced, and proper blood circulation is ensured. A round seat is effective in the following cases:
- for muscle pain;
- osteochondrosis;
- curvature of posture;
- for back pain;
- hemorrhoids;
- after coccyx injuries.
Such pillows can be used in the complex treatment of these pathologies, during rehabilitation after injuries, and for prevention. They provide a comfortable seat, and due to their compact size they are suitable for any chairs and armchairs. The optimal diameter is 39 cm.
Rectangle, square
For those who spend a lot of time sitting, it is better to choose a rectangular or square pillow. The advantage of them is that they come in different shapes and sizes, so it’s easy to choose the right one. They are fixed and do not move, which increases the comfort of use. Such overlays are popular among drivers, office workers, and programmers.
Thanks to the soft filling, the pillow relieves tension and ensures proper blood circulation. There are anatomically shaped pads with bulges and recesses for a more comfortable seat. They follow the contours of the body and evenly distribute the load. They can be solid or with a recess for the coccyx. Designs in the shape of the letter “P” are convenient. The standard size of such products is 40 x 60 cm.
Wedge-shaped
This type of chair pads is less popular, as it is made of dense polyurethane foam. It has a rectangular shape, beveled towards one edge. This ensures the correct position of the spine, relaxation of the buttock muscles, and removal of stress from the perineum.
Such pillows restore blood circulation in the pelvis. They are used in the treatment of prostatitis, pathologies of the bladder, and rectum. The products also prevent lower back pain, numbness in the legs, and varicose veins. Common dimensions are 40 x 40 cm.
