Tension fabrics are well-deservedly popular because they allow you to “ennoble” the ceiling in the shortest possible time without labor-intensive and costly leveling and subsequent painting. Also, when installing additional directional light fixtures, there is no need to ditch or hide the connection wiring in any way - all of it will be hidden between the stretch ceiling sheet and the upper level. But how to properly combine a built-in wardrobe and a suspended ceiling and which is better to install first? This question is asked by many who have decided to allocate part of the room for the installation of a built-in wardrobe.
Where to start - a suspended ceiling or a closet?
When installing ordinary furniture, repairs are carried out according to the rule from top to bottom. Therefore, first they stretch PVC film, then decorate the edges, cover the walls and floor. Then they assemble and install the cabinet. In the case of a built-in model, installation is carried out taking into account the method of fixing the ceiling.
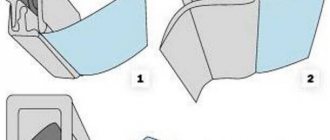
The PVC sheet is attached around the perimeter of the walls using a baguette profile or bracket. In the first case, the film is first stretched, then the height of the furniture body is selected with the desired gap. In the second case, the design allows the panel to be passed through the top of the cabinet so that the façade appears flush with the walls and ceiling.
Installation option with installation of an extension
Advice: before installation, be sure to treat concrete surfaces with an antiseptic to prevent fungus from forming indoors. Instead of branded fungicides, a strong solution of copper sulfate is suitable.
Situation two – the cabinet was installed earlier
Again this is normal. If the furniture is not mounted under the ceiling itself, we mount a wooden beam as a load-bearing element between the top cover and a concrete slab (hereinafter we will call it a beam, a mortgage), on which we then install the suspended ceiling profile. To give the design a full aesthetic perception, we mount a decorative strip on the tree.
However, you can do without a strap by attaching a baguette along the lower edge of the embed.
You can also attach the ribbon not at the end of the media, but under it, in front of the guides. In this way, a kind of visor is formed. If the compartment already has a visor, cut it out, fix it with a mortgage and use it as a battery. In this case, the canvas will hide the cut line.
If the door slats are attached directly to the slab, a recess is attached in front of them and hides the top of the cabinet.
In this case, it is necessary to leave a small distance between the mortgage and the guides, since the ceiling profile is fixed on the back side of the beam. Visually, in this case, it looks as if the cabinet extends into the ceiling. If the gap between the compartment cover and the plate allows you to mount moldings right along the perimeter of the ceiling and you want to do everything that way, add the cost of canvas to the cost of installing the system in a hard-to-reach place.
Installation of lamps and lighting
For decorative lighting or lamps, it is more rational to use LEDs. You can choose a comfortable color temperature: the backlight should be soft, warm light, and the main light should be neutral white. For the bedroom, lighting with brightness adjustment with a dimmer is installed.
The room should have an illumination level of 250-500 lm. Insufficiently bright lamps will negatively affect vision or light-sensitive hormones.
LED light sources require cooling to prevent the semiconductor crystal from degrading when overheated. Therefore, LED strips under the ceiling must be mounted on an aluminum profile, which will dissipate heat. It is better to install higher power lamps on a copper or aluminum radiator using thermal paste or a thermal pad.
The LED strip is mounted on an aluminum heat sink profile
General principles for installing spotlights for suspended ceilings:
- Before installing the membrane, the mounting locations for the lamps are marked, the wiring is routed using corrugations, and 12V power supplies for the LEDs are installed. Profiles are screwed under the lamps. To ensure rigid fixation, a base is mounted.
- The film is stretched and the coupe body is assembled. Where mounts for light bulbs are installed under the membrane, rings made of silicone or polyurethane are glued.
- When the seal adheres to the film, the inner space of the ring is cut out, revealing the base for the lamp.
- The lamp is connected and installed in the hole using hooks.
For suspended ceilings, incandescent lamps or light sources with strong heat cannot be used. You can use gas-discharge bulbs, but it is more economical to connect LED bulbs.
Methods for installing a wardrobe with a suspended ceiling
There are several combination options:
- use of bezel;
- installation of a sunken beam;
- independent fastening of sliding doors and tension curtains;
- assembling a cabinet with a roof.
Each combination method has advantages and disadvantages that must be considered. The choice is also influenced by aesthetic preferences; the appearance of a wardrobe with a suspended ceiling will be slightly different for different installation options.
False panel
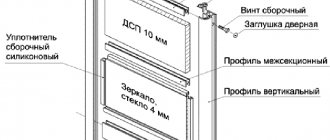
First, a mortgage is issued. To do this, take a wooden beam with a cross-section from 50x50 to 100x100 mm. The length must correspond to the width of the room at the installation site. You can assemble a frame from chipboard of the same shape.
The installation goes like this:
- Mark the location of the mortgage on the ceiling (simply place a wooden board on the surface and trace it with a pencil).
- Drill holes in the floor slab.
- Metal corners are secured with dowels.
- A beam is attached to them.
Attention! The mortgage must be strictly horizontal. To place it evenly, use a level or string stretched between the points marked on the wall. Sometimes two strings are pulled at the same time to more accurately measure the plane.
Sliding door slats are screwed to the bottom of the wood. Then, from the side of the room, a decorative strip is attached to the mortgage.
The material used is the same chipboard as the furniture. The width must be greater than the size of the beam including guides, and the bottom end must be laminated. The false panel will cover the profiles of the compartment doors and the entire structure will be more aesthetically pleasing. This option is chosen for the living room or bedroom.
A stretch ceiling molding is attached to the board and free walls at the same level. The minimum distance from the untreated sheet to the canvas is about 5 cm. When assembling the cabinet, the ceiling is stretched.
Mortgage
With this method you will also need a strong beam. It is mounted in the place where the cabinet doors will be located. The insert is fixed flush with the ceiling profile. So, after stretching, the canvas in this place will be homogeneous.
The beam is installed according to the same principle as the previous method. But the film will flow directly under the solution, so it is important to prepare the wood. The wood is thoroughly polished so that there are no burrs or other irregularities left, and impregnated with an antiseptic to prevent the development of fungus.
The next step will be the installation of a stretch ceiling. Installation occurs as usual, so we will not go into details of this moment.
Door slats are attached to the mortgage through the door leaf. Holes are simply made in the fabric; the material will not allow them to separate. But PVC films need protection. Thermal rings or plumbing tape are glued around the punctures. This way the material will not spread.
As a result, you will get the same beautiful ceiling both in the room and inside the wardrobe. But there is a risk of damaging the film from sharp objects, such as box corners or ski poles, which are often hidden in the hallway or hallway.
Independent mount
First, the insert for the stretch ceiling is installed. A profile is attached to the side of the future wardrobe. So, install guides for sliding doors at a short distance or close. The space between the cabinet and the ceiling is covered with a plinth or a decorative dowel F is inserted. Sometimes lighting is installed there. To do this, take a special aluminum profile and LED strip.
Installing a stretch ceiling with this option is somewhat complicated. But material costs are reduced, since a rough ceiling remains in the storage area.
There is also no risk of damage to the film when placing objects with sharp edges. And the ceiling in the toilet area can be covered with a sheet of chipboard, painted or left as is. The first method looks more aesthetically pleasing, but space is lost.
Wardrobe with roof
Previous options considered the installation of built-in furniture, which is assembled on site in accordance with the size of the room. But they often buy modular cabinets. Which are made according to a different principle. The main difference is the presence of a chipboard top cover.
In this case, there are two options for the relative position:
- The ceiling is stretched and then the cabinet is assembled.
- A furniture frame is installed, and then baguettes are screwed to the top bar to secure the canvas. Cover the small space with masking tape or decorative rope.
Each method has its own advantages and disadvantages. In the first case, a small space remains (up to several centimeters) in which dust accumulates. Also, if you install it loosely, you may be able to touch and tear off the film with tools. Then you need to repair the ceiling. But installation of the canvas occurs quickly and without additional costs.
For the second option, it is necessary to provide a strip of the appropriate width at the top of the cabinet. In large spaces this method should be used with caution. The fact is that as the ceiling area increases, the traction force becomes greater, and the load on the chipboard strip increases. It is less durable than thick wood and may not hold up. But this option looks good. In addition, less dust accumulates, making cleaning easier.
Combination options
What does a suspended ceiling or a built-in wardrobe do first? Which is better? There are several options for combining a stretch ceiling with a cabinet.
- the material is located above the furniture
- the material is located inside the cabinet
- suspended ceiling around furniture
- the cabinet is installed after the ceiling stretching work
Option 1: installing a ceiling above the cabinet
With this option, the furniture is located from wall to wall.
Sequencing:
- A wooden beam is screwed to the load-bearing ceiling slab. The level of its lower edge must correspond to the level of the tension fabric. The timber will be considered the base for the top guide
- Next, a guide is installed to the beam itself
- A decorative panel is screwed onto the top of the guide. Note: the screw heads must be on the top of the panel
- A fixing baguette is attached to the decorative panel to attach the film. Note: it is better to use long wood screws, since the decorative panel has low load-bearing functions
- Furniture is being installed
- The tension fabric is being installed. After finishing the work, the grooves in the baguette are closed with a decorative insert
- Doors are being installed
Option 2: internal coating
In this embodiment, the canvas is placed inside the furniture body. The advantage of this option is that PVC film will decorate the space inside the furniture. In addition, you can install lighting inside the cabinet, which never hurts.
Sequencing:
- First, a beam is screwed to the ceiling slab
- Next, stands or platforms for lighting fixtures are produced.
- The canvas is placed on the frame
- In the place where it comes into contact with the mortgage, a PVC plate is glued to the canvas
- Afterwards, the upper guide is screwed to the mortgage through a plastic plate
- Next step: glue the ceiling plinth to the guide
- Lamps are installed inside
- Doors are being installed
Option 3: installation around the cabinet
Sequencing:
- To begin with, the timber is marked
- Afterwards, holes are drilled in the supporting slab and in the timber in order to install fasteners in the future.
- The next step is to screw the harpoon baguette
- The beam is attached to the ceiling
- According to the level of the baguettes, harpoon-type wall baguettes are screwed onto the wall
- Next, the canvas is stretched onto the frame
- The last step: seal the cracks with masking tape
This option is considered quite difficult. Therefore, it is better to order the canvas itself along with the harpoon edge. This will allow you to easily install the PVC film.
Option 4: installation under the finished product
Is it possible to make a built-in wardrobe if there is a suspended ceiling? It often happens that furniture is installed after the installation of the stretch ceiling. And, of course, the main desire is for the wardrobe to be located under a suspended ceiling without unnecessary gaps. In this case, when ordering a cabinet from a company, it is worth ordering a few millimeters less than the height of the room. This will allow you to beautifully place the built-in wardrobe in the room without damaging the suspended ceiling.
How to change the body of a built-in wardrobe to install a stretch ceiling
Ideally, a built-in wardrobe or a wardrobe with hinged doors is installed closely, essentially in a niche in the room. But there are situations when a corner, part of the space of the room, is allocated.
In this case, it makes sense to pre-install the frame of the built-in wardrobe from the intended material and thoughtful design.
This can be a wooden frame or profile, with additional sheathing made of sheet material.
Or installing a cabinet made of cardboard under furniture or chipboard.
Do not be afraid that the strength of the furniture partition will not be enough to secure the stretch ceiling molding. Enough.
For installation of the sliding system, there is also a distant beam designed from timber or chipboard strips. It is better to provide such a height that it would be enough to install the ceiling plinth. Which can completely hide the beam or leave it partially open.
Installing a cabinet with an installed ceiling
A sliding wardrobe under a suspended ceiling is often sought by people who did not bother to plan the renovation in advance and are now forced to look for a way out of the current situation. However, the situation is not critical and it is quite possible to find a good solution that not only suits you, but may also be better than other options. To better understand the essence of installing a cabinet under a suspended ceiling, let's consider its pros and cons.
Professionals:
- Allows you to install a finished cabinet without touching the ceiling
- Installing a freestanding cabinet is often cheaper
- When moving, a free-standing wardrobe can be disassembled and assembled at your new place of residence
There are not many professionals, and most people may not even agree with them. But, nevertheless, in a hopeless situation this is far from the worst option. For the sake of objectivity, let's pay attention to the disadvantages.
The video shows the process of installing a cabinet with a suspended ceiling installed:
Flaws:
- The space between the closet and the ceiling, which will be the main accumulation of dust in the apartment
- Wasted space
- Overpayment for unused stretch ceilings
- Limited selection of cabinets
The disadvantages turned out to be more convincing, and this is not surprising, because the work will be high-quality and efficient only if it is thought out and planned in advance.
Types by method of fastening
Mortgages for lamps for suspended ceilings are of two types:
- fixed;
- universal.
Fixed ones are selected individually for the specific size of the lighting fixture. Their cost is cheaper, but when replacing a lamp, you have to select a new model with the same diameter as the old soffit. Otherwise, difficulties arise during re-installation.
Universal ones are more common due to the fact that they are suitable for installing most chandeliers and spots. During installation, part of the plastic is cut off, leaving a hole of the required diameter.
Stretch ceilings and built-in wardrobes: interior ideas
According to the designers, installing decorative fabric on cabinet doors yourself will be easy to use. Furniture can be rearranged from place to place, moved to other rooms or transported.
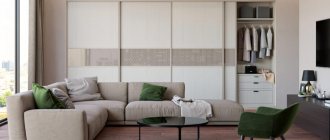
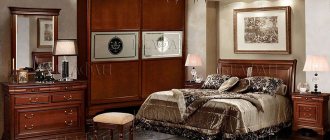
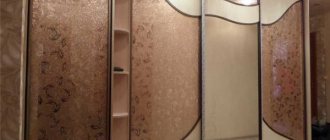
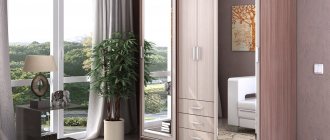
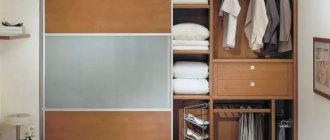
Most often, sliding wardrobes are installed in bedrooms or corridors. For a spacious and bright room, any wardrobe combined with suspended ceilings is suitable. You can also choose any door in the compartment: chipboard, eco-leather, glass or wood.
Full length photo of a chest of drawers with bedroom lighting
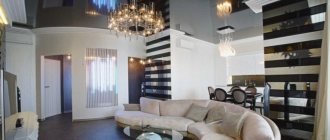
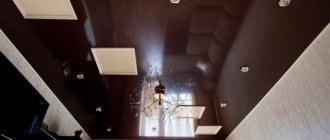
Soaring ceilings and built-in wardrobes make a perfect tandem. Glossy PVC sheets will visually expand the spatial boundaries of the room. LED lighting will complement the interior.
CASE STUDIES
1. A niche was planned in the corridor for a built-in wardrobe - a compartment, where there was a turned corner with a room height of 3100 mm
.
The customer did not know what to do to make it beautiful and inexpensive. I contacted our company for help in resolving the issue, they suggested the following: the corner part of the space is closed and covered with plasterboard, a partition is lowered from the ceiling, forming a straight and neat opening for the future wardrobe and the installation of compartment doors. As a result, the customer became the owner of a functional wardrobe in the hallway with a complex geometry, a “ problem angle
” and neatly “fitted” into the overall interior of the apartment
Photo 1
.
In Photo 2
we can see a gap between the vestibule and the wall, which does not look very nice, the choice is yours.
How to install a suspended ceiling over an already installed wardrobe
Often the decision to install a suspended ceiling comes when the cabinet is already in the room. This is a rather large piece of furniture, which, when installed, is almost impossible to move from the wall, as well as disassemble and reassemble. At the same time, the gap between the cabinet roof and the ceiling is unlikely to allow installers to somehow secure the profile for the stretch ceiling along the wall and corner of the room. Therefore, as a rule, two options are offered:
- Attach the lid frames to the cabinet body.
- Slide the decorative panels onto the cabinet roof to the desired depth.
You must understand that after such manipulations the cabinet becomes completely integrated and disassembled; it will be impossible to move it without damaging the tension fabric.
Which is better to install first?
When you need to combine a built-in wardrobe and a suspended ceiling, you need to decide what will be installed first. Indeed, what comes first, a built-in wardrobe or a suspended ceiling?
If you first assemble the wardrobe, the stretch fabric will be smaller in area and, therefore, cheaper. In this case, you will need to attach the canvas to the top front panel of the cabinet, which may not be ready for such loads. If a suspended ceiling is installed first, then when installing the cabinet there is a high risk of damaging the canvas.
Let's consider possible solutions to the problem:
The cabinet is installed first
This option is especially useful in cases where the cabinet completely occupies the entire wall. Installers will then need to securely secure the top panel, which will be a few centimeters wider than the ceiling space between the elastic fabric and the ceiling. The panel will play the role of a wall to which a baguette made of stretch fabric will be attached. The presence of a gap in the ceiling facilitates stable fastening of the panel, allowing the installation of jumpers on both sides. The strength of the installation is a very important consideration as this unit will carry both the tension sheet and the cabinet door tracks. Further installation of the cabinet is carried out in the usual way, as well as subsequent installation of the stretch ceiling.
The suspended ceiling is installed first
In this case, you can use two options:
- The wardrobe is made separately from the ceiling. There is a small space (about 5 cm) between the elastic fabric and the top of the cabinet. The good thing about this option is that there is no contact between the ceiling and the cabinet, and there is no danger of damaging one or another element. The ability to install a wardrobe under a suspended ceiling successfully solves the problem, but for this you need to order the correct cabinet design.
- The tension fabric is not installed over the entire ceiling area, but only up to the cabinet installation line. The method is similar to that used for hidden fastening of ceiling cornices. A bar is installed on the limiting line of the canvas, through which the canvas is folded and fixed to the base. The sliding wardrobe is installed in the usual way, but the door guides are not mounted directly on the slab, but are smaller than the size of the ceiling slot. A small gap forms between the canvas and the cabinet wall, which can be closed with a ceiling plinth, decorative strip or other element.
Attention! For the second method, it will be necessary to discuss the installation technology in advance with representatives of the sliding wardrobe manufacturer in order to avoid misunderstandings and mistakes.
Sources
- https://made-box.ru/shifoner/kupe/shkaf-kupe-i-natyazhnoj-potolok.html
- https://Potolki-NikoMaks.ru/montazh/shkaf-kupe-i-natyazhnoj-potolok.html
- https://mebelclubspb.ru/shkafy-kupe/kak-sovmestit-natyazhnoy-potolok-i-vstroennyy-shkaf-kupe.html
- https://www.potolkoff.ru/articles/shkaf-kupe-i-natyazhnoy-potolok/
- https://HoroshijPotolok.ru/dizain/natyazhnoj-potolok-i-shkaf-kupe.html
- https://shkaf-kupe-info.ru/shkafkupe-svoimi-rukami/vstroennyy-shkaf-i-natyazhnoy-potolok-kak-sovmestit-i-chto-ustanovit-ranshe.html
- https://kakpotolok.ru/natyazhnoj-potolok/shkaf-kupe/
- https://str-mebel.ru/shkafy-i-komody/vstroennyj-shkaf-i-natyazhnoj-potolok.html
- https://stul-roznica.ru/shkafy/shkaf-pod-potolok-i-natyazhnoj.html
- https://Potolok.expert/konstrukcii/shkaf-kupe-i-natyazhnoj-potolok.html
- https://kuppe.ru/sborka/shkaf-i-natyazhnoy-potolok.html
- https://my-class.ru/kak-ustanovit-shkaf-kupe-yesli-uzhe-yest-natyazhnoy-potolok/
- https://severdv.ru/mebel/shkafy-i-shkafy-kupe/vstroennyj-shkaf-kupe-s-natyazhnym-potolkom/
